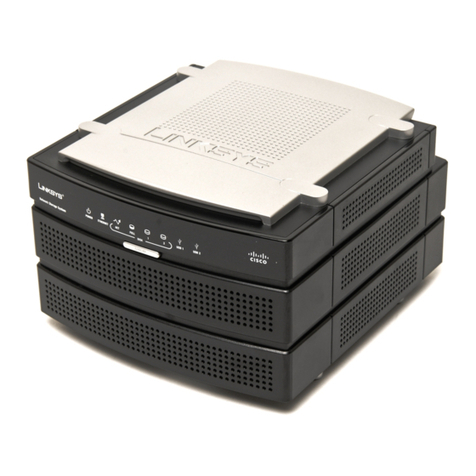
Huang Chung BT Downloader User manual

BT Downloader User Guide
Huang Chung Electronics Ltd.
The diagrams and images contained in this manual may not fully represent the product that you are using
and are there for illustration purposes only.
BT Downloader - User Guide

BT Downloader User Guide
Table of Contents
CHAPTER 1 - INTRODUCTION ..........................1
PACKAGE CONTENTS..........................................1
SYSTEM REQUIREMENTS.....................................1
DETAILED VIEW ..................................................2
Front View....................................................2
LED Indicators..............................................2
Rear View.....................................................2
QUICK INSTALLATION GUIDE................................3
CHAPTER 2 - SYSTEM SETUP..........................4
INSTALLATION.....................................................4
USB Eject Procedure...................................4
Shut Down Procedure..................................4
USB File System..........................................4
HOW TO LOGIN ...................................................5
Login on a PC ..............................................5
Login on a Mac ............................................6
Peer to Peer.................................................6
CHAPTER 3 - WEB CONFIGURATION..............7
Home............................................................7
ADMINISTRATION ................................................8
LAN..............................................................8
System.........................................................9
FTP Server.................................................10
USB............................................................10
Users..........................................................11
Share..........................................................11
BitTorrent™................................................12
CHAPTER 4 - TOOLS........................................14
Restart........................................................14
Hard Disk Utility .........................................14
Firmware Upgrade.....................................15
Factory Default...........................................15
Login Setting..............................................15
System Log................................................15
E-Mail.........................................................15
CHAPTER 5 - NETWORK STORAGE.............. 16
FILE ACCESS ON A PC ..................................... 16
FTP............................................................ 16
Windows Explorer..................................... 17
Map Network Drive.................................... 17
FILE ACCESS ON A MAC ................................... 19
SMB........................................................... 19
FTP............................................................ 20
UPNP............................................................. 20
CHAPTER 6 - ADDITIONAL FUNCTIONS....... 21
USB COPY...................................................... 21
Copy Direction........................................... 22
CHAPTER 7 - APPENDIX................................. 23
SPECIFICATIONS .............................................. 23
TECHNICAL TERMS........................................... 23
BitTorrent™............................................... 23
Torrent™................................................... 23
Seeder....................................................... 23
XFS ........................................................... 23
FAT32........................................................ 23
NTFS......................................................... 24
LAN ........................................................... 24
FTP............................................................ 24
SMB........................................................... 24
FAQ ............................................................... 24
ABOUT THIS MANUAL ....................................... 25

BT Downloader User Guide
Chapter 1 - Introduction
The BT Downloader is a perfect tool for easy downloads of your favourite BitTorrent Files
and sharing of Your USB storage devices on the local network.Simple to install and configure,
you can have the unit up and running in a matter of seconds. There is no need to purchase a
dedicated LAN disk anymore, because you can simply use the BT Downloader and turn your
USB drives into network attached storage including UPnP support!
Product Dimensions: 14.0cm x 8.6cm x 2.6cm
5.5in x 3.4in x 1in
Package Contents
•BT Downloader;
•Power Adapter;
Input 100-240V, Output +5V/2A
•Ethernet Cable
•Manual
Note: Package contents may vary, depending on vendor & version.
System Requirements
•Computer with internet browser and network access for setup
•Switch or Router with one free Ethernet port for the BT Downloader
•At least one USB hard drive (capacity >10GB), to be re-formatted
Supported Operating Systems:
•PC running Win98SE, WinME, Win2000 or WinXP
•Mac running Mac OS 10.2 or above
Note: We recommend using self-powered USB drives. If two bus-powered USB drives are
connected at the same time, at least one of them needs to be powered by an external
power supply.
Page 1 / Chapter 1 - Introduction

BT Downloader
User Guide
Detailed View
For a detailed description on how each of these ports and buttons work, please refer to the
following chapters.
Front View
1. USB-A eject button 4. Status LEDs (see LED Indicators)
2. USB port A 5. USB port B
3. USB-A to USB-B copy button 6. USB-B eject button
LED Indicators
1 2 3 4
1. USB-A LED
ON=USB device connected, OFF=USB device disconnected
Blinking=Data Access
2. LAN LED
ON=LAN connected, OFF=LAN disconnected
Blinking=Data Access
3. System LED
Green=System Ready, Red=Device Error
Green Blinking=Booting or Copying (when copy button is pressed)
4. USB-B LED
ON = USB device connected, OFF = USB device disconnected
Blinking = Data Access
Rear View
XYZ[
1. Ethernet port 3. Power receptacle
2. Reset button 4. ON/OFF switch
Page 2 / Chapter 1 - Introduction

BT Downloader User Guide
Quick Installation Guide
Following is a quick installation guide to get you up and running. For further details to each
of the settings, please refer to Chapter 2 and later.
1. Connect the Ethernet cable from your network router or switch to the BTDownloader.
2. Prepare at least one USB drive with more than 10GB of capacity and connect it to
USB port A on the BT Downloader.
3. When everything is connected, turn both the USB drive and the BT Downloaderon.
4. During boot up, the LAN and system LED will go ON, confirmed by a short beep
sound.
5. Once the USB LED is ON, access the web configuration interface via your web
browser. See “How to login” in Chapter 2.
6. Go to Harddisk Utility in the Tools menu, select your drive and format it using the
XFS file system.
7. Go to Users and add a new user.
8. You are now ready to start sharing or downloading files.
Note: Following the steps above is only the beginning but without setting up a USB drive
first, most of the functions will not be available.
Page 3 / Chapter 1 - Introduction

BT Downloader User Guide
Chapter 2 - System Setup
Installation
Before the device can be accessed via the local network, it has to be connected and
turned on.
1. Connect the Ethernet cable from your network router or switch to the BTDownloader.
2. Prepare at least one USB drive and connect it to one of the USB ports on the BT
Download.
3. When everything is connected, turnboth the USB drive and the BT Downloaderon.
4. During boot up, the LAN LED will go ON as the network connection is detected.
5. The system LED will blink and go steady as soon as the system has finished
booting, confirmed by a short beep sound.
6. Once the system is ready, it will detect the USB drive and the USB LED will light up
green.
7. Done, your device is now ready for access and further setup.
Note: If the BT Downloader is turned on but can not acquire an IP address, it
will warn the user with a beep sound. To turn off the warning signal, make sure the
Ethernet cable is connected properly and the BT Downloader has access to the
local network to acquire the IP address.
USB Eject Procedure
To remove a USB drive, use the eject button located next to each of the USB ports.
1. Press the corresponding eject button and release it again.
2. The system will confirm that the eject button has been pressed with a short beep
sound.
3. Once the drive is ready to be removed, the system will confirm it with another two
short beep sounds.
4. You can now turn off the USB drive and remove the USB cable.
Shut Down Procedure
To turn off the BT Downloader, stopall current downloads, then turn off the power using
the ON/OFF switch. Once the system has shut down,remember also turning off the power
to your USB drives.
USB File System
To use the file and user management as well as the BitTorrent™ function, we strongly
recommend formatting one drive using the XFS file system. Other drives connected to the
BT Download can either use FAT 32, allowing both read and write access, or
NTFS which only allows read access. For optimum performance and functionality, we
recommend using XFS.
Page 4 / Chapter 2 - System Setup

BT Downloader User Guide
How to login
To configure your BT Downloader , you will need to use the web browser, enter the IP
address and then use the web configuration for further setup. To find out the ip address
of your device once it is connected to the network,there are several different ways as
described on the following pages.
Login on a PC
Use the NetTool utility included on the CD. This will list the device automatically and allow
you to access the web configuration interface with a simple click of your mouse. You may
also use the same utility at a later point to map the network drive after you setup your
shares.
1. Turn on your BT Downloader and make sure it is connected to the same network as
your computer.
2. Start the NetTool utility by double clicking on the EXE file.
3. Your BT Downloader will automatically show up in the device list but if not,make sure
the NetTool has access to the network.You might have to configure your firewall or
even temporarily turn it off.
4. Click on your device and it will list all the details.
2
1
5. Previously greyed out commands will now be available and you can click on
“Access via web”.
Note: Alternatively, you could use the Setup Wizard to configure the basic settings and
view the IP address. Open your web browser and then manually input the IP address to
access the web configuration interface.
Page 5 / Chapter 2 - System Setup

BT Downloader User Guide
Login on a Mac
First, you will have to find out the IP address of your BT Downloader and then
use the web browser to access the web configuration interface.
1. Turn on your BT Downloader and make sure it is connected to the same network
as your computer.
2. Start the Terminal utility, which is usually located in your Applications folder under
Utilities.
3. Type nmblookup NSD***, where the star marks represent the last 6 digits of your
Mac address. This number can be found on a sticker either on the outside of your
device or on the bridge board itself.
The command would therefore look something like this:
nmblookup NSDDDEE03
4. After entering the previous command and hitting the Enter key, it should return an
IP address, followed by the name you just entered.
5. Open your web browser and enter the IP address from the previous step to access
the web configuration interface.
Peer to Peer
If you connect the BT Downloader directly to your computer via Ethernet cable,you can
access it using its default IP192.168.16.1. Open the web browser and enter 192.186.16.1
to access the web configuration interface.
Page 6 / Chapter 2 - System Setup

BT Downloader User Guide
Chapter 3 - Web Configuration
Open your web browser, enter the IP address of your BT Downloader and login.
The default login is as follows:
Username: admin
Password: root
For more information about the initial setup and finding your IP address, please refer to
Chapter 2.
Home
This menu will show you the basic system information and details regarding your BT
Downloader.Under USB devices, youcan see how many USB drives are connected at
the present time. Under System info,you will see the firmware version and other network
related information.
Note: If there is no USB device connected or it is not recognised under USB devices, you
will not be able to use any of the FTP, SMB or BitTorrent™ functions. Make sure at least
one drive is connected and if necessary, format it using the Harddisk Utility in the Tools
menu.
Page 7 / Chapter 3 - Web Configuration

BT Downloader User Guide
Administration
This is where you will configure your system, setup FTP accounts, SMB shares and add
BitTorrent™ jobs.
LAN
This section contains the LAN settings for your BT Downloader. By default, this will be set
tacquire the to IP address automatically with no need for you to change anything.However,
f you do change the settings, press the Apply button to save your new configuration.
•Workgroup: If your computer is part of a workgroup, you can change the default
workgroup and customise this field.
•Protocol: If set to DHCP, it will obtain the IP address automatically. If set to Static IP,
you can enter the address manually.
•IP Address: If you need assistance in manually filling out these fields, please contact
your network administrator for help.
Note: If the protocol is set to DHCP but there is no DHCP server available to distribute an
IP address, the device will automatically use its default IP address 192.168.16.1.
Page 8 / Chapter 3 - Web Configuration

BT Downloader User Guide
System
Change your device name and description in this section and set the time. After changing
the settings, press the Apply button to save your new configuration.
•Device Name: By default, this name starts with the letters NSD, followed by the last 6
digits of your Mac address. You may change this manually if required.
•Date & Time: Select the current date from the drop down list and enter the time.
•NTP: Enable this function to synchronise the time automatically with a NTP server such
as time.windows.com as an example.
Note: To use the NTP function, you need to enter a valid NTP server. If the default
address at time.windows.com does not work, find a new one and then try again or turn off
the NTP server and set the time manually.
Page 9 / Chapter 3 - Web Configuration

BT Downloader User Guide
FTP Server
In this section, you can enable and setup the FTP server. After changing the settings,
press the Apply button to save your new configuration.
•FTP: We recommend leaving the port set at its default on 21. Enable the anonymous
login for users to access the drive without a password or disable it and setup individual
accounts with passwords instead.
•Language: Select your language from the drop down list or leave it set as Unicode.
USB
This page will list details related to your USB storage devices. For those using Internet
Explorer (IE) on a PC, clicking on the share name link will open the Explorer window and
connect you to the storage device.
Note: Clicking on the share name link will only work for PC users accessing the page with
Internet Explorer.
Page 10 / Chapter 3 - Web Configuration

BT Downloader User Guide
Users
In this section you can add and manage the users for the BT Downloader. For each user,
there will automatically be a new foler created,starting with "sh_" followed by ther username.
Click on “Add a new user” and follow the setup wizard to create a new user.
Share
All available and shared folders will be listed here. To modify the access rights, select the
folder you want to edit and click on “Modify Properties”.
2
1
Page 11 / Chapter 3 - Web Configuration

BT Downloader User Guide
BitTorrent™
In this section you can manage your torrents and add new downloads to the queue. Before
you add the first job, click on Global Setting to access further options. After changing the
settings, press the Save button to apply the new configuration.
•Share Folder: By default, downloaded files will be stored in the public folder. If you set
up your own folder, you can select it from the drop down list and store the files there
instead.
•Transfer Rate: To manage the transfer rate and not use up the whole bandwidth, you
can set the maximum download and upload rate here.
•Seed Options: You can either seed infinitely until the job is manually stopped or set up
a limit and start the next job in queue automatically.
Note: If these settings are changed after a job has already started downloading, you will
need to stop all running jobs and restart them again for the new settings to take effect.
Adding a New Job
To add a new job, you will have to download a torrent file first, then upload it to the BT
Download and start the download.
1. Download a torrent file from the internet and store it on your local drive
(refer to the technical terms in the Appendix for further details regarding the terms
“torrent file” and “BitTorret™).
2. Access the BT Downloader viaweb browser and go to the BitTorrent™
menu.
Page 12 / Chapter 3 - Web Configuration

BT Downloader User Guide
3. Click on “Add a New Job”, browse for the torrent file on your local disk and add it to
your job list.
4. Click on Start to initialise the download. It will search for peers automatically and
then start downloading the file.
5. For further details, click on the Details button to see the process of the current job.
•Details: Show details and progress status of the current job. The information will be
shown in a separate window and refresh automatically every few seconds.
•Start: To start the first two jobs, click this button.
•Stop: Used to manually stop a job.
•Delete: Stop and delete a job to free up space after it has finished downloading or
manually delete an incomplete job.
Note: A maximum of 10 jobs can be added to the list and only 2 jobs can be running at the
same time! If you like the jobs in the queue to start downloading automatically when the
previous job has finished, make sure you turn on the seed option under Global Settings.
Page 13 / Chapter 3 - Web Configuration

BT Downloader User Guide
Chapter 4 - Tools
This section offers tools to format the hard drive, upgrade the firmware, review the system
log and various other options described below.
Restart
To restart the BT Downloader manually,click on the “Restart Now” button. This can be used
after a firmware upgrade or to troubleshoot the devie and reboot the system.
Hard Disk Utility
This tool can be used to format the attached USB drives. To use the file and user
management as well as the BitTorrent™ function, we strongly recommend formatting one
drive using the XFS file system. Select the drive on the left hand side, choose your format
and click on the Format button to start the process. This may take a few minutes, so wait
until the formatting is finished. For this tool to work, you need a hard drive with at least
10GB of capacity.
•Format: For use with the BT Downloader, we strongly recommend formatting one of the
drives using XFS. If FAT32 is used,ther maximum file size of a single file is limited to
2GB.
•Scandisk: Used to scan and repair damaged sectors on a drive. Only works for XFS
formatted drives!
Note: Only one XFS formatted drive can be connected to the BT Downloader at any time
Page 14 / Chapter 4 - Tools

BT Downloader User Guide
Firmware Upgrade
This section displays the current firmware revision and allows you to upgrade if required.
To update a new firmware version, download it to your local drive, then browse for the file
and click on “Start Upgrade” to begin the process.
Factory Default
For troubleshooting and to manually reset the device settings, click on the “Restore Default
Settings” button. Alternatively, you could also use the hardware reset button.
•Pressing the reset button once will reset the IP to its default 192.168.16.1.
•Pressing the reset button for 10 seconds will reset all settings.
Login Setting
To prevent unauthorized access, we recommend changing the default login name and
password as soon as possible. After changing the settings, press the Apply button to save
your new configuration. Default login is admin/root.
System Log
View the system log here to see and review changes.
E-Mail
Enter your e-mail address and enable this option to receive a notification of important
changes to your mailbox (e.g. IP changes).
Page 15 / Chapter 4 - Tools

BT Downloader User Guide
Chapter 5 - Network Storage
To access the USB drives attached to the BT Downloadervia the network connection,you may
use either FTP or SMB.
File Access on a PC
FTP
Use your Internet Explorer and type ftp:// followed by the IP address of your BT
Downloader. It will list the availablefolders and you can download or upload new files.
As an example, your URL might look something like this:
ftp://192.168.11.10
Note: For FTP transfers, we recommend installing and using a dedicated FTP application,
which can either be a free utility or professional shareware programs.
Page 16 / Chapter 5 - Network Storage

BT Downloader User Guide
Windows Explorer
Use Windows Explorer and type \\ followed by the IP address of your BT Downloader.
It will list all available folders and shares on your BT Downloader,which you then can
access directly.
You can copy files to the network storage as if it were a folder on your local drive.
Depending on the bandwidth, you can also directly play and open the files, although we
recommend transferring the data to your local drive first.
Map Network Drive
For easy access, we recommend mapping the storage as network drive.
1. Double click on My Computer, go to the Tools menu and select “Map Network
Drive…”.
Page 17 / Chapter 5 - Network Storage

BT Downloader User Guide
2. Follow the setup wizard and fill in the path to your BT Downloader.Alternatively,
you can also browse for the shares by clicking on the Browse button and locating
the folder that way.
3. Once the drive has been mapped, you are able to find and access it under My
Computer. This link will still be there even after rebooting your Operating System.
Page 18 / Chapter 5 - Network Storage
Table of contents