Huion KD200 User manual

KD200
Contents
Product Overview .................................................. 2
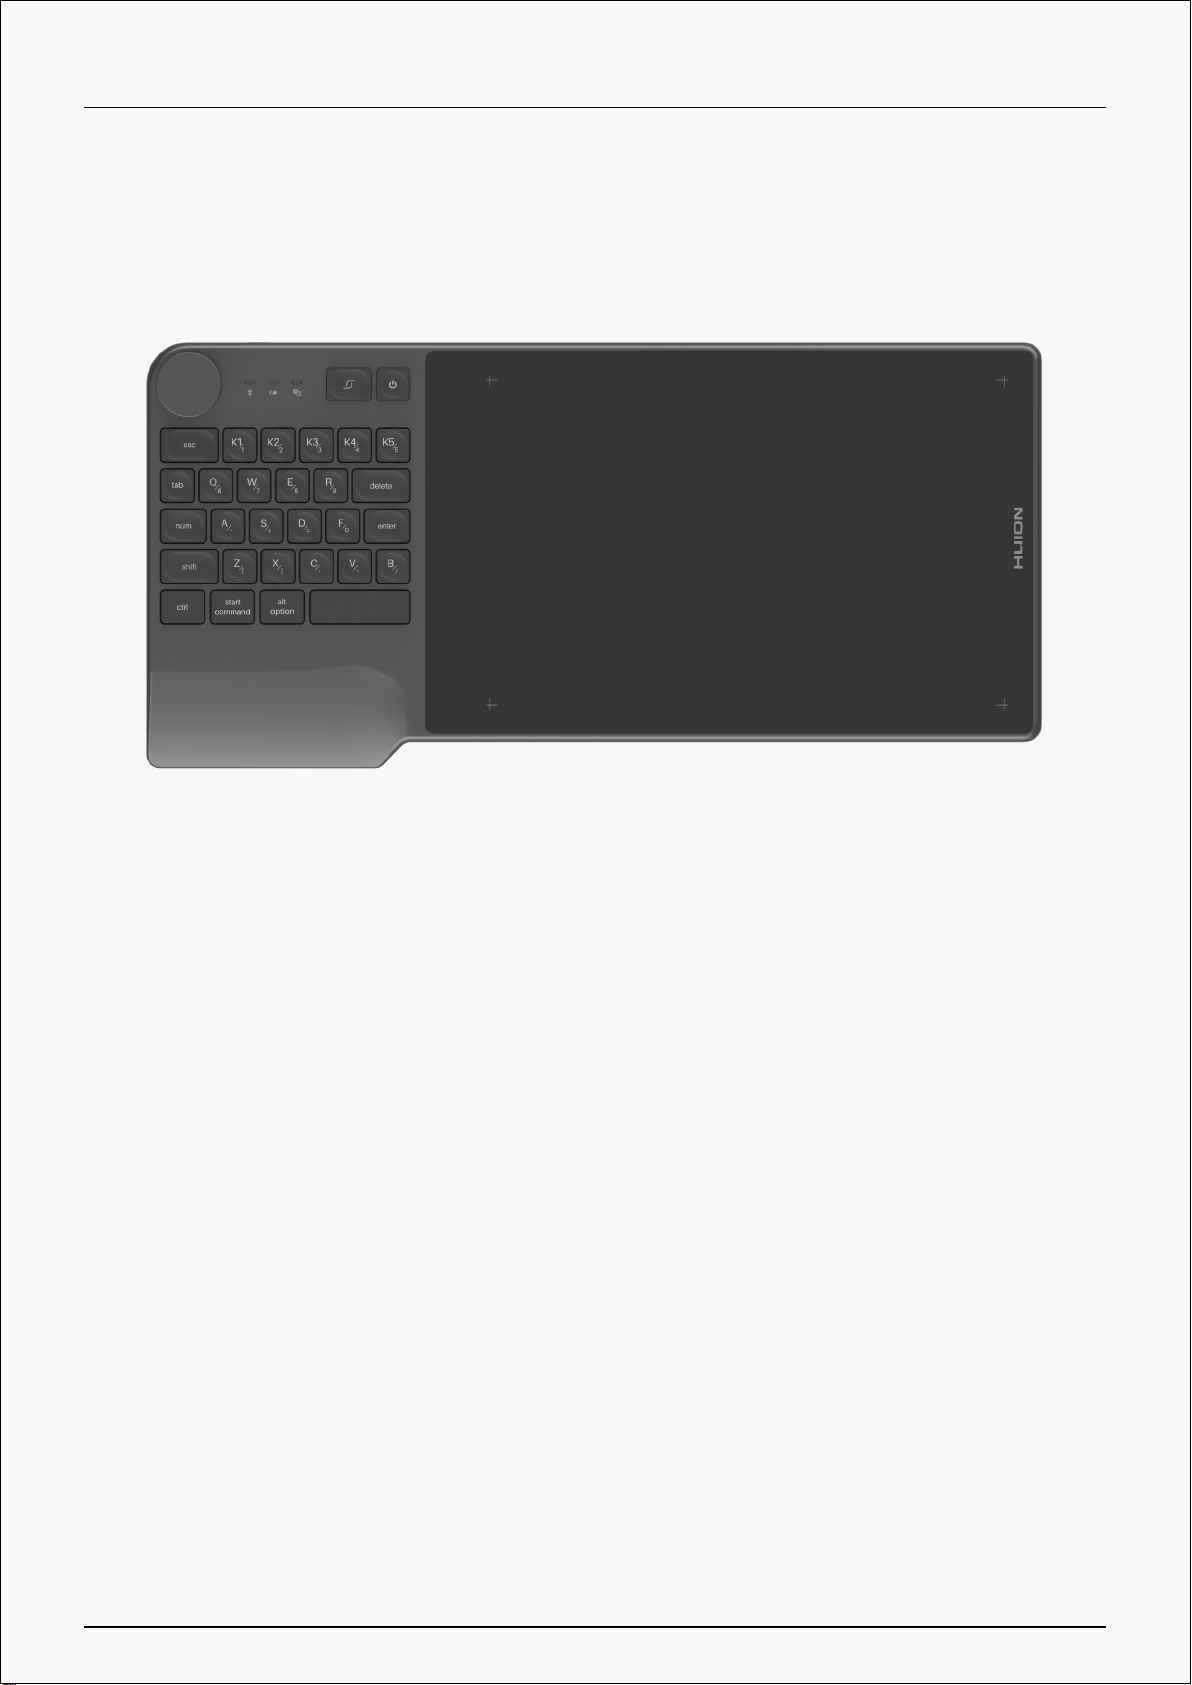
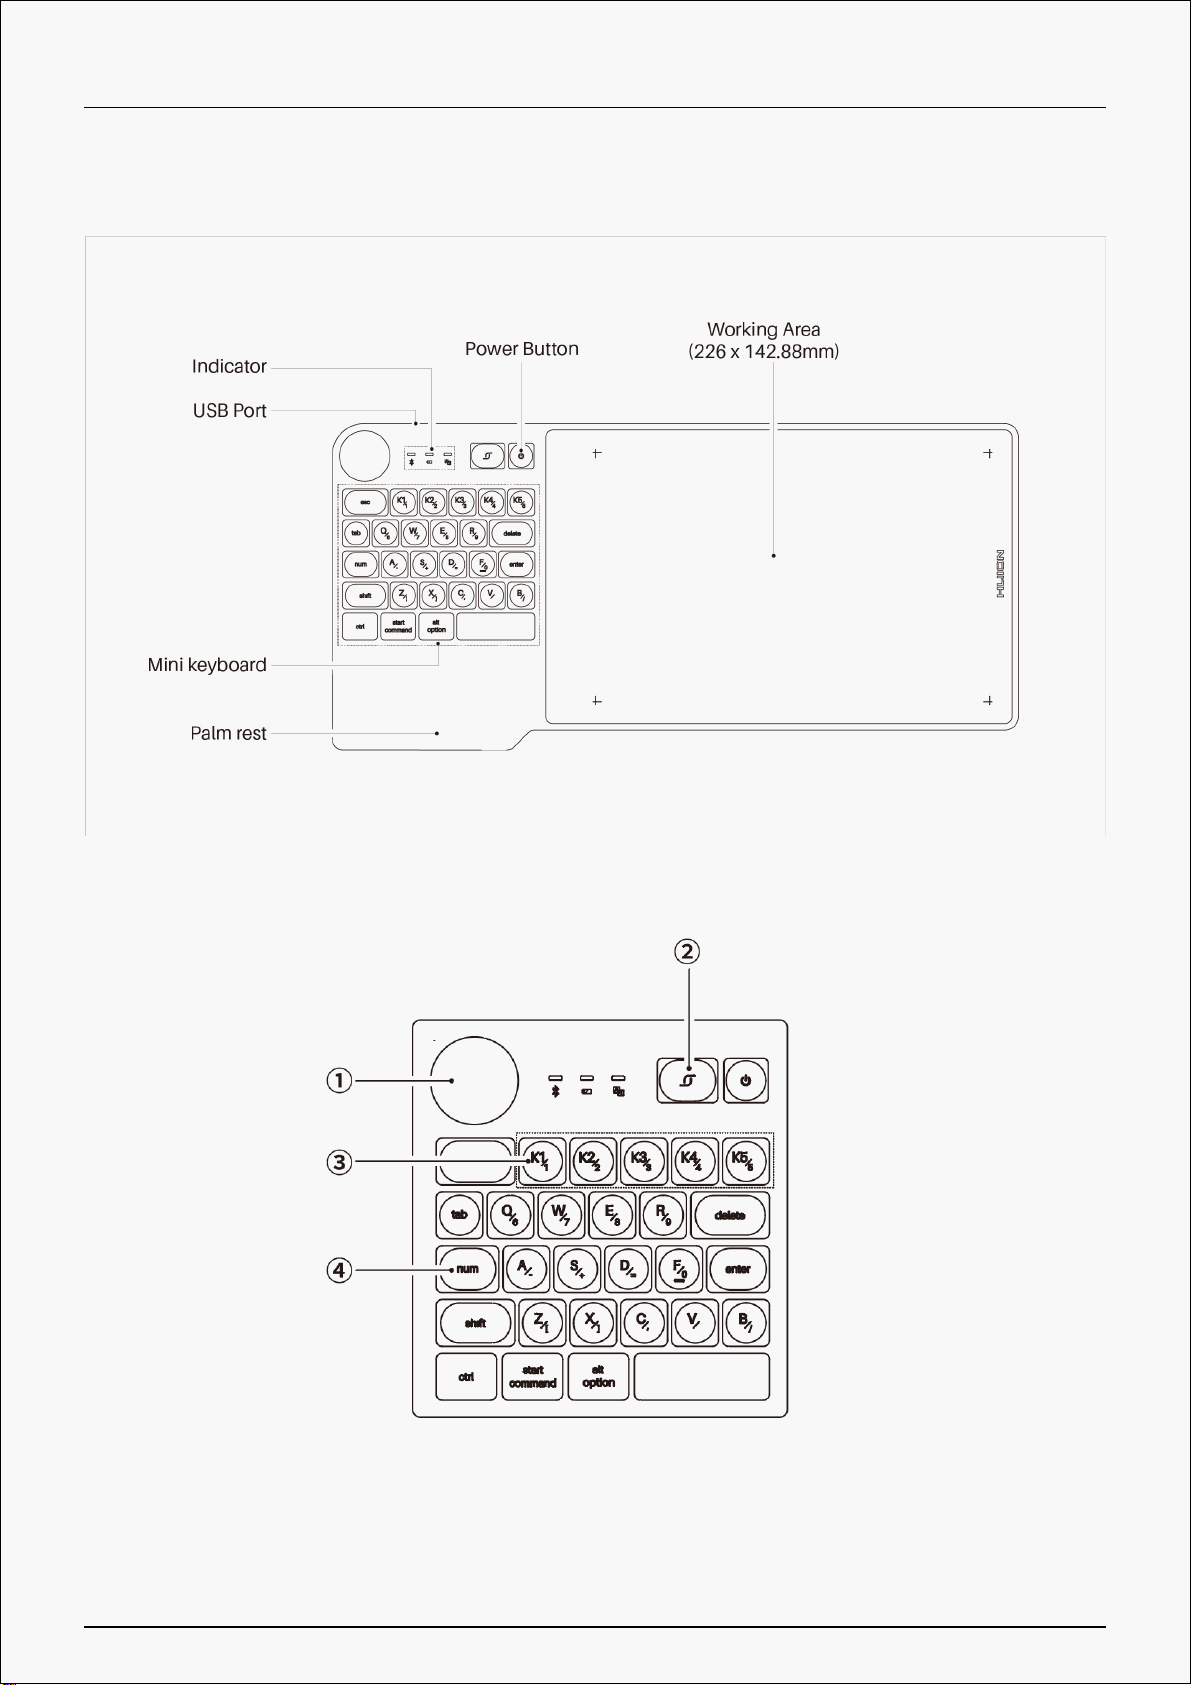
Tablet Introduction .................................................. 2
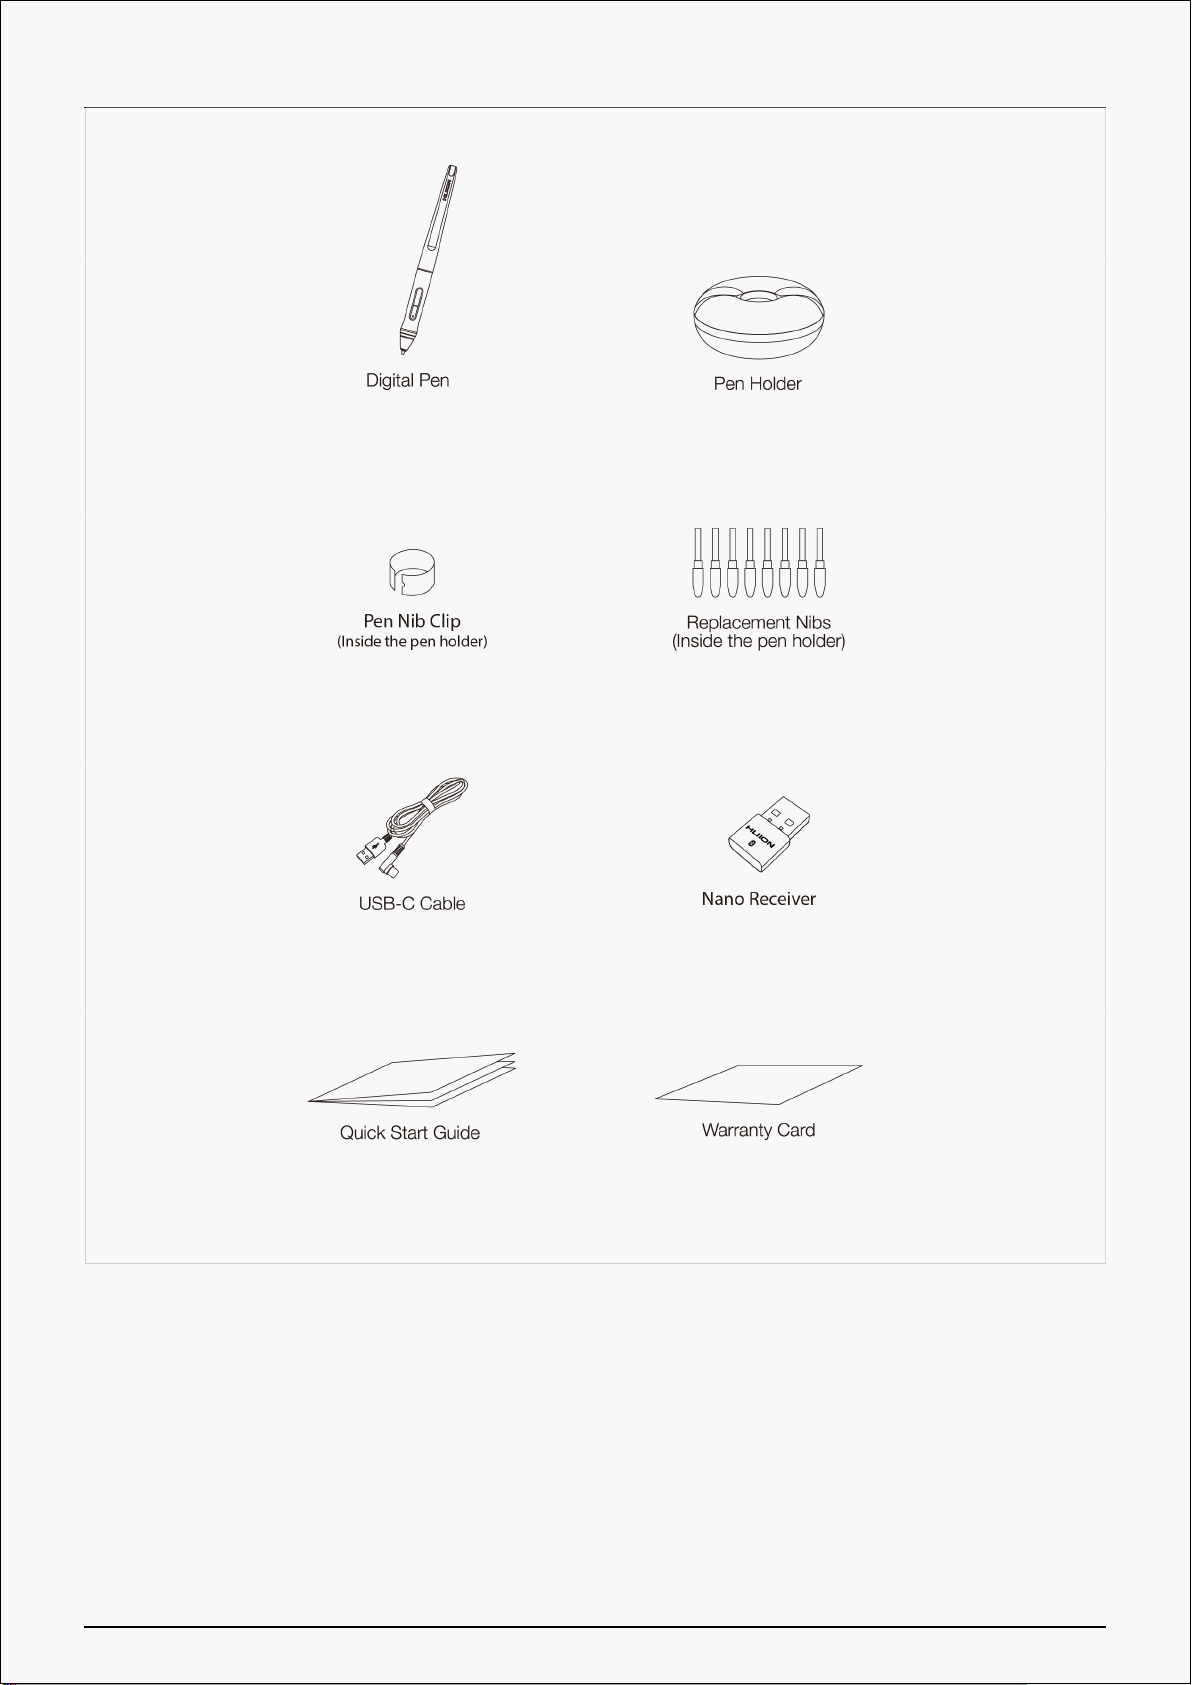
Product and Accessories .............................................. 2
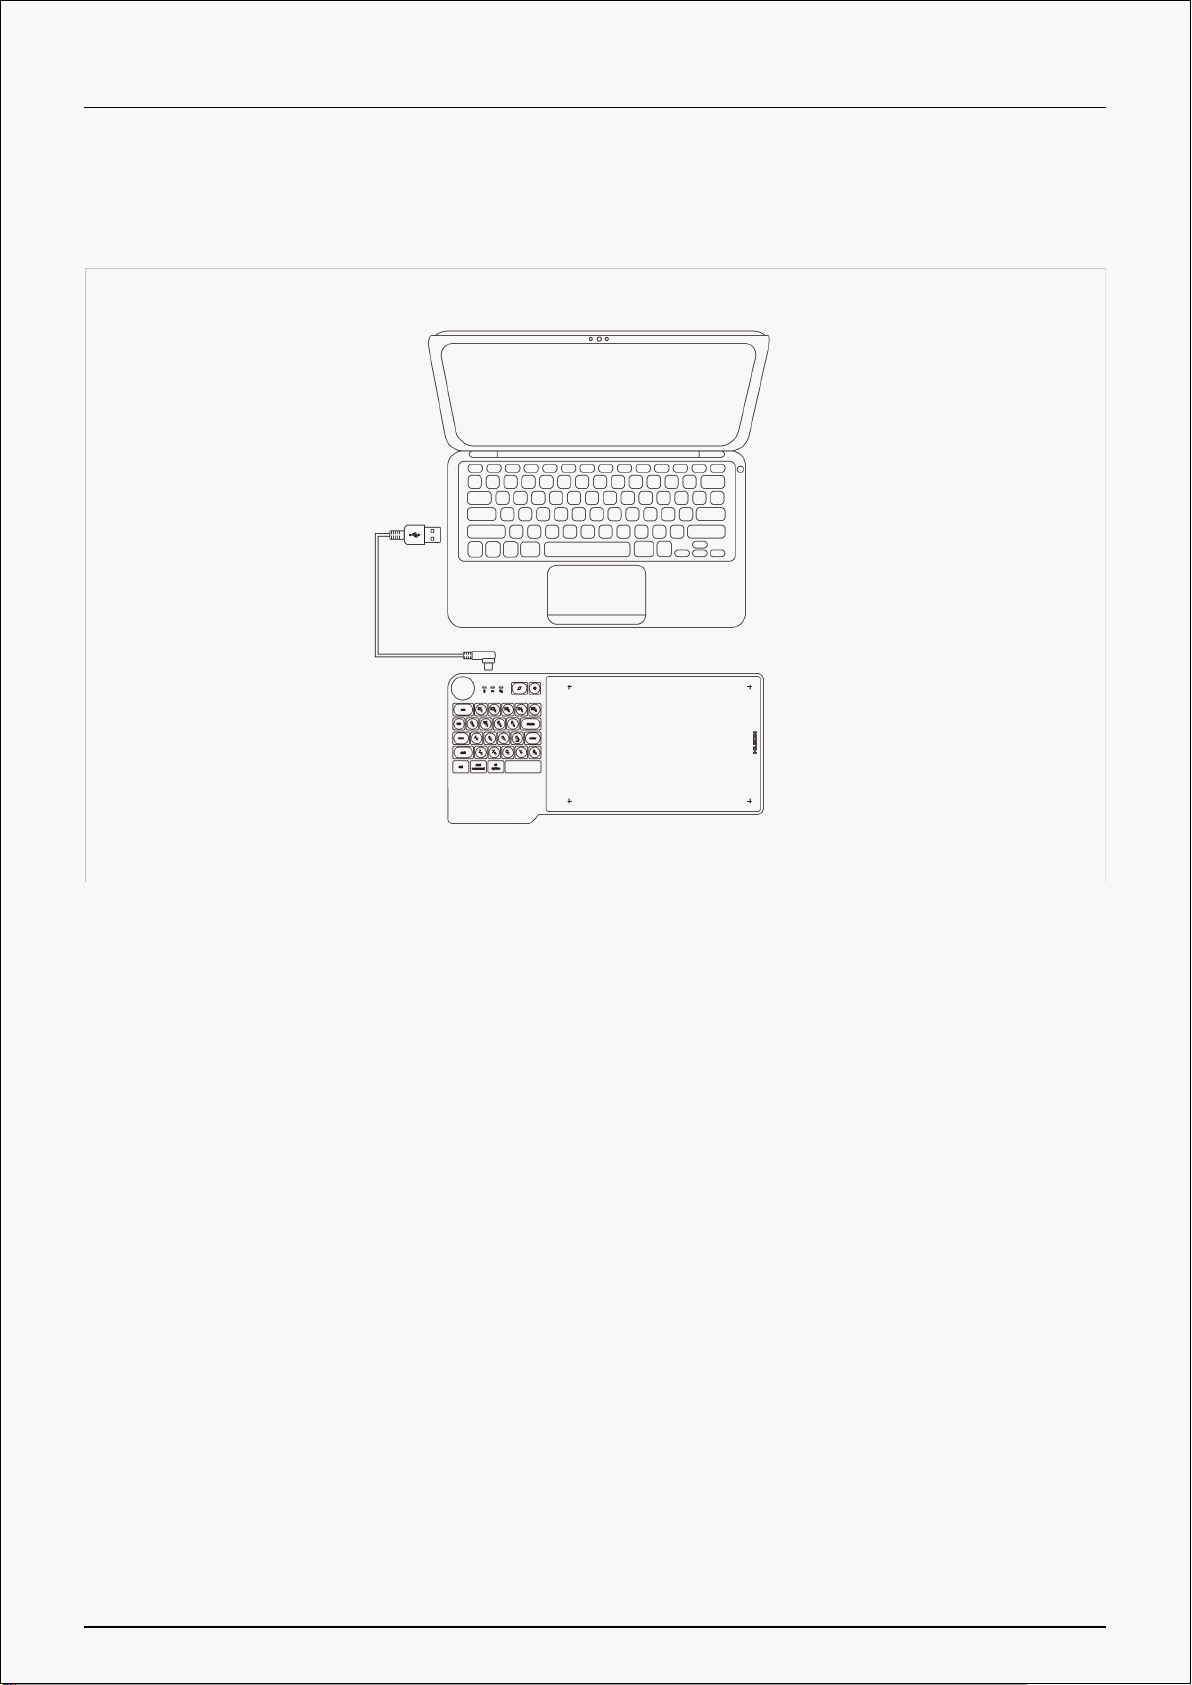
Product Connection ................................................ 5
Driver and Setting ................................................. 9
Install Driver ....................................................... 9
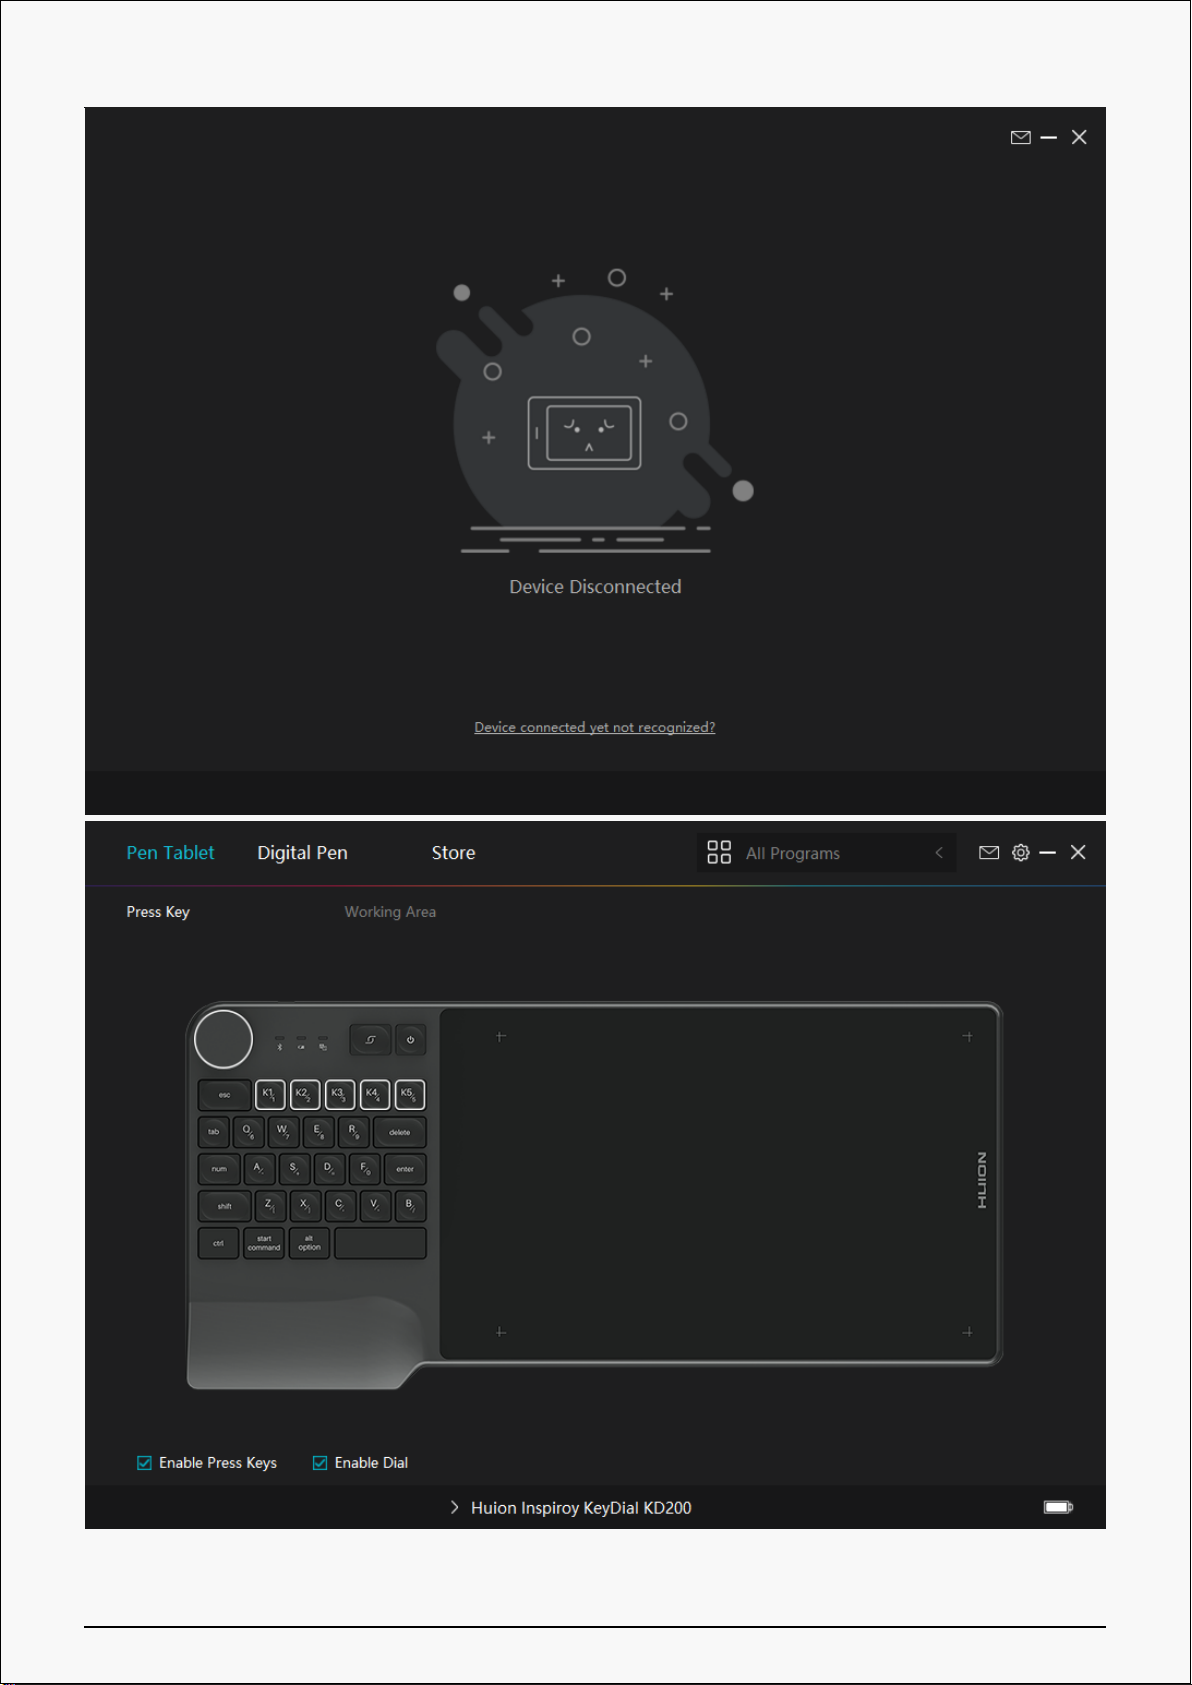
Driver Interface Preview ............................................. 10
Pen Tablet Setting .................................................. 12
Dial Function Setting ................................................ 20
Digital Pen Setting .................................................. 23
Driver Setting ..................................................... 29
Digital Pen Basic Operation ........................................ 33
Specifications ..................................................... 37
Troubleshooting Solutions ......................................... 38
1 / 39

KD200
Product Overview
Tablet Introduction
Thanks for choosing HUION INSPIROY Keydial creative pen tablet. This is a new
generation of professional battery-free drawing tablet, which can greatly improve your
work efficiency of painting and creation, and full of fun. You can freely painting and
writing, depicting different lines and colors, just as the pen writes on the paper, which
brings you a real shock experience.
To give you a better understanding and using of your tablet, please read this user
manual carefully. The user manual only shows the information under Windows, unless
otherwise specified, this information applies to both Windows and Mac systems.
Note: The pictures in the User Manual are for reference only.
2 / 39

KD200
Product and Accessories
Please see the detailed product introduction.
*Press Keys
1. Dial: While the Dial mode, features are programmable, with default functions being
canvas size adjustment, brush size adjustment and canvas scrolling.
3 / 39

KD200
2. Long press to call up the function menu /Serve as Enter Button.
3. Press keys that are programmable on the driver.
4. Num Key: Switch the alternative functions of keys.
After unboxing your package, make sure that you have the following items:
Tablet*1
Battery-free Pen*1
Pen Holder*1
Replacement Nibs(Inside the Pen Holder)*8
USB Cable*1
Quick Start Guide*1
Warranty Card*1
4 / 39

KD200
Product Connection
The tablet supports the connection of a computer and a mobile phone.
Wired Connection, Bluetooth Connection and Navo Receiver Connection.
5 / 39

KD200
Imporantly, you can judge the status of the device by observing the color of the light.
Indicator Color of light Status of Mini
keyboard
Bluetooth indicator Flash Blue Light Pairing
Blue Light Bluetooth Paired
Battery indicator Flash Red Light Low Battery
Red Light Charging
Green Light Charged
Num indicator White Light Alternative
Functions of Keys are Activated
1. Wired Connection
Connect the tablet to your computer with USB cable. Please follow the steps below:
1. Take out the USB cable from the package, then connect tablet to your computer.
2. Please download the Pen Driver from our website:Driver-KD200.
3. Open the driver interface, the device picture will be displayed on the interface, indicating that
the tablet is successfully connected to the computer.You can start use the tablet.
See Section
6 / 39

KD200
2. Bluetooth Connection
PC and Android devices are supported to be paired with Bluetooth. Please follow the steps below:
1. Activate Bluetooth on PC or any Android device.
2. Long press the power button for 2 seconds till the blue light flashes to power on the pen tablet.
3. Have the device Inspiroy Keydial connected via Bluetooth pairing, Please hold the key combos
Shift+Ctrl+Start Command to adjust the imaging on your phone in case of display distortion.
7 / 39

KD200
3. Nano Receiver Connection
A nano receiver is available for PC without Bluetooth. Please follow the steps below:
1. Long press the power button for 2 seconds till the blue light flashesto power on the pen tablet.
2. Insert the nano receiver into the PC and a blue light will be on to indicate the connection
success.
8 / 39

KD200
Driver and Setting
Install Driver
Please download the driver from our website: Driver-KD200
Note:
1. Before installing driver, please close all graphic software and antivirus program.
2. If you have installed other pen tablet driver, please uninstall it before you install this driver.
3. Please make sure your computer OS are as following: Windows 7 or later, macOS 10.12 or
later.
4. Run the tablet driver program and complete the installation according to the instruction.
After the download is successful, double-click to open the driver, Connect the device to your
computer.
If the connection fails, please reconnect the computer to the device, or restart the driver or
computer.
9 / 39

KD200
10 / 39

KD200
Driver Interface Preview
1. Pen Tablet
Pen Tablet function setting interface, the users can set the tablet function on this interface, such as
Press Key, Dial and Working Area.
See Section
2. Digital Pen
The users can set the Pen function on this interface. About Press Key, Mode selection, Pressure
Sensitivity Adjustment and Pressure Test.
See Section
3. Store
11 / 39

KD200
Huion Store, where you can get the latest information about the product such as its FAQ or sales
promotion. Additionally, you can also purchase other products or accessories on Huion Store.
4. Add Programs
You can customize different functions on the current device for different programs.
When select All programs, the setting of the device is valid for every program.
By clicking Add a Program from the drop-down list, you can set the functions for a specific
program and hence have unique settings for different programs. After that, when launching a
specific program, the Driver will automatically recognize it and the setting features will change to
its corresponding one.
5. Setting
The users can set the Driver function on this interface. About Device Information, Backup
Setting, General Setting and Driver Update.
See Section
6. Switch between Devices
Driver can support the connection to two digital drawing devices at the same time. When these
devices are sharing the same Driver with the current device, users can customize the settings of
the devices by switching the Driver interface to the corresponding one.
Pen Tablet Setting
Press Key
You can customize the functions of these buttons according to your own habits, and you can
uncheck "Enable press keys" in the lower left corner to turn off the button function.
Place the cursor on a key to check its default value. Click the key for a pop-up dialog box and
then set the function.
12 / 39

KD200
You can enter a name for the keystroke, then select the property of the keystroke and customize
the function.
1. Keyboard Key
Click on the input box above and enter a valid key combination to creat a shortcut. For example
"Ctrl+A", "Ctrl+Z", and so on.
13 / 39

KD200
2. Mouse Key
Select the function of a Mouse or Wheel. Please see the picture below for detailed functions.
Mouse: Left Button, Right Button, Middle Button.
Wheel: Wheel Forward, Wheel Backward.
Double-Left Click.
14 / 39

KD200
3. Switch
Select Switch Screen or Switch Brush.
Note: Some software does not support the "Switch Brush" function.
4. Run Program
Browse and select a program that you want to launch quickly. After the setting, you can launch
that program with just a single press.
15 / 39

KD200
5. System Application
The table below are the functions of Windows and Mac Systems that can be customized on the
Keys.
6. Multimedia
16 / 39

KD200
To realize the functions such as previous song, next song, play/pause, volume up, volume down.
7. None
When select None, the keys will have no function.
Working Area
Select the Working Area tab to define the relationship between pen movement on the tablet and
cursor movement on the monitor screen.
By default the entire active area of tablet maps to the entire monitor. If more than one monitor is
in use and you are in extended mode, you need to choose the related monitor on the driver
interface which you are going to map to.
If your monitors are in mirror mode (All monitors display the same content), the tablet maps to
the entire space on each monitor and the screen cursor is displayed on each monitor
simultaneously.
1. Working Area Setting
Define the tablet area that will be mapped to the screen area.
[1] Full Area: the entire active area of the tablet. This is the default setting.
[2] Screen Ratio:As a general rule, be 16:9.
[3] Customized Area:
17 / 39

KD200
1> Enter coordinate values.
2> Drag the corners of the foreground graphic to select the screen area.
2. Rotate Working Area
By changing the direction of the tablet to adapt to the left and right hand operation. You can
rotate the tablet by 0°,90°,180° or 270°.
18 / 39

KD200
3. Display Mapping
If you are using multiple displays, you can select 'All Display' to map the working area to all
displays. After mapping to all displays, you can use the digital pen to operate these displays.
19 / 39

KD200
Dial Function Setting
You can customize the features of the Dial, and you can uncheck "Enable Dial" in the lower left
corner to turn off the Dial function.
Click the Dial for a pop-up box where you can see the three groups of current settings and to
modify them.
There are four properties for the Dial, which are Default, Multimedia, Customize Function, and
None.
20 / 39
Other manuals for KD200
2
Table of contents
Other Huion Keyboard manuals