Hutt DDC Series User manual

http://us.huttwisdom.com
HUTT Window Cleaning Robot
Product Manual

English( en ) P1-P9
Русский ( P10-P18
ru)
Благодарим вас за выбор робота-мойщика
окон производства HUTT
Пожалуйста, внимательно прочтите данное руководство перед использованием
для обеспечения вашей личной безопасности иэффективной работы устройства.

1. Product Overview
2. Safety Precautions
3. LED Indicator and Meanings
4. Troubleshooting
5. Technical Parameters
6. Path Planning Description
7. Fault List
8. Environmental Protection Use Period
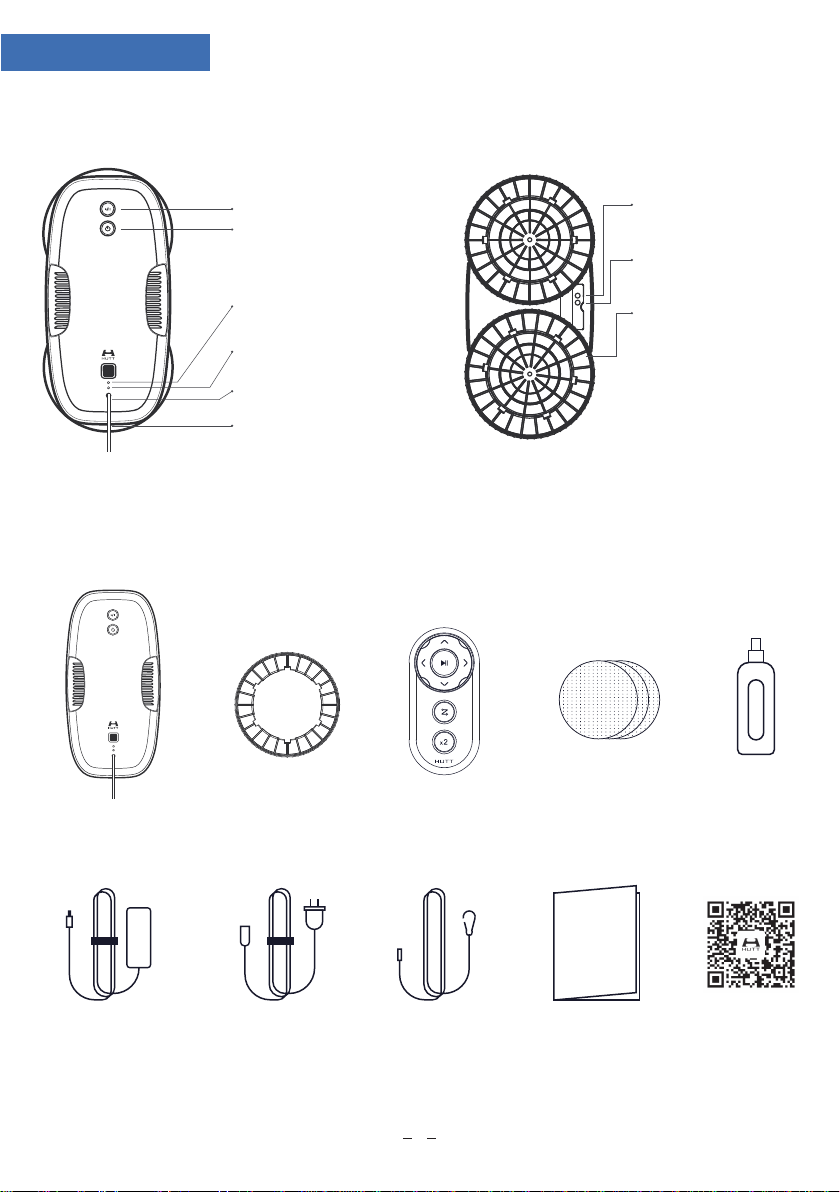
1.1 Component Name and Function
1.2 Parts List
1.3 Introduction to Standard Operating Method
1.4 Introduction to Installation Method
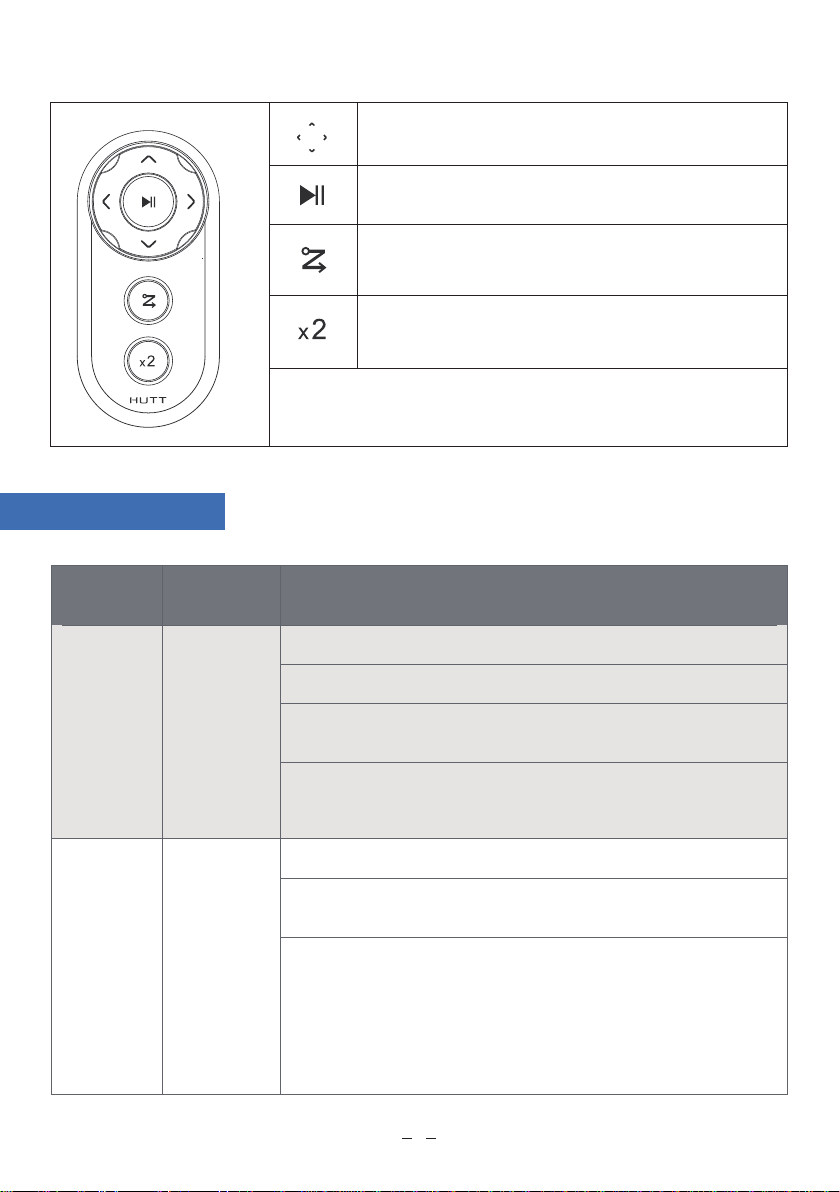
1.5 Instructions for Using the Remote Control
2
2
2
3
4
5
5
7
7
8
9
9
9
I. Product Overview
1.1 Component Name and Function Introduction
1.2 Parts List
Start switch Status indicator (green)
Status indicator (red)
Removable turntable
(do not disassemble under
normal conditions, place the
rag directly)
Power switch
Charging indicator
Status indicator
Power cable
Safety rope mounting hole
(Hold for 3 seconds to start/shut
down the machine)
Main unit and extension wire Turntable (installed) Remote control Cleaning cloth Spraying canister
Power adapter Plug Safety rope Instructions
Scan the QR code to
view the installation video
2
1.3 Introduction to Standard Operating Method
Dry-wiping method
Wet-wiping method
Wipe with a completely dry rag.
① Method 1:
Operating Method Specifics
Introduction to cleaning method
S/N
Name of Operating
Method
1
2
3
4
5
6
Spray an appropriate amount of water on the completely dry rag with the
spraying canister. It is recommended to spray water about 10-15 times,
adjusting the number of sprays according to environmental conditions. In
a dry environment, spray more water; in a humid environment, spray less
water.
① Method 2:
In a high temperature, dry and artificially inaccessible environment, wet
the rag and wring it out, drying it to a humidity similar to that of clothes
dried by washing machine, then wipe the window with the rag.
If there are hard particles or dust on the glass, there is a risk of scratching
the glass. It is recommended to wipe the glass manually and then wipe it
with this product.
After using the machine, replace the used rag with a clean and dry rag, or
store the machine without a rag.
After working in wet-wiping mode, the machine can be placed in a dry,
ventilated and cool place for 1-2 days to dissipate the moisture inside the
machine before storage.
If the turntable is removed, install it according to the position of the
matching port indicated on the label of the turntable, ensuring that each
mount is installed in place to avoid air leakage and falling.
After the machine is connected to the power source, the battery will
automatically charge.
If manual wiping is not possible, it is recommended to wipe the glass
twice with the machine, using the dry-wiping method for the first time to
reduce scratches; then wet-wiping for the second time.
※ It is forbidden to wipe the window with a rag other than the above-mentioned
degree of wetness. In particular, rags with a high degree of wetness, such as a rag
wrung out after soaking, will cause the machine to slip or even fall due to its
wetness.
※ Make sure to use the rag that came with the machine, otherwise the performance
of the machine will be affected.
※ After dry-wiping, a new and clean rag should be used for wet-wiping.
Cleaning method when the glass
glue is dirty and there are a lot of
larger particles on the glass
Storage of the machine
Turntable installation
Charging
3

1.4 Introduction to Installation Method
Install the rag
①
Put a clean and dry rag on the turntable,
keep the rag smooth and put in place.
Attach the safety rope
③
Connect to power supply
②
Connect the power wire and adapter
of the machine.
Connect the power wire and the adapter
of the plug.
Connect the power wire to the socket to
supply power.
Start the machine
④
Hang the safety rope on a solid, reliable and
immovable object, leaving an appropriate
length for the machine to work.
Check whether the safety rope is damaged. If
the safety rope is intact and undamaged,
perform the following operations.
Hold the Power button for 3 seconds to turn
on the machine, place the machine far away
from the window frame.
(2) After ensuring that the machine is attached
to the glass, release your hands, press the
Start button for 1 second and the machine will
begin operation.
Take down the machine
⑤
After wiping the window, pull the safety rope
with one hand, and hold the Power button
with the other hand for 3 seconds to shut
down the machine, then take it down.
Note: If the machine cannot be touched after wiping the window,
please use the remote control to maneuver the machine to a place
that is convenient for accessing by human hands, then take down
the machine according to the above steps.
When attaching, it may be appropriate to wind
1-2 more turns.
4
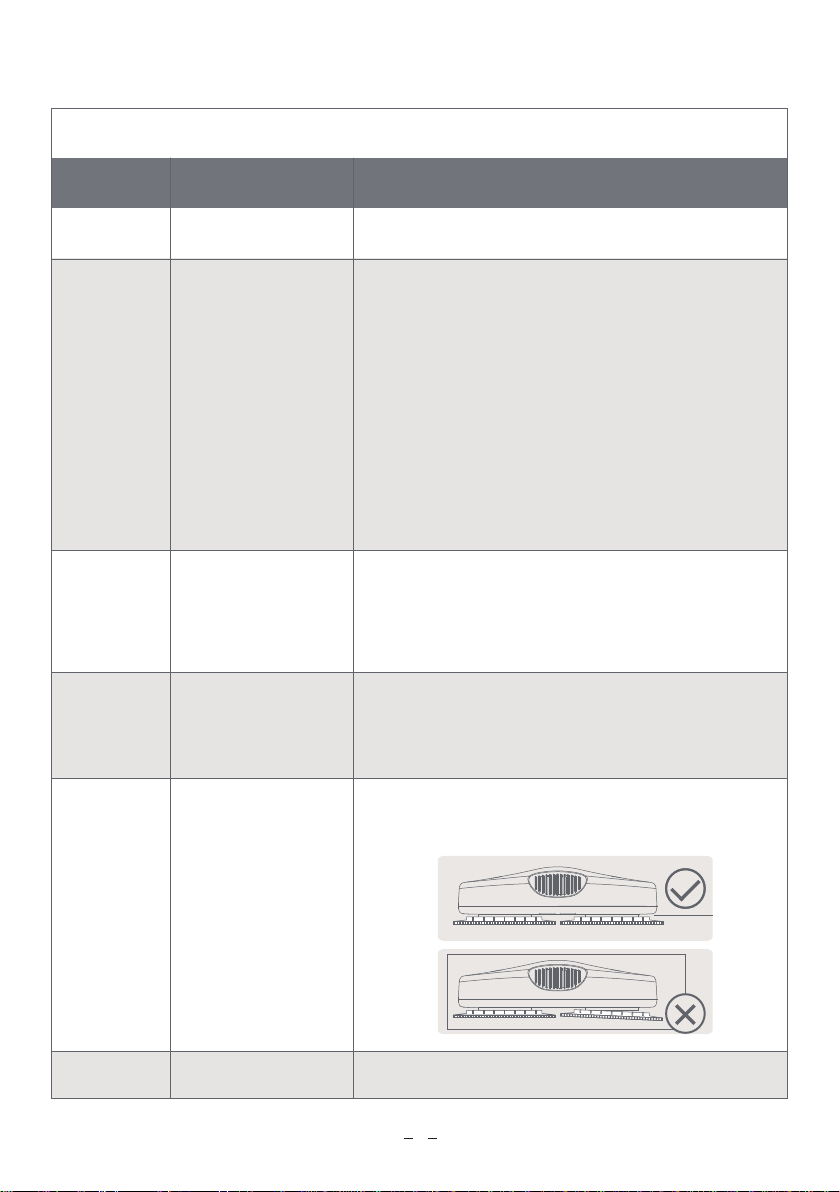
2. Safety Precautions
1.5 Instructions for Using the Remote Control
Move Up/Down/Left/Right/Stop when at the edge of the glass
Start/Pause/Continue
Move to the right from the current position to the edge wipe to
the bottom of the glass
Wipe the glass twice
In order to prevent operation by children, press the Pause button between giving instructions
S/N Classification Content
01
02
Environmental
Precautions
Precautions for
the Cleaned
Surface
Do not use in rainy weather or when the glass is wet or misty.
Only use the product for home environment cleaning at 0-40℃.
Do not use on cracked or damaged glass.
When the ambient temperature is low or below 0℃, it is
recommended to use antifreeze glass cleaner.
Please use in an environment where the width of the window
frame is at least 6mm.
Make sure that the window size is greater than 30*30cm (height)
and check whether the window is an ultra-narrow frame, bevel
frame, ultra-thin frame, beveled glass, no frame, or whether the
glass glue has unevenness, bumps, leaks, gaps, etc.
If external high-altitude operation is required, ground safety
warnings must be set on the ground to prevent accidental
personal injury.
※ Under the above circumstances, it is not recommended to use the product, or to use the
product under supervision, since such conditions may cause the product to fall.
5

03 Storage
Precautions
04 Operation
Precautions
05
Operation
and Use
Precautions
The product should not be exposed to water.
Do not place this product outdoors, or in places with direct
sunlight, high temperature, humidity or water.
Do not place this product together with flammable substances
such as oil, gas or flammable paint.
Make sure to check whether the safety rope is damaged, and
attach the safety rope to an immovable place.
Please use a dry rag.
Children are not allowed to operate this product.
Confirm that the battery is fully charged before use.
Keep the charger away from heat sources.
Please use on vertical glass, be cautious when using on
inclined glass under supervision. If necessary, use the remote
control to control the machine during use.
Make sure to shut down the machine before cleaning the
surface of the machine to avoid danger when the machine is
in operation.
Do not approach the rotating parts and openings of this
product with your fingers or any part of your body.
Do not use third-party chargers or disassemble or modify the
main unit, battery or charger by yourself.
If the product must be transported, it is recommended to use
the original packaging to transport the machine after shutdown.
If the product will not be used for a prolonged, please charge it
fully and shutdown the machine, placing it in a cool and dry
place. During storage, charge at least once every 3 months
to avoid battery failure due to over-discharge.
Do not continue to use the charger if it is damaged or broken,
please contact our customer service staff.
Please use this product in accordance with the Manual. If the
fault cannot be eliminated, please contact our customer
service staff, and do not repair it by yourself to avoid danger.
Keep the machine and accessories out of reach of children.
6

3. LED Indicator and Meanings
4. Troubleshooting
LED Light and Sound State Meaning
Status indicator
Charging indicator
Charging indicator Flashing in red
Status indicator Flashing in red
and green
alternatively
ON in green
ON in red
Flashing in blue
ON in blue
Working condition is normal
Low battery, please charge for 15 minutes before
starting the machine
The built-in battery is charging, if the indicator turns
red after the machine starts, please continue charging
The main unit is powered off, please connect the
power supply or take down the machine
Insufficient suction, please check whether the
machine is leaking
If the friction with the glass is too high or too low,
replace the rag as appropriate
The machine is abnormal, please contact our
customer service staff
The built-in battery is fully charged
Window cleaning completed
ON in green
+
Three long beeps
S/N Problem Description Solution
01 The machine slides
downwards during operation
The rag moves abnormally, and the machine
cannot recover to normal after observation:
① Too much moisture in the rag, absorb the
moisture in the rag repeatedly with tissue.
② The rag is dirty, please replace it with a
dry and clean rag
③ The rag is too dry, causing slipping, spray
water on the rag properly.
7

5. Technical Parameters
S/N Problem Description Solution
02
03
When taking down the machine
the machine cannot be touched
with hands and there is no
remote control
A reason which causes the
machine to leak
04
05
Measures to be taken
when the machine is not
moving smoothly
The machine does not
automatically stop after wiping
the entire window
Pull the safety rope against the glass, slowly
pull the machine back to a position that can be
reached by your hand, and then take down the
machine.
Check whether the turntable is in place.
Replace with a clean rag.
Check for sticky objects on the glass.
Please directly take down the machine.
06 Accidental power failure
The battery on the machine will keep the
machine adsorbing to the glass for at least 20
minutes and will set off an alarm.
Please take down the machine or restore power
supply as soon as possible.
Check whether the rag is installed evenly.
The glass or other surfaces to be cleaned are
curved or have uneven surfaces such as
stickers, resulting in large-scale air leakage.
Model DDC5/DDC55
Rated Power 90W
Size 29*13.5*8.5cm
Power-off Protection
Battery Capacity
Variable Frequency
Suction Range
Power-off Protection
Adsorption Time
Smallest Working Area
650mAh
2000~3800Pa
Rated Voltage 24V
Noise ≈65db
Charging Current 300mA
At least 20min
300*300mm
(the power in the battery will affect
the adsorption time)
8
This manual suits for next models
2
Table of contents
Languages:
Other Hutt Vacuum Cleaner manuals


