HydroMist HydroMistUSA.com
8
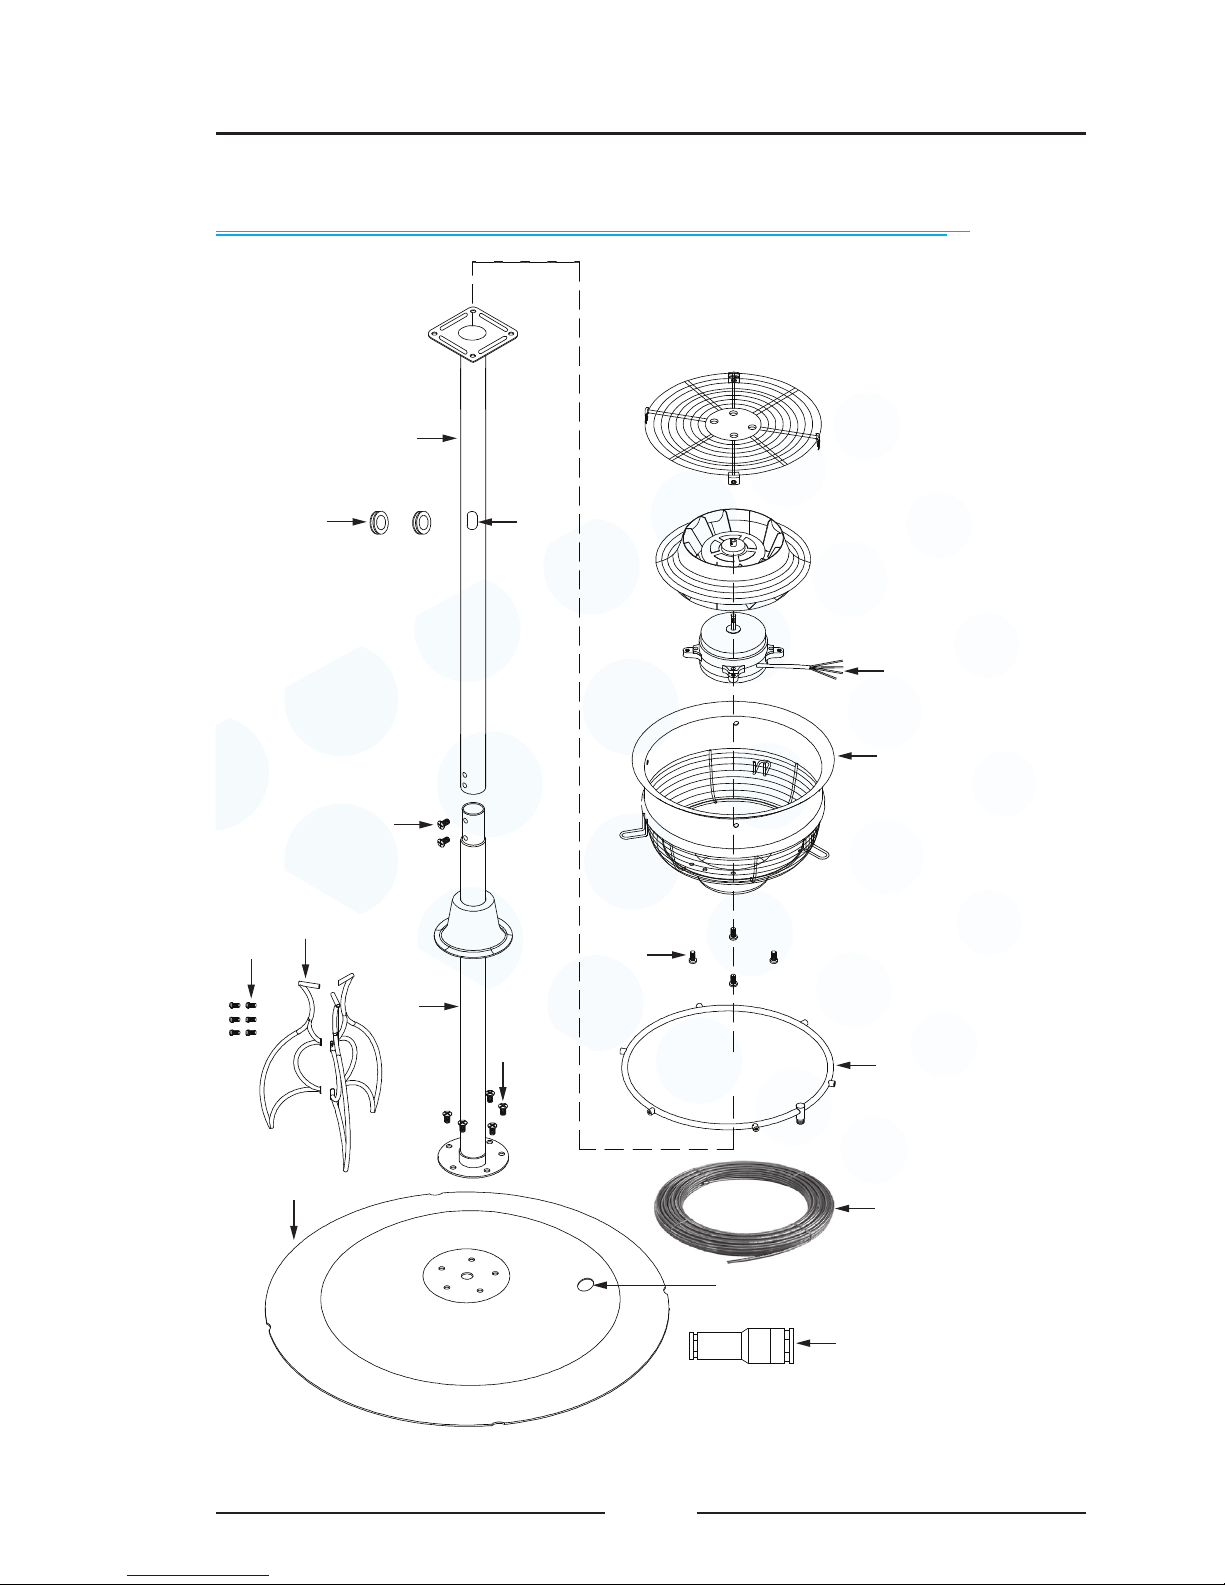
Assembly
1. Attach Lower Pole (5) to Tower Base (1), using Tower Mounting Screws
(2).
2. Attach Lower Supports (4) to the Lower Pole (5) using Support Mounting
Screws (3).
3. Attach Upper Pole (9) to Fan Head (11) using Upper Mounting Screws
(10).
4. Remove Pole Connecting Screws (6).
5. Slide Upper Pole (9) and attached Fan Head (11) onto Lower Pole (5),
and re-install the Pole Connecting Screws (6).
6. Hold the assembly by the Upper Pole (9) close to the Fan Head (11) and
SLOWLY tilt and lower the Fan Head (11) until the weight of the unit can
be gently placed onto the ground. Be careful not to damage the Misting
Ring (13) or any of its components
7. Push the Power Cord (12) through one of the Wire and Tube Routing
Holes (8) until it exits the bottom of the Tower Base (1).
8. Route the Power Cord (12) up through the Wire and Tube Exit Hole (15)
from the bottom side of the Tower Base (1).
9. Push the 1/4-Inch Nylon Tube (14) down through the unused Wire and
Tube Routing Hole (8) until it comes out of the Tower Base.
Note: Wire and tube should not both go into only one Tube Routing Hole (8).
Be sure Rubber Pole Grommets (7) are still covering the hole edges.
10. Route the 1/4-Inch Nylon Tube (14) up through the Wire and Tube Exit
Hole (15).
11. Connect the top end of the 1/4-Inch Nylon Tube (14) to the inlet tting
on the Misting Ring (13). Be sure the tube is pushed in rmly to reduce
the possibility of leakage.
12. Remove any remaining slack of the 1/4-Inch Nylon Tube (14) and Power