HydroMist HydroMistUSA.com
8
Assembly
1. Attach Fan Head unit (10) to Lower Mounting Pole (4) using the Pole-to-
fan mounting screws and washers (6), (7).
2. Push power wire (9) through one of the Wire and Tube Routing Holes (8)
until the wire exits the end of the Upper Mounting Pole (1).
Note: Try twisting the wire and/or pushing and pulling repeatedly if it
is difficult to push the wire through.
3. Starting at one of the Wire and Tube Routing Holes (8) Push the included
1/4 Inch Nylon Tube (12) through the Lower and Upper Mounting Poles
(4), (1), until the tube exits the open end.
Note: Try twisting the tubing and/or rapidly pushing and pulling repeatedly
if it is difcult to push the tube through.
4. Press the end of Nylon Tube (12) into the pre-installed hose adapter tting
on the misting ring.
5. Attach the Mounting Bracket (11) to an appropriate ceiling mounting location
using 4 ea of Lag Screw (13-G). Supplied Lag Screws (13-G), are designed
to secure the mounting bracket into a wooden ceiling joist. For other materials,
please purchase appropriate mounting hardware.
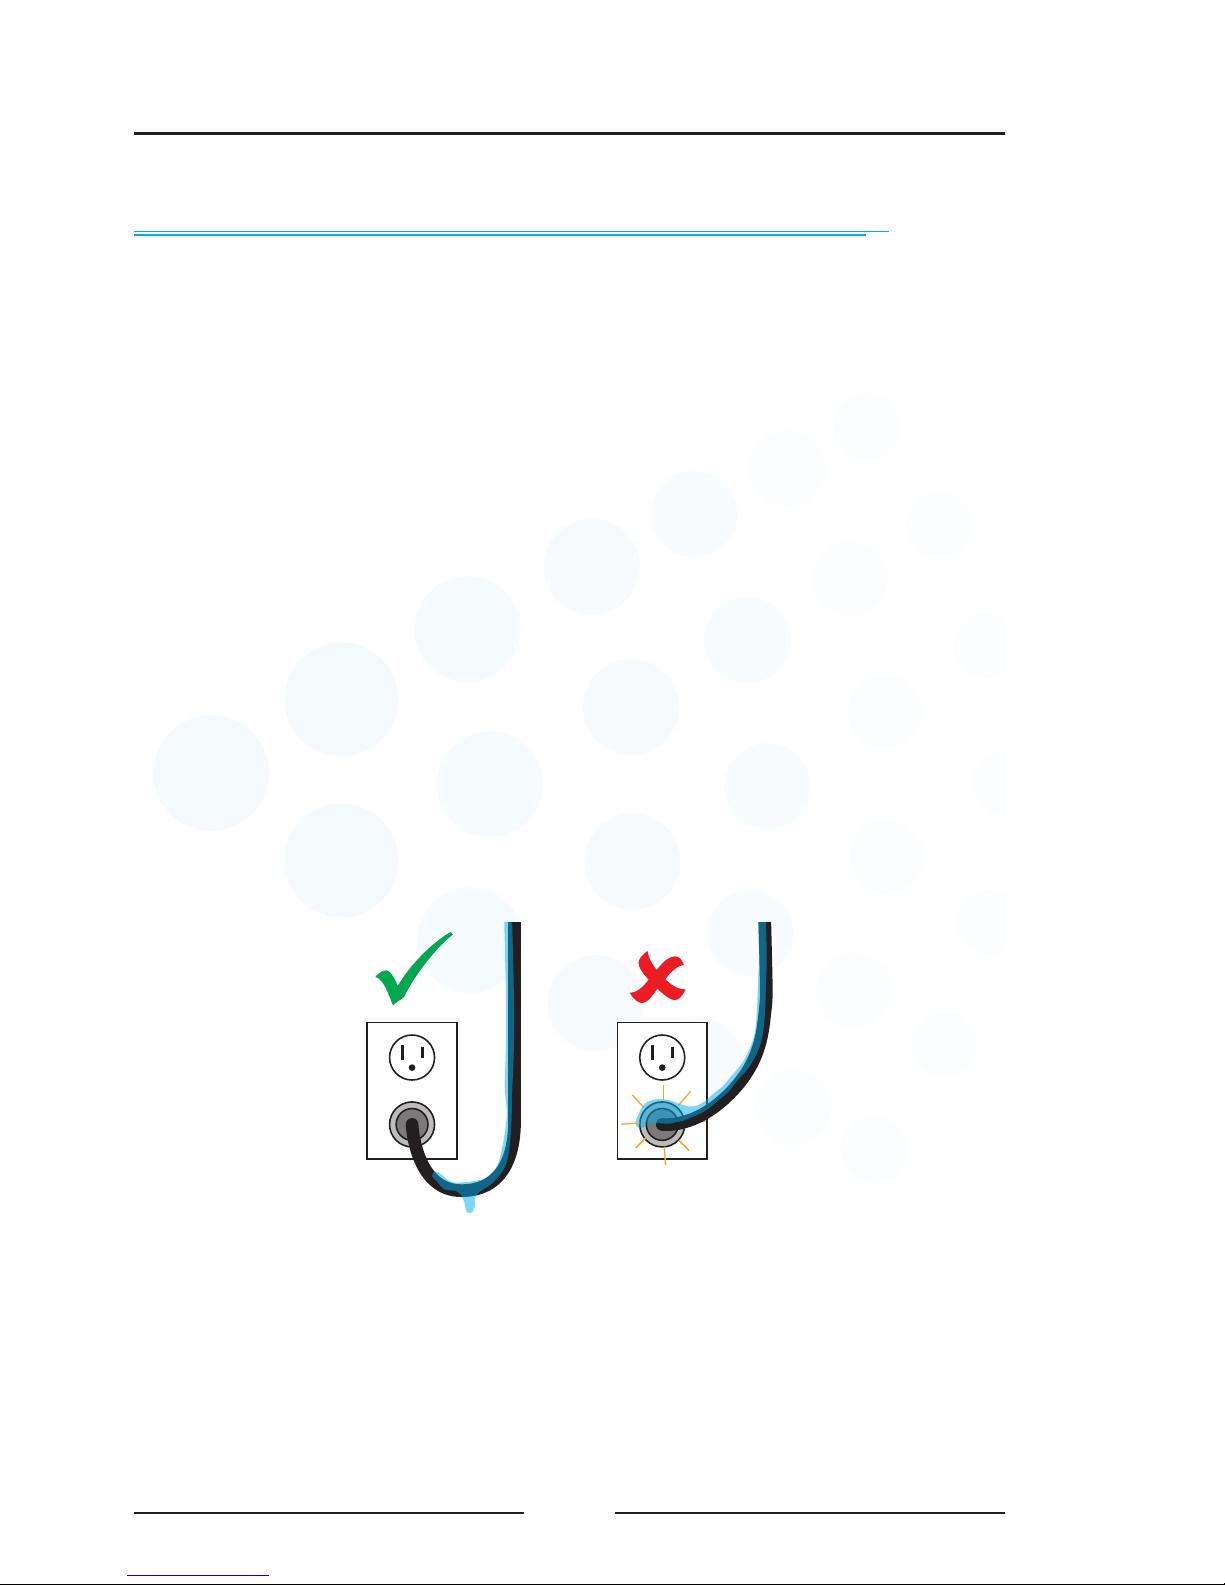
WARNING: Mounting Bracket must be secured to a ceiling joist or other
surface that will support 60 pounds.
6. Insert the Clevis Pin (13-B) into a at washer (13-A).
7. While supporting the weight of the fan, slide the Upper Mounting Pole
into the Mounting Bracket, and insert the Clevis Pin (13-B) with Washer
(13-A) through the center hole on the Mounting Bracket, through the top
hole of the Upper Mounting Pole and out through the other Mounting
Bracket (11) center hole.
8. Slide a washer (13-A) over the end of the Clevis Pin (13-B) with the hole
in it. Slide the Cotter Pin (13-E) through the hole at the end of the Clevis
Pin (13-B) to secure the pin in the bracket.