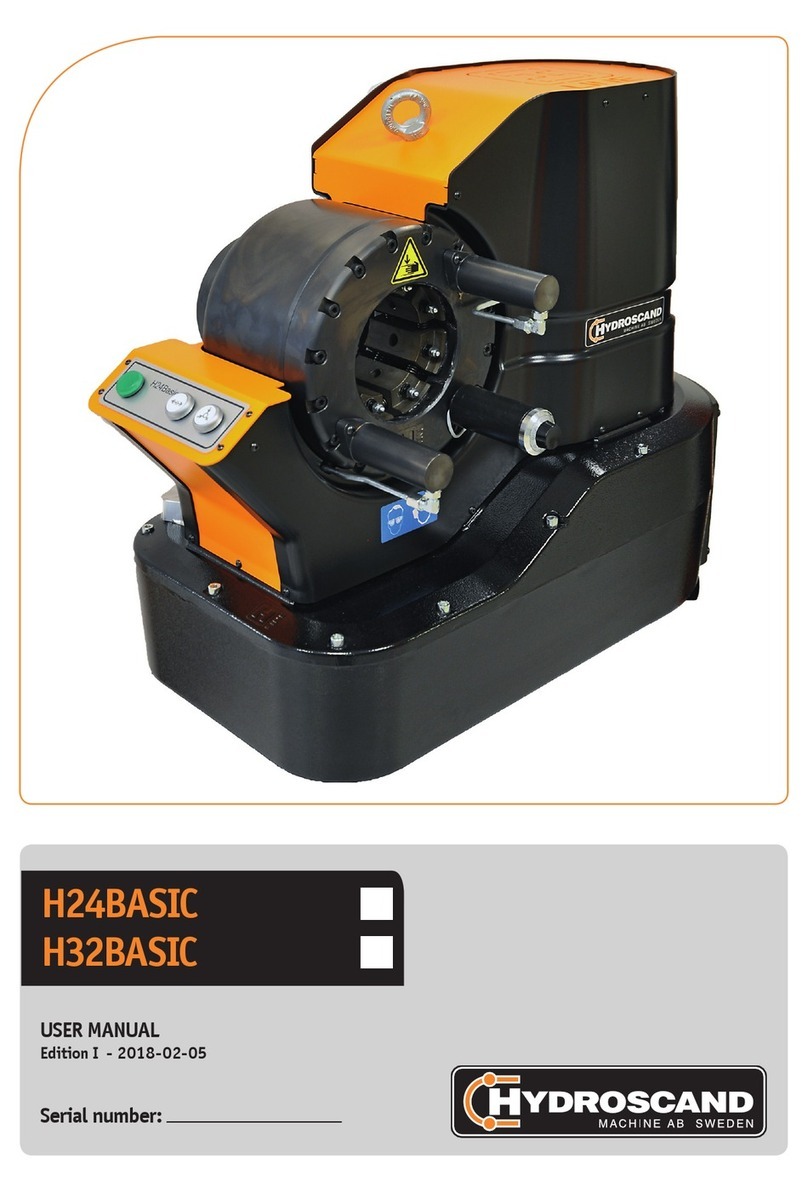
HYDROSCAND H120BASIC User manual

USER MANUAL
Edition II - 2016-12-28
Serial number:
H120BASIC

CONTENTS
1. INTRODUCTION .....................................................3
2. SAFETY RULES ...................................................3-4
3. EQUIPMENT .......................................................4-8
3.1 WARRANTY ....................................................5
3.2 IMPORTANT....................................................5
3.3 IDENTIFICATION........................................6 - 7
3.4 USER INTERFACE IDENTIFICATION......................8
4. CALIBRATION ....................................................8
5. START - UP...................................................... 9-11
5.1 POSITION ......................................................9
5.2 FILLING THE OIL.............................................9
5.3 ELECTRICAL INSTALLATION...............................9
5.4 SELECTING DIE SET .........................................9
5.5 SETTOMG CRIMPING MEASUREMENTS..................9
5.6 DIE SETS .....................................................10
5.7 CHANGING DIE SET........................................ 10
5.8 CHANGING DIE SET WITH QC TOOL................... 11
5.9 CRIMPING.................................................... 11
5.10 CRIMPING WITH ELECTRICAL BACKSTOP OR FOOT
PEDAL ................................................................... 11
6. MAINTENANCE ....................................................12
6.1 LUBRICATION...............................................12
6.2 CHANGING THE OIL AND FILTER ......................12
7. TROUBLE SHOOTING .............................................13
8. TECHNICAL DATA ................................................. 14
9. ELECTRICAL DRAWS ...................................... 15 - 24
10. SPARE PART ............................................... 25 - 26
Page 2
H120BASIC USER MANUAL EDITION I 2015-06-01

Page 3
H120BASIC USER MANUAL EDITION II 2016-12-28
1. Introduction
Do not unpack or operate the crimping machine until you have thoroughly read this manual.
All who operate the crimping machine must read this manual.
This manual provides necessary information for safe use of this machine.
This manual is the result of continual development, testing and technical evaluations that
are registered and veried by Hydroscand Machine AB according to 2006/42/EC in order to
secure result validity.
This information is intended only for specialized operators who can operate the machine
without risk to themselves, other persons, property, the machine, or the environment. The
operator should have fundamental knowledge in trouble-shooting methods, perform machi-
ne inspections and simple maintenance according to the information provided in this ma-
nual and according to local legislation for protection of health and safety.
This manual does not explain disassembly or comprehensive maintenance in detail. These
may only be performed by an authorized service technician.
It is necessary to store the manual and keep it in good condition for future use. Contact your
closest authorized supplier for a replacement manual or additional information if necessary.
This manual should be preserved and stored for the length of the machine’s lifetime or at
least ten (10) years in a well-known, easily accessible location together with other machine
documentation.
Hydroscand Machine AB is not liable for injury/damage to persons/machine or property as a
result of improper use, having made prohibited modications to the machine or misinterpre-
ting this manual’s safety instructions.
2. Safety rules
Always ensure that the minimum standards for safety, installation and operation are complied with be-
fore operating the machine. Observe the surrounding environmental conditions such as temperature,
humidity, lighting, vibrations, dust and other conditions at the machine operation site. Never remove
the machine’s information or warning plates. Ensure that they remain clearly readable. Contact an aut-
horized service workshop for replacement plates if they become unreadable.
The use of any spare parts that deviate from this manual’s specications, any other changes/manipula-
tions (however insignicant) made to your machine releases Hydroscand Machine AB from any liability
for consequences that arise due to the machine’s performance, level of safety for nearby persons and/or
personal property.

Page 4
H120BASIC USER MANUAL EDITION II 2016-12-28
Disassembling or side-stepping safety devices or rules is extremely hazardous and absolu-
tely prohibited. Refusal to follow these requirements puts others at severe risk of injury!
Always dispose of operation waste according to current local laws and regulations.
Note!
All maintenance not described in this manual must be performed by an authorized service
technician.
3. Equipment
H120BASIC is a hydraulic crimper designed to crimp hydraulic hose, for service and serial
production. The machine consists of the chassie (tank), crimping head, the electronic unit
and pump unit.
The machine comes packaged on a pallet/wooden box marked with the product, serial num-
ber, order number, weight and volume. Make sure the data is line with your order and deli-
vered product.
Open the clips on the bottom and lift off the packaging. Remove the screws that secure the
machine to the pallet.
Use a lifting strap through the eye bolt for lifting the machine to the desired location.
NOTE! Consult a quali ed electrician for electrical installations.
NOTE! The machine must not be lifted by the lifting eye with oil in the tank.
NOTE! The machine must not be started until the oil is lled.
NOTE! Dispose of packaging material according to of cial regulations.
CLIPS
Lifi ting eye

Page 5
H120BASIC USER MANUAL EDITION II 2016-12-28
The machine is delivered with:
• Rearview mirror
• Calibration mandrel
• Grease gun
• Grease tube for the dies
• Tool for changing dies
• Instruction manual
• Certi cate of conformity according to CE standard
3.1 Warranty
The warranty lasts one (1) year from purchase and only under the strict condition that the manual
instructions have been followed. The warranty covers faulty material/parts and fl awed workmanship,
replacing faulty parts cost.
The warranty does not cover improper use or normal wear. Travel costs, time for repair and shipping
costs are not covered by the warranty. Repairs under the warranty are to be made only by Hydroscand
Machine AB or an authorized service technician approved by Hydroscand Machine AB. Lost income or
extra costs that may arise for any reason are not covered by the warranty.
Note!
Ensure that the machine is undamaged and that all of the described items are present upon arrival or
shortly after. Hydroscand Machine is not liable for incorrect or missing parts that are not reported
within eight (8) days after delivery.
3.2 Important
H120BASIC is designed, constructed and protected for crimping hydraulic hose in sizes
3/16 ” - 2”. Any other use is considered as improper and Hydroscand Machine AB takes no
responsibility for injury to persons, property or machinery in this case. The machine should only be
used for crimping hydraulic hose as speci ed. Hydroscand Machine AB’s guidelines for working
conditions and restrictions of use and the health and safety laws must be followed.
Warning !
Pinch point!
Keep hands and all other body parts away
from the red-indicated area while crimping.

Page 6
H120BASIC USER MANUAL EDITION II 2016-12-28
3.3 Identication
The machine can be identied by CE plate which is xed externally at the rear.
● Manufacturer
● Serial number
● Manufactured year
● Weight
● Voltage
Note!
It is absolutely prohibited to remove or damage the identication plates. Contact an autho-
rized service workshop for new plates if they become damaged and unreadable.
Always provide the following information and technical explanation of the machine’s
problem when contacting the authorized service workshop:
● Model
● Serial number
● The manual’s version and date

Page 7
H120BASIC USER MANUAL EDITION II 2016-12-28
1
6
3
4
2
5
7
H120BASIC
1. Mirror
2. Manometer
3. Electrical box
4. Door to access the oil ller cap and the lter.
5. Crimping head
6. Control panel
7. Emergency Stop

Page 8
H120BASIC USER MANUAL EDITION II 2016-12-28
3.4 User Interface
1. Control device H120BASIC.
2. Teach in ( Push ”Teach in button” once to memorizing the opening diameter )
3. Push button opening.
4. Push button crimping.
5. Socket for foot pedal and electrical backstop. Foot Pedal, plug in
and it will work as ”Push Button Crimp”.
6. Main power switch.
7. Button for Power / Reset the emergency stop.
8. Filter alarm indicator lamp (Optional).
1
2 3 4
6 7 8
5
4. Calibration
The machine is equipped with a simple calibration function. Use the calibration tool to perform a
simple calibration.
If the actual crimping measurement differs too much from the set crimping measurements
then calibrate the machine, perform this with die set size 19.
1. Insert a die set size 19 into the machine.
2. Turn the adjustment dial to 0. Check image below.
3. Use the calibration tool that followed with H120BASIC and PUSH ”Teach In and crimp
button” together until the dies meet the calibration tool and tool shold be locked before
the LED indicator fl ashes, if not please repeat 3.
4. Simple calibration is done.
Locking mechanism to lock
the set crimping measurement

Page 9
H120BASIC USER MANUAL EDITION II 2016-12-28
5. Start up
5.1 Position
Place the machine on a stable and level surface.
5.2 Filling the oil
H120BASIC is supplied without oil in the tank. The tank holds 180 liters. Open backside cover on the
machine. Open the lling cap (1) and ll up as much oil as possible. Fill to the mark on the sight
glass. (2)
Below recommended oil shoud be used:
Recommended oil: ISO VG46 or equivalent.
5.3 Electrical installation
The machine is supplied without cable and plug. Contact a licensed electrician for electrical
installations. Check that the main voltage corresponds to the rated voltage of the machine before it
is connected to the network.
NOTE! Check direction of rotation of the pump. If reversed (wrong) rotation, the pump will be quiet
and you will hear a little bubbling sound in the tank. You can not run the machine! Is the pump in
the right direction, it will have a relatively high noise level of up to a minute then it will be almost
completely silent. It is now possible to run the machine!
5.4 Selecting die set
Determine the crimping dimensions for the current operation and select the die set with the correct
interval that corresponds to the crimping measurement.
For example: A crimping measurement of 17 mm requires the die set size nr 16 (since it covers the
16-19 mm interval). Always select the die set within the correct interval to achieve the best crimping
results. Every die is marked with the smallest crimping measurement in the interval. Crimping any
measurements outside the table crimping measurement interval is not recommended. Using dies that
are too small risk the ferrule becoming oval.
5.5 Setting crimping measurements
Turn the adjustment dial so that the zero (0) on the dial is lined-up with the zero (0) in the window.
If zero (0) is set, the machine will crimp the smallest diameter provided in the interval. Every revolu-
tion of the dial increases the value in the window with one unit. One revolution clock-wise corresponds
to 1 mm on the crimping measurement. The measurement shall be added to the least-speci ed diame-
ter in the interval. For example: Crimping 16 mm hose requires die nr 16 with the adjustment dial set
to zero (0) and lined up with zero (0) in the window. Crimping 21,2 mm hose requires die nr 19 with
the adjustment dial turned (two clock-wise rotations) at 2. Selecting 20 on the dial should line up with
2 in the window. Make sure to lock the dial when the desired crimping measurement is set.
1
2

Page 10
H120BASIC USER MANUAL EDITION II 2016-12-28
5.6 Die sets
5.7 Changing die sets
1. Return the dies as much as possible by pressing the Man open button twice. (Stops at the
rst press at the set opening diameter)
2. Remove the die segment by using the enclosed changing tool and pull the knob until the
segment releases.
3. Be sure to check that the set (consisting of 8 segments) is clean, that there are no
damages and that they all have the same number. The label should be facing you and the
dies should be inserted from the front. Insert the die by pulling the knob, push the pin in
the die into the hole in the machine and then release the knob to lock the die segment.
4. Check that all the dies are positioned correctly in the machine.
Locking Pin
Die Set
QC tool
Die Set Crimping area
32-10
32-12
32-14
32-16
32-19
32-22
32-26
32-30
32-34
32-39
32-45
32-51
32-57
32-63
32-69
32-74
32-78
10-12 mm
12-14 mm
14-16 mm
16-19 mm
19-22 mm
22-26 mm
26-30 mm
30-34 mm
34-39 mm
39-45 mm
45-51 mm
51-57 mm
57-63 mm
63-69 mm
69-74 mm
74-78 mm
78-87 mm

Page 11
H120BASIC USER MANUAL EDITION II 2016-12-28
5.8 Changing die set with QC tool
As an addition to the machine there is a die set rack (QC-stand) and a QC tool. Using the QC-tool,
the entire die set can be changed in one operation as follows. If there are no dies in the machine
start directly at step 4.
1. Fully contract the dies together to zero (0). Insert the QC-tool in the holes for
the QC - tool in the contracted dies and then completely retract (return) the
dies. Insert the die set in its storage compartment (QC-stand or QC-plate) and
turn the tool counter-clockwise until it stops. Remove the tool.
2. Insert the QC-tool in the desired die set and turn clock-wise until it stops. Pull
out the die set and mount them in the machine.
3. Contract the dies* together until you hear or feel that they click in place.
* TO AVOID DAMAGING THE MACHINE, MAKE SURE THAT THE DIE SET PINS CENTRE WITH THE HOLES IN THE
MASTER DIES.
NOTE! Make sure the die set pins in the die set are aligned with the holes in the machine. Stop
immediately if the pins are not aligned with the holes. Great care is encouraged!
Mistakes will lead to extensive repairs.
5.9 Crimping
1. Once the desired die set is mounted and crimping diameter is set, place the hose
application between the dies.
2. Press and hold the Crimping push button.
3. Press the Opening push button until the hose application is free.
4. Measure the crimped connector and make adjustments if necessary.
5.10 Crimping with electrical backstop or foot pedal
1. Plug in the backstop or foot pedal into the socket.
2. Adjust the backstop axial position (1) by loosening
the handle (2) to t the application to be crimped.
3. Press the application onto the contact plate (3) to start crimping.
The contact plate must be held down until the set crimping diameter is reached.
When the set crimping diameter is achieved the machine returns automatically.
4. Check crimping diameter and adjust if necessary.
5. When the backstop is not in use turn it into a position
so that it is not in the way. Loosen the handle (4), move and
tighten again.
Die set change sequence
4
2
3
1

Page 12
H120BASIC USER MANUAL EDITION II 2016-12-28
6. Maintenance
6.1 Lubrication
The machine must be cleaned and lubricated every eight working hours. When lubricating, the dies
should be returned as far as possible, but no more than that you can reach the grease ttings. Use a
grease gun that plugs into the nipples. (1). Excess grease should be removed. Lubricate rather less
and often than seldom and a lot. If the machine is not lubricated the machine loses power and the
sliding surfaces inside the machine will be damaged. Use only grease recommended by Hydroscand
Machine AB.
Recommended grease: Optimol viscogen
6.2 Oil and lter change
Oil should be changed once a year. When changing oil, the dies should be fully opened. Drain the old
oil by opening the drain plug in the bottom of the tank (1) or use a suction device and suck out the
oil through the oil ller cap (2). Change the lter every oil change. Then ll the new oil to the mark
on sight glass. Unscrew the lter housing (2), take out and repalce the lter.
Use only oil recommended by Hydroscand Machine AB.
Recommended oil: ISO VG46 or equivalent.
1
2
1

Page 13
H120BASIC USER MANUAL EDITION II 2016-12-28
7. Trouble shooting
Problem
Machine starts but cylinder will
not move:
Low crimping force:
Inconsistent crimping
measurements:
Machine will not start:
1. Incorrect motor
rotation.
2. Low oil level.
3. Electrical/mechanical
failure.
1. Insufcient lubrication.
2. Low oil level.
3. Faulty pressure reliefe
valve.
4. Electrical/mechanical
failure.
5. Insufcient lubrication.
6. The machine need to
be recalibrated.
7. Electrical/mechanical
failure.
1. No power.
2. EM-stop no reset
3. Motor protection has been
tripped.
Change direction of motor rota-
tion.
Add oil.
Service is required,
Contact Hydroscand
Machine AB.
Lubricate.
Add oil.
Check hydraulic pressure. Adjust
or change valve.
Service is required,
Contact Hydroscand
Machine AB.
Lubricate.
Perform calibration.
Service is required,
Contact Hydroscand
Machine AB.
Connect, check fuses.
Press reset button.
Check motor protection.
Reason Solution

Pungmakarbovägen 1, SE-783 90 Säter, Sweden
Phone: +46-(0)225-573 30 Fax: +46-(0)225-501 08
info@hydroscand-machine.se www.hydroscand-machine.se
TECHNICAL DATA
Crimping range in mm .................................. 10 - 87 mm
Crimping range in inch ..................................0,39 - 3,42
Crimping force in metric tons...................................280
Crimping force in kN ............................................. 2800
Maximum hose size in inch ........................................2”
Die Set ................................................................H 32
Maximum travel of dies in mm..............................70 mm
Master die Diam. /Length in mm........................... 99/ 97
Master die Diam. /Length in inches.................3,90 / 3,82
Machine control ................................................ Manual
Motor size in kW......................................................5,5
Motor size in HP...................................................... 7,5
Colour................................................... Black / Orange
DIMENSIONS
Widht/ Depth/ Height .......................760x1050x1470 mm
Weight ............................................................ 1100 kg
DESIGNATION PART NUMBER:
H120BASIC ................................................. 9028-01-02
DIES: PART NUMBER:
H32-10 ....................................................... 9060-32-10
H32-12....................................................... 9060-32-12
H32-14 ....................................................... 9060-32-14
H32-16 ....................................................... 9060-32-16
H32-19 ....................................................... 9060-32-19
H32-22....................................................... 9060-32-22
H32-26....................................................... 9060-32-26
H32-30....................................................... 9060-32-30
H32-34....................................................... 9060-32-34
H32-39....................................................... 9060-32-39
H32-45....................................................... 9060-32-45
H32-51 ...................................................... 9060-32-51
H32-57....................................................... 9060-32-57
H32-63....................................................... 9060-32-63
H32-69....................................................... 9060-32-69
H32-74 ........................................................9060-32-74
H32-78....................................................... 9060-32-78

Page 15
H120BASIC USER MANUAL EDITION II 2016-12-28
9. Electrical Draws

Page 16
H120BASIC USER MANUAL EDITION II 2016-12-28
9. Electrical Draws

Page 17
H120BASIC USER MANUAL EDITION II 2016-12-28
9. Electrical Draws

Page 18
H120BASIC USER MANUAL EDITION II 2016-12-28
9. Electrical Draws

Page 19
H120BASIC USER MANUAL EDITION II 2016-12-28
9. Electrical Draws

Page 20
H120BASIC USER MANUAL EDITION II 2016-12-28
9. Electrical Draws
Table of contents
Other HYDROSCAND Crimping Tools manuals
Popular Crimping Tools manuals by other brands

molex
molex 207129 Series Operating Instruction Sheet And Specifications

Tyco Electronics
Tyco Electronics 408-10050 instruction sheet

Greenlee
Greenlee K425BG instruction manual

Hilpress
Hilpress 11030 operating instructions

Klauke TEXTRON
Klauke TEXTRON K502 instruction manual

Panduit
Panduit CT-920 Series instruction manual