1110
(located on center dash)
A
DRIVER’S SIDE TEMPERATURE
CONTROL: Press switch Aup to
increase temperature. Press switch A
down to decrease temperature.
B
FRONT WINDSHIELD DEFROST:
Press switch Bto activate/deactivate
front defrost.
C
REAR WINDOW DEFROST: Press
switch Cto activate/deactivate rear
window defroster.
D
BLOWER FAN CONTROL: Press
switch Dto increase/decrease blower
fan speed.
E
AIR INTAKE CONTROL: Press switch
Eto activate/deactivate. In this mode,
air is drawn from within passenger
compartment.
F
FRESH AIR SYSTEM: Press switch
Fto activate/deactivate. In this mode,
outside air enters vehicle.
G
PASSENGER’S SIDE
TEMPERATURE CONTROL: Press
switch Gup to increase temperature.
Press Gdown to decrease temperature.
H
DUAL TEMPERATURE
CONTROL: Press switch Hto operate
driver and passenger side temperatures
individually.
I
A/C: Press switch Ito activate/
deactivate air conditioning.
J
MODE: Press switch Jto control the
directional ow of air.
KOFF: Press switch Kto turn blower
fan o.
L
AUTO: Press switch Lto activate
automatic heating and cooling. In this
mode, desired temperature is
maintained automatically.
M
DISPLAY WINDOW: Displays
driverandpassengertemperaturecontrol
settings, fan speed and selected air ow.
DEFROSTING/DEFOGGING:
1Press front windshield defrost switch B.
2Set blower fan speed Dto highest setting.
3Set temperature control Aand Gto desired setting.
NOTE: If the air conditioner lter for the evaporator blower is not replaced following
the scheduled maintenance section, excessive window fogging may result. Your
authorized Hyundai dealer can replace this lter for you.
TEMP
AUTO OFF MODE DUALA/C
TEMP
PASS
AB
L
C
K
D
J
E
I
M
F
H
G
(varies by model)
NOTE: Please refer to your Owner’s Manual for more information on how to use your
audio system. A clear view of the southern sky is recommended to ensure XM® radio
reception if service is available in your area.
Trial XM® subscription ends 3 months following vehicle date of sale. Please contact XM® Radio at
1-800-XM-RADIO (1-800-967-2346) to renew your XM® subscription. For more XM® Radio information
call 1-800-XM-RADIO (1-800-967-2346) or visit online at XMRadio.com.
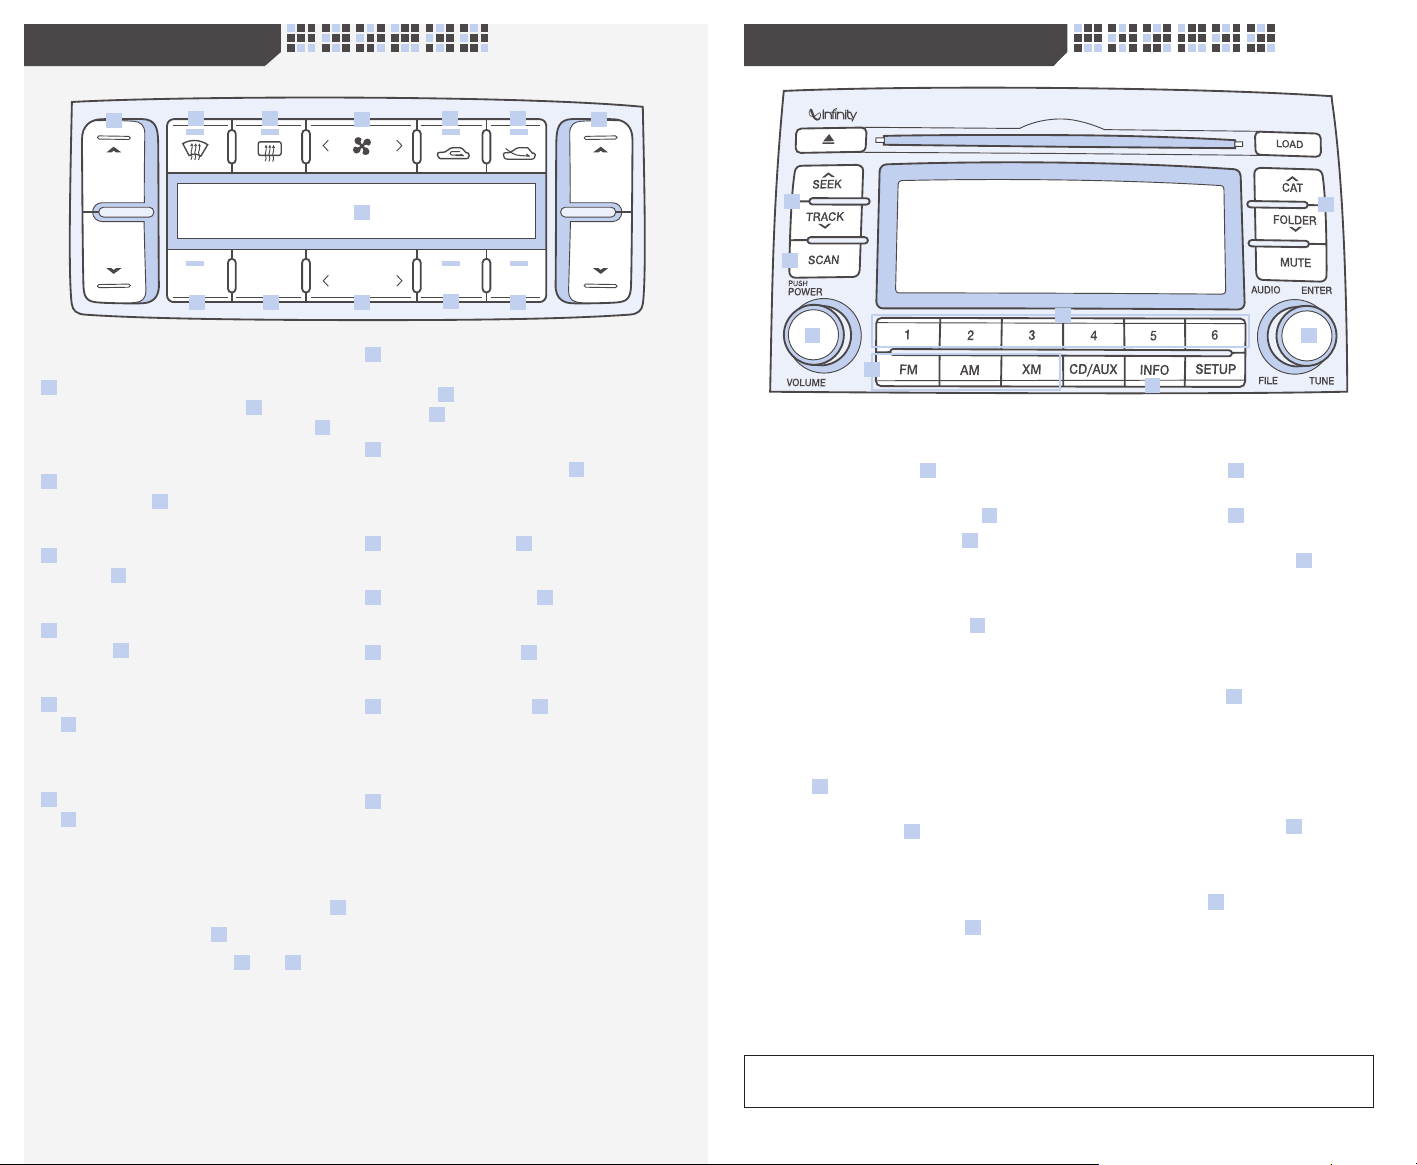
SETTING PRESET MEMORY
BUTTONS (AM/FM OR XM®®):
1Press POWER button Ato turn
radio on.
2Press AM, FM, or XM® button H.
3Rotate Audio Control knob Efor
desired channel (for XM® rotate knob
to select desired channel and then
press knob).
4Press and hold preset button G(1-6)
until audible beep is heard to store
current channel.
NOTE: FM has 2 bands for 12 presets.
XM® has 3 bands for 18 presets.
CATEGORY SEARCH (XM®®®):
1While in XM®, press CAT/FOLDER
button Dto scroll through music
categories.
2Press AUDIO knob Eto select
desired category.
SEEKING NEXT AVAILABLE
CHANNEL (AM/FM OR XM®®®):
Press SEEK or TRACK button Cfor
next channel.
SCANNING THROUGH AUDIO
CHANNELS (AM/FM, XM
®®
®, OR CD/MP3):
1Press SCAN button Bto preview each
channel/track.
2Press SCAN button Bagain to stop
scan feature.
3Press and hold SCAN button Buntil
a beep is heard to scan channel presets
for AM or FM (Channel Presets must
be stored rst).
ADJUSTING THE EQUALIZER
(SOUND QUALITY CONTROL):
1Press AUDIO knob Eto select from the
following sound qualities:
Equalizer gBass gMiddle gTreble g
Balance gFader gCurrent State.
NOTE: Equalizer options may vary by
stereo model.
2Rotate Audio Control knob Eto adjust
sound quality.
DISPLAYING INFORMATION (XM®®®):
Press INFO button Fto display channel
information:
Title gName gCategory g
Current State
B
E
F
A
C
G
D
H
124247_09a_Azera_QRG_052308.indd 11-12 5/23/08 11:40:56 AM