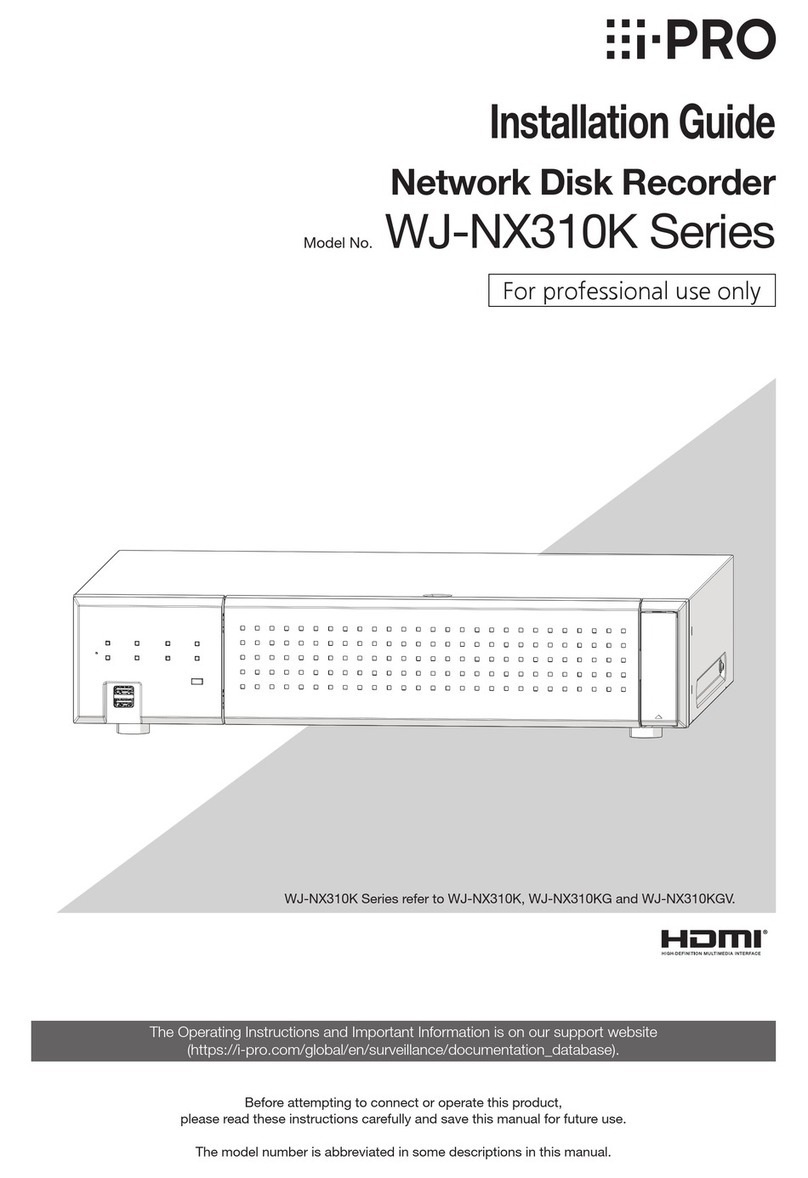
i-PRO WJ-HXE410 Series User manual

Before attempting to connect or operate this product,
please read these instructions carefully and save this manual for future use.
The model number is abbreviated in some descriptions in this manual.
Installation Guide
Extension Unit
Model No. WJ-HXE410 Series
The Operating Instructions and Important Information is on our support website
(https://i-pro.com/global/en/surveillance/documentation_database).
For professional use only
WJ-HXE410 Series refer to WJ-HXE410, WJ-HXE410G and WJ-HXE410GV.

Important Information
Refer to the Important Information on our support website for the following items.
Safety Information · Important safety information
Introduction · Preface
· Disclaimer of warranty
Precautions · Precautions for use
Major operating controls · Major operating controls and their functions
HDD unit · Handle the HDD unit
· Install the HDD unit in extension unit
· Remove the HDD units from extension unit
· Remove the extension unit from recorder
Others · Specifications
2
Contents
Introduction.............................................................................................................................. 3
Standard accessories ............................................................................................................................................................... 3
About the user manuals ............................................................................................................................................................3
About the symbol mark.............................................................................................................................................................3
About HDD Unit ........................................................................................................................................................................4
Precautions for installation........................................................................................................................................................4
Operations flow ....................................................................................................................... 6
Installation flow .........................................................................................................................................................................6
About the operation ..................................................................................................................................................................6
1
Rack mounting ................................................................................................................... 7
Installation procedure................................................................................................................................................................7
Position in the Rack ..................................................................................................................................................................8
2Connection .......................................................................................................................... 9
3Turn on the devices .......................................................................................................... 11
Turn on the power of the extension unit .................................................................................................................................11
(When turn off the power of the extension unit)...................................................................................................................... 11
4
Assemble HDD unit .......................................................................................................... 12
5
Installation of HDD unit.................................................................................................... 13
Troubleshooting..................................................................................................................... 14

3
Introduction
About the user manuals
About the symbol mark
This manual describes how to install, connect, and install the HDD unit of the WJ-HXE410 Series (hereafter this product or
extension unit) using an example configuration with an optional network disk recorder (WJ-NX510K Series, WJ-NX410K Series,
hereinafter recorder). Also read the manuals of the recorder.
There are 2 manuals provided for this product as follows.
Installation Guide (this book): Contains procedures of how to install/connect this product with devices.
Important Information: Contains preface, precautions, and major operating controls and their functions and
specications.
Refer to our support website
(https://i-pro.com/global/en/surveillance/documentation_database).
The external appearance in the document may differ from the actual product within no influence range on operation due to
improvement of the product.
The explanation of the symbol marks used in this product are as follows.
Alternation current symbol Computer network "ON"/"OFF" (push-push)
Direct current symbol Mouse port
For indoor use only USB port
Polarity of d.c. power connector Functional earthing;functional
grounding (US) symbol
Installation Guide ............................................... 1 pc.
Power Cord (WJ-HXE410) ................................. 1 pc.
Power Cord (WJ-HXE410G) .............................. 2 pcs.
Power Cord (WJ-HXE410GV) ............................ 1 pc.
Label*1.............................................................. 1 pc.
Key.................................................................... 2 pcs.
Connection cable (1.5 m {4 feet 11 inches})....... 1 pc.
Cable clamp ...................................................... 2 pcs.
Rack mounting bracket ..................................... 2 pcs.
Standard accessories
Rack mounting bracket xing screw .................. 6 pcs.
Rack handle ...................................................... 2 pcs.
Screws for the rack handle ................................ 4 pcs.
Washer.............................................................. 4 pcs.
HDD canister..................................................... 9 pcs.
HDD xing screw............................................... 36 pcs.
Power cord clamp ............................................. 1 pc.
Spring washer (for future use) ............................ 36 pcs.
*1 This label is the same one found on the surface of this product. Keep it in view when installing this product in the rack.

4
Introduction (continued)
This product is designed to be used indoors.
This product is not operable outdoors. Do not expose this
product to direct sunlight for hours and do not install the
product near a heater or an air conditioner. Otherwise, it may
cause deformation, discoloration and malfunction.
Keep this product away from water and moisture.
i-PRO Co., Ltd. assumes no responsibility for injuries
or property damage resulting from failures arising out
of improper installation or operation inconsistent with
this documentation or through use of parts other than
this product, such as locally procured parts.
Do not place this product in the following places:
• Locations exposed to direct sunlight
• Locations subject to having strong vibration or impact
• Locations near magnetic eld sources such as a
television or speakers
• Locations near the devices that emit large sound and
generate vibration by sound pressure
• Locations where condensation forms easily, where
temperature changes greatly or where humidity level is
high
• Locations subject to steam and oil smoke such as a
kitchen
• Locations which are not level
• Locations subject to dust
• Locations where it may get wet from rain or water splash
Do not install this product in locations where the
product or the cables can be destroyed or damaged
by persons with malicious intent.
In order to prevent injury, the product must be securely
mounted to a wall according to Installation Guide.
Place this product horizontally on a level surface.
Do not place this product in an upright position. When
stacking multiple recorders, clear a space of more than 5 cm
{2 inches} from both sides, the top, the bottom and the rear
of the recorders.
More than
5 cm {2 inches} More than
5 cm {2 inches}
More than
5 cm {2 inches}
More than
5 cm {2 inches}
• Do not stack this product in a stack.
• Do not place anything that can generate vibration on the
top of this product.
Precautions for installation
To install a hard disk drive in the recorder, it is necessary to assemble an HDD unit (encase the hard disk drive in the HDD
canister). The HDD unit is designed to easily install/remove the hard disk drive in/from the recorder. Contact your dealer about
purchasing, installing, and replacing the hard disk drives.
About HDD Unit

5
Introduction (continued)
Heat dissipation
To prevent this product from overheating, heed the
following. Failure to observe this may cause fire or trouble.
• Do not block the cooling fan outlet or the ventilation holes
with a wall, rack, cloth, etc. Maintain the product
periodically to prevent dust from blocking ventilation
holes.
• The lifetime of the cooling fan is limited by use. It is
recommended to replace them after around 30000
hours of operation. Contact your dealer for replacement
of the cooling fans.
• When the internal temperature rises, the fan noise may
become louder.
• Clear a space of more than 5 cm {2 inches} from both
sides, the top, and the rear of the product. Do not block
the ventilation holes on the front side since this product
is designed to cool the hard disk drives by drawing in air
from the front.
Avoid placing this product near noise sources
If the cables are placed near noise sources such as
fluorescent lamps, noises may be produced. In this case,
rewire avoiding the noise sources, or move the product to a
place far from the source.
Grounding
Confirm that the wire is connected from the SIGNAL GND
terminal to earth ground.
A grounding connection must be made before connecting
the power plug or this product to the main power supply.
When disconnecting the grounding wire, make sure that the
power plug of this product is disconnected from the main
power supply.
Avoid placing receptacles that contain liquids such as
water near this product.
If liquid spills onto this product, it may cause fire or an
electric shock.
About sulfuration of rubber products
Do not leave rubber products containing sulfur (packing and
rubber feet) close to the recorder or in the same storing box.
Sulfur constituent from the rubber products may cause
sulfuration corrosion on electrical parts or terminals and
defects in the recorder.
Equipment classification and power source indication
label
Refer to the indication label on the bottom side of this unit
for the equipment classification, power source, and other
information.

6
1Rack mounting
☞Page 7
2Connections
☞Page 9
3Turn on the devices
☞Page 11
4Assemble HDD unit
☞Page 12
5Installation of HDD unit
☞Page 13
Install the extension unit in the rack.
Go to step 2when not installing it in the rack.
Connect the extension unit to the recorder.
Turn on the power of the extension unit.
Turn on the power of the extension unit before turning on the
power of the recorder.
Encase an HDD in the HDD canister.
Remove the "HDD unit holding bracket" of the recorder and
install the HDD unit.
The removed "HDD unit holding bracket" is necessary when
transporting the recorder. Keep it in an appropriate place.
• Professional knowledge on and experience in network and the HDD are required for
the settings and changes of the operation.
• The PC is required for reading the Important Information.
Operations ow
Installation ow
The installation flow of the extension unit is as follows.
About the operation
The extension unit requires the recorder to set the operational mode of the HDD units or format them. Perform the setting using
the connected recorder.
Refer to the Operating Instructions of a corresponding recorder for further information.

7
1
Rack mounting
Step 3
Place the rack mounting brackets (included) on both
sides of the recorder and fix them with the rack
mounting bracket fixing screw (included) (×6).
Secure them using the rack mounting bracket xing screw
(included) (×6).
Tightening torque: 0.88 N·m ~ 1.08 N·m (0.65 lbf·ft ~ 0.80 lbf·ft)
Rack mounting bracket fixing screws (included)
Rack handle (included)
Rack mounting brackets (included)
Rack handle (included)
Step 4
Install the recorder in the rack by using four rack
mounting screws.
Secure using the rack mounting screws (×4).
Tightening torque: 2.0 N·m ~ 2.4 N·m (1.48 lbf·ft ~ 1.78 lbf·ft)
Rack mounting screws (M5 × 12 mm, locally procured)
Important:
• The operating temperature range of this product is
0 °C ~ +45 °C {32 °F ~ 113 °F}.
* HDDs deteriorate at high temperatures, affecting their
service life. It is recommended that the product be
used at a temperature of about +25 °C {77 °F}.
• The following measures should be taken when installing
the rack to ensure that the product is used within the
operating temperature range.
嵣Install a fan or other equipment to lower the
temperature inside the rack.
嵣Allow a distance of at least 1U (44 mm {1-23/32
inches}) between the top and bottom of the product.
嵣Do not put doors on the front of the rack or block
the sides.
• The recorder weighs over 10 kg{22.1 lbs}. Be careful
not to drop the recorder when installing it into a rack.
Dropping may cause damage, deformation of the
recorder, or injury.
Install the recorder in an EIA standard 19-inch rack (Depth:
550 mm or more).
Note:
• Use four M5 × 12 mm screws (locally procured) to install
the recorder in a rack.
• The illustration on this page is schematic. Details of the
shape are omitted.
Installation procedure
Step 1
Remove the five rubber feet from the bottom of the
recorder.
Use a screwdriver to remove the screws holding the rubber feet.
Remove rubber feet
Step 2
Attach the rack handles (included) to the rack
mounting brackets (included).
Fix them using the screws (included) (×4) and the washers
(included) (×4) for the rack handle.
Tightening torque: 2.0 N·m ~ 2.4 N·m (1.48 lbf·ft ~ 1.78 lbf·ft)
Washer (included)
Screws for the rack handle (included)
Rack mounting bracket (included)
Washer (included)
Rack handle (included)
Note:
• The rack mounting bracket (included) has two types of
tting holes to adjust the protrusion of the front rack. Use
either of them depending on the installation conditions.
Standard fitting holes
Fitting holes for the front position (about 15 mm {19/32 inches})

8
Position in the Rack
This is an example where the recorder and the extension unit (max 5 units) are installed in the rack.
Connect the recorder and the extension unit using the connection cable (1.5 m {4 feet 11 inches}) included in the extension unit.
(☞Page 9)
Recorder
Require a space of 1 unit
Connection cable
(included in extension unit)
Extension unit
(Unit number 1)
Extension unit
(Unit number 2)
Extension unit
(Unit number 3)
Extension unit
(Unit number 4)
Extension unit
(Unit number 5)
Other unit, Rack upper side
Other unit, Rack bottom side
Require a space of 1 unit
Note:
• When installing the extension unit in the rack, leave a space of 1U (44 mm {1-23/32 inches}) above and below the recorder or the
extension unit for ventilation.
• The unit number is the same as the external storage connector number of the recorder.
1
Rack mounting (continued)

9
A separately sold recorder can be mounted with a maximum of 5 units. Connect the extension unit and the recorder using the
included connection cable. Fix the connection cable with the included cable clamp so that it does not come off when installing
the unit.
45 1
23
Fix the connection cable
Connection cable
(included in extension unit)
Recorder
Extension unit (unit number 1)
Extension unit (unit number 2)
Extension unit (unit number 3)
Extension unit (unit number 4)
Extension unit (unit number 5)
Attach a cable clamp to each connection
cable.
Attach a cable clamp to each connection
cable.
Important:
• Use only the connection cable included in the extension unit when connecting the extension unit and the recorder.
• Fix the connection cable rmly using the cable clamp included in the extension unit (☞Page 10). When the cable is not
connected rmly or when it is disconnected, the system may become unstable or recording may fail.
• Do not wind the cable in a coil.
2
Connection

10
Cable clamp
Fix the connection cable using the included cable clamp as
follows.
Step 1
Attach the cable clamp fixing belt to the fixing hole on
the rear, and attach the holder part of the cable clamp
behind the connector end of the connection cable.
Pull the cable clamp xing belt to conrm that the xing belt
is not pulled out from the rear of the extension unit.
Cable clamp
fixing belt
Holder part
Step 2
Close the clamp.
Step 3
Slide the cable clamp toward the connector end of the
connection cable, and then hold the connector end of
the connection cable.
Make sure that the connection cable is connected rmly.
Note:
• Overhead view
(1)
Knob
(2) Clamp Connector end of the
connection cable
• Hold the connector end of the connection cable by slid-
ing the holder part in the direction of arrow indication (1).
If the holder part is not slide all the way to the connector
end side, the cable may come out.
• To slide the holder part in the direction of arrow (2), slide
it while keeping the knob pulled down.
2
Connection (continued)

11
Turn on the power of the extension unit
Important:
• Connect the included power source cords to all the extension units and turn them on before turning on the recorder.
Step 1
Connect the included power cord to the power cord
inlet on the rear panel of the extension unit, and insert
the power plug to an outlet whose rating is as follows.
100 V - 240 V AC, 50 Hz/60 Hz
Important:
• Insert the power cord fully into the power cord inlet so
that it will not loosen or come out.
• Fix the power cord rmly at 15 cm to 20 cm {5-7/8 to
7-7/8 inches} from the plug with the included power
cord clamp to prevent the cable from unplugging.
How to x the power cord
Fix the power cord at 15 cm to 20 cm {5-7/8 to 7-7/8 inches}
from the connector with the included cable clamp (for power
cord) passed through the clamp mount.
Fix the power cord so that it does not block the cooling fan
outlet.
⋇
⋈
Clamp mount
Power cord clamp
①Pass the power cord clamp through the clamp mount.
②Make a ring with the power cord clamp as shown in the
illustration to tighten the power cord.
⋉
15 cm to 20 cm
{5-7/8 to 7-7/8 inches}
③Tighten the power cord at 15 cm to 20 cm {5-7/8 to 7-7/8
inches} from the connector and fix it to the clamp mount.
Cut the unnecessary part of the power cord clamp as
necessary.
Step 2
Press the POWER switch on the rear of the extension
unit to turn on the power.
• The OPERATE indicator will light and the system check
(checking the system and hard disk drives) will start.
• The "Initializing" indication will be displayed on the LCD at
startup.
• When the system check is complete, the operational mode
and temperature will be displayed on the LCD.
3
Turn on the devices
(When turn off the power of the extension unit)
Follow the procedure below to turn off the power.
If multiple extension units are connected, turn off them in an arbitrary order.
Step 1
Stop recording on the recorder.
• Stop all recordings on the network disk recorder.
• Stop all playbacks.
Step 2
Turn off the power of the recorder.
Step 3
Turn off the power of the extension unit.
Important:
• Turn off the power of the extension unit after turning
off the power of the recorder.

12
To install a hard disk drive in the recorder, it is necessary to
assemble an HDD unit (encase the hard disk drive in the
HDD canister).
The HDD unit is designed to easily install/remove the hard
disk drive in/from the recorder.
Contact your dealer about purchasing, installing, and replac-
ing the hard disk drives.
HDD canister HDD
Anti-static mat
Important:
• Hard disk drives are precision devices. Before installing
the hard disk drives, read the "Hard disk drive" section
of Precautions in important information together with the
following.
• Before touching a hard disk drive, release static
electricity from your body using an anti-static
grounding strap, etc.
Even after releasing static electricity, hold the side of
the hard disk drive when carrying it. To prevent
damage to the hard disk drive from static electricity,
do not touch the circuit board and the connectors of
the hard disk drive.
• Use an anti-static mat and an anti-static grounding
strap when installing/replacing the hard disk drives.
• When installing hard disk drives, use a low-torque
powered screwdriver or a torque screwdriver to
tighten screws with the specied torque.
Step 1
Fix both sides of the hard disk drive with the dedicated
HDD canister using the 4 included screws for HDD
canister installation.
Tightening torque for the screws: 0.49 N·m (5 kgf·cm) (use a
low-torque powered screwdriver or a torque screwdriver)
HDD fixing screws for the HDD canister
4
Assemble HDD unit

13
The illustration on this page is schematic. Details of the shape are omitted.
It is possible to install the HDD units without stopping the operation (except when RAID1/RAID5/RAID6 mode is in operation).
Do not use an electric screwdriver to avoid impact on the HDD.
Step 1
After inserting the key (included) into the key hole on
the front cover, push and turn it to the right to open
the front cover.
➀
➁
Step 2
Remove the HDD unit holding bracket.
①Remove the xing screw for bracket.
②Slide the HDD unit holding bracket sideways and remove
it.
HDD unit holding bracket
①
②
• Keep the removed fixing screw for bracket and the HDD
unit holding bracket in an appropriate place.
Step 3
Insert the HDD units into the HDD slots in order
starting from HDD1.
①Lift up the lever on the HDD unit while holding down the
removal knob, and then insert the HDD unit all the way
into the HDD slot.
Insert the HDD unit carefully without knocking it against
anything (and without knocking against HDD units which
are already inserted).
②Push the upper part of the lever securely until it hits the
protruding section at the back side of disk slot top and
then turn down the lever.
③The removal knob ts into position with a "click" sound
when turning down the lever.
➁
➀
Removal knob Lever
Upper part of lever
Protruding section
at back side
➂
Important:
• Insert the HDD units from the slot number 1.
• When mounting the HDD unit, be careful not to pinch
your ngers with the lever.
④The LCD displays as follows.
EXTx-y
NEW HDD DETECT
* x is a unit number, y is a slot number
Step 4
Initialize the HDD unit
Refer to the Install Guide of the recorder for initialization the
HDD unit.
5
Installation of HDD unit

14
Before asking for repairs, check the symptoms with the following table.
Contact your dealer if a problem cannot be solved even after checking and trying the solution in the table or a problem is not
described below.
Symptom Cause/solution Ref. pages
Power is not turned on. • Is the power plug connected to the outlet rmly?
Confirm the cable is firmly connected.
−
• Check if the power cord is properly inserted into the power socket
of the extension unit.
Check if it is connected firmly.
11
The "Thermal error" indication
is displayed on the main
monitor.
• The ambient operating temperature is 0 °C to +45 °C. The "Thermal
error" is displayed based on the internal thermal information of the
HDD. If the "Thermal error" indication is displayed, it is recommended
to change the installation environment so that the ambient
temperature is maintained at approx. +25 °C. When the "Thermal
error" indication is displayed frequently, contact your dealer.
−
• Check if the fan is malfunctioning. Operating
Instructions
• Check if the recorder ventilation holes or cooling fan are blocked,
and also check for dust collected around the ventilation holes.
5
The extension unit is not
recognized.
• Make sure that the connection cable provided with the extension
unit is being used.
−
• Make sure that the connection cable is not loose. −
• Was the power of the extension unit turned on before turning on
the power of the recorder?
Reboot the system and turn on the power of the extension unit rst.
11
• When using a circuit breaker or equivalent device to turn on/off the
power of the whole system at one time, make sure that all devices
are connected to the same power source.
−
• When using an UPS (uninterruptible power system), connect all
devices to the same UPS.
The hard disk drive is not
recognized. The HDD status
indicator does not light.
• Make sure that the HDD unit is inserted all the way into the HDD slot.
−
• The hard disk drive is faulty. −
The HDD access indicator is
being lit red/blinking red.
• Make sure that the HDD units are installed in order from HDD1 to HDD9.
−
•
The respective HDD unit is faulty in the RAID1/RAID5 or RAID6 mode.
RAID1: the HDD access indicator of the HDD unit in failure will light red.
RAID5: the HDD access indicator of the rst HDD unit to fail will
light red. The HDD access indicator of the second HDD unit to fail
will blink red.
RAID6: the HDD access indicators of the rst and second HDD unit
to fail will light red. The HDD access indicator of the third HDD unit
to fail will blink red.
Important
Information
Cannot recover data after
replacing the HDD units in the
RAID1/RAID5/RAID6 mode.
• Make sure that the HDD unit is inserted all the way into the HDD slot.
Installation
Guide
• The hard disk drive on which there is data to be recovered is faulty. −
• Check if the capacity of the new hard disk drive is smaller than the
original one's.
−
The HDD access indicator
blinks
orange even when no
recording or playback is being
performed.
• Make sure that recovery of data in the RAID1/RAID5/RAID6 mode
is not being processed.
−
The error indicator blinks red. • A system error occurred. Contact your dealer. −
Troubleshooting

15
Inspect the power cord, power plug and connectors periodically.
Symptom Cause/solution Ref. pages
The power cord insulation is damaged. • The power cord, connector, or power plug is damaged.
This may result in electric shock or a fire.
Unplug the power plug from the AC outlet immediately, and
refer to qualified service personnel.
−
The power cord, plug and
connectors get hot during use.
The power cord gets hot when bent
or stretched.
Troubleshooting (continued)

Disposal of Old Equipment and Batteries
Only for European Union and countries with recycling systems
These symbols on the products, packaging, and/or accompanying documents mean that used electrical and electronic
products and batteries must not be mixed with general household waste.
For proper treatment, recovery and recycling of old products and used batteries, please take them to applicable collection
points in accordance with your national legislation.
By disposing of them correctly, you will help to save valuable resources and prevent any potential negative effects on human
health and the environment.
For more information about collection and recycling, please contact your local municipality.
Penalties may be applicable for incorrect disposal of this waste, in accordance with national legislation.
Note for the battery symbol (bottom symbol)
This symbol might be used in combination with a chemical symbol. In this case it complies with the requirement set by the
Directive for the chemical involved.
Disposal may be regulated in your community due to environmental considerations. For disposal or recycling information,
please visit our website.
For U.S.A.
Tokyo, Japan
https://www.i-pro.com/
© i-PRO Co., Ltd. 2022 Ls1023-1103 Printed in China
Authorised Representative in EU:
i-PRO EMEA B.V.
Laarderhoogtweg 25, 1101 EB
Amsterdam, Netherlands
i-PRO EMEA B.V. UK Branch
1010 Cambourne Business Park,
Cambridgeshire CB23 6DP
Table of contents
Other i-PRO Network Hardware manuals