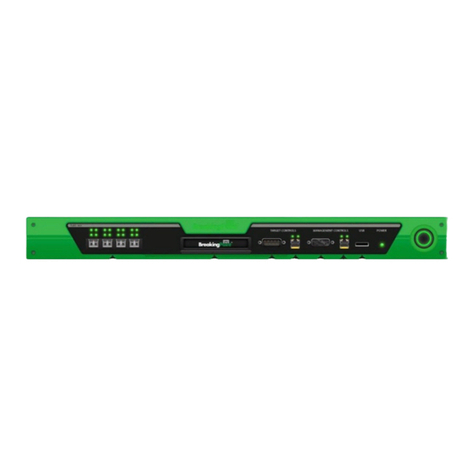
IXIA BreakingPoint 20 User manual

BreakingPoint 20
Installation Guide
Release 3.4, Jan. 2015

2 BreakingPoint 20 Installation Guide, Release 3.4
Copyright © 1/21/15 Ixia. All rights reserved.
This publication may not be copied, in whole or in part, without Ixia’s consent.
RESTRICTED RIGHTS LEGEND: Use, duplication, or disclosure by the U.S. Government is subject to the
restrictions set forth in subparagraph (c)(1)(ii) of the Rights in Technical Data and Computer Software clause at
DFARS 252.227-7013 and FAR 52.227-19.
Ixia, the Ixia logo, and all Ixia brand names and product names in this document are either trademarks or
registered trademarks of Ixia in the United States and/or other countries. All other trademarks belong to their
respective owners.
The information herein is furnished for informational use only, is subject to change by Ixia without notice, and
should not be construed as a commitment by Ixia. Ixia assumes no responsibility or liability for any errors or
inaccuracies contained in this publication.
Corporate
Headquarters
Ixia Worldwide Headquarters
26601 W. Agoura Rd.
Calabasas, CA 91302
USA
+1 877 FOR IXIA (877 367 4942)
+1 818 871 1800 (International)
(FAX) +1 818 871 1805
sales@ixiacom.com
Web site: www.ixiacom.com
General: [email protected]
Training: [email protected]
Support: [email protected]
+1 818 595 2599
For the online support form, go to:
http://www.ixiacom.com/support/
inquiry/
BreakingPoint
Systems
Ixia BreakingPoint Systems
3900 N. Capital of Texas Hwy., Ste. 180
Austin, TX 78746
USA
+1 512 821 6000
Web site: www.breakingpoint.com
General: http://www.ixiacom.com/
products
Support: [email protected]
+ 1 818 595 2599
EMEA Ixia Technologies Europe Limited
Part 2nd floor,
Clarion House, Norreys Drive
Maidenhead, UK SL6 4FL
+44 (1628) 408750
FAX +44 (1628) 639916
saleseme[email protected]
Support: [email protected]
+40 21 3015699
For the online support form, go to:
http://www.ixiacom.com/support/
inquiry/?location=emea
Asia Pacific Ixia Pte Ltd
210 Middle Road
#08-01 IOI Plaza
Singapore 188994
Support: Support-
AsiaPac@ixiacom.com
+65 6332125
For the online support form, go to:
http://www.ixiacom.com/support/
inquiry/

BreakingPoint 20 Installation Guide, Release 3.4 3
For viewing the FAQs related to the product, go to Ixia Technical Support Online:
https://ebsoprod.ixiacom.com/OA_HTML/jtflogin.jsp
Japan Ixia Communications KK
Nishi-Shinjuku Mitsui Bldg 11F
6-24-1, Nishi-Shinjuku, Shinjuku-ku
Tokyo 160-0023
Japan
Support: [email protected]
+81 3 5326 1948
For the online support form, go to:
http://www.ixiacom.com/support/
inquiry/
India Ixia Technologies Pvt Ltd
Tower 1, 7th Floor, UMIYA Business Bay
Cessna Business Park
Survey No. 10/1A, 10/2, 11 & 13/2
Outer Ring Road, Varthur Hobli
Kadubeesanahalli Village
Bangalore East Taluk
Bangalore-560 037, Karnataka, India
+91 80 42862600
Support: Support-[email protected]
+91 80 49396400
For the online support form, go to:
http://www.ixiacom.com/support/
inquiry/?location=india

4 BreakingPoint 20 Installation Guide, Release 3.4

Table of Contents
BreakingPoint 20 Installation Guide
About This Guide
Purpose........................... i
Target Audience........................... i
Organization........................... i
Conventions........................... i
Related Documentation........................... ii
Strike Center........................... ii
Support........................... ii
Documentation Feedback........................... iii
Product Overview
BreakingPoint 20 Overview........................... 1
BreakingPoint 20 Hardware Overview........................... 1
Control Center Overview........................... 3
Getting Started
Getting Started Overview........................... 7
Task 1: Installing the BreakingPoint Device........................... 8
Task 2: Configuring the BreakingPoint Device........................... 8
Task 3: Establishing a BreakingPoint Session........................... 10
Task 4: Accessing the BreakingPoint Control Center........................... 11
Task 5:Creating a User Account........................... 13
Task 6: Setting the Time and Date........................... 14
Task 7: Creating a Device Under Test Profile........................... 15
Task 8: Creating a Network Neighborhood........................... 17
Task 9: Making Port Reservations........................... 21

Table of Contents
BreakingPoint 20 Installation Guide
Task 10: Creating a Test........................... 23
Site and Safety Regulations
Site Requirements........................... 25
Safety Recommendations........................... 27
Safety Regulations........................... 28
Installation Guide
Shipping Package Contents Overview........................... 29
Installation Overview........................... 29
Powering the System........................... 32
Connecting a Device Under Test to the BreakingPoint 20........................... 33
System Configuration
Initial Configuration........................... 35
Factory Revert........................... 36
Accessing the Control Center
Accessing the Control Center........................... 37
Frequently Asked Questions
Account Questions........................... 39
Addressing Questions........................... 39
Bandwidth Questions........................... 40
System Questions........................... 41
Troubleshooting Questions........................... 42
Update Questions........................... 42

Table of Contents
BreakingPoint 20 Installation Guide
Appendix
Hardware Specifications........................... I
Software Specifications........................... II
Light-Emitting Diodes........................... II
Shipping Container Contents........................... III
CLI Commands........................... IV

BreakingPoint BreakingPoint 20 Installation Guide i BreakingPoint Systems Inc. © 2005-2015
About This Guide
This section explains the purpose, audience, and organization of this guide. It also defines
conventions used to present instructions and information throughout this guide and includes
information on how to get support for issues encountered while using your BreakingPoint device.
Purpose
To provide safety regulations, site requirements, and installation instructions for the BreakingPoint
20.
Target Audience
The intended audience is users of all skill levels.
Organization
This guide is organized into the following sections:
• About this Guide
• Product Overview
• Site and Safety Requirements
• BreakingPoint 20 Installation
• System Configuration
• Accessing the Control Center
• Frequently Asked Questions
• Appendix
• Index
Conventions
This guide uses the conventions listed in Table I-1 on page i.
Table I-1: Document Conventions
Convention Description Example
Bolded text Commands, keywords, or buttons Press the Enter key.
Courier font
User input Type
GET
in the Method
Request field.

Related Documentation
BreakingPoint BreakingPoint 20 Installation Guide ii BreakingPoint Systems Inc. © 2005-2015
Related Documentation
Table I-2 on page ii lists all the documentation related to the BreakingPoint 20. All
documentation can be accessed through the Documentation area of Strike Center.
Strike Center
Strike Center is an online portal for security and software updates as well as industry
information. You can use Strike Center to:
• Obtain the latest software releases for the BreakingPoint 20.
• Download the most up-to-date ATI Updates (formerly known as StrikePacks), which includes the
latest Strikes, test capabilities, and application protocols.
• Download PDFs of documentation.
• Find contact information for Customer Support, Sales, and corporate facilities.
• Access blogs and technical articles related to vulnerabilities, exploits, and recent updates to any
BPS product.
Support
If a solution to a problem has not been found after consulting the related section in this guide,
please contact Customer Support using one of the methods in Table I-3 on page iii.
Note: Helpful suggestion or reference to
additional information
Note: Racks must meet
standard EIA-310-C
requirements.
Link Clickable link that references tables,
figures, sections, and cross-
references.
See Table 12 for more
information.
Table I-2: Related Documentation
Documentation Description
BreakingPoint 20 User Guide Provides information on how to use the Control Center to
set up, customize, and run traffic through devices under
test.
BreakingPoint 20 Migration
Guide
Provides an overview of the tasks you must complete in
order to migrate from the BreakingPoint Storm to the
BreakingPoint 20.
BreakingPoint Online Help Online documentation for all BreakingPoint products.
Requires Internet Explorer 10.0+ or Firefox 2.0+ for
proper viewing.
Table I-1: Document Conventions
Convention Description Example

BreakingPoint BreakingPoint 20 Installation Guide iii BreakingPoint Systems Inc. © 2005-2015
To expedite a support issue, please have the following information available:
• Customer Number – Located on the Customer Support Agreement and on the shipping invoice
for the BreakingPoint 20.
• Serial Number – Located on the shipping invoice for the BreakingPoint 20.
• Software Versions – Located from the Help Menu in the Control Center (select Help > About).
Documentation Feedback
Please send any feedback or suggestions regarding this documentation to
Table I-3: Support Methods
Method Contact Information
E-mail support-bps@ixiacom.com
Telephone 1-818-595-2599

Documentation Feedback
BreakingPoint BreakingPoint 20 Installation Guide iv BreakingPoint Systems Inc. © 2005-2015

BreakingPoint BreakingPoint 20 Installation Guide 1 BreakingPoint Systems Inc. © 2005-2015
1 Product Overview
This section covers:
• BreakingPoint 20 Overview
• BreakingPoint 20 Hardware Overview
• Control Center Overview
BreakingPoint 20 Overview
BreakingPoint Systems has developed a system that measures and hardens the resiliency of every
component of your critical infrastructure against potentially crippling attacks and peak application
traffic: the BreakingPoint 20. The BreakingPoint 20 is the world’s highest port density solution for
real-world testing that supports numerous concurrent users in any large-scale lab facility.
The BreakingPoint 20 consists of the chassis, and the user interface called the Control Center. Both
components work together to create a comprehensive and user-friendly test solution for all network
devices. The BreakingPoint 20 can concurrently simulate TCP sessions, application traffic, and live
security attacks, and ultimately, identify “breaking points” in your network devices.
BreakingPoint 20 Hardware Overview
The BreakingPoint 20 is comprised of five slots. Figure 1-1 on page 1 highlights these slots with
callouts.
Figure 1-1: BreakingPoint 20 Slots
Callouts 1, 2 and 3refer to the slots dedicated to high-speed data plane processors (or the blades)
for the system. When you initially receive the BreakingPoint 20 chassis, these slots will not contain
any blades. You will need to install the blade(s) into the chassis.

BreakingPoint 20 Hardware Overview
BreakingPoint BreakingPoint 20 Installation Guide 2 BreakingPoint Systems Inc. © 2005-2015
Each blade provides 20 universal 10GigE/1GigE SFP+ ports that support up to Gbps per blade. The
fiber-optic connections between the ports on your device under test and the test ports on the chassis
establish the transmitting and receiving interfaces for your tests.
The BPS management ports (serial and Ethernet) allow you to connect your system to a network
and access it through an IP address.
Callout 4 refers to the power tray, which contains the power supply for the system.
Callout 5 refers to the removable fan tray that is vertically mounted on the right-side of the
chassis.
Front-view of the BreakingPoint 20
Figure 1-2 on page 2 illustrates the front of the BreakingPoint 20. Locate the corresponding
callout in the table below for more information about each component.
Figure 1-2: BreakingPoint 20 Front View
Table 1-1: BreakingPoint 20 Front View
Callout Component Description
1 Data Ports Transmits and receives traffic to and from the
DUT.
2 BPS Management Ethernet
Port
Manages the BreakingPoint 20 configuration
through an Ethernet connection.
3 BPS Management Serial Port Manages the BreakingPoint 20 configuration
through a serial connection.
4 System Fan Tray Holds the fan tray for the system.

BreakingPoint BreakingPoint 20 Installation Guide 3 BreakingPoint Systems Inc. © 2005-2015
Back-view of the BreakingPoint 20
The power inlet and power switch are located on the back of the chassis, as shown in Figure 1-3
on page 3. Additionally, there are BNC interfaces that you will be able to use in future releases to
link together multiple chassis.
Figure 1-3: BreakingPoint 20 Back View
Table 1-2: BreakingPoint 20 Back View
Control Center Overview
The Control Center is a Web-based user interface where the testing environment can be created,
tests can be run, and reports can be viewed. The Control Center is accessible through a Flash-
enabled Web browser – such as Internet Explorer, Mozilla Firefox, Safari, and Opera. You must
also have JavaScript enabled to view the Control Center.
Note: Safari 6.0.2 on Mac OS 10.8.2 and Safari for Windows are not supported. Mac users with
OS 10.8.2 can use Firefox or Chrome as their browser.
Note: BreakingPoint recommends that users of Internet Explorer use IE 10 or higher. IE 9 and
earlier versions are not supported.
Enabling JavaScript
You must have JavaScript enabled to view the Control Center.
Callout Component Description
1 BNC Interfaces Interfaces that are used to connect multiple
chassis together (for clock I/O and trigger I/O)
2 Power Switch Power breaker switch for the BreakingPoint 20
3 Power Inlet Power inlet for the BreakingPoint 20

Control Center Overview
BreakingPoint BreakingPoint 20 Installation Guide 4 BreakingPoint Systems Inc. © 2005-2015
To enable JavaScript for Internet Explorer:
1. Open an Internet Explorer browser window.
2. Select Tools > Internet Options from the Menu bar.
3. Select the Security tab.
4. Click the Custom Level button.
5. Scroll down to the Scripting section.
6. Find the category called Active Scripting.
7. Click the Enable button for this category.
8. Click Yes when the confirmation popup window displays.
9. Click the OK button to exit the Internet Options window.
To enable JavaScript for Mozilla Firefox 2.0:
1. Open a Mozilla Firefox browser window.
2. Select Tools > Options from the Menu bar.
3. Select the Content button located at the top of the window.
4. Click the Enable JavaScript option.
5. Click the OK button to exit the Options window.
To enable JavaScript for Safari:
1. Open a Safari browser window.
2. Select Preferences from the Safari menu.
3. Click the Security option from the top of the window.
4. Select the Enable JavaScript option located under the Web Content section.
5. Close the Security window.
Accessing the Control Center
To access the Control Center, you must have a Web browser with the following items enabled or
installed:
• Adobe Flash Player (version 11.6.602.171 or higher)
• Pop-ups
• JavaScript
Additionally, you must have the host address that has been set for the BPS Management Port and
the Control Center login information.
Note: The chassis must already be installed and configured before the Control Center can be
accessed.

BreakingPoint BreakingPoint 20 Installation Guide 5 BreakingPoint Systems Inc. © 2005-2015
Figure 1-4: BreakingPoint Start Page
To access the Control Center:
1. Open a Web browser.
Note: After upgrading or reverting to any release of the BreakingPoint Firmware, you must
clear your cache and refresh your browser.
2. Enter the host address for the BPS Management port in the Address bar.
Note: The default address is http://10.10.10.10; however, the host address may have changed
during the initial configuration of the system. You will need to contact the System
Administrator for the current host address.
3. Click the Launch BreakingPoint Systems Control Center link on the Start Page.
Note: The first time you attempt to login to the system, your browser will require you to verify
a security exception in order to login. Follow the steps required by your browser to
accept and verify the security exception. Once the security exception has been accepted
and verified, you will be allowed to continue with the login process. A new window will
open and display the Control Center login page.
4. Enter the login ID in the Username field.
5. Enter the password in the Password field.
Note: Passwords are case sensitive.
6. Click the Login button.
Note: The system allows three invalid logins. If invalid login information is entered on the fourth
attempt, the login window will lock the user out. Users must refresh their browser to unlock
their accounts.

Control Center Overview
BreakingPoint BreakingPoint 20 Installation Guide 6 BreakingPoint Systems Inc. © 2005-2015
Navigational Overview
This section provides an overview of the navigational areas in the Control Center. The Control
Center is divided into two main areas: the menu bar and the navigational buttons. See Figure 1-5
on page 6 for a tour of the interface.
Figure 1-5: Control Center Overview
Table 1-3: Control Center Overview
Callout Name Description
1 Menu Bar Provides point and click access to the main areas
of the user interface.
2 Device Status Provides access to the Device Status area so that
you can reserve ports while no tests are running
or the Real Time Statistics screen if there is a
running test.
3 Navigational Buttons Provides access to areas within the user
interface.

BreakingPoint 20 Installation Guide 7 BreakingPoint Systems Inc. © 2005-2015
2 Getting Started
This section covers:
• Getting Started Overview
• Task 1: Installing the BreakingPoint Device
• Task 2: Configuring the BreakingPoint Device
• Task 3: Establishing a BreakingPoint Session
• Task 4: Accessing the BreakingPoint Control Center
• Task 5:Creating a User Account
• Task 6: Setting the Time and Date
• Task 7: Creating a Device Under Test Profile
• Task 8: Creating a Network Neighborhood
• Task 9: Making Port Reservations
• Task 10: Creating a Test
Getting Started Overview
Welcome to the Getting Started section of the BreakingPoint 20 Installation Guide. This section
will provide an overview of the tasks you must complete in order to install and configure the
BreakingPoint device, as well as explain how to set up your test environment within the
BreakingPoint Control Center.
Table 2-1 on page 7 lists the Getting Started tasks.
Table 2-1: Getting Started Tasks
Task Description
Task 1 Installing the BreakingPoint Device
Task 2 Configuring the BreakingPoint Device
Task 3 Establishing a BreakingPoint Session
Task 4 Accessing the BreakingPoint Control Center
Task 5 Creating user accounts
Task 6 Setting the time and date
Task 7 Creating a DUT Profile
Task 8 Creating a Network Neighborhood
Task 9 Making Port Reservations
Task 10 Creating a test

Task 1: Installing the BreakingPoint Device
BreakingPoint 20 Installation Guide 8 BreakingPoint Systems Inc. © 2005-2015
Task 1: Installing the BreakingPoint Device
This section will briefly describe how to set up the BreakingPoint device.
To set up the BreakingPoint device:
1. Secure the chassis into an equipment rack. For more information on mounting the chassis, see
the section Mounting the BreakingPoint Storm into an Equipment Rack on page 32.
Note: The chassis must be close enough to the device under test so that you can connect cables
from the appliance to the device under tes
2. Insert the system controller into the module above the power tray. For more information on
installing the system controller, see the section Installing the System Controller on page
34.
3. Insert the blade(s) into the top two modules. For more information on installing the blade(s), see
the section Installing the Blade on page 34.
4. Power the system. For more information on powering the system, see the section Powering the
System on page 35.
5. Connect the device under test to the BreakingPoint device. For more information on connecting a
device under test to the BreakingPoint device, see the section Connecting a Device Under
Test to the BreakingPoint Storm on page 35.
Task 2: Configuring the BreakingPoint Device
You will need to use either a telnet client or text console in order to configure the network settings
for the BreakingPoint device. The following sections provide instructions for configuration through
a telnet client or a text console.
Figure 2-1: Network Information Box
Telnet
This section will describe how to configure the host address, netmask, and gateway for the
BreakingPoint device using either a telnet client or a text console.

BreakingPoint 20 Installation Guide 9 BreakingPoint Systems Inc. © 2005-2015
To configure the BreakingPoint device using Telnet:
1. Open a telnet client (e.g., PuTTy, AlphaCom, etc.).
2. Telnet to the following host address: 10.10.10.10.
3. Specify your terminal emulation preference (e.g., ansi, xterm) at the prompt and press Enter.
4. Specify the following information for your BreakingPoint device in the Network Information
box:
• DHCP Enable/Disable
Note: If DHCP is disabled, users will be able to configure additional system routes from the
BreakingPoint Control Center. If DHCP is enabled, the Routes area in the
BreakingPoint Control Center will be disabled.
• DHCP Hostname
• IP Address
• Netmask
• Gateway
5. Select Next.
6. Enter the login ID for the user account at the prompt.
Note: The login ID must use alphanumeric characters and consist of 1-15 characters. The first
character of the login ID must be a letter. Login IDs cannot solely consist of numbers.
The login ID cannot be changed once it has been created.
7. Enter the password that will be used for the user account at the prompt.
Note: The password can consist of up to 15 alphanumeric and/or special characters.
The system will disconnect while the new network settings are applied and your account is created.
Document the network IP address and user account information. You will need this information to
access and log into the BreakingPoint Control Center. You may create additional accounts through
the Administration page in the BreakingPoint Control Center.
Text Console
This section will describe how to configure the host address, netmask, and gateway for the
BreakingPoint device using a text console.
To configure the BreakingPoint device using a text console:
1. Open a terminal emulation client (e.g., HyperTerminal).
2. Connect to the BPS Management serial port using the following settings:
• Baud Rate: 115200 bps
• Data Bits: 8
• Parity: None
• Stop Bits: 1
• Flow Control: None
Table of contents
Other IXIA Network Hardware manuals