manuals.online logo
Brands
  1. Home
  2. •
  3. Brands
  4. •
  5. I.R.I.S.
  6. •
  7. Software
  8. •
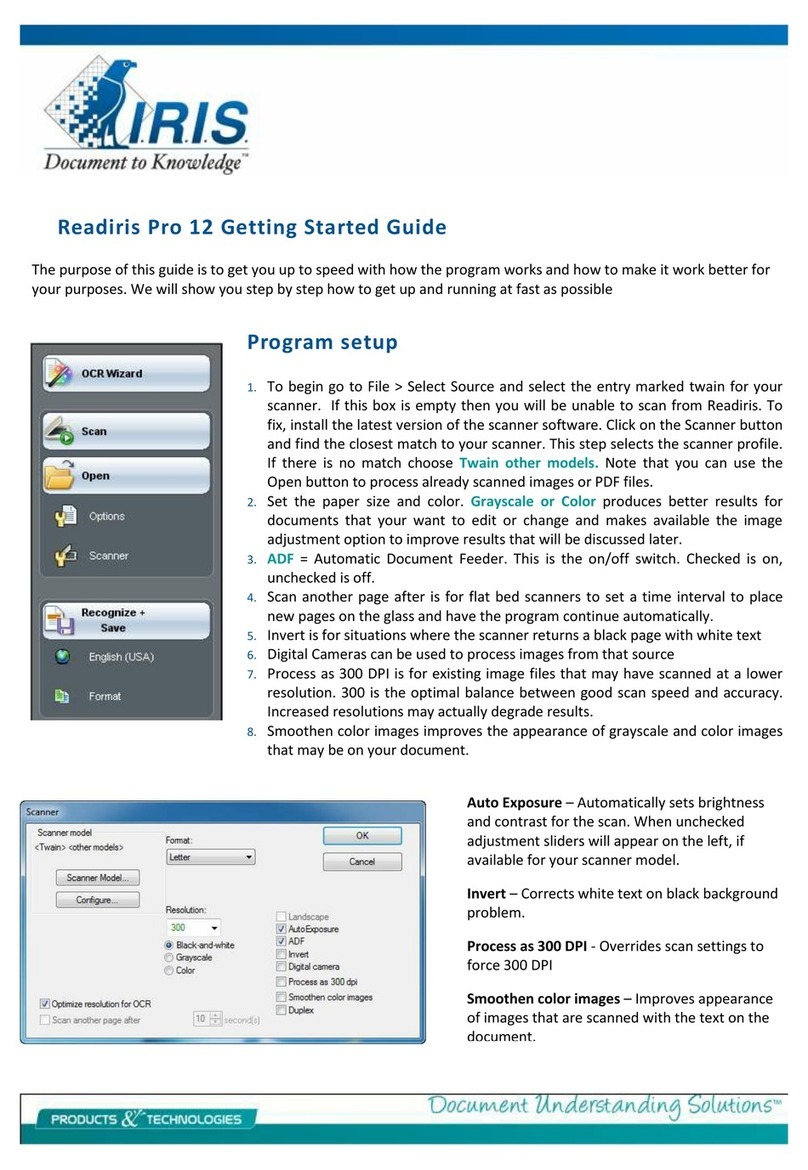
  9. I.R.I.S. READIRIS PRO 12 Instruction manual

I.R.I.S. READIRIS PRO 12 Instruction manual

U vindt de laatste informatie omtrent Readiris Pro 11 op www.irislink.com
Trouvez les dernières informations sur Readiris Pro 11 sur www.irislink.com
Find the latest information about Readiris Pro 11 at www.irislink.com
Format
Select the output target (Word, Excel, HTML editor, WordPad, Acrobat Reader, StarOce or any other external
output formats). You can even send the recognized document into a new e-mail and immediately share the
information! Choose the text formatting of the recognized document, running text, word formatting or full
autoformatting. In that case you can activate the“Flowing Text™” mode with the option “Use columns instead
of frames”for an easier editing.
Format
Sélectionnez le format de sortie (Word, Excel, éditeur HTML, WordPad, Acrobat Reader, StarOce ou n'importe
quel format de sortie externe). Vous pouvez même envoyer le document reconnu dans un nouvel e-mail et
partager immédiatement l’information ! Choisissez le formatage de texte du document reconnu: texte continu,
formatage des mots ou formatage automatique complet. Dans ce dernier cas, vous pouvez activer le mode
"Texte Flottant™" en cochant la fonction « Utiliser des colonnes et non des cadres » pour une édition plus facile.
Formaat
Selecteer het uitvoerdoel (Word, Excel, HTML editor, WordPad, Acrobat Reader, StarOce of andere externe
uitvoerformaten). U kunt het herkende document zelfs met een nieuwe e-mail meesturen en de informatie
onmiddellijk delen! Kies het tekstformaat van het herkende document, lopende tekst, woordformatering of
volledige autoformatering. In dat geval kunt u de modus“Flowing Text™” activeren met de optie“Kolommen
gebruiken in de plaats van kaders” om gemakkelijker te bewerken.
Multipage
Represents the various images opened in Readiris.The current
page is highlighted.
Pages multiples
Représente les diérentes pages ouvertes dans Readiris. La page
en cours est mise en évidence.
Meerbladig
Geeft de verschillende afbeeldingen weer die geopend zijn in
Readiris. De huidige pagina is geselecteerd.
Status Windows: Indicates all the useful information about the scanneddocument.
Fenêtre d’état :
Indique toutes les informations utiles au sujet des documents numérisés.
Windows status :
Toont alle nodige informaties over de gescande documenten.
When your document is open in Readiris, use your right-click to access useful
functions:
Magnifying glass
Copy as Text: allows to select a text zone and to paste it into any application: the text is
immediately retyped!
View: gives access to the dierent zoom levels
Window: allows to change the block type (Text/Table/Graphic) or to delete it if you don’t
want to recognize it.
Quand votre document est ouvert dans Readiris, utilisez votre clique-droit pour
accéder à des fonctions pratiques :
Loupe
Copier comme texte : permet de sélectionner une zone de texte et de la coller dans toute
application : le texte est immédiatement retapé !
Vue : donne accès aux diérents niveaux de zoom
Fenêtre : permet de changer le type du bloc (Texte/Graphique/Tableau) ou de le supprimer
si vous ne souhaitez pas le reconnaître.
Als uw document geopend is in Readiris, klik dan met de rechter-muisknop om
toegang te krijgen tot een aantal nuttige functies:
Vergrootglas
Kopiëren als tekst: maakt het mogelijk een tekstzone te selecteren en deze in om het even
welke toepassing te plakken: de tekst wordt onmiddellijk hertypt!
Bekijken: biedt toegang tot de verschillende zoomniveaus
Venster: maakt het mogelijk om het bloktype te wijzigen (Tekst/Figuur/ Tabelvenster) of
om het te verwijderen als u het niet wil herkennen.
Tip / Astuces /Tip
Select Window
Sélectionnez la fenêtre
Selecteer vensters
Draw text window
Dessinez une fenêtre texte
Teken tekstvensters
Draw graphic window
Dessinez une fenêtre graphique
Teken grasche vensters
Draw table window
Dessinez une fenêtre tableau
Teken tabelvensters
Draw barcode window
Dessinez une fenêtre codes à barres
Teken barcodevensters
Draw handprint window
Dessinezune fenêtre écriture manuscrite
Teken handgeschrevenvensters
Analyze page
Analyse de page
Pagina analyseren
Ignore Exterior Zone
Ignorer la zone extérieure
Buitenkant van zone negeren
Deskew page
Redresser la page
Bladzijden rechtzetten
Select and sort windows
Sélectionner et trier les fenêtres
Tekstvenster selecteren en ordenen
Fit to window
Pleine page
Volle bladzijde
Print the document thumbnails
Imprimer les "imagettes" des documents
Beeld van de geprinte documenten
Fit to width
Pleine largeur
Volle breedte
Actual size
Taille réelle
Ware grootte
Rotate the image
Rotation de l’image
Rotatie van het beeld
Magnifying glass
Loupe
Vergrootglas
Learn
Enable or disable the interactive learning
phase. Interactive Learning is enabled by
default.
Apprentissage
Activez ou désactivez la phase
d'apprentissage interactif. L'apprentissage
interactif est activé par défaut.
Leren
Schakel de interactieve leerfase in of
uit. Interactief leren is standaard
ingeschakeld.
Languages
Click on the“Language” button to select
one of the 123 languages.
Langues
Cliquez sur le bouton "Langue" pour
sélectionner l'une des 123 langues.
Talen
Klik op de knop “Talen” om één van de
123 talen te selecteren.
Recognize and Save
Perform the document recognition and save the result in the selected output format.
Reconnaître et Enregistrer
Eectuez la reconnaissance du document et sauvegardez-le dans le format de sortie sélectionné.
Herkennen en Opslaan
Voer de documentherkenning uit en sla het resultaat op in het geselecteerde output formaat.
Recognition / Reconnaître / Herkennen
Scanner
Allows you to set up your scanner. Readiris works with all TWAIN scanners available on the market.
New! Indicate Readiris a timespan between 2 automatic scanning and easily scan a book on a atbed
scanner.
Numériseur
Vous permet de régler votre numériseur. Readiris fonctionne avec tous les TWAIN scanners
disponibles sur le marché. Nouveau! Indiquez à Readiris un intervalle de temps entre 2 numérisations
automatiques et numérisez facilement un livre sur un scanner à plat.
Scanner
Deze knop kunt u gebruiken om uw scanner in te stellen. Readiris ondersteunt alle TWAIN scanners
die beschikbaar zijn op de markt. Nieuw! Geef aan Readiris een tijdspanne tussen 2 automatische
scans en scan gemakkelijk een boek op een atbed scanner.
Options
The“Options”button allows to enable or disable 3 functions: the Page Deskewing (straightens pages),
the Page Rotation and the Page Analysis (automatically draws frames around text, tables and
graphics). Page analysis is enabled by default.
Options
Permet d’activer ou de désactiver 3 fonctions : Redressement des pages, Détecter l’orientation de la
page et Analyse de page (dessine automatiquement des cadres autour des textes, des tableaux et des
graphiques). L’analyse de page est activée par défaut.
Opties
Met behulp van de knop “Opties” kunnen drie functies worden ingeschakeld of uitgeschakeld:
Bladzijden rechtzetten, Oriëntatie bladzijde detecteren en Pagina-analyse (tekent automatisch een
kader rond tekst, tabellen en guren). Pagina-analyse is standaard ingesteld.
Source
Click on this button to select your image source: the scanning or the opening of
existing image les.
Source
Cliquez sur ce bouton pour sélectionner la source de l’image : la numérisation ou
l’ouverture de chiers image existants.
Bron
Klik op deze knop om uw beeldbron te selecteren: scannen of een bestaand
beeldbestand openen.
Open or Scan
You can open a prescanned document when the “Open” button is displayed or directly scan a paper document
from Readiris when the“Scan” button is displayed. To change the “Open” button in“Scan”button click on the
“Source”button.
Ouvrir ou Numériser
Vous pouvez ouvrir un document pré-numérisé quand le bouton "Ouvrir" est aché ou directement numériser un
document papier depuis Readiris quand le bouton "Numériser" est aché. Pour acher l’un ou l’autre bouton,
cliquez sur le bouton "Source".
Openen of scannen
U kunt een reeds gescand document openen wanneer de knop“Openen”wordt weergegeven of u kunt
rechtstreeks een papieren document scannen vanuit Readiris wanneer de knop“Scannen”wordt weergegeven.
Om de knop “Openen” te veranderen in de knop “Scannen”, dient u op de knop “Bron” te klikken.
Scanning / Numériser / Scannen
OCR Wizard
The wizard guides you through the OCR process. Answer a few question
and you'll obtain a recognized document.
Assistant OCR
L'assistant vous guide à travers le processus OCR. Répondez à quelques questions
et vous obtiendrez un document éditable.
OCR Wizard
De wizard leidt u door het OCR-proces. Beantwoord een aantal vragen en u verkrijgt meteen een herkend
document.
Snelle startgids
Linkerwerkbalk: uw documenten in twee eenvoudige stappen verwerven
1 Scan uw documenten of open PDF- of beeldbestanden
Open gemakkelijk beeldbestanden of haal documenten op van scanners of digitale camera’s.
1.
Schakel indien nodig de juiste systeemopties in (Bladzijden rechtzetten, Pagina-analyse, Oriëntatie bladzijde detec teren) door op“Opties”te klikken.
2. Klik op de knop “Bron” om de beeldbron te selecteren: scannen of bestaande bestanden openen. Klik vervolgens op “Scannen”om het scannen te starten
of op “Openen”om een bestand op uw harde schijf te openen.
Kies om het even welk document:
Complexe kolommen, teksten, guren en tabellen. Laserkwaliteit, verlaagde kwaliteit of dot matrix.
Documenten bestaande uit één of meer bladzijden, meertalig (Readiris ondersteunt tot 123 talen).
Open PDF-bestanden of documenten opgeslagen in TIFF-, BMP-, JPEG- en JPEG2000-formaat of gescand in kleur, zwart-wit of grijswaarden.
2 Uw documenten herkennen
1. Klik op de knop “Taal” en selecteer de taal
2. Bepaal het uitvoerformaat van het OCR-resultaat door te klikken op de knop“Formaat”.
Stuur het automatisch naar de doeltoepassing: Word, Excel, Acrobat, Internet Explorer, HTML-editors, WordPerfect, StarOce enz.
Sla het document in de meest populaire uitvoerformaten zoals HTML, TXT, RTF, PDF, Word, Excel enz.
Open automatisch de toepassing van het overeenkomende bestand om uw document te bewerken met de optie “Opslaan en openen”of
Stuur het herkende document rechtstreeks mee met een nieuwe e-mail en verdeel de informatie onmiddellijk!
Hercreëer de lay-out van het oorspronkelijke document. Als u “Brondocument hercreëren”kiest, kunt u de modus “FlowingText™” activeren om
gemakkelijker te kunnen bewerken met de functie“Kolommen gebruiken in de plaats van kaders”.
3. Klik op “Herkennen en Opslaan” om uw document te verwerken.
Rechterwerkbalk: Optimaliseer de herkenning met knoppen
Indien nodig helpt de rechterwerkbalk u om comfortabel te werken op het documentbeeld.
Maak uw eigen tekst-, guur- en tabelzones of vraag Readiris om de pagina automatisch te analyseren
Ontwerp indien nodig ook barcode en handgeschreven zones. Readiris herkent niet automatisch deze zones, je moet een rechthoek er omheen tekenen
door de barcode en handschrift knoppen te gebruiken
Bepaal een beperkte herkenningszone met de knop“Buitenkant van zone negeren”
Zet de bladzijde recht of roteer de bladzijde
Selecteer en sorteer de gewenste tekstzones
Zoom in op het document om details te bekijken
U heeft uw documenten snel, eenvoudig en nauwkeurig omgezet in een elektronisch formaat. U kunt uw document
nu bewerken in uw favoriete toepassing, uw document opslaan voor toekomstig gebruik of het document de
wereld rondsturen naar familie, vrienden of collega’s.
Handmatig congureren
1. Start Readiris Pro op
2. Klik op het Readiris Pro startscherm
3. Klik op “Annuleren”in het wizardscherm
4. Klik op de knop “Scannerinstelling bepalen”, klik op de knop “Scannermodel”
5. Selecteer uw scanner in de lijst. Selecteer “Twain other models” indien uw
scanner niet in de lijst voorkomt. Klik op“OK”
6. Klik op de knop “Congureren”en verieer uw beeldbron. Klik op “Selecteren”
en klik op “OK”
7. Kies de resolutie van uw scanner (een resolutie van 300 dpi wordt aanbevolen)
en het formaat van uw document (formaat A4 – niet beschikbaar als u een
Twain-scanner gebruikt)
8. Selecteer de kleurmodus grijswaarden of kleur voor een beter resultaat
9. Klik op de knop “Taal” om de taal van het document aan te geven
10. Klik op de knop“Formaat”om het uitvoerformaat van uw document te
selecteren
11. Plaats een document in uw scanner en klik op de knop“Scannen”
Met de wizard
1. Start Readiris Pro op
2. Klik op het Readiris Pro startscherm
3. Klik op de knop "Volgende" in de OCR wizard
4. Selecteer uw scanner in de lijst. Selecteer “Twain other models” indien uw
scanner niet in de lijst voorkomt. Klik op“OK”
5. Klik op de knop “Congureren”en verieer uw beeldbron. Klik op “Selecteren”
en klik op “OK”
6. Kies de resolutie van uw scanner (een resolutie van 300 dpi wordt aanbevolen)
en het formaat van uw document (formaat A4 – niet beschikbaar als u een
Twain-scanner gebruikt)
7. Selecteer de kleurmodus grijswaarden of kleur voor een beter resultaat
8. Klik op de knop “Volgende”
9. Kies de taal van uw document, klik op de knop“Volgende”
10. Selecteer het gewenste uitvoerformaat door indien nodig op“Wijzigen”te
klikken. Klik op de knop“Volgende”
11. Plaats een document in uw scanner en klik op“Star ten”
Eerste stappen bij het gebruik van Readiris Pro
1] Sluit uw scanner aan op uw pc en installeer de bijgeleverde software.
Test uw scanner. Neem bij problemen contact op met de fabrikant van uw scanner.
2] Plaats de zelfstartende Readiris cd-rom in uw pc.
Vul uw gebruikersnaam én de rmanaam in (“privé”voor thuisgebruikers).
Kies het gewenste type installatie: de volledige installatie wordt aangeraden
Klik op "Installeren"
Klik op "Voltooien"
Vul het serienummer in (dat zich op de DVD-doos bevindt) en registreer het nadien
Volg de instructies op het scherm, klik op“Beëindigen”.
De eerste keer dat u Readiris gebruikt moet u uw scanner congureren (manueel of met de wizard).
Guide pratique de l'utilisateur
Barre d’outils de gauche : acquérez et traitez vos documents en 2 étapes faciles
1 Numérisez vos documents ou ouvrez des chiers PDF ou image
Ouvrez facilement des chiers image ou saisissez vos documents à partir d'un scanner ou d'un appareil photo numérique
1. Activez les options (Redressement des pages, Détecter l’orientation de la page, Analyse de page) en cliquant sur "Options".
2. Cliquez sur le bouton "Source" pour sélectionner la source de l’image ; la numérisation ou l’ouverture de chiers existants. Puis cliquez sur "Numériser"
pour démarrer la numérisation ou sur "Ouvrir" pour ouvrir un chier depuis votre disque dur.
Choisissez tous types de document :
Textes, tableaux, mises en page complexe, graphiques, de qualité laser ou matricielle
Des documents d'une seule ou plusieurs pages, multilingues (Readiris reconnaît jusqu’à 123 langues)
Ouvrez des chiers PDF ou aux formats JPEG, JPEG2000, TIFF, BMP,… ou numérisés en couleur, en noir et blanc ou en niveaux de gris.
2 Reconnaissez vos documents
1. Sélectionnez la langue de votre document en cliquant sur le bouton "Langues"
2. Dénissez le format de sortie du résultat OCR (bouton "Format")
Envoyez-le automatiquement vers Word, Excel, Acrobat Reader, Internet Explorer, un éditeur HTML,WordPerfect, StarOce, etc.
Sauvergardez-le dans les formats de sortie les plus connus tels que HTML,TXT, RTF, PDF, Word, Excel, etc. et :
Ouvrez automatiquement l’application correspondant au format choisi pour éditer votre document grâce à l’option "Enregistrer et ouvrir".
Envoyez directement le document reconnu par courrier électronique et partagez immédiatement l'information!
Recréez la mise en page du document original. Si vous choisissez l’option "Recréer le document d’origine", vous pouvez activer le mode "Texte Flottant™"
pour une édition plus facile en cochant la fonction "Utiliser des colonnes et non des cadres".
3. Cliquez sur "Reconnaître et Enregistrer" pour traiter votre document.
Barre d’outils de droite : Optimisez la reconnaissance grâce à des boutons intuitifs
Si besoin, la barre d’outils de droite vous aide à travailler confortablement sur l’image du document.
Dessinez vos propres zones de texte, de tableau et de graphique ou demandez à Readiris Pro d’analyser automatiquement la page
Dessinez également les zones de codes à barres et d’écriture manuscrite. Readiris n’identie pas de façon automatique ces zones. Vous devez dessiner un
cadre autour de celles-ci à l’aide des boutons « codes à barres » et « écriture manuscrite »
Dénissez une zone de reconnaissance limitée avec le bouton « Ignorer la zone extérieure »
Redressez ou faites pivoter la page
Sélectionnez et ordonnez les zones de texte selon votre intérêt
Agrandissez l’image du document pour voir les détails
Vous avez converti vos documents en format électronique avec rapidité, facilité et précision. Vous pouvez à présent les
éditer dans votre application favorite, les sauvegarder pour un usage ultérieur ou les distribuer dans le monde entier,
à votre famille, vos amis, vos collègues.
Conguration manuelle
1. Lancez Readiris Pro
2. Cliquez sur l'écran de démarrage de Readiris Pro
3. Cliquez sur "Annuler" dans l'écran de l'assistant
4. Cliquez sur l'icône "Numériseur" et suivez le processus de conguration
5. Sélectionnez votre numériseur dans la liste, si votre numériseur ne gure pas
dans la liste, sélectionnez "Twain other models", cliquez sur "OK"
6. Cliquez sur "Congurer", vériez votre "Source", cliquez sur "Select" et cliquez
sur "OK"
7. Choisissez la résolution de votre scanner (300 dpi sont recommandés) et le
format de votre document (A4 – format non disponible si vous utilisez un
scannerTwain).
8. Sélectionnez "gris" ou "couleur" pour de meilleurs résultats
9. Cliquez sur l'icône "Langue" pour sélectionner la langue du document
10. Cliquez sur l'icône "Format" pour sélectionner le format de sortie de votre
document
11. Insérez un document dans votre numériseur et cliquez sur "Numériser"
A l'aide de l'assistant
1. Lancez Readiris Pro
2. Cliquez sur l'écran de démarrage de Readiris Pro
3. Dans l'assistant OCR, cliquez sur "Suivant"
4. Sélectionnez votre numériseur dans la liste, si votre numériseur ne gure pas
dans la liste, sélectionnez "Twain other models", cliquez sur "OK"
5. Cliquez sur "Congurer", vériez votre "Source", cliquez sur "Select" et cliquez
sur "OK"
6. Choisissez la résolution de votre scanner (300 dpi sont recommandés) et le
format de votre document (A4 - format non disponible si vous utilisez un
scannerTwain).
7. Sélectionnez "gris" ou "couleur" pour de meilleurs résultats
8. Cliquez sur "Suivant"
9. Choisissez la langue de votre document, cliquez sur "Suivant"
10. Sélectionnez le format de sortie en cliquant sur "Modier" si nécessaire, cliquez
sur "Suivant"
11. Insérez un document dans votre numériseur et cliquez sur "Démarrer"
Premiers pas pour l’utilisation de Readiris Pro
1] Connectez votre scanner à votre PC et installez le logiciel fourni avec votre scanner.
Testez votre scanner et si vous rencontrez un quelconque problème, contactez le fabricant de votre scanner.
2] Insérez le CD-ROM Readiris à démarrage automatique dans votre PC.
Introduisez votre nom d’utilisateur ET le nom de votre société ("privé" pour les particuliers).
Veuillez sélectionner un type d'installation : l’installation standard est recommandée.
Cliquez sur“Installer”.
Cliquez sur“Terminer”.
Introduisez votre numéro de série (référez-vous au dos de la boite du DVD) et ensuite enregistrez-vous.
Lors de votre première utilisation de Readiris, vous devez congurer votre scanner (à l’aide de l’assistant ou
manuellement).
Quick User Guide
Left Toolbar: acquire and process your documents in 2 easy steps
1Scan your documents or open PDF or image les
Easily open image les or capture documents from scanners or digital cameras
1. Enable the proper system options if needed (Page Deskewing, Page Analysis, Page Orientation) by clicking on“Options”.
2. Click on the “Source” button to select the image source; the scanning or the opening of existing les. Then click on “Scan”to start the scanning or on
“Open”to open a le from your hard disk.
Choose any document:
Complex columns, texts, graphics and tables. Laser quality, degraded or dot matrix.
Single or multipage documents, multilingual (Readiris supports up to 123 languages).
Open PDF les or documents saved in TIFF, BMP, JPEG, JPEG2000 or scanned in color, in black and white or grayscale
2Recognize your documents
1. Click on the “Language”button and select the language document
2. Dene the output format of the OCR result by clicking on the“Format”button.
Send it automatically to the target application:Word, Excel, Acrobat, Internet Explorer, HTML editors,WordPerfect, StarOce, etc.
Save it in the most popular output formats such as HTML,TXT, RTF, PDF, Word, Excel, etc. and:
Open automatically the application of the corresponding le to edit your document with the "Open after saving" option or
Send directly the recognized document in a new e-mail and share immediately the information!
Recreate the layout of the original document. If you choose "Recreate source document", you can activate the “FlowingText™” mode for an easier
editing with the "Use columns instead of frames" function
3. Click on “Recognize and Save” to process your document.
Right Toolbar: Optimize the recognition with smart buttons
If needed, the right toolbar helps you to work comfortably on the document image.
Design your own text, graphic and table zones or ask Readiris to automatically analyze the page
Design also the barcode and handprint zones when needed (Readiris doesn’t identify automatically these zones, you must draw a frame
around them
using the “barcode” and“handprint” buttons
Dene a limited recognition zone with the“Ignore exterior zone” button
Straighten or rotate the page
Select and sort the text zones of interest
Zoom on the document to see the details
You have transformed your documents into electronic format quickly, easily and accurately. You can now edit your
document in your favorite application, save your document for later use or distribute the document around the
world to family, friends or colleagues.
Conguring manually
1. Launch Readiris Pro
2. Click on the Readiris Pro splasch screen
3. Click on "Cancel" in the wizard screen
4. Click on the "Dene scanner settings" button, click on the "Scanner model"
button
5. Select your scanner in the list, if your scanner is not in the list, select "Twain
other models", click on "OK"
6. Click on "Congure", check your "Source", click on "Select" and click on "OK"
7. Choose the Resolution of your scanner (300 dpi are recommended) and the
Format of your document (format: A4/letter - not available if you use a Twain
scanner).
8. Select grayscale or color if you have a bad quality document
9. Click on the "Language" icon to select the language of the document
10. Click on the "Format" icon to select the output format of your document
11. Insert your document in your scanner and click on the "Scan" icon
Using the wizard
1. Launch Readiris Pro
2. Click on the Readiris Pro splash screen
3. In the OCR Wizard, click on "Next"
4. Select your scanner in the list, if your scanner is not in the list, select "Twain
other models", click on "OK"
5. Click on "Congure", check your "Source", click on "Select" and click on "OK"
6. Choose the Resolution of your scanner (300 dpi are recommended) and the
Format of your document (format: A4/letter - not available if you use a Twain
scanner).
7. Select grayscale or color for better results
8. Click on "Next"
9. Choose the language of your document, click on "Next"
10. Select the output format by clicking on "Change" if necessary, click on "Next"
11. Insert a document in your scanner and click on "GO"
First steps to use Readiris Pro
1] Connect your scanner to your PC and install the software delivered with your scanner.
Test your scanner. If you experience any problem contact your scanner manufacturer.
2] Insert the auto-running Readiris CD-ROM in your PC
Fill in your user name AND your company name ("private" for home users)
Select a setup type: complete is recommended
Click on“Install”
Click on“Finish”
Insert your serial number (refer to the sticker on the DVD box) and after that please register it
The rst time you use Readiris you need to congure your scanner (using the wizard or manually).
La información más reciente acerca de Readiris Pro 11 la encontrará en www.irislink.com
Consultare le informazioni più recenti su Readiris Pro 11 all'indirizzo: www.irislink.comDie aktuellsten Informationen über Readiris Pro 11 nden Sie unter www.irislink.com
Format
Wählen Sie das Ausgabeformat (Word, Excel, HTML-Editor,WordPad, Acrobat Reader, StarOce oder ein anderes
externes Ausgabeformat). Sie können das erkannte Dokument sogar per E-Mail senden und es anderen Personen
direkt zur Verfügung stellen! Wählen Sie die Formatierung für das erkannte Dokument, d. h. durchgehender Text,
Wortforma-tierung oder Autoformatierung. In diesem Fall können Sie den Modus "Flowing Text™" und die
Funktion "Spalten statt Rahmen anwenden" zur bequemeren Bearbeitung des Dokuments aktivieren.
Formato
Selezionare la destinazione dell’output (Word, Excel, editor HTML,WordPad, Acrobat Reader, StarOce o altri
formati di output esterni). È possibile inviare il documento riconosciuto tramite e-mail e condividere
immediatamente le informazioni! Scegliere la formattazione del testo del documento riconosciuto, giusticato,
formattazione parole o autoformattazione completa. In questo caso, è possibile attivare la modalità“Flowing
Text™” con l’opzione“Utilizza colonne e non le cornici”per modiche più immediate.
Formato
Seleccione el formato de edición (Word, Excel, editor HTML,WordPad, Acrobat Reader, StarOce o cualquier
otro formato de edición externo). Incluso puede enviar el documento reconocido a un nuevo mensaje de correo
electrónico y compartir inmediatamente la información. Elija el formato del texto del documento reconocido,
texto seguido, formato por palabras o formato automático completo. En ese caso, puede activar el modo
“Flowing Text™” con la opción “Usar columnas y no marcos”para facilitar la edición.
Multipage
Stellt die verschiedenen Bilder dar, die in Readiris geönet sind.
Die aktuelle Seite ist farblich hervorgehoben.
Multipagina
Rappresenta le varie immagini aperte in Readiris. La pagina
corrente è evidenziata
Multipágina
Representa las diversas imágenes abiertas en Readiris. La página
actual aparece resaltada.
Statusfenster : Enthält sämtliche nützlichen Informationen zum gescannten Dokument.
Finestra di stato : Indica tutte le informazioni utili a proposito del documento scansionato.
Ventana de estado : Indica toda la información útil sobre el documento escaneado.
Klicken Sie mit der rechte Maustaste in einem in Readiris geöneten Dokument,
um Zugri auf nützliche Funktionen zu erhalten:
Lupe
Kopieren als Text: Sie können einen Textbereich auswählen und in einer beliebigen
Anwendung einfügen. Er wird sofort neu geschrieben!
Ansicht: Ermöglicht den Zugri auf verschiedene Zoom-Einstellungen.
Fenster: Der Blocksatz (Text/Tabelle/Grak) kann geändert bzw. gelöscht werden, wenn
dieser nicht erkannt werden soll.
se il documento è aperto in Readiris, fare clic con il pulsante destro del mouse per
accedere a utili funzioni:
Lente d’ingrandimento
Copiare come testo: consente di selezionare una zona di testo e di incollarla in qualsiasi
applicazione: il testo viene ridigitato immediatamente!
Visualizzazione: consente di accedere ai diversi livelli di zoom
Finestra: consente di cambiare il tipo di blocco (Testo/Tabella/
Immagine) o di eliminarlo se non si desidera riconoscerlo.
Cuando el documento esté abierto en Readiris, utilice el botón derecho del ratón
para acceder a funciones útiles:
Lupa
Copiar como texto: permite seleccionar una zona de texto y pegarla en cualquier
aplicación: el texto se vuelve a escribir inmediatamente.
Ver: proporciona acceso a los distintos niveles de zoom.
Ventana: permite modicar el tipo de bloque (Texto/Tablas/
Grácos) o borrarlo si no desea que se efectúe el reconocimiento.
Tipp / Suggerimento / Sugerencia
Fenster auswählen
Seleziona nestra
Seleccionar ventana
Textfenster denieren
Traccia nestra testo
Denir una ventana de texto
Grakfenster denieren
Traccia nestra immagine
Denir una ventana de grácos
Tabellenfenster denieren
Traccia nestra tabella
Denir una ventana de tabla
Barcode-Fenster denieren
Traccia nestra codice a barre
Denir una ventana de códigos de barras
Handschrift-Fenster denieren
Traccia nestra scrittura manoscritta
Denir una ventana de escritura manuscrita
Seite analysieren
Analizza pagina
Analizar la página
Außenseite Zone ignorieren
Ignorare zona esterna
Ignorar la zona exterior
Schräglage Seite korrigieren
Allinea pagina
Restablecer la página
Fenster auswählen und anordnen
Seleziona e ordina nestre
Seleccionar y ordenar las ventanas
Ganzes Bild
Adatta alla nestra
Ajustar a la ventana
Dokument-Miniaturansichten drucken
Stampare le immagini dei documenti
Imprimir las miniaturas
Ganze Breite
Adatta alla larghezza
Ajustar a lo ancho
Reelle Größe
Dimensione reale
Tamaño real
Rotation
Rotazione
Rotación
Lupe
Lente d’ingrandimento
Lupa
Lernen
Über diese Schaltäche kann das interaktive
Lernprogramm aktiviert bzw. deaktiviert werden.
Diese Option ist standardmäßig aktiviert.
Apprendimento
Abilita o disabilita la fase di apprendimento
interattiva. Per impostazione predenita, questa
opzione è abilitata.
Aprendizaje
Active o desactive la fase de aprendizaje
interactivo. La opción Aprendizaje interactivo
esta desactivada de forma predeterminada.
Sprachen
Klicken Sie auf diese Schaltäche, und
wählen Sie eine der 123 Sprachen aus.
Lingue
Fare clic sul pulsante“Lingua” per
selezionare una delle 123 lingue.
Idioma
Haga clic en el botón“Idioma”para
seleccionar uno de los 123 idiomas.
Erkennen und Speichern
Führen Sie eine Dokumenterkennung durch, und speichern Sie das Ergebnis im gewünschten Format.
Riconoscere e Salvare
Esegue il riconoscimento del documento e lo salvaguarda nel formato d’uscita selezionato.
Reconocer y Guardar
Realice el reconocimiento del documento y salve el resultado en el formato de salida elegido.
Erkennen / Riconoscere / Reconocer
Scanner
Ermöglicht die Einrichtung des Scanners. Readiris kann mit allen auf dem Markt erhältlichen TWAIN
Scannern eingesetzt werden. Neu! Geben Sie eine Zeitspanne für das Intervall zwischen zwei
automatischen Scan-Vorgängen ein, um ein Buch problemlos auf einem Flachbettscanner zu scannen.
Scanner
Consente di impostare lo scanner. Readiris funziona con tutti gli TWAIN scanner disponibili sul mercato.
Nuovo! Indicate a Readiris un intervallo di tempo tra 2 acquisizioni automatiche e scansionate
facilmente un libro con uno scanner piano.
Escáner
Permite congurar su escáner. Readiris funciona con todos los TWAIN escáneres disponibles en el
mercado. ¡Nuevo! Indique a Readiris un tiempo de intervalo entre dos escaneados automáticos y
escanee fácilmente libros con su escáner de mesa.
Optionen
Über diese Schaltäche können die folgenden drei Funktionen aktiviert bzw. deaktiviert werden: "Seitenschräglage
korrigieren" (richtet die Seiten gerade aus), "Seitenorientierung entdecken" und "Seitenanalyse" (fügt automatisch
Rahmen umText, Tabellen und Graken ein). Die Seitenanalyse ist standardmäßig aktiviert.
Opzioni
Il pulsante “Opzioni”consente di abilitare o disabilitare tre funzioni: Allineamento pagine, Rivela l'orientazione
della pagina e Analisi pagina (disegna automaticamente le cornici attorno a testo, tabelle e immagini). Per
impostazione predenita, è abilitata Analisi pagina.
Opciones
El botón“Opciones” permite activar o desactivar tres funciones: Restablecimiento de página (endereza páginas),
Detectar la orientación de la página y Análisis de página (dibuja marcos automáticamente alrededor del texto,
tablas y grácos). La opción activada de forma predeterminada es Análisis de página.
Quelle
Mit dieser Schaltäche können Sie die Bildquelle auswählen: das gescannte
Bild oder die zu önende Datei.
Sorgente
Fare clic su questo pulsante per selezionare l’origine dell’immagine: la scansione
o l’apertura di le di immagine esistenti.
Fuente
Haga clic en este botón para seleccionar el origen de la imagen: escanear o
abrir un archivo de imagen existente.
Önen oder Scannen
Sie können ein bereits gescanntes Dokument önen, wenn die Schaltäche "Önen" angezeigt wird, oder ein
Papierdokument direkt mit Readiris scannen, wenn die Schaltäche "Scannen" angezeigt wird. Klicken Sie auf die
Schaltäche "Quelle", wenn anstelle der Schaltäche "Önen" die Schaltäche "Scannen" angezeigt werden soll.
Apri o Scansione
È possibile aprire un documento già acquisito se viene visualizzato il pulsante“Apri” oppure acquisire
direttamente un documento cartaceo con Readiris se è visualizzato il pulsante“Scansione”. Per modicare la
funzionalità del pulsante da“Apri”a “Scansione”, fare clic sul pulsante“Sorgente”.
Abrir o Escanear
Puede abrir un documento previamente escaneado cuando aparece el botón“Abrir”o escanear directamente un
documento en papel desde Readiris cuando aparece el botón“Escanear”. Para cambiar el botón“Abrir”por el
botón“Escanear”, haga clic en el botón “Fuente”.
Scannen / Scandire / Escanear
OCR Assistent
Der Assistent führt Sie durch die OCR-Verarbeitung. Beantworten Sie ein paar Fragen,
und schon wird das Dokument erkannt.
Proc. Guidata
La procedura guidata accompagna l’utente nel processo dell’OCR. È suciente rispondere
ad alcune domande per ottenere il documento riconosciuto.
Asistente OCR
El asistente le orienta a través del proceso OCR. Responda unas simples preguntas y obtendrá
el reconocimiento de los caracteres del documento.
Guía práctica del usuario
Barra de herramientas izquierda: obtenga y procese sus documentos en dos sencillos pasos
1 Escanee sus documentos o bien abra archivos PDF o de imágenes
Abra fácilmente archivos de imágenes o capture documentos de escáneres o cámaras digitales.
1. Active las opciones del sistema correspondientes si es necesario (Restablecimientode página, Análisis de página, Detec tar la orientaciónde la página) haciendo clic en “Opciones”.
2. Haga clic en el botón “Fuente” para seleccionar el origen de la imagen, de la exploración o de archivos existentes. A continuación, haga clic en “Escanear”para iniciar la
exploración o en“Abrir”para abrir un archivo del disco duro.
Elija cualquier documento:
Columnas complejas, textos, grácos y tablas. Calidad láser, degradado o matriz de puntos.
Documentos de una o varias páginas, multilíngües (Readiris admite hasta 123).
Abra archivos PDF o documentos guardados en formato TIFF, BMP, JPEG, JPEG2000 o escaneados en color, en blanco y negro o escala de grises.
2 Reconozca sus documentos
1. Haga clic en el botón “Idioma”y seleccione el idioma del documento.
2. Dena el formato de edición del resultado OCR haciendo clic en el botón“Formato”.
Envíelo automáticamente a la aplicación de edición:Word, Excel, Acrobat, Internet Explorer, editores HTML, WordPer fect, StarOce, etc.
Guárdelo en los formatos de edición más conocidos, como, por ejemplo, HTML, TXT, RTF, PDF, Word, Excel, etc. y
Abra automáticamente la aplicación del archivo correspondiente para editar el documento mediante la opción "Abrir después de guardar" o.
Envíe directamente el documento reconocido en un nuevo mensaje de correo electrónico y comparta inmediatamente la información.
Recree el diseño del documento original. Si elige "Recrear documento original", puede activar el modo “Flowing Text™” para facilitar la edición mediante la función
"Utilizar columnas y no cuadros".
3. Haga clic en “Reconocer y Guardar” para procesar el documento.
Barra de herramientas derecha: Optimice el reconocimiento mediante los botones inteligentes
Si es necesario, la barra de herramientas derecha le ayuda a trabajar cómodamente en la imagen del documento.
Diseñe sus propias zonas de texto, grácos y tablas y pídale a Readiris que analice automáticamente la página.
Diseñe también las zonas con códigos de barras y escritura manuscrita (Readiris no reconoce automáticamente estas zonas, por ello tiene que denir las zonas
utilizando los botones ‘códigos de barras’y escritura manuscrita’.
Dena una zona de reconocimiento limitada mediante el botón“Ignorar zona exterior”.
Enderece o gire la página.
Seleccione y ordene las zonas de texto de interés.
Amplíe el documento para ver los detalles.
Ha transformado sus documentos en formato electrónico de forma rápida, fácil y precisa. Ahora puede editar el
documento en su aplicación preferida, guardarlo para usarlo posteriormente o distribuirlo por el mundo o a sus
familiares, amigos o compañeros.
Conguración manual
1. Inicie el programa Readiris Pro.
2. Haga clic en la pantalla de inicio de Readiris Pro.
3. En la pantalla del asistente, haga clic en "Cancelar".
4. Haga clic en el botón "Establecer la conguración del escáner" y haga clic en el
botón “Modelo de escáner”.
5. Seleccione su escáner en la lista. Si su escáner no apareciera en la lista,
seleccione "Twain other models" y haga clic en "Aceptar".
6. En el menú "Congurar", seleccione su "Fuente", haga clic en "Seleccionar" y
haga clic en "Aceptar".
7. Seleccione la resolución de su escáner (se recomiendan 300 dpi) y el formato
del documento (formato: A4/carta – no disponible si utiliza un escáner
Twain).
8. Seleccione escala de grises o color para obtener mejores resultados.
9. Haga clic en el icono "Idioma" para seleccionar el idioma de su documento.
10. Haga clic en el icono "Formato" para seleccionar el formato de edición de su
documento.
11. Inserte un documento en su escáner y haga clic en el icono "Escanear".
Utilizar el asistente
1. Inicie el programa Readiris Pro.
2. Haga clic en la pantalla de inicio de Readiris Pro.
3. En el asistente de OCR, haga clic en "Siguiente".
4. Seleccione su escáner en la lista. Si su escáner no apareciera en la lista,
seleccione "Otros modelos Twain" y haga clic en "Aceptar".
5. En el menú "Congurar", seleccione su "Fuente", haga clic en "Seleccionar" y
haga clic en "Aceptar".
6. Seleccione la resolución de su escáner (se recomiendan 300 dpi) y el formato del
documento (formato: A4/carta – no disponible si utiliza un escáner Twain).
7. Seleccione escala de grises o color para obtener mejores resultados.
8. Haga clic en "Siguiente".
9. Seleccione el idioma de su documento y haga clic en "Siguiente".
10. Seleccione el formato de edición haciendo clic en "Modicar" si fuera necesario
y haga clic en "Siguiente".
11. Inserte un documento en su escáner y haga clic en "Iniciar".
Primeros pasos para usar Readiris Pro
1] Conecte su escáner a su PC e instale el programa que acompaña su escáner.
Pruebe el escáner. Si encontrara cualquier dicultad, póngase en contacto con el fabricante de su escáner.
2] Inserte el CD-ROM de ejecución automática Readiris en su PC.
Complete su nombre de usuario y el nombre de su empresa ("privado" para usuarios domésticos).
Seleccione un tipo de instalación: recomendamos la instalación completa.
Haga clic en "Instalar".
Haga clic en "Finalizar".
Introduzca su número de serie (reérase a la pegatina en la caja de DVD) y regístrelo después.
La primera vez que utilice Readiris deberá congurar su escáner (utilizando el asistente o en modo manual).
Guida utente rapida
Barra strumenti sinistra: acquisizione ed elaborazione dei documenti in 2 semplici fasi
1 Acquisire i documenti oppure aprire i le PDF o di immagine
È possibile aprire con facilità le di immagine o catturare documenti da scanner o fotocamere digitali
1. Selezionare, se necessario, le corrette opzioni di sistema (Allineamento pagine, Analisi pagina, Orientamento della pagina) facendo clic su“Opzioni”.
2. Fare clic sul pulsante“Sorgente”per selezionare l’origine dell’immagine; ossia scansione o apertura dei le esistenti. Fare quindi clic su “Scansione”per
acquisire documenti o su“Apri” per aprire un le dal disco rigido.
Scegliere un documento qulasiasi:
Colonne complesse, testi, immagini e tabelle, qualità Laser, bassa qualità o matrice a punti.
Documenti singoli o a più pagine, multilingue (Readiris supporta no a 123 lingue).
Apertura di le PDF o documenti salvati in TIFF, BMP, JPEG, JPEG2000 o acquisiti a colori, in bianco e nero o in scala di grigi.
2 Riconoscere i documenti
1. Fare clic sul pulsante“Lingua” e selezionare la lingua del documento.
2. Denire il formato di output del risultato dell’OCR facendo clic sul pulsante“Formato”.
Inviarlo automaticamente all’applicazione di destinazione: Word, Excel, Acrobat, Internet Explorer, editor HTML, WordPerfect, StarOce, ecc.
Salvarlo nei formati di output più comuni quali HTML, TXT, RTF, PDF, Word, Excel, ecc.
Aprire automaticamente l’applicazione del le corrispondente per modicare il documento con l’opzione "Salva e apri".
oppure Inviare direttamente il documento riconosciuto tramite e-mail e condividere immediatamente le informazioni!
Ricreare il layout del documento originale. Se si seleziona "Ricrea documento sorgente", è possibile attivare la modalità“Flowing Text™”per una più
facile modica con la funzione "Utilizza colonne e non le cornici".
3. Fare clic su“Riconoscere e Salvare”per elaborare il documento.
Barra strumenti destra: Ottimizzazione del riconoscimento con i pulsanti intelligenti
Se necessario, la barra degli strumenti destra consente di lavorare comodamente sull’immagine del documento.
Disegnare le zone di testo, immagine e tabelle o analizzare automaticamente la pagina con Readiris.
Disegnare le zone“codici a barre” e“scrittura manoscritta”. Readiris non identica automaticamente queste zone. Deve disegnare una cornice intorno a
loro utilizzando i pulsanti“codici a barre” e“scrittura manoscritta”.
Denire una zona di riconoscimento limitata con il pulsante “Ignorare zona esterna”.
Raddrizzare o ruotare la pagina.
Selezionare e ordinare le zone di testo di interesse.
Ingrandire il documento per visualizzare i dettagli.
I documenti sono stati trasformati con facilità, velocità e precisione in formato elettronico. A questo punto è
possibile modicare il documento nell’applicazione preferita, salvarlo e utilizzarlo in seguito o inviarlo a famigliari,
amici o colleghi.
Congurazione manuale
1. Avviare Readiris Pro
2. Fare clic sulla schermata Readiris Pro
3. Fare clic su "Annulla" nella schermata della procedura guidata
4. Fare clic sul pulsante "Dene scanner settings" (Denisci impostazioni scanner),
quindi sul pulsante“Scanner model”(Modello scanner) e fare clic su OK
5. Selezionare lo scanner nell'elenco; se non è presente, selezionare "Twain other
models", quindi fare clic su "OK"
6. Nel menu Congura, scegliere la "Sorgente", fare clic su "Seleziona", quindi su
"OK"
7. Scegliere la Risoluzione dello scanner (si consiglia 300 dpi) e il Formato del
documento (formato: A4/letter, non disponibile se si utilizza uno scanner Twain)
8. Se la qualità del documento non è ottimale, scegliere scala di grigi o colore
9. Fare clic sull'icona "Lingua" per selezionare la lingua del documento
10.
Fare clic sull'icona "Formato" per selezionare il formato di output del documento
11. Inserire il documento nello scanner e fare clic sull'icona "Scansione"
Utilizzo della procedura guidata
1. Avviare Readiris Pro
2. Fare clic sulla schermata di Readiris Pro
3. Nella procedura guidata dell’OCR, fare clic su "Avanti"
4. Selezionare lo scanner nell'elenco; se non è presente, selezionare "Twain other
models" (Altri modelli Twain), quindi fare clic su "OK"
5. Nel menu Congura… selezionare la "Sorgente", fare clic su "Seleziona", quindi
su "OK"
6. Scegliere la Risoluzione dello scanner (si consiglia 300 dpi) e il Formato del
documento (formato: A4/letter, non disponibile se si utilizza uno scanner Twain)
7. Per ottenere i migliori risultati, selezionare scala di grigi o colore
8. Fare clic su "Avanti"
9. Scegliere la lingua del documento, quindi fare clic su "Avanti"
10. Selezionare il formato di output facendo clic, se necessario, su "Cambia", quindi
su "Avanti"
11. Inserire un documento nello scanner e fare clic su "Vai"
Primi passi per l’utilizzo di Readiris Pro
1] Collegare lo scanner al PC e installare il software dello scanner.
Eseguire il test dello scanner. In caso di problemi rivolgersi al produttore.
2] Inserire il CD-ROM di Readiris nell'unità del PC; dovrebbe avviarsi automaticamente
Inserire nome utente e il nome della società ("privato" per impiego non professionale)
Selezionare un tipo di installazione: la completa è raccomandata
Fare clic su“Installa”
Fare clic su“Fine”
Digitate il vostro numero di chiave (vedere sull’adesivio della scatola del DVD) in seguito vi preghiamo di
registrarvi
Al primo utilizzo di Readiris è necessario congurare lo scanner (manualmente o tramite la procedura guidata).
Kurzanleitung
Linke Symbolleiste: Erfassen und Verarbeiten des Dokuments in zwei leichten Schritten
1 Scannen von Dokumenten bzw. Önen von PDF- oder Bilddateien
Schnelles Önen von Bilddateien oder Erfassen von Dokumenten mithilfe von Scannern oder Digitalkameras
1. Aktivieren Sie ggf. die geeigneten Systemoptionen durch Klicken auf "Optionen"(Seitenschräglage korrigieren, Seitenanalyse, Seitenorientierung entdecken).
2. Klicken Sie auf "Quelle", um die Bildquelle, d. h. das gescannte Bild oder die zu önende Datei auszuwählen.
Klicken Sie anschließend auf "Scannen", um den Scanvorgang zu starten, bzw. auf "Önen", um die Datei auf der Festplatte zu önen.
Wählen Sie ein beliebiges Dokument aus:
Umfangreiche Spalten, Texte, Graken und Tabellen. Laserqualität, verminderte Qualität oder Punktmatrix.
Einseitige oder mehrseitige Dokumente, mehrsprachige Dokumente (Readiris erkennt bis zu 123 Sprachen).
PDF-Dateien, Dokumente im TIFF-, BMP-, JPEG- oder JPEG2000-Format sowie in Farbe, in Schwarzweiß oder in Graustufen gescannte Dokumente.
2 Erkennen von Dokumenten
1. Klicken Sie auf die Schaltäche "Sprache des Dokumentes bestimmen", und wählen Sie die Sprache des Dokuments.
2. Geben Sie das Ausgabeformat für das OCR-Ergebnis durch die Schaltäche "Format" an zuklicken.
Senden Sie es an die Zielanwendung: Word, Excel, Acrobat, Internet Explorer, HTML-Editoren,WordPerfect, StarOce usw.
Speichern Sie es in einem der gängigsten Ausgabeformate wie HTML, TXT, RTF, PDF, Word, Excel usw. und
Önen Sie automatisch die Anwendung der entsprechenden Datei, um das Dokument mithilfe der Option zum Önen nach dem Speichern zu bearbeiten.
oder Senden Sie das erkannte Dokument per E-Mail, und stellen Sie es anderen Personen direkt zur Verfügung!
Geben Sie das Layout des ursprünglichen Dokuments wieder. Bei Auswahl der Option zur Wiedergabe des Quelldokuments steht der Modus "Flowing Text™" und
die Funktion "Spalten statt Rahmen anwenden" zur bequemeren Bearbeitung des Dokuments zurVerfügung.
3. Klicken Sie zur Verarbeitung des Dokuments auf "Erkennen und Speichern".
Rechte Symbolleiste: Optimieren der Erkennung mit Smart Buttons
Die rechte Symbolleiste ermöglicht eine einfache und bequeme Bearbeitung des Dokumentbilds.
Entwerfen Sie Ihre eigenen Text-, Tabellen- und Grakbereiche, oder lassen Sie die Seite automatisch durch Readiris Pro analysieren.
Entwerfen Sie bei Bedarf auch die Barcode- und Handschrift-Zonen. (Readiris erkennt diese Zonen nicht automatisch. Ziehen Sie daher mit Hilfe der Schaltächen
für Barcode und Handschrift einen Rahmen um die Zonen.).
Denieren Sie Ihren Erkennungsbereich über die Schaltäche "Außenseite Zone ignorieren".
Richten Sie die Seite gerade aus, oder drehen Sie sie.
Wählen und sortieren Sie die gewünschtenTextbereiche.
Vergrößern Sie das Dokument, um die Details anzuzeigen.
Sie haben Ihre Dokumente schnell, bequem und exakt in ein elektronisches Format übertragen. Sie können sie nun
in Ihrer bevorzugten Anwendung bearbeiten, sie zur späterenVerwendung speichern oder sie Familienmitgliedern,
Freunden oder Kollegen zur Verfügung stellen.
Manuelle Konguration
1. Starten Sie Readiris Pro.
2. Klicken Sie auf den Readiris Pro-Begrüßungsbildschirm.
3. Klicken Sie im Assistenten-Fenster auf "Abbrechen".
4. Klicken Sie auf die Schaltäche zum "Denieren der Scanner-Einstellungen" und
anschließend auf die Schaltäche für das "Scanner-Modell".
5. Wählen Sie Ihren Scanner aus der Liste aus. Falls Ihr Scanner nicht aufgeführt ist,
wählen Sie ein anderes Twain-Modell aus, und klicken Sie auf "OK".
6. Klicken Sie auf die Option zur Konguration, überprüfen Sie die Quelle, klicken Sie
auf "Auswählen" und anschließend auf "OK".
7. Wählen Sie die Auösung des Scanners (empfohlene Auösung: 300 dpi) und das
Format für das Dokument (Format: A4/Letter – nicht bei Twain-Scannern
verfügbar).
8. Wählen Sie Graustufen oder Farbe für ein optimales Ergebnis.
9. Klicken Sie auf das Symbol "Sprache des Dokumentes bestimmen", um die
Dokumentsprache zu bestimmen.
10. Klicken Sie auf das Symbol "Format", um das Ausgabeformat Ihres Dokuments
auszuwählen.
11. Legen Sie Ihr Dokument in den Scanner, und klicken Sie auf das Symbol "Scannen".
Mit dem Assistenten
1. Starten Sie Readiris Pro.
2. Klicken Sie auf den Readiris Pro-Begrüßungsbildschirm.
3. Klicken Sie im OCR Assistenten auf "Weiter".
4. Wählen Sie Ihren Scanner aus der Liste aus. Falls Ihr Scanner nicht aufgeführt
ist, wählen Sie ein anderes Twain-Modell aus, und klicken Sie auf "OK".
5. Klicken Sie auf die Option zur Konguration, überprüfen Sie die Quelle,
klicken Sie auf "Auswählen" und anschließend auf "OK".
6. Wählen Sie die Auösung des Scanners (empfohlene Auösung: 300 dpi) und
das Format für das Dokument (Format: A4/Letter – nicht bei Twain-Scannern
verfügbar).
7. Wählen Sie Graustufen oder Farbe für ein optimales Ergebnis.
8. Klicken Sie auf "Weiter".
9. Wählen Sie die Sprache Ihres Dokuments, und klicken Sie auf "Weiter".
10. Falls erforderlich, klicken Sie auf "Ändern", um das Ausgabeformat
auszuwählen. Klicken Sie dann auf "Weiter".
11. Legen Sie das Dokument in Ihren Scanner, und klicken Sie auf "Starten".
Die ersten Schritte mit Readiris Pro
1] Schließen Sie Ihren Scanner an Ihren PC an, und installieren Sie die mit dem Scanner mitgelieferte Software.
Testen Sie Ihren Scanner, und setzen Sie sich mit dem Hersteller in Verbindung, falls Probleme auftreten.
2] Legen Sie die automatisch startende Readiris CD-ROM in Ihren PC ein.
Geben Sie Ihren Benutzernamen UND den Namen Ihrer Firma ein ("privat" bei privater Nutzung).
Wählen Sie einen Setuptyp aus: Vollständig (empfohlen).
Klicken Sie auf “Installieren”.
Klicken Sie auf “Fertigstellen”.
Geben Sie Ihre Seriennummer ein (siehe Aufkleber auf der DVD Box) und danach registrieren Sie diese.
Wenn Sie Readiris zum ersten Mal verwenden, müssen Sie Ihren Scanner kongurieren(mit dem Assistenten oder manuell).
J060213
Other manuals for READIRIS PRO 12

1

This manual suits for next models

1

Other I.R.I.S. Software manuals

I.R.I.S. IRISSCAN 2 User manual

I.R.I.S.

I.R.I.S. IRISSCAN 2 User manual

I.R.I.S. IRISPOWERSCAN 9 User manual

I.R.I.S.

I.R.I.S. IRISPOWERSCAN 9 User manual

I.R.I.S. ANYWHERE 2 Instruction manual

I.R.I.S.

I.R.I.S. ANYWHERE 2 Instruction manual

I.R.I.S. IRISPOWERSCAN 9 User manual

I.R.I.S.

I.R.I.S. IRISPOWERSCAN 9 User manual

I.R.I.S. IRISPOWERSCAN 9.0 User manual

I.R.I.S.

I.R.I.S. IRISPOWERSCAN 9.0 User manual

I.R.I.S. CARDIRIS 5 User manual

I.R.I.S.

I.R.I.S. CARDIRIS 5 User manual

I.R.I.S. POWERSCAN 9.5 User manual

I.R.I.S.

I.R.I.S. POWERSCAN 9.5 User manual

I.R.I.S. READIRIS PRO 12 User manual

I.R.I.S.

I.R.I.S. READIRIS PRO 12 User manual

Popular Software manuals by other brands

NUANCE DRAGON NATURALLYSPEAKING 8-QUICK Quick reference card

NUANCE

NUANCE DRAGON NATURALLYSPEAKING 8-QUICK Quick reference card

Olympus CAMEDIA Master 4.3/Pro operating instructions

Olympus

Olympus CAMEDIA Master 4.3/Pro operating instructions

VegaStream Vega Gateway Engineer's guide

VegaStream

VegaStream Vega Gateway Engineer's guide

Campbell PONDVIEW 4.0 instruction manual

Campbell

Campbell PONDVIEW 4.0 instruction manual

Altigen SuperQ manual

Altigen

Altigen SuperQ manual

Kenwood DNX7140 - Navigation System With DVD player instruction manual

Kenwood

Kenwood DNX7140 - Navigation System With DVD player instruction manual

Acer AO533 Driver installation

Acer

Acer AO533 Driver installation

Samsung CLX 6210FX - Color Laser - All-in-One Admin guide

Samsung

Samsung CLX 6210FX - Color Laser - All-in-One Admin guide

Brocade Communications Systems StoreFabric SN6500B manual

Brocade Communications Systems

Brocade Communications Systems StoreFabric SN6500B manual

Lexmark Apps Administrator's guide

Lexmark

Lexmark Apps Administrator's guide

Red Hat CLUSTER SUITE FOR ENTERPRISE LINUX 5.1 Configuration guide

Red Hat

Red Hat CLUSTER SUITE FOR ENTERPRISE LINUX 5.1 Configuration guide

Grundig L.E.D. manual

Grundig

Grundig L.E.D. manual

Lexicon OMEGA Software installation guide

Lexicon

Lexicon OMEGA Software installation guide

AVIRA PREMIUM SECURITY SUITE - FIREWALL 07-2009 manual

AVIRA

AVIRA PREMIUM SECURITY SUITE - FIREWALL 07-2009 manual

Emulex EMULEX Reference manual

Emulex

Emulex EMULEX Reference manual

Panasonic Avccam AG-AF100A Series manual

Panasonic

Panasonic Avccam AG-AF100A Series manual

Native Instruments Monark manual 

Native Instruments

Native Instruments Monark manual 

Omron WS02-NCTC1-E - 07-2001 Specifications

Omron

Omron WS02-NCTC1-E - 07-2001 Specifications

manuals.online logo
manuals.online logoBrands
  • About & Mission
  • Contact us
  • Privacy Policy
  • Terms and Conditions

Copyright 2025 Manuals.Online. All Rights Reserved.