manuals.online logo
Brands
  1. Home
  2. •
  3. Brands
  4. •
  5. Iceking
  6. •
  7. Refrigerator
  8. •
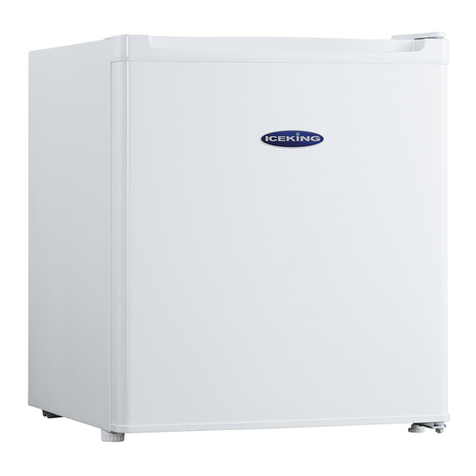
  9. Iceking ZL253WE User manual

Iceking ZL253WE User manual

ZL253WE
FZĂƚĞĚϱϱĐŵtŝĚĞdĂůů>ĂƌĚĞƌ&ƌŝĚŐĞ
tŚŝƚĞ
Installation And Operating Manual

  
Please read these instructions carefully before attempting to install or use this appliance.
It is advisable to keep these instructions in a safe place for future reference.
Introduction
Thank you for choosing this ICEKING appliance. It has been designed to
give years of trouble-free use provided it is installed and maintained
correctly.
Please read these instructions carefully before installing or using your appliance.
It is advisable to keep your purchase and installation receipts with these
instructions in a safe place for future reference. Included is some important safety
information in addition to guidelines and recommendations that will enable you to
take full advantage of all the functions available.
This quality appliance has been tested and certified to meet all applicable UK
electrical and safety standards.
This appliance must be installed and connected in accordance with
current regulations by a qualified electrician.
After unpacking the appliance ensure that there is no visible damage. If the
appliance has been damaged during transit, do not use it, contact your retailer
immediately.
Your  year Manufacturer's guarantee
THIS DOES NOT AFFECT YOUR STATUTORY RIGHTS.
Your new Iceking appliance carries a free guarantee which protects you against
the cost of repairs during the first 2 months from date of purchase provided
that: Any claim is accompanied by evidence of the model reference, model serial
number and proof of purchase, such as a Sales Receipt, showing that the
appliance was purchased within the  months prior to the date of claim.
What is not covered under the Guarantee:
•Any appliance not correctly installed and operated in accordance with the
manufacturer's instructions.
•Any appliance that is used for anything other than domestic purposes.
•Any defect caused by accident, misuse, unauthorized modification or
inexpert repair.
•Cost of Call-out where a fault cannot be found with the appliance.
•Cost of Call-out for work covering routine maintenance, such as, but not
exclusively, cleaning of filters or defrosting.
•Cost of Call-out for work required to correct the alignment of doors
following door reversal procedures carried out by you.
•Use of the appliance by anyone other than the Householder.
•Use in any commercial environment.
•Consumable items, such as, but not exclusively, fuses in plugs, bulbs and
breakable items which require routine replacement.
•Repair costs incurred that have not been authorised by Repairtech and/or
carried out by a non-approved Repairtech engineer.
YOUR GUARANTEE IS VALID ONLY IN THE UK.
To Register your Appliance simply complete the card in your appliance pack and return it with a
stamp affixed or Alternatively you can Register online at www.repairtechuk.com
SERVICE HELP-LINE
Should your appliance develop a fault, please call the
 Service Helpline on:
01527-888133
Please remember to have all your product details available, including the model number, serial
number, date of purchase and your retailer’s details before registering a fault.
Your service call cannot progress without this information.
Safety information
In the interest of your safety and to ensure the correct use, before
installing and first using the appliance, read this user manual carefully,
including its hints and warnings. To avoid unnecessary mistakes and
accidents, it is important to ensure that all people using the appliance
are thoroughly familiar with its operation and safety features. Save
these instructions and make sure that they remain with the appliance if
it is moved or sold, so that everyone using it through its life will be
properly informed on appliance use and safety.
For the safety of life and property keep the precautions of these user’s
instructions as the manufacturer is not responsible for damages
caused by omission.
Children and vulnerable people safety
yThis appliance can be used by children aged from 8 years and above
and persons with reduced physical, sensory or mental capabilities or
lack of experience and knowledge if they have been given super
vision or instruction concerning use of the appliance in a safe way
and understand the hazards involved.
yChildren aged from 3 to 8 years are allowed to load and unload this
appliance.
yChildren should be supervised to ensure that they do not play with
the appliance.
yCleaning and user maintenance shall not be made by children unless
they are aged from 8 years and above and supervised.
yKeep all packaging well away from children. There is risk of
suffocation.
yIf you are discarding the appliance pull the plug out of the socket, cut
the connection cable (as close to the appliance as you can) and
remove the door to prevent playing children to suffer electric shock or
to close themselves into it.
yIf this appliance featuring magnetic door seals is to replace an older
appliance having a spring lock (latch) on the door or lid, be sure to
make that spring lack unusable before you discard the old appliance.
This will prevent it from becoming a death trap for a child.
General safety
WARNING! Keep ventilation openings, in the appliance enclosure
or in the built-in structure, clear of obstruction.
WARNING! Do not use mechanical devices or other means to
accelerate the defrosting process, other than those recommended
by the manufacturer.
WARNING! Do not damage the refrigerant circuit.
1
Safety information
WARNING! Do not use other electrical appliances (such as ice
cream makers) inside of refrigerating appliances, unless they are
approved for this purpose by the manufacture.
WARNING! Do not touch the light bulb if it has been on for a long
period of time because it could be very hot.1 )
yDo not store explosive substances such as aerosol cans with a
flammable propellant in this appliance.
y
The refrigerant isobutane (R-600a) is contained within the refrigerant
circuit of the appliance, a natural gas with a high level of
environmental compatibility, which is nevertheless flammable.
y
During transportation and installation of the appliance, be certain
that none of the components of the refrigerant circuit become
damaged.
- avoid open flames and sources of ignition
- thoroughly ventilate the room in which the appliance is situated
y
It is dangerous to alter the specifications or modify this product in any
way. Any damage to the cord may cause a short circuit, fire and/or
electric shock.
y
This appliance is intended to be used in household and similar
applications such as
- staff kitchen areas in shops, offices and other working
environments;
- farm houses and by clients in hotels, motels and other residential
type environments;
- bed and breakfast type environments;
- catering and similar non-retail applications.
WARNING! Any electrical components(plug, power cord,
compressor and etc.) must be replaced by a certified service agent
or qualified service personnel.
WARNING! The light bulb supplied with this appliance is a “special
use lamp bulb” usable only with the appliance supplied. This “special
use lamp” is not usable for domestic lighting.1 )
1) If there is a light in the compartment.
WARNING! When positioning the appliance, ensure the supply
cord is not trapped or damaged.
WARNING! Do not locate multiple portable socket-outlets or
portable power suppliers at the rear of the appliance.
2
Safety information
1) If there is a freezer compartment.
2) If there is a fresh-food storage compartment.
yPower cord must not be lengthened.
yMake sure that the power plug is not squashed or damaged by the
back of the appliance. A squashed or damaged power plug may
overheat and cause a fire.
yMake sure that you can come to the mains plug of the appliance.
yDo not pull the mains cable.
yIf the power plug socket is loose, do not insert the power plug. There
is a risk of electric shock or fire.
yYou must not operate the appliance without the lamp.
yThis appliance is heavy. Care should be taken when moving it.
yDo not remove nor touch items from the freezer compartment if you
hands are damp/wet, as this could cause skin abrasions or
frost/freezer burns.
yAvoid prolonged exposure of the appliance to direct sunlight.
'DLO\XVH
yDo not put hot on the plastic parts in the appliance.
yDo not place food products directly against the rear wall.
yFrozen food must not be re-frozen once it has been thawed out.1 )
yStore pre-packed frozen food in accordance with the frozen food
manufacture,
s instructions.1 )
yAppliance,
s manufactures storage recommendations should be
strictly adhered to. Refer to relevant instructions.
yDo not place carbonated of fizzy drinks in the freezer compartment as
it creates pressure on the container, which may cause it to explode,
resulting in damage to the appliance.1 )
yIce lollies can cause frost burns if consumed straight from the
appliance.1 )
To avoid contamination of food, please respect the following
instructions
yOpening the door for long periods can cause a significant increase of
the temperature in the compartments of the appliance.
yClean regularly surfaces that can come in contact with food and
accessible drainage systems.
yClean water tanks if they have not been used for 48h; flush the water
system connected to a water supply if water has not been drawn for 5
days.
yStore raw meat and fish in suitable containers in the refrigerator, so
that it is not in contact with or drip onto other food.
yTwo-star frozen-food compartments (if they are presented in the
appliance) are suitable for storing pre-frozen food, storing or making
ice-cream and making ice cubes.
3
Safety information
1) If there is a freezer compartment.
2) If there is a fresh-food storage compartment.
&DUHDQGFOHDQLQJ

y
Before maintenance, switch off the appliance and disconnect the
mains plug from the mains socket.
y
Do not clean the appliance with metal objects.
y
Do not use sharp objects to remove frost from the appliance. Use a
plastic scraper.1 )
y
Regularly examine the drain in the refrigerator for defrosted water. If
necessary, clean the drain. If the drain is blocked, water will collect in
the bottom of the appliance.2 )
Installation
Important! For electrical connection carefully follow the instructions
given in specific paragraphs.
y
Unpack the appliance and check if there are damages on it. Do not
connect the appliance if it is damaged. Report possible damages
immediately to the place you bought it. In that case retain packing.
y
It is advisable to wait at least four hours before connecting the
appliance to allow the oil to flow back in the compressor.
y
Adequate air circulation should be around the appliance, lacking this
leads to overheating. To achieve sufficient ventilation, follow the
instructions relevant to installation.
y
Wherever possible the spacers of the product should be against a
wall to avoid touching or catching warm parts (compressor, con-
denser) to prevent possible burn.
y
The appliance must not be located close to radiators or cookers.
y
Make sure that the mains plug is accessible after the installation of
the appliance.
6HUYLFH
y
Any electrical work required to do the servicing of the appliance
should be carried out by a qualified electrician or competent person.
y
This product must be serviced by an authorized Service Center, and
only genuine spare parts must be used.
(QHUJ\VDYLQJ
y
Don’t put hot food in the appliance;
y
Don’t pack food close together as this prevents air circulating;
y
Make sure food don’t touch the back of the compartment(s);
yOne-, two- and three -star compartments (if they are presented in the
appliance) are not suitable for the freezing of fresh food.
yIf the appliance is left empty for long periods, switch off, defrost,
clean, dry and leave the door open to prevent mount developing
within the appliance.
4
Safety information
y
If electricity goes off, don’t open the door(s);
y
Don’t open the door(s) frequently;
y
Don’t keep the door(s) open for too long time;
y
Don’t set the thermostat on exceeding cold temperatures;
y
Some accessories, such as drawers, can be removed to get larger
storage volume and lower energy consumption.
(QYLURQPHQW3URWHFWLRQ
This appliance does not contain gasses which could damage the
ozone layer, in either its refrigerant circuit or insulation materials. The
appliance shall not be discarded together with the urban refuse and
rubbish. The insulation foam contains flammable gases: the appliance
shall be disposed according to the appliance regulations to obtain from
your local authorities. Avoid damaging the cooling unit, especially the
heat exchanger. The materials used on this appliance marked by the
symbol are recyclable.
The symbol on the product or on its packaging indicates that this
product may not be treated as household waste. Instead it
should be taken to the appropriate collection point for the
recycling of electrical and electronic equipment. By ensuring this
product is disposed of correctly, you will help prevent potential
negative consequences for the environment and human health, which
could otherwise be caused by inappropriate waste handling of this
product. For more detailed information about recycling of this product,
please contact your local council, your household waste disposal
service or the shop where you purchased the product.
Packaging materials
The materials with the symbol are recyclable. Dispose the packaging in
a suitable collection container to recycle it.
Disposal of the appliance
1. Disconnect the mains plug from the mains socket.
2. Cut off the mains cable and discard it.
WARNING! During using, service and disposal the
appliance, please pay attention to symbol as left side, which is
located on rear of appliance (rear panel or compressor.
It’s risk of fire warning symbol. There are flammable materials in
refrigerant pipes and compressor.
Please be far away fire source during using, service and
disposal.
5
Description of the Appliance
1. Thermostat Control & Interior Light
2. Interior Glass Shelves (x 4)
3. Door Storage – Specific Areas for Bottles & Dairy Products
4. Salad Crisper Box with Glass Shelf
5. Levelling Feet
Please note that your appliance may be supplied with the door left or right
hand hinged. To reverse the door please refer to section 4.5.
(Picture for indicative purposes only, model supplied may differ).
2.
3.
4.
5.
1.
Cool Zone
Coldest Zone
6
CONTENTS:
Section 1. Installation
Section 2. Safety Advice
Section 3. Operating the Appliance
Section 4. Maintenance
7
Section 1. Installation
-IMPORTANT! This appliance must be left to stand in an upright position for
at least 4 hours before being switched on for the first time.
-Remove all packaging and securing tape from the appliance.
-Wash the interior of the appliance with luke warm water containing a small
amount of bicarbonate soda (5ml to 0.5 litres of water).
-Position the appliance in a dry atmosphere and out of direct sunlight.
-Do not position next to a cooker or other sources of heat, i.e. radiator.
-If positioned next to another fridge or freezer, leave a minimum gap of 2cm
between the appliances in order to avoid condensation.
-A clearance of 50mm should be left above the appliance. If this cannot be
achieved you should ensure a clearance of 25mm is maintained on each side
of the appliance.
-Please ensure that there is a small ‘air-gap’ between the condenser on the
rear of the appliance and the rear wall.
-Do not place or store heavy items on the top of this appliance.
-Ensure that the appliance is positioned on a firm flat floor.
-This appliance must be level. Adjust the level by screwing the adjustable feet
up or down (use your fingers or a suitable spanner).
-Ensure that the appliance is upright and both feet are in firm contact with the
floor so that the cabinet is stable.
-Connect the plug to an adjacent 13amp socket outlet and ensure that the
appliance is not standing on the supply cable.
-N.B. If you site this appliance in a garage, out-building or a cold room
where the ambient temperature may fall below 6 to 8 degrees C,
condensation may form on the outer cabinet and ‘pool’ under the
appliance. This is quite normal and does not indicate that there is a
fault with the appliance.
To prevent condensation building up on the outer cabinet ensure that
the ambient temperature is above 8 degrees C.
8
Section 2. Safety Advice
-Please read this booklet thoroughly before installing and switching on the
appliance. The manufacturer accepts no responsibility for incorrect
installation and usage.
-If this appliance is to replace an old refrigerator with a lock, as a safety
measure break or remove the lock and/or door before disposal.
-Your old appliances contain insulation gases and refrigerant that must be
disposed of correctly. Please ensure that the refrigerant circuit is not
damaged before the appliance is taken away for correct disposal in line with
current legislation. If there is any doubt contact your Local Authority for
instructions.
-This appliance may contain the refrigerant isobutene (R600a). This is a natural
gas with a high level of environmental compatibility; however, caution is required
as isobutene is a flammable gas. It is essential to ensure that refrigerant tubes
are not damaged during transportation and the installation of the appliance. In
the event that the refrigerant circuit is damaged, avoid naked flames or sources
of ignition and ventilate the room in which the appliance is situated.
-Do not damage the refrigerant circuit.
-Do not allow children to play with plastic bags – tear the bag(s) immediately
and ensure that they are placed in a dust-bin out of reach.
-The appliance is not intended for use by persons (including children) with
reduced physical, sensory or mental capabilities, or lack of experience
and knowledge, unless they have been given supervision or instruction
concerning the use of the appliance by a person responsible for their
safety. Children should be supervised to ensure that they do not play with
the appliance.
-If using an adaptor, this must be used in accordance with the manufacturers
instructions and ensure that the electrical circuit is not overloaded as this
could cause overheating.
-Do not twist or bend the cables, and keep them away from hot surfaces.
-Do not plug ın or unplug this appliance with wet hands.
-Following installation make sure that the power cable is not trapped
underneath the appliance.
-If the power supply cord is damaged, it must be replaced by the
manufacturer, it’s service agent or similarly qualified persons in order to
avoid a hazard.
9
Section 3. Operating the Appliance
3.1. Switching on the Appliance
-Allow the appliance to stand for a minimum of 4 hours after installation.
-Plug in the appliance and switch on at the mains supply.
-Set the thermostat control to the required setting as detailed in the
Temperature Control section (3.2.).
-Leave the appliance for approximately 4 hours for the correct temperature to
be reached.
3.2. Temperature Control
The temperature selector knob is located on the right hand wall of the inner cabinet
(see Description of the Appliance on page 3). Please note that a larder fridge does
not have an ice-box and will operate at a slightly higher temperature than a fridge
with an ice-box.
-Setting “0”: Unit Off
-Setting “1”: Unit On – Warmest Temperature
-Setting “3” to ”4”: Normal Operation (adequate for most situations)
-Setting “7”: Coldest Temperature
Important!
During high ambient temperatures e.g. on hot summer days, it may be necessary to
set the thermostat to the coldest setting (position 7). This may cause the
compressor to run continuously in order to maintain a low temperature in the
cabinet.
N.B. If you site this appliance in a garage, out-building or a cold room where
the ambient temperature may fall below 6 to 8 degrees C, condensation may
form on the outer cabinet and ‘pool’ under the appliance. This is quite normal
and does not indicate that there is a fault with the appliance.
To prevent condensation building up on the outer cabinet ensure that the
ambient temperature is above 8 degrees C.
3.3. Normal Operating Sounds
You may hear faint gurgling or bubbling sounds when the refrigerant is pumped to
the cooling system and through the coils or tubing at the rear of the appliance.
When the compressor is in operation you may hear a slight whirring sound or
pulsating noise. The thermostat controls the operation of the compressor, and you
may hear a slight click as it cycles in and out.
10
Section 4. Maintenance
Before any maintenance or cleaning work is carried out, DISCONNECT the
appliance from the ELECTRICITY supply.
4.1. Internal Cleaning
Clean the interior and accessories with warm water and bicarbonate of soda (5ml to
0.5 litre of water). Rinse and dry thoroughly. Do not use detergents, abrasive
powders, highly perfumed cleaning products, wax polishes or cleaning products
containing bleach or alcohol.
4.2. External Cleaning
Wash the outer cabinet with warm soapy water. Do NOT use abrasive products.
There may be sharp edges on the underside of the product, so care should be
taken when cleaning. Once or twice a year dust the rear of the appliance and the
compressor at the back of the appliance, with a brush or vacuum cleaner, as an
accumulation of dust will affect the performance of the appliance and cause
increased energy consumption.
4.3. When the appliance is not in use
When the appliance is not in use for long periods, remove the contents, disconnect
from the electricity supply and clean the appliance, leaving the door ajar until you
wish to use the appliance again.
4.4. Changing the Interior Light Bulb
-Switch off the power supply to the appliance
-Remove the light cover (squeeze/unclip from housing)
-Unscrew the bulb from the rear of the light unit.
-Replace the bulb with a suitable replacement (normally 10W but check the
wattage shown on the bulb).
-Refit the cover and switch the appliance back on.
11
3.4. Energy Saving Advice
•Do not install the appliance close to sources of heat, such as a cooker,
dishwasher or radiator.
•Locate the appliance in a cool well-ventilated room and make sure that
the air vents are clear.
•Try to avoid keeping the door open for a long time, warm air will enter the
cabinet and may cause a build up of ice as well as affecting the energy
consumption. Ensure there are no obstructions preventing the door from
closing properly.
•Ensure that the door seal is clean and there are no tears or splits.
•Keep the most perishable foods, (those with a short shelf-life, such as
cooked meats), in the coldest part of the fridge. The Salad Crisper Box is
the warmest part of your fridge and should be used for vegetables, salads
and fruits etc. (see Description of Appliance on Page 3).
•Do not overload the fridge: the cooling air that circulates to keep the
fridge cold gets blocked and pockets of warm air form.
•Do not put hot food into the fridge – let it cool down first.
3.5. In the Event of a Power Failure
If there is a power failure, keep the door closed. When the power has been
restored the appliance will start to operate but it may take some time to achieve the
pre-set operating temperature. Check the condition of your stored food items and
liquids.
12
 
Door or balconies of fridge
compartment Foods with natural preservatives, such as jams,
juices, drinks, condiments.
Do not store perishable foods.
Crisper drawer (salad drawer) Fruits, herbs and vegetables should be placed
separately in the crisper bin.
Do not store bananas, onions, potatoes, garlic in
the refrigerator.
Fridge shelf – bottom
Chiller (box/drawer)
Raw meat, poultry, fish (for short-term storage)
Fridge shelf – middle Dairy products, eggs
Fridge shelf – top Foods that do not need cooking, such as ready-to-eat
foods, deli meats, leftovers.
Freezer drawer(s)/shelf Foods for long-term storage.
Bottom drawer/shelf for raw meat, poultry, fish.
Middle drawer/shelf for frozen vegetables, chips.
Top drawer/shelf for ice cream, frozen fruit, frozen
baked goods.
13
4.5. Reversing the Door
The door opening can be reversed from “right hand hinged” to “left hand hinged” if
required. If your appliance is supplied “left hand hinged” simply reverse the
following procedure.
Warning!
When reversing the door, the appliance must not be connected to the mains.
Remove the plug from the mains beforehand.
•
Remove the top hinge cover
•
Lean the appliance back and prop it up securely at the front
•
Remove the top door hinge screws and remove the hinge bracket
•
Remove the door from the lower hinge
•
Now remove the lower hinge bracket and unscrew/remove the central hinge
pin. Turn the hinge over and refit the hinge pin as shown below
•
Secure the lower door hinge into place on the opposite side of the appliance
•
Now ensure both levelling feet are in place and secure
•
Now position the door onto the lower hinge bracket
•
Now refit the upper hinge bracket on the opposite side of the appliance
•
Do not fully tighten the screws until you have tested that the door closes
correctly and that the door seal is tight
•
Now secure all the screws
•
Refit the top hinge cover.
N.B. Service calls relating to door problems and/or cooling issues will be
chargeable if the fault is found to be due to an incorrect door
reversal procedure carried out by the consumer!
14
4.6. What to do if something goes wrong
There is no power to the appliance:
-Check there is not a power cut
-Check there is power to the electric socket/appliance
-Check the fuse in the plug (Must be 13 amp)
The compressor runs continuously:
-Is the door closed correctly?
-Have large quantities of food recently been added to the appliance? – if yes,
allow the interior temperature to recover
-Has the appliance door been opened frequently? – if yes, allow the interior
temperature to recover
The appliance is making a noise:
-Refer to Normal Operating Sounds, section 3.4.
-Ensure that the appliance has been installed correctly (see section 1).
YOUR GUARANTEE IS VALID ONLY IN THE UK.
To Register your Appliance simply complete the card in your appliance pack and return it with a
stamp affixed or Alternatively you can Register online at www.repairtechuk.com
SERVICE HELP-LINE
Should your appliance develop a fault, please call the
Repairtech Service Helpline on:
01527-888133
Please remember to have all your product details available, including the model number, serial
number, date of purchase and your retailer’s details before registering a fault.
Your service call cannot progress without this information.
15
Insurance
!
Any warranty provided with this product
does
not
cover
loss
of
!
fridge/freezer content
.
Any claim for loss, damage, costs or expenses of an indirect or consequential
nature including any economic loss or damage to foodstuffs or any other goods is
excluded. We recommend that you inspect your fridge/freezer regularly to check
that it is working correctly, losses can result from deterioration following
breakdown or accidental failure of the appliance, fuses, plugs or public electricity
supply, these can be covered by your standard home insurance or might require
extra cover. Check with your insurance provider.
Important Note:
This
appliance is
marked
according
to
the
European
directive
2002/96/EC
on
Waste
Electrical and
Electronic
Equipment
(WEEE).
By
ensuring
this
product
is
disposed
of
correctly,
you
will
help prevent
potential
negative
consequences
for
the
environment
and
human
health,
which
could
otherwise
be
caused
by
inappropriate
waste
handling
of
this
product.
The
symbol
on
the
product,
or
on
the
documents
accompanying
the
product,
the
Crossed
Out Wheelie
Bin,
indicates
that
this
appliance may
not
be
treated
as
household
waste. Instead
it
shall
be
handed
over
to
the
applicable
collection
point
for
the
recycling
of
electrical
and electronic
equipment.
Disposal
must
be
carried
out
in
accordance
with
local
environmental
regulations
for
waste
disposal.
For
more
detailed
information
about
treatment,
recovery
and
recycling
of
this product,
please
contact
your
local
authority,
your
household
waste
disposal
service
or
the
retailer
where
you purchased
the
product.
We
continuously
try
to
improve
our
products
for
the
benefit
of
our
customers.
For
this
reason
we
reserve
the
right
to
make
changes
to
any
product
at
any
time,
without
notice
Issue: 0
0
/  
CKICK-Q02-A

This manual suits for next models

2

Other Iceking Refrigerator manuals

Iceking FF218WE User manual

Iceking

Iceking FF218WE User manual

Iceking RL6150W.E User manual

Iceking

Iceking RL6150W.E User manual

Iceking RK554W.E User manual

Iceking

Iceking RK554W.E User manual

Iceking RL111WL User manual

Iceking

Iceking RL111WL User manual

Iceking TF41W.E User manual

Iceking

Iceking TF41W.E User manual

Iceking ZZ245WE User manual

Iceking

Iceking ZZ245WE User manual

Iceking RHL550WE User manual

Iceking

Iceking RHL550WE User manual

Iceking RK104WE User manual

Iceking

Iceking RK104WE User manual

Iceking IK20569SE User manual

Iceking

Iceking IK20569SE User manual

Iceking RL253AP2 User manual

Iceking

Iceking RL253AP2 User manual

Iceking TK50W.E User manual

Iceking

Iceking TK50W.E User manual

Iceking IKBU201AP User manual

Iceking

Iceking IKBU201AP User manual

Iceking ICE-RZ110W.E User manual

Iceking

Iceking ICE-RZ110W.E User manual

Iceking RL550W.E User manual

Iceking

Iceking RL550W.E User manual

Iceking RL252AP User manual

Iceking

Iceking RL252AP User manual

Iceking IK5558WE User manual

Iceking

Iceking IK5558WE User manual

Iceking RL340WE User manual

Iceking

Iceking RL340WE User manual

Iceking RK198WE User manual

Iceking

Iceking RK198WE User manual

Iceking RL254W.E User manual

Iceking

Iceking RL254W.E User manual

Iceking RK113WE User manual

Iceking

Iceking RK113WE User manual

Iceking RL114W.E User manual

Iceking

Iceking RL114W.E User manual

Iceking BI707FF.E User manual

Iceking

Iceking BI707FF.E User manual

Iceking BU100.E User manual

Iceking

Iceking BU100.E User manual

Iceking RL104AP User manual

Iceking

Iceking RL104AP User manual

Popular Refrigerator manuals by other brands

Dometic miniBar RH 429LDAG operating instructions

Dometic

Dometic miniBar RH 429LDAG operating instructions

Amica BC271.3 instruction manual

Amica

Amica BC271.3 instruction manual

Randell RANFG IC-2 Specifications

Randell

Randell RANFG IC-2 Specifications

Goddess RSD 0124 GW8F instruction manual

Goddess

Goddess RSD 0124 GW8F instruction manual

Amana AS2628HEKB13 Use & care guide

Amana

Amana AS2628HEKB13 Use & care guide

Hanseatic HKGK18560BNFI user manual

Hanseatic

Hanseatic HKGK18560BNFI user manual

Thermador T24UR820DS installation guide

Thermador

Thermador T24UR820DS installation guide

Frigidaire FSC23R5DW7 installation guide

Frigidaire

Frigidaire FSC23R5DW7 installation guide

Samsung RT38 user manual

Samsung

Samsung RT38 user manual

Dometic DSF 900 Installation and operating manual

Dometic

Dometic DSF 900 Installation and operating manual

GE 19 M manual

GE

GE 19 M manual

Pkm SBS444EIXWD instruction manual

Pkm

Pkm SBS444EIXWD instruction manual

U-Line U-2245RINT-00B User guide & service manual

U-Line

U-Line U-2245RINT-00B User guide & service manual

Koolatron SUPER-KOOL 45 KCR-45 owner's manual

Koolatron

Koolatron SUPER-KOOL 45 KCR-45 owner's manual

cecotec bolero COOLMARKET TT BI 138 E instruction manual

cecotec

cecotec bolero COOLMARKET TT BI 138 E instruction manual

Beko KG515 user manual

Beko

Beko KG515 user manual

Pkm KS 120.4 A+ EB Instructions for use

Pkm

Pkm KS 120.4 A+ EB Instructions for use

Russell Hobbs RHBI55LF122-N instruction manual

Russell Hobbs

Russell Hobbs RHBI55LF122-N instruction manual

manuals.online logo
manuals.online logoBrands
  • About & Mission
  • Contact us
  • Privacy Policy
  • Terms and Conditions

Copyright 2025 Manuals.Online. All Rights Reserved.