ICF PYLA User manual

PYLA CHAIR
MESH - TECH - SOFT
PURE AND SIMPLE SEATING


2
Chairs and small armchairs for offices with video terminals, executive offices and meeting
rooms, according to UNI-EN1335 type B.
The chair has a pneumatic height adjustment system, it swivels and can be reclined using
the tilting mechanism. Only authorized personnel can replace or repair the pneumatic
system. The chair is equipped with soft castors for hard surfaces, marble, different types of
wood and tile in general. If requested, hard castors can be substituted.
Sedie e poltroncine per uffici operativi con videoterminale, direzionali, sale riunioni,
conformi alla normativa UNI-EN1335 tipologia B.
La sedia è dotata di regolazione in altezza mediante colonna a gas, è girevole, è inclinabile
mediante meccanismo di oscillazione. Solo personale addestrato può sostituire o riparare
colonne a gas. La sedia è dotata di ruote con battistrada morbido per superfici dure, marmi,
legni, piastrelle in genere. A scelta possono essere montate ruote con battistrada duro.
INTRODUCTION
INTRODUZIONE
LOW BACK HIGH BACK

3
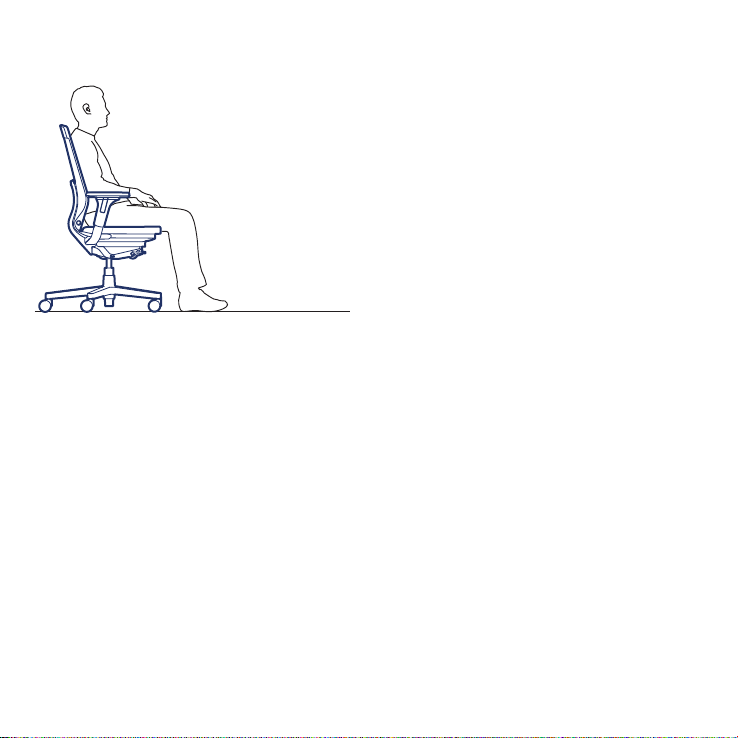
Chaises et fauteuils pour bureaux d’opérateur avec terminaux à écran, bureaux de
direction, salles de réunion, conformes à la norme UNI-EN1335, type B.
La chaise est équipée d’une colonne à gaz permettant de la régler en hauteur. Elle est
pivotante et inclinable grâce à un mécanisme d’oscillation. La colonne à gaz ne peut être
remplacée ou réparée que par du personnel qualifié. La chaise standard est dotée de
roulettes à bande molle pour les surfaces dures comme le marbre, le bois et le carrelage en
général. Des roulettes à bande dure peuvent être montées sur demande.
Sillas y sillones para oficinas operativas con ordenadores, despachos de dirección, salas
de reuniones, según la normativa UNI-EN1335 clase B.
La silla está dotada de un sistema de regulación en altura, mediante columna neumática, es
giratoria, se puede inclinar mediante un mecanismo de basculación. Sólo el personal
cualificado puede encargarse de sustituir o reparar las columnas neumáticas. La silla de
serie está dotada de ruedas con banda de rodadura blanda para superficies duras,
mármoles, maderas, baldosas en general. Según sus preferencias, se pueden montar
ruedas con banda de rodadura dura.
Bürostuhl und-Sessel für Computerarbeitsplätze in Basic-und Hochwertiger Ausführung,
Besprechungssessel, gemäss UNI-EN1335 Typ B.
Der Sessel ist hoehenverstellbar mittels Gasfeder, drehbar, hat eine neigbare
Rueckenlehne durch in die Sesselstruktur eingearbeitete Mechanik. Nur ausgebildetes
Personal darf den Gaslift reparieren oder austauschen. Der Sessel ist standardmaessig mit
Rollen mit einer weichen Laufflaeche ausgestattet, geeignet fuer harte Oberflaechen,
Marmor, Holz, Fliessen und Aehnliches. Auf Anfrage koennen Rollen mit harter Laufflaeche
geliefert werden.
INTRODUCTION | INTRODUCCIÓN | EINFÜHRUNG

4
CORRECT SEATING POSTURE
POSTURA CORRETTA
›Feet should be flat on the floor.
›The foot should be at approximately a 90° angle with the calf.
›The calf should be nearly vertical.
›The calf should be at approximately a 90° angle with the thigh.
›The thigh should be almost horizontal.
›The thigh should be approximately a 90° angle with the upper body.
›The upper body should be kept straight.
›La pianta del piede poggia sul pavimento.
›Il piede forma un angolo approssimativo di 90° con il polpaccio.
›Il polpaccio è approssimativamente verticale.
›Il polpaccio forma un angolo approssimativamente di 90° con la coscia.
›La coscia è per lo più orizzontale.
›La coscia forma un angolo approssimativamente di 90° con il tronco.
›Il tronco è eretto.

5
›La plante des pieds est posée sur le sol.
›Le pied forme un angle d’environ 90° avec le mollet.
›Le mollet est à-peu-près à la verticale.
›Le mollet forme un angle d’environ 90° avec la cuisse.
›La cuisse est essentiellement à l’horizontale.
›La cuisse forme un angle d’environ 90° avec le buste.
›Le buste est bien droit.
›La planta del pie apoyada al suelo.
›El pie forma un ángulo de unos 90° con la pantorrilla.
›La pantorrilla queda aproximadamente vertical.
›La pantorrilla forma un ángulo de unos 90° con el muslo.
›El muslo queda más o menos horizontal.
›El muslo forma un ángulo de unos 90° con el tronco.
›El tronco queda erguido.
›Ganzer Fuss ruht auf dem Fussboden.
›Fuss und Wade bilden einen Winkel von ca. 90°.
›Die Wade ist annaehernd senkrecht.
›Wade und Schenkel bilden einen Winkel von ca. 90°.
›Der Schenkel ist annaehernd horizontal.
›Schenkel und Oberkoerper bilden einen Winkel von ca. 90°.
›Der Oberkoerper ist senkrecht.
POSTURE CORRECTE | POSTURA CORRECTA | KORREKTE HALTUNG

6
The lever on the right side enables the height adjustment of the seat. The range of the adjustable
mechanism is 14 cm.
› To rise: while lifting your weight off chair, pull lever up.
› To lower: while seated, pull lever up.
Adjust the seat height in such a way that the elbows form an angle of 90° with the underarms,
while resting on the desk. The knees should be bent in the same angle, feet flat on the floor, in
order to improve the blood flow.
La leva, situata sul lato destro, permette la regolazione in altezza della seduta. L’escursione del
meccanismo di regolazione è di 14 cm.
› Per aumentare l’altezza del sedile: tirare la leva verso l’alto sollevando il proprio peso dalla
sedia.
› Per diminuire l’altezza del sedile: rimanendo seduti, tirare la leva verso l’alto.
Regolare l’altezza della seduta in modo che i gomiti, appoggiati sulla scrivania, formino un
angolo di 90°. Lo stesso angolo dovrebbe essere formato dalle ginocchia con i piedi ben
appoggiati per terra, al fine di migliorare la circolazione del sangue.
1
SEAT HEIGHT
ALTEZZA SEDUTA

7
HAUTEUR DE L’ASSISE | ALTURA DE LA SILLA | EINSTELLUNG DER SITZHÖHE
Le levier, situé sur le côté droit, permet de régler la hauteur de l’assise. L’amplitude du
mécanisme de réglage est de 14 cm.
›Pour augmenter la hauteur de l’assise: tirer le levier vers le haut en se levant de la chaise.
›Pour diminuer la hauteur de l’assise: tout en restant assis, tirer le levier vers le haut.
Régler la hauteur de l’assise pour que les coudes, posés sur le bureau, forment un angle de
90°. Le même angle devrait être formé par les genoux avec les pieds bien posés par terre, afin
d’améliorer la circulation du sang.
La palanca, situada en el lado derecho, permite la regulación en altura de la silla. La extensión
del mecanismo de regulación es de 14 cm.
›Para aumentar la altura de la silla: tirar la palanca hacia arriba sobrellevando el propio peso
de la silla.
›Para disminuir la altura del asiento: permaneciendo sentados, tirar de la palanca hacia
arriba.
Regular la altura del asiento de manera que los codos, apoyados en el escritorio, formen un
ángulo de 90°. El mismo ángulo debería estar formado por las rodillas y los pies bien apoyados
al suelo, para mejorar la circulación de la sangre.
Mit dem Hebel auf der rechten Seite reguliert man die Sitzhöhe. Der Mechanismus kann
innerhalb einer Spanne von 14 cm reguliert werden.
›Zum Höherstellen der Sitzfläche: den Hebel nach oben ziehen und aufstehen, um den Stuhl
zu entlasten.
›Zum Tieferstellen der Sitzfläche: im Sitzen den Hebel nach oben ziehen.
Die Sitzhöhe so einstellen, dass die auf den Schreibtisch gestützten Ellenbogen einen Winkel
von 90° bilden. Den gleichen Winkel sollten auch die Kniegelenke bilden, wobei die Füße gut
auf dem Boden stehen sollten, um den Blutkreislauf zu verbessern.

8
The handle, on the right side, enables the spring tension adjustment of the tilting mechanism.
› To increase tension: turn the sleeve clockwise.
› To decrease tension: turn the sleeve anti-clockwise.
Increase tilt tension provides more stability and back support while reclining.
La manovella, situata sul lato destro, permette la regolazione dell’intensità del meccanismo di
oscillazione.
› Per aumentare la tensione: ruotare il manicotto in senso orario.
› Per diminuire la tensione: ruotare il manicotto in senso antiorario.
Una maggior tensione del meccanismo di oscillazione fornisce maggiore stabilità e supporto
alla schiena quando si oscilla.
2
TILTING TENSION
TENSIONE DEL TILT

9
La manivelle, située sur le côté droit, permet de régler l’intensité du mécanisme basculant.
›Pour augmenter la tension: tourner le manchon dans le sens des aiguilles d’une montre.
›Pour diminuer la tension: tourner le manchon dans le sens inverse des aiguilles d’une
montre.
Une plus forte tension du mécanisme d’oscillation offre une meilleure stabilité et un meilleur
appui au dos quand on se bascule.
La manivela, situada en el lado derecho, permite la regulación de la intensidad del mecanismo
basculante.
›Para aumentar la tensión: girar el manguito en sentido horario.
›Para disminuir la tensión: girar el manguito en sentido anti-horario.
Una mayor tensión del mecanismo basculante proporciona una mayor estabilidad y sostén a
la espalda cuando se mueve.
Mit dem Hebel auf der rechten Seite reguliert man die Stärke des Schwingmechanismus.
›Zur Verstärkung der Spannung: die Muffe im Uhrzeigersinn drehen.
›Zur Verminderung der Spannung: die Muffe gegen den Uhrzeigersinn drehen.
Eine höhere Spannung des Schwingmechanismus bietet dem Rücken mehr Stabilität und
Abstützung beim Zurücklehnen.
TENSION DE BASCULEMENT | TENSIÓN DE LA BASCULACIÓN EN MOVIMIENTO | TILT-SPANNUNG
EINSTELLEN

10
The lever on the left side of the seat enables the user to lock/unlock the tilting mechanism of Pyla
in different positions.
›To lock the tilting: reached the desired position, push the lever up.
›To unlock the tilting: pull lever down.
For extra ergonomic comfort, we suggest you avoid locking the tilting mechanism.
La leva posta sulla sinistra, permette di bloccare/sbloccare il meccanismo di oscillazione della
Pyla in differenti posizioni.
›Per bloccare l’oscillazione: raggiunta l’inclinazione desiderata, sollevare la leva.
›Per sbloccare l’oscillazione: abbassare la leva.
Al fine di una maggiore ergonomia, si consiglia di non bloccare l’oscillazione dello schienale
per garantire un costante supporto alla schiena.
3
TILT LOCK
BLOCCO DEL TILT

11
BLOCAGE DU BASCULEMENT | BLOQUEO DE LA BASCULACIÓN EN MOVIMIENTO | TILT BLOCKIEREN
Le levier, situé sur la gauche, permet de bloquer/débloquer le mécanisme basculant de Pyla
dans différentes positions.
›Pour bloquer le basculement: une fois l’inclinaison souhaitée trouvée, soulever le levier.
›Pour débloquer le basculement: baisser le levier.
Pour une meilleure ergonomie, il est conseillé de ne pas bloquer le basculement du dossier,
afin de garantir un appui constant au dos.
La palanca situada a la izquierda, permite bloquear/desbloquear el mecanismo basculante de
Pyla en diferentes posiciones.
›Para bloquear la basculación: una vez alcanzada la inclinación deseada, levantar la palanca.
›Para desbloquear la basculación: bajar la palanca.
Para conseguir una mayor ergonomía, se aconseja no bloquear la basculación del respaldo
para garantizar un constante sostén a la espalda.
Mit dem Hebel auf der linken Seite kann der Schwingmechanismus von Pyla in verschiedenen
Positionen blockiert werden.
›Zur Blockierung des Schwingmechanismus: die gewünschte Neigung einstellen und den
Hebel nach oben drücken.
›Zum Lösen des Schwingmechanismus: den Hebel nach unten drücken.
Um eine bessere Ergonomie zu erreichen, wird empfohlen, die Schwingung der Rücklehne
nicht zu blockieren, um eine dauerhafte Abstützung des Rückens zu gewährleisten.

12
The seat depth adjustment allows the chair to adapt to any users’ build. It correctly supports the
user’s thighs and it allows an even distribution of the body weight. This guarantees a comfortable
back support even after prolonged use.
› To adjust: pull out the lever located under the seat on the left until you have reached your
required position.
Maximum range is 6 cm.
La regolazione della profondità del sedile consente di adeguare la seduta alle diverse
corporature dell’utilizzatore, supportando correttamente le cosce e favorendo la distribuzione
del peso del corpo in modo uniforme, in modo da garantire un adeguato sostegno per la schiena
anche dopo un prolungato utilizzo.
› Per la regolazione: tirare verso l’esterno la leva, situata a sinistra sotto il sedile, fino al
raggiungimento della posizione desiderata.
L’escursione massima è di 6 cm.
4
SEAT DEPTH ADJUSTMENT
REGOLAZIONE PROFONDITA’ SEDILE

13
RÉGLAGE PROFONDEUR ASSISE | REGULACIÓN PROFUNDIDAD ASIENTO | SITZTIEFEN-REGELUNG
Le réglage en profondeur de l’assise permet de s’adapter aux différentes morphologies des
utilisateurs, en supportant correctement les cuisses et en partageant le poids d'une façon
uniforme, afin de garantir le meilleur soutien du dos même après une utilisation prolongée.
›Pour le réglage : tirer la poignée, située à gauche en dessous de l’assise, vers l’extérieur,
jusqu’à la position souhaitée.
La variation est de 6 cm. maxi.
La regulación de la profundidad del asiento permite la adaptación a las diferentes complexiones
del usuario, soportando correctamente el peso de las piernas y favoreciendo la distribuición del
peso del cuerpo de manera uniforme, para garantizar el apoyo adecuado en la espalda incluso
después de un uso prolongado.
›Para la regulación: tirar hacia fuera la palanca, situada en el lado izquierdo debajo del asiento,
hasta llegar a la postura deseada.
La regulación máxima es de 6 cm.
Die Sitztiefen-Regelung erlaubt eine Anpassung an jede Körpergröße, sowohl die Schenkel
werden unterstützt als auch das Körpergewicht verteilt. Dies garantiert eine komfortable
Rückenunterstützung, selbst nach langem Sitzen.
›Für Einstellung: den links unter dem Sitz befindlichen Hebel einfach bis zu Ihrer gewünschten
Position ziehen.
Maximaler Bereich beträgt 6 cm

14
The lumbar support enables to improve the support of the vertebral column, in particular of the
3rd and 4th lumbar vertebra which present the major forward bending. The element automatically
increases the shell tension. Usually the lumbar support is positioned just above belt line.
› PYLA TECH | To adjust height: while seated, turn the knobs with both hands positioned on the
sides of the chair. Raise or lower the lumbar support until you have reached the desired position.
› PYLA MESH - PYLA SOFT | To adjust height: raise or lower the knob at the rear of the backrest
until you have reached the required position of the lumbar support.
Il supporto lombare consente di migliorare il sostegno della colonna vertebrale, in particolare
della 3a e 4a vertebra lombare che presenta la maggior curvatura in avanti. L’elemento aumenta
automaticamente la tensione del telo. In genere il supporto lombare viene posizionato all’altezza
dei reni.
› PYLA TECH | Per regolare l’altezza: rimanendo seduti, ruotare con entrambe le mani le due
manopole situate lateralmente. Sollevare o abbassare il supporto lombare fino a raggiungere
la posizione desiderata.
› PYLA MESH - PYLA SOFT | Per regolare l’altezza: sollevare o abbassare il pomolo sul retro
dello schienale fino a raggiungere la posizione desiderata del supporto lombare.
5
LUMBAR SUPPORT
SUPPORTO LOMBARE
PYLA TECH PYLA MESH - PYLA SOFT

15
SOUTIEN LOMBAIRE | SOPORTE LUMBAR | LORDOSENSTÜTZE
Le soutien lombaire permet d'améliorer le soutien de la colonne vertébrale, en particulier de la
3ème et 4ème vertèbres lombaires qui présentent la plus grande courbure en avant. L’élément aug
mente automatiquement la tension de la toile. En général, l’appui lombaire est positionné à la
hauteur des reins.
›PYLA TECH | Pour régler la hauteur: tout en restant assis, tourner avec les deux mains les
deux poignées situées sur les côtés. Le soulever ou le baisser de manière à trouver la position
désirée.
›PYLA MESH - PYLA SOFT | Pour régler la hauteur: soulever ou baisser la poignée sur la partie
arrière du dossier jusqu’à la position souhaitée pour le support lombaire.
El soporte lumbar permite mejorar el sostén de la columna vertebral, en especial de la 3ª y 4ª
vértebra lumbar que presenta la mayor curvatura hacia adelante. El elemento aumenta
automáticamente la tensión de la lona. En general el soporte lumbar se coloca a la altura de los
riñones.
›PYLA TECH | Para regular la altura: permaneciendo sentados, girar con ambas manos las dos
manivelas situadas a los lados del respaldo. Levantarlo y bajarlo hasta alcanzar la posición
deseada.
›PYLA MESH - PYLA SOFT | Para regular la altura: subir o bajar la rueda en la parte trasera
del respaldo hasta alcanzar la posición deseada del soporte lumbar.
Dank der Lordosenstütze kann die Haltung der Wirbelsäule verbessert werden, insbesondere die
des 3. und 4. Lendenwirbels, die am meisten nach vorn geneigt sind. Das Element erhöht
automatisch die Spannung des Gewebes. Normalerweise wird die Lendenstütze auf Höhe der
Nieren eingestellt.
›PYLA TECH | Zum Verstellen der Höhe: im Sitzen, drehen Sie es mit beiden Händen die beiden
Knöpfe an der Seite. Hochheben oder niedriger machen um zu die gewünschte Position
erreichen.
›PYLA MESH - PYLA SOFT | Zum Verstellen der Höhe: heben oder senken Sie den Knopf auf
der Rückseite der Rückenlehne, bis zu einer gewünschten Position der Lordosenstütze zu
erreichen.

16
Height, dept and inclination adjustment enable to adapt the position of 4D armrest according to
the user’s body dimensions and personal preferences.
› To raise armrest: press the button and raise the armrest till the required height.
› To adjust the armrest in depth and inclination: move the armrest forwards/backwards and
right/left till the required position.
La regolazione in altezza, in larghezza ed inclinazione consente di adattare la posizione dei
braccioli 4D secondo le dimensioni corporee dell’utilizzatore e le sue preferenze personali.
› Per alzare i braccioli: tenere premuto il bottone e sollevare il bracciolo fino al raggiungimento
dell’altezza desiderata.
› Per regolare i braccioli in profondità e inclinazione: muovere il poggiabraccio in
avanti/indietro e a destra/sinistra sino al raggiungimento della posizione desiderata.
6
4D ARMREST ADJUSTMENT
REGOLAZIONE BRACCIOLO 4D

17
RÉGLAGE DE L’ACCOUDOIR 4D | REGULACIÓN DEL REPOSABRAZOS 4D | EINSTELLUNG DER ARMLEHNE 4D
Le réglage en hauteur, en largeur et de l’inclinaison permet d’adapter la position des accoudoirs
4D en fonction des dimensions corporelles de l’utilisateur et de ses préférences personnelles.
›Pour lever les accoudoirs: tenir le bouton enfoncé et soulever l’accoudoir jusqu’à atteindre la
hauteur souhaitée.
›Pour régler la profondeur et l'inclinaison des accoudoirs: déplacer l’appuie-bras en
avant/arrière et à droite/gauche jusqu’à atteindre la position souhaitée.
La regulación de la altura, la anchura y la inclinación permite adaptar la posición de los
reposabrazos 4D según el tamaño del cuerpo del usuario y de sus preferencias personales.
›Para subir los reposabrazos: mantener apretado el botón y levantar el reposabrazos hasta
alcanzar la altura deseada.
›Para regular la profundidad y la inclinación de los reposabrazos: mover el reposabrazos
hacia adelante/atrás y a derecha/izquierda hasta alcanzar la posición deseada.
Je nach Körpergröße des Benutzers und nach persönlichem Bedarf können Höhe, Breite und
Neigung der Armlehnen 4D verstellt werden.
›Zum Höherstellen der Armlehnen: die Taste gedrückt halten und die Armlehne bis zur
gewünschten Höhe anheben.
›Zum Einstellen der Tiefe und der Neigung der Armlehnen: die Armlehne nach vorn/hinten
und rechts/links bewegen, bis die gewünschte Position erreicht ist.

18
CARE AND MAINTENANCE
Regularly following maintenance and cleaning instructions, the characteristics of materials and products
will last longer.
Fabric / 3D Mesh
For normal maintenance and cleaning, use often the vacuum cleaner with the appropriate part for fabric,
and if necessary, cover the part with a soft cloth.
For a deeper cleaning use a dry detergent for fabrics. Do not use anything petroleum based.
Do not brush fabric and do not use vacuum cleaner with rotating brushes which could permanently
damage the fabric causing pilling problems or change fabric appearance. Do not apply water or liquid
solutions. To make fabric wet could cause permanent damages.
Sotega
Clean with a dampened and soapy cloth and rinse with water. Do not use solvents, bleach or chemical
cleanings or polishing sprays.
Leather
ICF leather is strictly tested before being worked. We only select leather having the best features of
waterproofing and resistance to rubbing, stains, spots and ageing. Besides its elegant and natural aspect,
which is considered a long lasting quality, this leather, contrary to usual tanning systems, is aniline dyed,
a system which emphasises its resistance and makes it smooth and pleasant to touch. Vegetable tanning
and thickness, enhance the fullness and softness features. This extremely important feature makes the
leather evenly coloured so that, in case of scratches, the damage is very small.
Furthermore the leather is completely natural; this feature is stressed by the presence of wrinkles and
scars which characterise its quality and origin. Due to the natural features of the products, it is not
possible to guarantee the perfect matching of the colours between samples and available leather,
furthermore any sign or imperfection on the hide is a feature of the leather, showing its authenticity and
its natural beauty.
Our leather are not included in the category of the extinction animals mentioned by the convention of
Washington and are free of pentachlorophenol.
For normal maintenance and clearing it is suggest to dust regularly with a soft and dry cloth. Spots can be
cleaned with damp cloth and mild soap. Dry immediately after the treatment. Do not rub. Use a light
circular motion working toward the center of the stain.
Furthermore it is suggested to use "Leather soft cleaner" and "Leather protection cream".
Leather soft cleaner - is a mild water-based cleaner that can be used on every type of leather. It will clean
most soiling as well as water-based stains and unlike other detergents, doesn't contain solvents like
alcohol or turpentine. Use the equipped sponge in the "Leather master" kit.
Leather protection cream - provides excellent protection against oil-alcohol based stains as well as
helping to resist the effects of daily soiling, creating an invisible, breathable barrier. Apply it to a soft cloth
and wipe it on evenly, paying particular attention to high use areas. We recommend fully cleaning and
protecting your furniture 2-3 times per year.
Mesh
A fabric is considered dirty when it shows visible marks. These are usually the result of a progressive built
up of dirt or dust as a result of the normal use.
ICF mesh is highly dirt resistant for three reasons:
- thread covering, thanks to extrusion technique, is smooth and no porous look to the thread
- it is not susceptible to static electricity, so the mesh doesn't attract dust
- the protective thread covering was formulated to be resistant to humidity and to micro-organisms
growth.
For normal maintenance and cleaning:
- dust fabric with vacuum cleaner or with a soft brush
- wash with a soft brush or with a sponge using a solution of water and detergent
- rinse a lot with water
- let the mesh dry in open air
Aluminium
To preserve the brillant finish, regularly wipe with a soft clean cloth using only mild soap and water.
Plastic material
For normal maintenance and cleaning use a soft clean cloth with water and normal soap.
An updated list of colours and finishes is available on our web site www.icf-office.it
Table of contents
Other ICF Indoor Furnishing manuals
Popular Indoor Furnishing manuals by other brands

Arblu
Arblu TULIP COLONNA GIREVOLE Assembly instructions

Hafele
Hafele Bettlift Foldaway Bed Fittings 271.95.203 Installation instructio and drilling jig

Sauder
Sauder Boulevard Cafe 422420 manual

Newskill
Newskill EROS Instruction guide

KOBLE
KOBLE New England Care & instruction manual

SMITH SYSTEM
SMITH SYSTEM UXL Nest and Fold Table Assembly instructions