ICO VKP1010 User manual

This is what your apple peeler should contain:

CONGRATULATIONS!

You now own the world’s finest apple/potato peeler. Here are some instructions so you can get
the most out of your new ICO Peeler, save time, effort and money. With this device you can:
• Peel, core, and slice apples
• Slice and core apples without peeling
• Peel apples and potatoes
• Make shoestring potatoes
Whether it be on apples or potatoes, you may always chose to leave the peel on or take it off.
Warning!
- This device is meant for household use only, and is to be handled by adults.
- Close supervision is required when using peeler near children.
- Peeler has sharp blades and edges that can cause serious injury if used or handled improperly.
- Use caution at all times when assembling, adjusting or using this peeler.
- Please read the entire manual before using.
Assembly:
Following the diagram in this manual, first using a screw driver and attach the handle using the
included screw. Then, attach the fork to the end of the threaded rod.
Mounting to suitable surface:
Before each use, the peeler needs to be properly secured to a suitable surface that is secure and
will stay firmly in place during use. This is required for the peeler to work properly.
VKP1010 Suction Base Peeler: The suction mount must be used with a smooth non-porous
surface. When suction cup is used on the correct mounting surface it will stay firmly in place and
allow the peeler to be used without need to reattach. Surfaces such as wood, small or rough tile,
unsealed granite and textured surfaces or surfaces with crack may not be suitable.
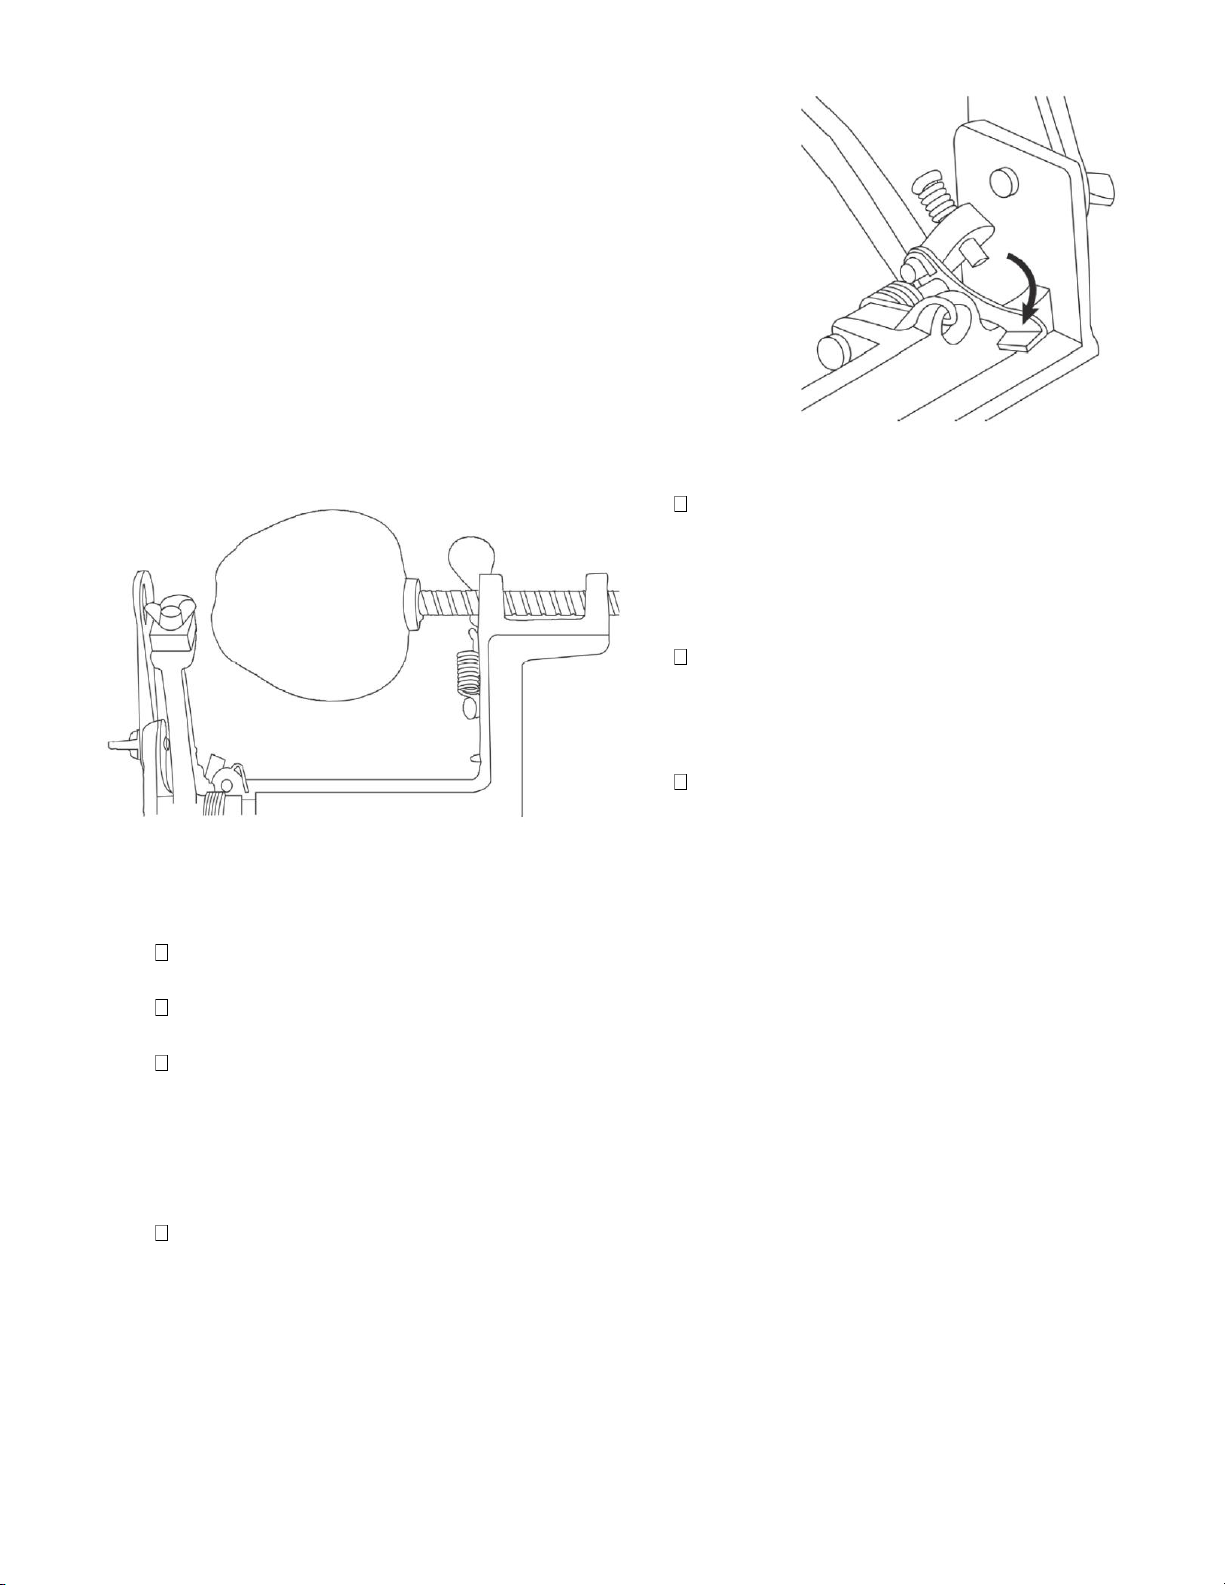
VKP1011 Clamp Base Peeler: Needs to be attached to a firm sturdy surface. The clamp base will
attach to any surface between 1/2-inch to 1-1/2 inches of thickness. Clamp should only be
tightened by hand. Do not use tools to tighten the clamp, it may damage the peeler and will void
your warranty.

Align the coring blade:
The fork should be able to pass through the center of the circular
blade without touching the sides (see correct alignment on the diagram)
The blade MUST be tightened firmly so it will not move out of
alignment during operation. * Use caution when adjusting, blade is sharp!
Align, adjust and secure blades:
Before using the peeler it is critical that the blades
are properly aligned, adjusted and secured.
Misaligned or unsecured blades will damage the peeler.
Test alignment:
To verify that your alignment is correct, press down on
the release lever and move the shaft forwards and
backwards. Watch that the fork passes through the center
of the coring blade without touching the sides of the
coring blade.
Adjust peeling blade:
The peeling blade works best when adjusted to about 1/8 inch past the head of the peeling arm.
To adjust the peeling blade, loosen the wing-nut 1/2 turn. The blade can be moved forwards to
remove more peel or backwards to remove less peel. Firmly tighten the wing-nut after
adjustment has been made. It may require a few tests and further blade adjustments before you
get the desired result. * Use caution when adjusting, blade is sharp!

Adjust peeling arm:
The peeling arm is adjusted to have approximately ¼ inch
clearance between the peeling blade and the widest part of the
fork. To adjust the position of the peeling arm, either tighten
or loosen the adjustable screw to achieve proper spacing. Turn
the screw clockwise to adjust it away from the fork or
counter-clockwise to adjust it closer to the fork.
Place apple on fork:
- Press the release lever as shown in the
illustration on bottom of page 3 and
pull the spiral shaft away from the coring
blade until the fork is as far away from the
coring blade as possible.
- Place apple on fork (stem end first) and
center the apple on the fork as well as
possible. Make sure the apple is pressed
firmly onto the fork.
- Turn the handle clockwise a few turns
to make sure the apple is centered on the
fork properly. Adjust if necessary.
To Peel, Slice and Core
- To peel turn the handle slowly clockwise to advance the apple into the blades. The peeling
blade will automatically adjust to the contour of the apple as it advances forward.
- To remove the core, push in the shaft lever and pull back on the handle. Core will be ejected
by the coring/slicing blade.
- When peeling is finished carefully remove the core from the fork. Press the release lever and
pull the shaft away from the coring blade and back to the starting position.
For Peeling Only
Peeling apples and potatoes is quick and easy with the ICO Peeler –no more scraping your hand
with a potato peeler.
- Loosen the wing nut at the end of the ICO Peeler. This will allow you to disengage the coring
slicing blade. Either move the coring slicing blade to the side, out of the path of the shaft, or
remove the blade completely

For Slicing and Coring without Peeling
When you wish to keep the peels on the fruit for flavor, texture, or color, pull the peeling arm
downward and engage the lock lever. The lever will keep the peeling blade clear of the fruit.
Tips and tricks
- Apples and potatoes that are firm, blemish free, and symmetrically shaped work best.
- For best results use only small to medium sized apples. Very large apples may have
undesirable results.
- When peeling potatoes US Grade #1 will give you the best results.
- Avoid using soft fruit. Soft fruit will have problems peeling and staying in place on the fork.
Making Shoestring Potatoes
You will need to use this technique and cut potatoes into shoestring thickness if you wish to
make hash browns for example. The ICO peeler makes cutting shoestring potatoes almost
effortless, which will save you from having to shave your potatoes on the grater.
1. Remove the coring/slicing blade from the path of the shaft.
2. Adjust the peeling blade as far toward the potato as possible so that it cuts deep into
the potato.
3. Turn handle and peel the potato with the deep cut.
4. When the full length of the potato has been peeled, lock back the peeling arm, pull
back the peeling shaft, and then release the peeling arm.
5. Repeat steps 3 and 4 until the peeling blade will no longer clear the 3-
prong fork.
Cleaning and care:
- When cleaning the entire unit hand washing in recommended.
- After washing dry thoroughly.
- Peeling and coring/slicing blade can be washed in a dishwasher.
- A drop of vegetable oil on the moving parts will insure smooth operation for next use.
Additional Support
See our website ICO.com for replacement parts, instructional videos and other helpful
information.

This manual suits for next models
1
Table of contents
Other ICO Kitchen Appliance manuals