Icon Q Boundless E1 User manual

E1
User Guide

2
Table of Contents
I. Introduction..............................................................................3
II. What’s Inside.............................................................................3
III. Unit at a Glance........................................................................4
IV. Usage...........................................................................................5
A. Functions..........................................................................5
B. Charging Your Device..................................................7
C. Pairing Devices ..............................................................7
D. Pairing Devices Using NFC.........................................8
E. Multi-Point Function....................................................9
F. Using the Cord Manager ......................................... 10
V. Safety Guidelines.................................................................. 11
VI. Specications......................................................................... 12
VII. Support.................................................................................... 12
VIII. Limited Warranty.................................................................. 12
FCC Statement ............................................................ 13

3
I. Introduction
Welcome to your new Boundless E1 earphones. We hope
you enjoy using them as much as we do.
Before using your product, we strongly encourage you to
fully read through this user guide. This guide will help you
operate your new wireless earphones with Bluetooth®.
Please also familiarize yourself with the Bluetooth func-
tions of your mobile phone and/or other devices. Last,
remember to follow the safety guidelines at all times.
For best performance, charge fully before rst use.
PAIRING ID: Boundless E1
II. What’s Inside
1 x Boundless E1
3 x Earphone tips (various sizes)
1 x Cord manager
1 x USB Cable (micro USB)
1 x User Guide

4
III. Unit at a Glance
1. Ear stabilizer
2. Ear tip (removable)
3. Microphone
4. Increase volume /
Next track
5. Multi-function button:
Pair / Play / Pause / Call
6. Decrease volume /
Previous track
7. Indicator light
8. NFC (see back)
9. Micro USB port

5
IV. Usage
A. FUNCTIONS
Function Key Action
Power On Press for 3 seconds when the device
is o. The indicator light will ash
blue slowly.
Power O Press for 3 seconds when the device is
on. The indicator light will turn o.
Play | Pause Press to play when the device is
paused, and press to pause when the
device is playing.
Next + / Press once to go to the next song.
Previous – / Press once to go to the previous song.
Increase
volume
+ / Press for 2 seconds to increase the
volume level.
Decrease
volume
– / Press for 2 seconds to decrease the
volume level.
Answer and
end calls
Press once to answer a call. Press
again to end the call.
Reject calls During an incoming call, press for 2
seconds to reject the call.

6
Function Key Action
Mute + /
– /
During an ongoing call, press both
buttons at the same time to mute.
Press again to unmute.
Transfer call
between
devices
During an ongoing call, press twice to
transfer a call between the earphones
and a mobile phone.
Handling
two calls at
once
To end the current call and answer an
incoming call, press once. To hold the
current call and answer an incoming
call, press twice. To switch between
two calls, press once.
Redial Press twice to redial the last number
called.
Voice com-
mands
– / Press to rst pause playback, then
press – / for 2 seconds. When the
tone sounds, speak the command.
Requires a phone that supports voice
commands (e.g., voice dialing).
Reset + /
– /
Press both buttons together until
the indicator light ashes blue and
red twice, then press until the
earphones turn o. All pairing records
will be deleted.
In addition to the status indicator light, your Boundless
E1 will use helpful audio indicators to let you know when
many of these functions are triggered.

7
B. CHARGING YOUR DEVICE
The Boundless E1 oers convenient charging via a micro
USB port. For best performance, you must charge the
product fully before using it for the rst time. When the
battery is low, the indicator light will ash red.
Steps:
1. Find the USB cable included with this product.
2. Connect the micro connector to the earphones’ micro
USB port.
3. Connect the other end to your computer’s USB port. Make
sure your computer is turned on. (You may also connect
the cable to a USB power adapter for charging with an
electrical outlet. )
IMPORTANT: Use only a USB power adapter with a rated
output that matches the input voltage of your device.
4. When charging, the status indicator will light red.
5. When fully charged, the indicator light will turn o.
C. PAIRING DEVICES
To use your Bluetooth® earphones, you must rst pair it
with a Bluetooth enabled device, such as a smartphone or a
computer. Once paired, your earphones will automatically
recognize and connect to the Bluetooth device in the future.

8
To pair your earphones:
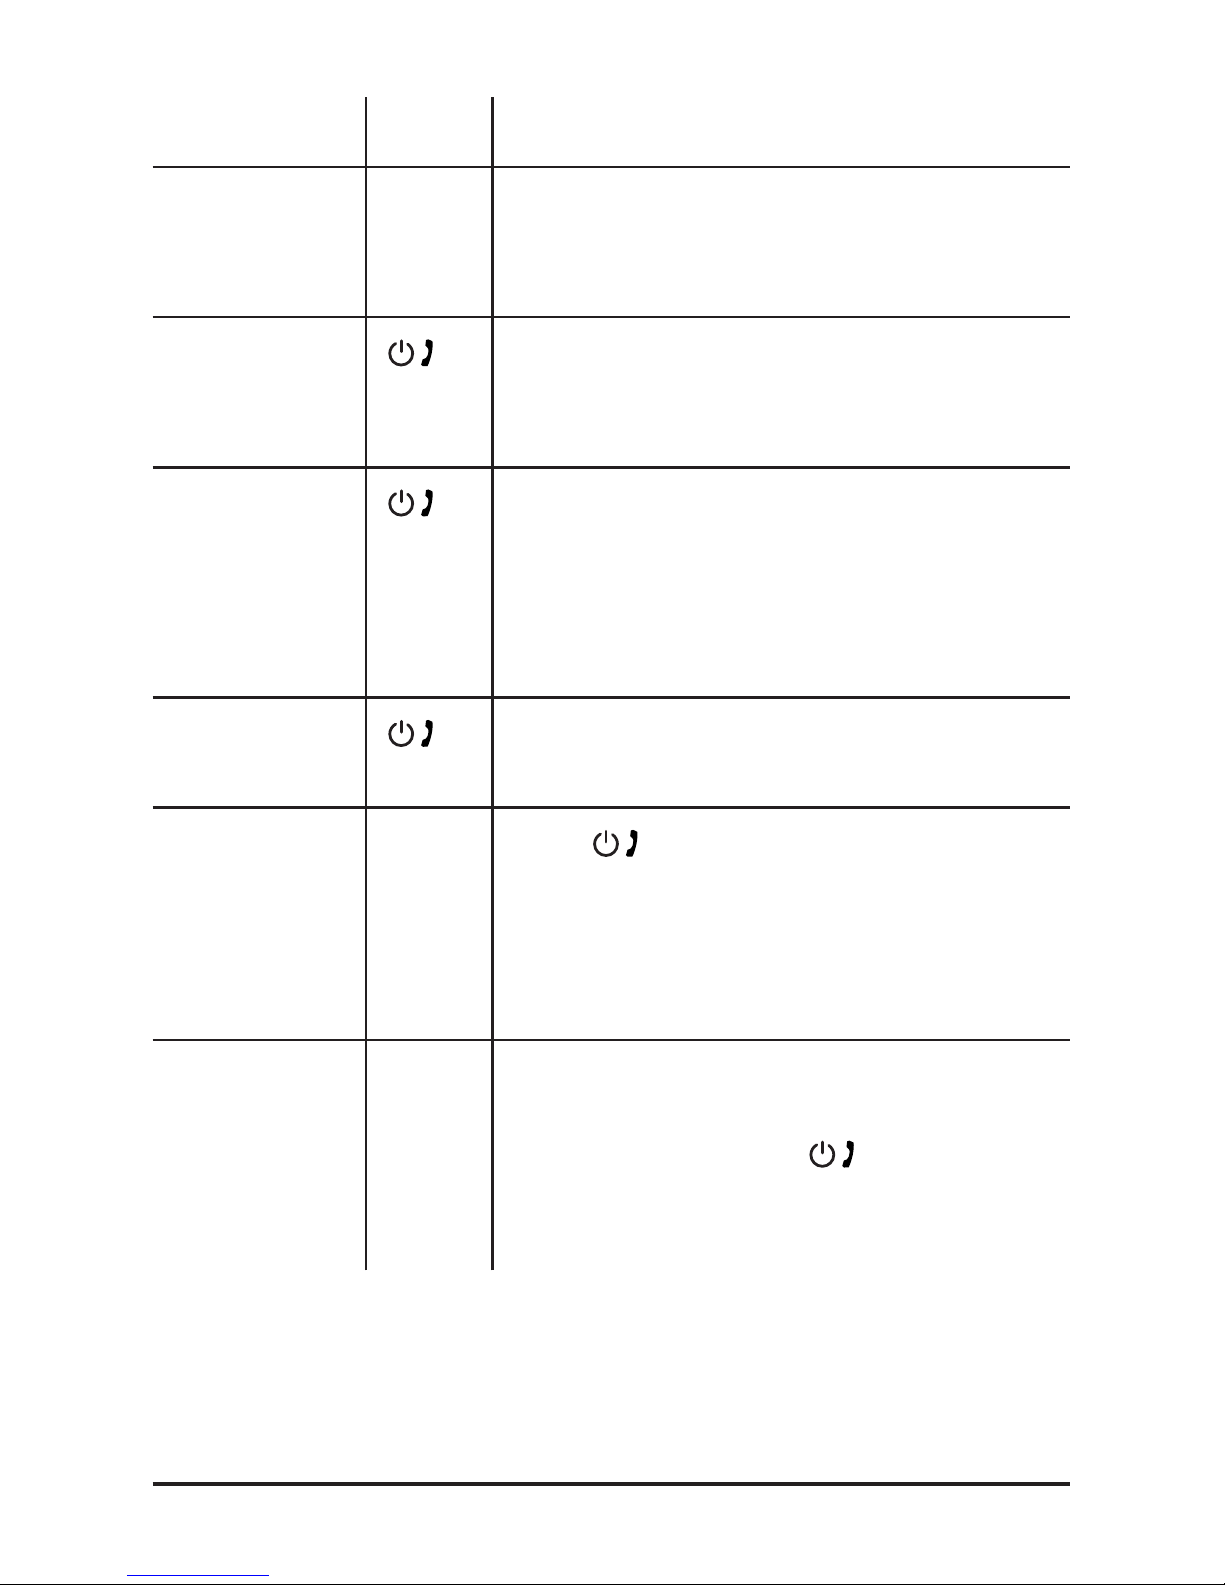
1. Make sure the earphones are charged. While the
earphones are turned o, press and hold until the
indicator light ashes red and blue. The earphones are
in pairing mode.
2. The indicator light by the power button will ash red
and blue rapidly. The earphones are in pairing mode.
3. Turn on your Bluetooth device and ensure its Bluetooth
function is activated. You will nd this option on most
devices under Settings or Options.
4. Follow your device’s instructions to search for Blue-
tooth devices. After a few seconds, your Bluetooth
device will list the earphones as a discovered device.
The earphones ID is “Boundless E1”.
5. Select the Boundless E1 to pair the two devices. If asked
for a passcode, enter“0000”.
6. Your earphones will say that they are paired and the
indicator light will ash blue intermittently. Your Blue-
tooth enabled device has been successfully connected.
D. PAIRING DEVICES USING NFC
If you have an NFC enabled device, you can take advan-
tage of the Boundless E1’s NFC function for easier and
quicker pairing. NFC lets you pair devices almost instanta-
neously by simply tapping them together.
1. Make sure the earphones are charged. Turn on the
earphones.

9
2. Turn on your device and ensure its Bluetooth and NFC
functions are active. You will nd these options on most
devices under Settings or Options.
3. Briey hold your device against the NFC sensor found
on the back of the earphone controls. Accept the
request when your device asks if you want to pair with
the Boundless E1 earphones.
4. Your earphones will say that they are paired and the
indicator light will ash blue intermittently. Your Blue-
tooth enabled device has been successfully connected.
E. MULTI-POINT FUNCTION
The multi-point function allows you to pair the earphones
to two devices at once.
Steps:
1. Follow the instructions in Part IV, Section C above to
pair your earphones with Phone 1.
2. Disable Bluetooth on Phone 1 and turn o the earphones.
3. Follow the instructions in Part IV, Section C above to
pair your earphones with Phone 2.
4. Re-enable Bluetooth on Phone 1. Find the Boundless E1
from the list of paired devices and select it.
Phone 1 and Phone 2 are now paired and connected to
the earphones.

10
F. USING THE CORD MANAGER
If you use the Boundless E1 often while running or other
physical activity, you may prefer a tighter t to keep the
cord o of your neck. Use the included cord manager to
customize the t of your earphones.
1. Determine the center point of the cable, then route the
cable through the manager as shown in the gure below.
2. For a tighter t, grasp the loop formed by the cable as
shown in the gure below and gently pull out in the
direction of the arrows. (The cable will shorten as the
loop gets bigger.)

11
3. For a looser t, grasp the cable as shown in the gure
below and gently pull out in the direction of the arrows.
(The cable will lengthen as the loop gets smaller.)
V. Safety Guidelines
Please follow the safety guidelines below at all times when
operating or caring for your device.
• Be wary of any edges, uneven surfaces, and metal parts,
including on accessories and product packaging, to
prevent any possible injury or damage.
• Listen to music at a proper volume to avoid hurting
your hearing and the earphones.
• Avoid storage in high temperatures, such as in a hot
vehicle or in direct sunlight.
• Do not expose the earphones or any of its supplied
parts to rain or other liquids.
• Do not drop or cause undue impact to the earphones.
• Do not modify, repair, or dismantle the product on
your own.
• Do not use any dilutant or volatile liquid to clean the
product.
• Do not use the product in a hazardous location.

12
VI. Specications
Model number: QBE710
Bluetooth version: v4.0
Range: 10 m (approx. 33 ft.)
Frequency range: 20 Hz – 20 KHz
Signal-to-noise: 95 dB ± 3 dB
Driver: 8mm
Sampling frequency: 8KHz - 48 KHz
Rating power: RMS 1 W
Battery: 3.7V, 80 mAH
Input Voltage: DC 5V ± 0.25V, 500mA
Playing mode: Bluetooth
Size (L x W x H): 1.8 x 0.4 x 0.3 in. (45 x 10 x 7.5 mm)
Weight: 0.6 oz (17 g)
VII. Support
If your device is not functioning correctly, please visit
www.GetIconQ.com/pages/productsupport for customer
support, and we will be more than happy to help you.
VIII. Limited Warranty
For more information and instructions on how to get war-
ranty service, visit www.GetIconQ.com/pages/warranty.

13
FCC Statement:
This device complies with Part 15 of the FCC Rules. Operation is subject to the
following two conditions:
(1) This device may not cause harmful interference, and
(2) This device must accept any interference received, including interference
that may cause undesired operation.
Note: This equipment has been tested and found to comply with the limits for
Class B digital devices, pursuant to Part 15 of the FCC rules. These limits are
designed to provide reasonable protection against harmful interference in a
residential installation. This equipment generates, uses and can radiate radio fre-
quency energy and, if not installed and used in accordance with the instructions,
may cause harmful interference to radio communications. However, there is no
guarantee that interference will not occur in a particular installation. If this equip-
ment does cause harmful interference to radio or television reception, which can
be determined by turning the equipment o and on, the user is encouraged to
try to correct the interference by one or more of the following measures:
• Reorient or relocate the receiving antenna.
• Increase the separation between the equipment and receiver.
• Connect the equipment into an outlet on a circuit dierent from that to
which the receiver is connected.
• Consult the dealer or an experienced radio/TV technician for help.
Use of shielded cable is required to comply with Class B limits in Subpart
B of Part 15 of the FCC rules. Do not make any changes or modications to
the equipment unless otherwise specied in the manual. If such changes or
modications should be made, you could be required to stop operation of the
equipment.
QDID: 37024
With all the choices out there, thanks for choosing us.
Find out more at: www.GetIconQ.com
/MyIconQ @MyIconQ
©2014 Icon Q Corporation
1225 Franklin Avenue, Suite 325 Garden City, NY 11530

Table of contents
Other Icon Q Headphones manuals