ICON P1-M User manual

User manual
The future of DAW controllers has arrived.
Welcome to the revolution!
Presenting the shining star of mid-sized MIDI DAW control
surfaces – the P1-M, featuring a 16-panel, programmable digital
touch screen, multiple simultaneous DAW
control, clear and bright
LED channel meters, highly advanced software, easy plug-in control
and intuitive,
intelligent design. Extendable, reliable and adaptable
and now taking center-stage; the P1-M!

Important Safety Instructions
1. Read this manual thoroughly before using this unit.
2. Keep this manual for future reference.
3. Take notice of and comply with all warnings included in the user's manual or indicated on the
appliance.
4. Follow all instructions included in this manual.
5. Do not expose this unit to rain or moisture. Avoid having water or other liquids spilled on this
unit.
6. When cleaning the cabinet or other parts of this appliance, use only a dry or slightly damp soft
cloth.
7. Do not block any ventilation openings or interfere with the proper ventilation of this unit. Install
in accordance with the manufacturer's instructions.
8. Do not use or store near any heat sources such as radiators, heat registers, stoves, or other heat-
producing appliances.
9. Do not interfere with plugs in any way. Do not open the unit. ALWAYS consult an
electrician for any proposed electrical work and NEVER attempt any remedial work yourself.
10. Protect the power cord from being walked on or otherwise damaged by items placed on or
against them. Particular attention should be given to the plugs, receptacles, and the point where
the cord exits the appliance.
11. To avoid the risk of electrical shock, do not touch any exposed wiring while the unit is in
operation.
12. Only use attachments/accessories specified by the manufacturer.
13. Unplug this unit and all connected electrical equipment during lightning storms or when left
unused for a long period of time.
14. Refer all servicing to qualified service personnel. Servicing is required when the appliance has
been damaged in any way or fails to operate normally.
WARNING: To reduce the risk of fire or electric shock, do not expose this unit to rain or moisture
The lightning ash with an arrowhead
symbol within an equilateral triangle is
intended to alert the user to the presence
of uninsulated hazardous voltage within
the device's enclosure, which may be of
sucient magnitude to induce a risk of
electric shock to persons.
The exclamation point within an equilateral
triangle is intended to alert the user to
the presence of important operating and
maintenance (servicing) instructions in the
literature accompanying the device.

3
Contents
Introduction........................................................................... 4
What's in the package? ........................................................ 4
Register your ICON Pro Audio product to your personal
account................................................................................. 5
Features Pt. 1....................................................................... 6
Features Pt.2........................................................................ 7
Top Panel Layout.................................................................. 9
Rear Panel Layout ............................................................. 14
Getting Started with the P1-M ............................................ 15
How to Allocate DAWs to the DAW buttons in the iMAP .... 16
Launching the P1-M in Every Day Use............................... 20
Installing iMapTM for the Mac ............................................. 21
Installing iMapTM for Windows............................................. 24
The iMAPTM......................................................................... 26
Other Functions in iMapTM .................................................. 34
Firmware upgrade .............................................................. 35
Ableton Live ....................................................................... 38
Audition............................................................................... 39
Bitwig.................................................................................. 40
Cakewalk ........................................................................... 41
Cubase/Nuendo ................................................................. 43
Digital Performer 11............................................................ 44
FL Studio ........................................................................... 45
Logic Pro ............................................................................ 46
Luna.................................................................................... 47
Mixbus 32C ........................................................................ 48
Pro Tools............................................................................. 49
Reaper................................................................................ 50
Reason ............................................................................... 52
Samplitude ......................................................................... 53
Studio One.......................................................................... 54
Tracktion Waveform............................................................ 55
Hardware Connections....................................................... 56
Expanding your system ...................................................... 57
Specications ..................................................................... 59
Services.............................................................................. 60

4
Introduction
What's in the package?
●P1-M USB C - MIDI Controller x 1pc
●Quick Start Guide x 1
●USB C Cable x 1
●AC adaptor x 1
Firstly, congratulations on your purchase of the ICON Pro Audio P1-M MIDI DAW
controller! In these pages, you'll nd a detailed description of the features of the
P1-M and a full list of specications.
Please register the product on our website at the link below
www.iconproaudio.com/registration
As with most electronic devices, we strongly recommend you retain the original
packaging. In the unlikely event that the product is returned for servicing, the original
packaging (or reasonable equivalent) is required. With proper care and adequate air
circulation, your P1-M MIDI DAW controller will operate awlessly for many years to
come.
We trust that this product will provide years of excellent service and in the unlikely
event that your product does not perform to the highest standard, every eort will be
made to address the issue.

5
Register your ICON Pro Audio product to
your personal account
1. Check the serial number of your device
Please go to http://iconproaudio.com/registration or scan the QR code below.
Input your device’s serial number and the other information on the screen. Click
“Submit”.
A message will pop up showing your device information such as model name
and its serial number - Click “Register this device to my account”. If you see any
other message, please contact our after-sales service team
2. Log in to your personal account page for existing users or
sign up as a new user
Existing user: Please log into your personal user page by inputting your
user name and password.
New user: Please click “Sign Up” and ll in all the information.
3. Download all useful materials
All your registered devices under your account will show on the page. Each
product will be listed along with all its available les such as drivers, rmware,
user manuals in dierent languages and bundled software etc. for download.

6
Features Pt. 1
Many of the top mixing engineers and producers in the world are switching to mid-sized
DAW controllers from older, larger systems due to their convenience, size and increasing
functionality and reliability. The P1-M is set to make a very large impact in this market, as
it's never-before-seen level of functionality, combined with expandability and rock solid
reliability courtesy of the super stable Cortex-M7 @500 MHz ARM chip, provides a fresh,
new perspective on just what is achievable for a device of this size and price point. Existing
mid-sized DAW controller owners will also be drawn to the rich array of features available -
which some would describe as revolutionary! Because.....they are!
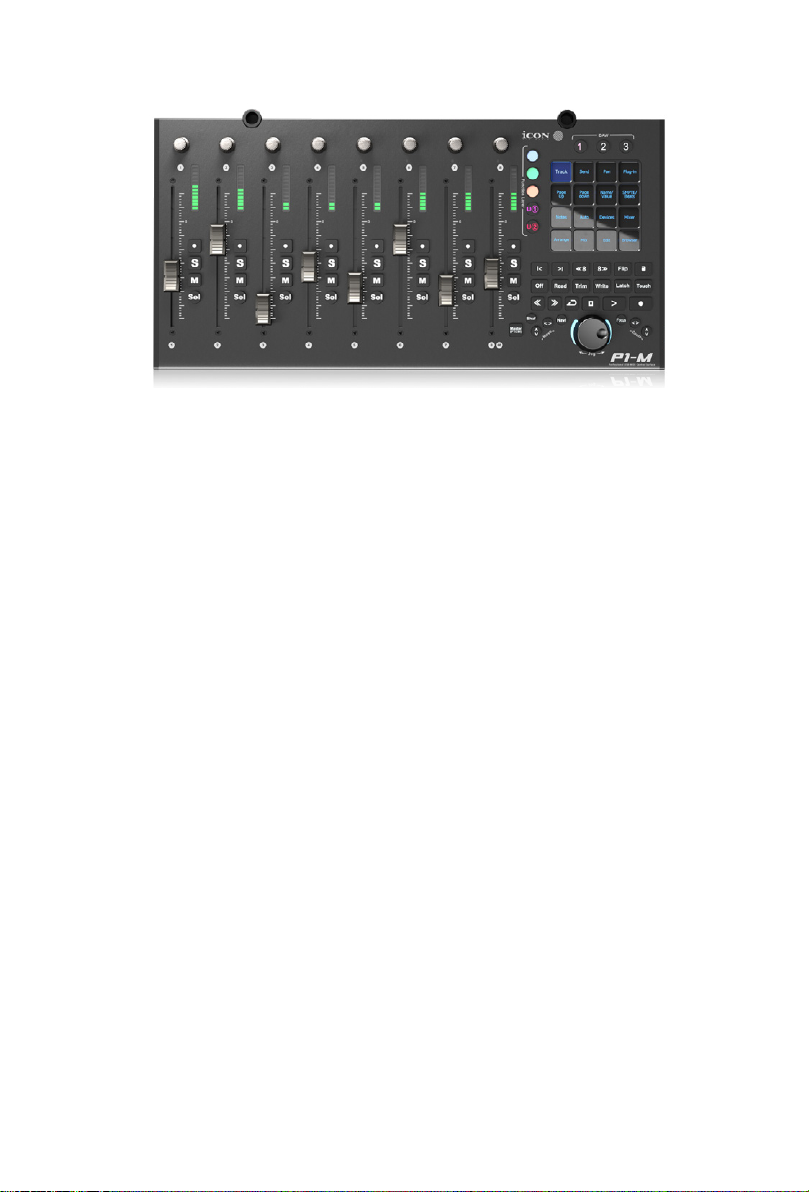
With ground-breaking functionality at your ngertips via a programmable 16 panel
electronic touchscreen, which features all the DAW functions you would ever need in a
recording, mixing or mastering session, the P1-M will soon become the beating heart of
any studio facility.
A total of 80 DAW functions can be assigned to this attractive and color-coded touchscreen
display - via 5 color modes, (blue, green, orange, purple and red), which can in turn be
adjusted (i.e. for EQ or a plug in) with the eight noiseless, smooth and rened rotary
encoders, which also function as PAN knobs.
With the P1-M, you can now connect up to three DAWs at the same time! If your main
project is in, say Pro Tools, but you need to quickly shoot back to Cubase - no problem!
The P1-M will allow this to happen literally at the touch of a button without any delay or
fuss, which means no interruption to you or your workow.
By pressing 'Focus', you can now select a plug-in parameter* with the mouse and adjust
values with the smooth, gliding action of the jog wheel. This feature is likely to become a
favorite of those who love hands-on, interactive control of their plug-ins and EQ (and who
doesn't?!).
*Every parameter may not be supported by every plug in
A new and highly advanced user-friendly generation of iMAPTM software supports the P1-
M. This allows you to completely re-arrange how DAW functions appear in the 5 color
modes of the 16 panel touchscreen (a total of 80 possible functions per DAW). Additionally,
users can map MIDI functions and keyboard hotkeys within the software. All in real time!
Beautifully clear and bright on-board LED monitoring reects accurate readings from the
DAW. These are designed with ergonomics in mind, in the upper area of the device so
that the meters are always visible.
With the optional D-4T display unit, the P1-M gives you complete control over your projects.
Expandable with the optional P1-X extender and its own D-4 display unit, the world really
is your oyster! This intelligent, intuitive and highly attractive unit will suit anyone's aesthetic
and feature requirements. The professional feel, design and functionality of the P1-M will
bring you closer to your music, improve your workow and heighten your experience.
Welcome to the revolution!

7
Features Pt.2
●8x touch-sensitive motorized faders with 12-bit resolution
●Programmable 4 inch, 16 panel digital touch screen display showing DAW functions
per 5 color modes - a potential total of 80 displayable and actionable functions per
DAW
●Organize DAW functions in the 16 panel touchscreen easily via 'drag and drop' in
the iMAPTM - changes made in real time
●Capability of connecting to 3 DAWs at one time via the DAW select buttons
●Extremely hardwearing, durable and versatile
●Precise, clear and attractive OLED meters
●Smooth-action jog wheel shuttle for fast search, scrub and control
●8 smooth action dual-function encoder knobs (Rotate and Enter)
●Illuminated function buttons for 'Read', 'Write', 'Touch', 'Latch', 'Trim'; and 'O' -
activated/de-activated as required per DAW
●Illuminated buttons for channel control including Mute, Solo and Record
●6 illuminated transport buttons including Play, Stop, Rec, Rewind, Fast Forward
and Loop
●Dedicated 'Flip' and 'Master' buttons for fader ipping and access to the master
channel (Channel 8 becomes the Master channel)
●Illuminated “Zoom” button with 2 directional keys (Left/Right & Up/Down), also used
in combination with the jog wheel
●Illuminated 'Focus' button which allows the user to "focus" in and adjust plug-in,
EQ parameters etc. via the smooth-action jog wheel
●2 illuminated “Track” buttons for selecting individual channels
●2 illuminated “Bank” buttons for shifting 8-channels at a time
●Supports Universal Mackie Control and HUI protocols for seamless integration with
compatible music production software
●Supports Ability, Audition, Ableton Live, Bitwig, Cakewalk, Cubase/Nuendo, Digital
Performer, FL Studio, Mixbus 32C, Pro Tools, Logic Pro, Luna, Reaper, Reason,
Samplitude, Studio One and Tracktion Waveform

8
●iMapTM software included
●USB C high-speed connectivity
●Firmware upgrade available via USB C connection and iMapTM software
●User A & User B 1/4 inch inputs for connecting footswitch pedals
●Class-compliant with MacOS 10.15 or above & Windows 10 or above
●Superior build quality and robust metal casing with Kensington lock port
●Expandable with the D-4T display unit for complete control
●Expandable with the P1-X extender unit (8 channels per unit)
●Expandable with the D4 display unit for the P1-X

9
Top Panel Layout
1. Faders
The eight ergonomically designed, motorized faders are generally used for
controlling the track volume of the DAW. Depending on your DAW, you may use
the “Flip” button to swap the rotary encoders and the fader functions. This may
be useful if making very intricate moves for PAN or plug-in parameter values
commonly executed using the rotary encoders. The 12 bit resolution faders are
capable of very detailed movement.
Any automation recorded in a project will be reected by the fader positions.
All faders are touch sensitive and allow the user to override automation the
moment a fader is touched.
Select the 'Master' button to assign channel 8 as the Master channel, (except with Pro
Tools).
2. Control buttons
2a) Recording channel control buttons section
REC button - Activate and deactivate the recording state of the associated
channel. The switch will light red when the channel is armed.
SOLO button - Activate/deactivate the solo state of the associated channel. The
switch will light green when the channel solo state is on and other channels will
be muted.
MUTE button - Activate and deactivate the mute state of the associated
channel. The switch will light blue when the channel is muted.
SEL button- Activate the selected track.
NOTE: The P1-M is a universal DAW controller (i.e. not designed for one specic DAW).
Functions will operate slightly dierently between DAWs. Please refer to your DAW manual for each function.
12
2a
1
14
6a
5
4
7
10
6b
3c3d 3a 3b
2b
8
9
11
13

10
2b) Motorized fader control buttons section
Fader left button - Shift “one” channel down for all faders
Fader right button - Shift “one” channel up for all faders
BANK left button - Shift “one” channel up for all faders
BANK right button - Shift “one” channel up for all faders
3. Jog wheel section
3a) Jog wheel - the jog wheel is used for various purposes specic to the
DAW application, including shue and scrubbing functions. Press to switch
between two functions, specic to the DAW. Engineered without stepped
increments for a smooth, noiseless and luxurious feel.
3b) Zoom/Focus control buttons section
Zoom UP/DOWN button - The Zoom UP/Down button is used to navigate up or
down through the Graphical User Interface (GUI) of the DAW application. This
can also be controlled using the jog wheel.
Zoom LEFT/RIGHT button - The LEFT/RIGHT button is used to navigate left
or right through the Graphical User Interface (GUI) of the DAW application. This
can also be controlled using the jog wheel.
Focus - Press 'focus' and hover over a plug-in parameter with your mouse and
use the jog wheel as a device to change the parameters.
3c) Move and directional buttons
Press the "Navi" button and rotate the jog wheel to navigate through the
channels.
Select directional buttons to determine the direction of travel for navigating up
and down your tracks in your DAW's arrangement window and left and right
across the tracks in the Mixer view using the jog wheel. You may also use these
buttons in combination with the jog wheel to navigate elements of your DAW, for
example audio segments in the arrangement window.
3d) 'Shue button - Press this button and rotate the jog wheel to navigate
through the tracks in banks of 8 channels at a time. This will result in high speed
navigation through the channels - especially helpful in projects with many tracks.
4. Transport control buttons section
PLAY button - Activate the play function of the DAW.
STOP button - Activate the stop function of the DAW.
REC button - Activate the record function of the DAW.
REWIND button - Activate the rewind function of the DAW.

11
FAST FORWARD button - Activate the fast forward function of the DAW.
LOOP button - Activate the loop function of the DAW.
5. Knobs
The eight smooth, noiseless, endless rotary encoder knobs are generally
used for controlling the track pan position, aux send levels and EQ of your
DAW. You may also use them to adjust specic parameters within plug-ins and
virtual instruments, (as your DAW software allows). The push-button action of
the knob can be used to change modes of operation within the DAW (this is
DAW dependent) and the rotating action of the knob can be used to change
parameters of PAN, EQ, plug-in values etc.
6. Color-coded function buttons (5 buttons)
6a) - This section of 3 control buttons are LED color-coded for dierent
functions on each layer. Switch between the color modes (along with those
in 6b) for dierent functions which appear in the 16 panel touch screen. The
functions can be rearranged in the iMAP to your own conguration.
6b) - This section of 2 control buttons are LED color-coded for dierent
functions on each layer. Switch between the color modes (along with those
in 6a) for dierent functions which appear in the 16 panel touch screen. The
functions can be rearranged in the iMAP to your own conguration.
By default, purple and red modes (Labelled ‘U1’ (User 1) and’ U2’ (User 2)) are
set in the touchscreen, to hotkey functions, (i.e. Ctrl+C= copy). The other three
modes are set to ‘MIDI’ functions (i.e. ‘Pan’ as per the diagram)).
Users who wish to store their own ‘hotkey’ functions can do so in purple and red
modes, (using the ‘U[ser] 1 and U[ser]2’ buttons and also store MIDI functions of
their choice in blue, green, and orange modes.
This is to help users organize their programming. You can, if you prefer, assign
any MIDI function to any color mode and any hotkey to any color mode. It’s up to
you!
7. Dedicated function buttons
Read - Read function enabled/disabled
Write - Write function enabled/disabled
Touch - Touch function enabled/disabled
Latch - Latch function enabled/disabled
Trim - Trim function enabled/disabled
O - O function enabled/disabled
As the P1-M is a universal controller, these will illuminate or not depending on
your DAW. For example, in Cubase, the latter four buttons will not illuminate,
whereas in Bitwig, the latter two will not illuminate. This is part of the intelligent
design of the P1-M.

12
8. 16 panel touchscreen display
The pièce de résistance of the P1-M. This 4 inch 16 panel touchscreen features
an illuminated display of DAW control functions for easy access by the user.
The 16 panel display allows for functions to be displayed in ve dierent
color modes, (section 6). That means an amazing 80 functions can be easily
accessed via the touchscreen. These can be left in their default state or loaded,
arranged and rearranged by the user in the iMAP software so that you can have
all the functions you need, at your ngertips, where you want them!
Alter the appropriate function parameters via the smooth action rotary
controllers.
As an example, in Cubase, select Edit, to load the channel settings of the
selected track, EQ to alter the channel EQ setting. Use PAGE UP and PAGE
DOWN to navigate through the parameter pages and the rotary encoders to
change the value of Gain, Frequency and Q.
9. DAW selector buttons
Select the DAW you would like to connect to, by selecting DAW buttons 1-3. The
DAW must be set up and congured previously, (see Getting Started with the
P1-M). You may change which DAWs you connect to in the iMAP, (see 'How to
Allocate the DAWs to the DAW Buttons').
10. Flip
Use this button to 'ip' the functions of your fader and the rst rotary controller.
This is ideal when you need to make very intricate changes to PAN or plug-in
parameter values using the fader, rather than the rotary encoder.
11. Master/Assign
Select this button to switch to using the channel 8 fader as a Master fader.
5 color modes
16 panel keypad
5 color modes
16 panel keypad

13
12. Lock
Pressing this button will ensure that the units faders do not change regardless of
the movement of the physical fader. The user must press this button to 'unlock'
the channel in order to aect a change.
If using P1-X extenders, the Lock button will communicate in real time via the
iMAP - which acts as a 'bridge' between the units - faders on the P1-X will be
similarly aected.
13. Channel LED Meters
Eight 12-segment LED meters showing the associated channel level.
14. D4T sockets
These sockets are used to house the 'legs' of the D4T display unit. A D4T display
unit will signicantly enhance the experience of the user. Without a D4T unit, if
the user wishes to aect a change in, say a plug in, they may observe parameter
changes etc. in the DAW itself or on the smaller, on-board display, (information
displayed is DAW-dependent).

14
Rear Panel Layout
1. USB C port
Functions as a MIDI port to your computer and compatible software.
2. User A / User B ¼ inch inputs
These ¼ inch inputs are used to connect to foot pedals to activate selected
functions in your DAW. To set their parameters, select USER A and USER B
parameters in your DAW.
3. 12V/2.5A power adapter port
Connect the power adaptor provided, here.
(Note: the P1-M is not able to work without the provided power adaptor
connected. USB bus power from a computer is insucient).
4. D4T display unit connector
Connect your optional D5 display module to this connector with the provided
cable. The D4T displays a range of DAW dependent information as well as
digital metering. The D4T OLED makes adjusting parameters of plugs-ins and
EQ easy, with less staring at your DAW and more interaction with your DAW
controller!
314
2

15
1. Connect the P1-M to your Mac/PC via the USB C port
Choose a USB port on your Mac/PC and insert the USB C cable. Connect the
cable’s other end to the P1-M. Switch on! Your Mac/PC should automatically “detect”
the new hardware.
2. Set up the 3x DAWs you wish to connect to in the iMAP
A) See installing the 'iMAP' section.
B) Following the diagrams below. Let's use these examples as the DAWs we want
to set up on the P1-M.
Getting Started with the P1-M
DAW #1 Bitwig
DAW #2 Cubase
DAW #3 Logic
In order to allocate the right DAW to the right DAW button (above), we're going to
need to use the iMAP.
First, make sure the iMAP is downloaded and installed, then read the following
section.
Esc
F1 F2 F3 F4
F5
F6
F7 F8 F9 F10 F11 F12
Prtsc
sysrq
pause
Break
Lns
Del
Home
Pgup
PgDN
End
$
~
`
!
1
··
23456778 90
)
)
*—
-
+
=
#¥%
*
##
QWERTYUIOP{}|
ASDFGHJKL:
;
ZXCVBNM<>?
Tab
CapsLook
Shift
Ctrl Alt AltGr Ctrl
Backspace
[
]
|
Enter
Shift
intel
2
1
5 color modes
16 panel keypad
5 color modes
16 panel keypad

16
How to Allocate DAWs to the DAW buttons in
the iMAP
This is covered in more detail in the iMAP section of this manual, but here's a
general introduction.
Just so we understand the general principle, we are going to allocate button 1, 2 and 3 on the
P1-M to Bitwig, Cubase and Logic respectively. Therefore, since ‘1’ is selected in the diagram
below, we are going to choose ‘Bitwig’ in the drop-down menu.
So, you've downloaded, installed and opened the iMAP. You will see the three DAW
buttons on top of the iMAP. These correspond to the three DAW buttons on the P1-M.
Simply select the corresponding button of choice and select a DAW from the drop
down list.
The DAW will be automatically allocated. There is no need to send data, or perform
any special function.
You may do this for all three buttons on the iMAP/P1-M.
Please go to the iMAP section for further details on this and how to use the iMAP,
including how to allocate commands and functions to the 16 panel touchscreen, MIDI
map commands and even allocate QWERTY hot keys to your P1-M.
Remember that, in everyday use, YOU MUST ENSURE YOU LAUNCH THE
CONTROLLER FIRST, then the iMAP, before launching the DAWs you wish to work with;
Remember:
Step 1: Switch on the Controller
Step 2: Open the iMap
TM
Step 3: Launch the DAW/s you intend to use
Or simply remember;
Controller iMAP DAW/s (CiD!)
(You may wish to associate a phrase that will make this easy to remember i.e. “Consider it Done!”)
Note: Please wait a few moments between each step, to ensure each is fully loaded.
2
1

17
Note: MIDI port 4 is used by the iCON Pro Audio software, iMAP(TM), to change the
three DAWs you use, to update rmware and to program the 16 panel touchscreen
with the functions of your choice.
These four options will appear as a menu from which you can select your chosen
DAW.
So, remembering our examples of;
DAW #1 Bitwig
DAW #2 Cubase
DAW #3 Logic
We know that we need to select 'P1-M V1.02' (or whichever rmware version it is*),
in Bitwig because that is the DAW we have chosen to be DAW #1. When you press
DAW #1 on the unit, the P1-M will automatically go into Bitwig mode.
In our example, Cubase is our second DAW, so when we are conguring our DAW
to work with the P1-M, we will need to select 'MIDIIN2 (P1-M V1.02)' or whichever
rmware version it is*) in the menu. When the P1-M is set up as a Mackie control
device in Cubase, whenever we press '2' in the DAW Controller selection section,
the P1-M will automatically select Cubase.
The same applies for Logic, although this time we are going to select 'MIDIIN3 (P1-M
V1.02)' (or whichever rmware version it is*) and use button '3' in the DAW controller
selection area to automatically select this DAW.
*rmware versions are updated over time
Now we have allocated our 3 DAWs within the iMAP, we will need to congure
our DAWs so that the P1-M recognizes them and the DAW/s recognize the
P1-M.
This is how it works;
Setting up the P1-M in the DAWs
iCON P1-M V1.02 DAW #1
MIDIIN2(P1-M V1.02) DAW #1
MIDIIN3(P1-M V1.02) DAW #1
MIDIIN4(P1-M V1.02) iMAP

18
Here's an example of how it is set up in Cubase.
iCON P1-M V1.02 DAW #1
MIDIIN2(P1-M V1.02) DAW #1
MIDIIN3(P1-M V1.02) DAW #1
MIDIIN4(P1-M V1.02) iMAP
iCON P1-M V1.02
(iCON P1-M V1.02)
(iCON P1-M V1.04)
(iCON P1-M V1.02)
(iCON P1-M V1.02)
As you can see, when conguring the device as a Mackie controller, there is a choice
of 4 possible options. Because we have set up Cubase to respond to DAW control
button '2' on the P1-M, we are going to select 'MIDIIN2 ( P1-M V1.02)'.
Please also note, (although this is specic to Cubase), that users should use Mackie
Control in the usual way to set up their devices in Cubase 12 onwards and not
Cubase's MIDI Remote Manager. Regardless of the supported DAWs you are using,
the principle will be largely the same.
Now, we've covered how we allocate DAWs to the P1-M DAW button of your choice (1-
3) in the iMAP and, in principle, how to congure the DAW to the corresponding MIDI
port, (as depicted above), let's move on to conguring our DAW/s in the next section.
Before we move on, let’s remember CiD;
Step 1: Switch on the Controller
Step 2: Open the iMap
Step 3: Launch the DAW/s you intend to use
Note: Please wait a few moments between each step, to ensure each is fully
loaded.
The reason for the order of this process is that, as you can see from the diagram below,
the iMAP must occupy MIDI port 4 in order to communicate eectively. Unfortunately, some
DAWs will automatically try to occupy that port when launched and this will prevent the iMAP
from functioning properly. The iMAP, therefore, needs to be turned on after the controller and
before the DAW to make sure it occupies that MIDI port.

19
Practical uses for the DAW modes
Some users might want to use two instances of the same DAW for, say buttons
DAW#1 and DAW#2. Why? Well, let's take Fernando. Fernando is a young, up and
coming producer and musician and he likes to master his own material too.
On a day-to-day basis, Fernando uses Cubase as his 'go to' DAW to record. He
has set up his template which he loads into Cubase and he has also set up the
touchscreen on his P1-M to load all of his favorite Cubase commands when pressing
DAW button #1, when recording and mixing.
When mastering, however, Fernando imports his nal mix stereo les into his
mastering template in Cubase. Because this is a dierent task altogether, which
requires a dierent approach, he has organized dierent commands for mastering
purposes in Cubase which load when pressing DAW button #2.
Fernando is very organized. He will go far.
This is just one example of why you may wish to load the same DAW twice or even
three times on the P1-M.

20
Launching the P1-M in Every Day Use
Every time you launch the P1-M, you should launch the controller rst, the
iMAP second and the DAW/s last.
This will allow the iMAP to communicate to the hardware directly. The iMAP
communicates directly to the hardware only and does not communicate to other
software - this ensures that the speed of communication is fast and unhampered by
secondary factors.
Additionally, the iMAP acts as a kind of 'bridge' between the P1-M main unit and any
P1-X extenders you may be using and ensures cohesion. The 'Lock' function, when
used in conjunction with a P1-X extender unit for example, will work as expected. If
the iMAP is not connected, it won't.
Of course, if you are expecting to make any changes with the programming of
functions, the iMAP will need to run concurrently with the P1-M hardware.
Lastly, the reason for using the sequence of Controller, iMAP, DAW is because
MIDI port 4 is used by the iCON Pro Audio software, iMAPTM to change the three
DAWs you use, to update rmware and to program the 16 panel touchscreen
with the functions of your choice. You cannot use this port to connect your device.
Unfortunately, some DAWs will automatically try to occupy Port 4 when launched
and this will prevent the iMAP from functioning properly. The iMAP, therefore, needs
to be turned on before the DAW/s and after the controller to make sure it occupies
that MIDI port and is connected properly.
Remember
Every time you launch the P1-M
Controller
iMAP
DAW
Please note: For the benet of the following examples, we are going to assume the
DAW you are connecting is DAW#1.
Table of contents
Other ICON Dj Equipment manuals