Ideen Welt KB9588A1 User manual
D
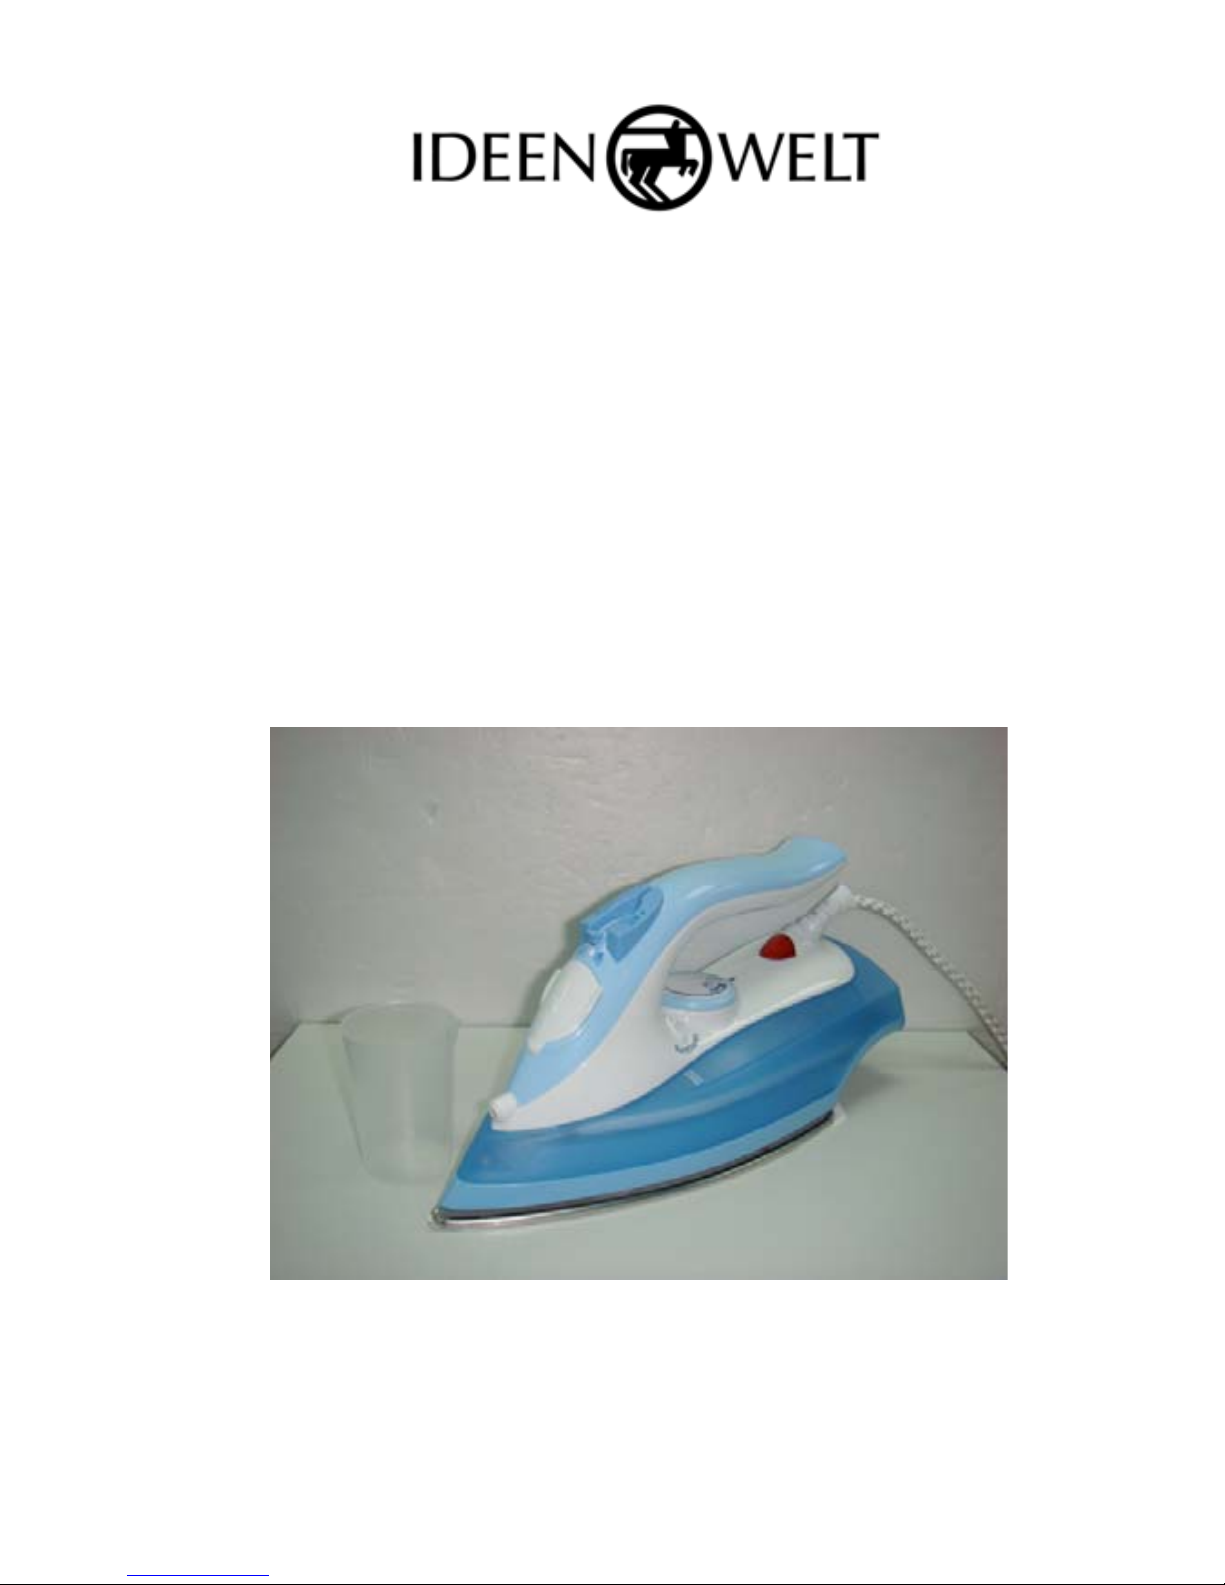
Dampfbügeleisen
Bedienungsanleitung
Steam Iron
Instruction manual
Napaovací ehlika
Návod k obsluze
elazko parowe
Instrukcja obsugi
H
Vasaló
Használati útmutató
KB9588A1

DVORSICHT..................................................................................................................1
TEILE..........................................................................................................................2
VOR DER ERSTEN INBETRIEBNAHME....................................................................3
HINWEISE ZUM BÜGELN..........................................................................................3
TEMPERATUREINSTELLUNG UND BÜGELMATERIAL...........................................4
TROCKENBÜGELN....................................................................................................4
DAMPFBÜGELN.........................................................................................................4
SPRÜH-FUNKTION ....................................................................................................5
WASSERTANK ENTLEEREN.....................................................................................5
REINIGUNG UND PFLEGE........................................................................................5
TECHNISCHE DATEN................................................................................................6
CAUTION....................................................................................................................7
PARTS ........................................................................................................................8
PRIOR TO FIRST USE ...............................................................................................8
IRONING INSTRUCTIONS.........................................................................................9
TEMPERATURE SETTING AND IRONING FABRIC................................................10
DRY IRONING ..........................................................................................................10
STEAM IRONING......................................................................................................10
SPRAY FUNCTION...................................................................................................11
EMPTYING THE WATER TANK...............................................................................11
CLEANING AND CARE.............................................................................................11
TECHNICAL DATA....................................................................................................12
POZOR......................................................................................................................13
DÍLY..........................................................................................................................14
PED PRVNÍM UVEDENÍM DO PROVOZU.............................................................14
POKYNY K EHLENÍ................................................................................................15
NASTAVENÍ TEPLOTY A MATERIÁL K EHLENÍ...................................................16
EHLENÍ NASUCHO................................................................................................16
EHLENÍ S NAPAOVÁNÍM....................................................................................16
FUNKCE POSTIKOVÁNÍ........................................................................................17
VYPRÁZDNNÍ VODNÍ NÁDRKY...........................................................................17
ITNÍ A ÚDRBA.................................................................................................17
TECHNICKÁ DATA...................................................................................................18
UWAGA.....................................................................................................................19
CZCI.....................................................................................................................20
PRZED PIERWSZYM UYCIEM...............................................................................21
WSKAZÓWKI DOTYCZCE PRASOWANIA............................................................21
USTAWIENIA TEMPERATURY I PRASOWANEJ TKANINY....................................22
PRASOWANIE NA SUCHO......................................................................................22
PRASOWANIE PAROWE.........................................................................................22
FUNKCJA SPRYSKIWANIA......................................................................................23
OPRÓNIANIE ZBIORNIKA NA WOD...................................................................23
CZYSZCZENIE I KONSERWACJA...........................................................................23
DANE TECHNICZNE ................................................................................................24
HVIGYÁZAT.................................................................................................................25
RÉSZEK....................................................................................................................26
MIELTT ELSZÖR HASZNÁLNÁ ..........................................................................27
TANÁCSOK VASALÁSHOZ......................................................................................27
HMÉRSÉKLETBEÁLLÍTÁS ÉS A VASALANDÓ ANYAGOK..................................28
SZÁRAZ VASALÁS...................................................................................................28
GZÖLS VASALÁS...............................................................................................28
VÍZSZÓRÓ FUNKCIÓ...............................................................................................29
A VÍZTARTÁLY KIÜRÍTÉSE.....................................................................................29
TISZTÍTÁS ÉS ÁPOLÁS ...........................................................................................29
MSZAKI ADATOK...................................................................................................30

D
1
VORSICHT
1. Lesen Sie vor dem Gebrauch diese Bedienungsanleitung vollständig durch.
2. Bei Weitergabe des Gerätes an Dritte muss auch diese Bedienungsanleitung mit
ausgehändigt werden.
3. Dieses Gerät entspricht den technischen Normen und den betreffenden
Sicherheitsanforderungen für elektrische Geräte.
4. Der Hersteller übernimmt keine Haftung für Schäden, die auf unsachgemäßen Gebrauch
oder Nichtbeachtung dieser Bedienungsanleitung zurückzuführen sind.
5. Halten Sie Kinder vom Gerät fern.
6. Dieses Gerät ist nicht dafür bestimmt, durch Personen (einschließlich Kinder) mit
eingeschränkten physischen, sensorischen oder geistigen Fähigkeiten oder mangels
Erfahrung und/oder mangels Wissen benutzt zu werden, es sei denn, sie werden durch eine
für ihre Sicherheit zuständige Person beaufsichtigt oder erhielten von ihr Anweisungen, wie
das Gerät zu benutzen ist.
7. Kinder sollten beaufsichtigt werden, um sicherzustellen, dass sie nicht mit dem Gerät spielen.
8. Tauchen Sie das Gerät, das Kabel oder den Netzstecker niemals in Wasser. Bedienen
Sie das Gerät auch nicht mit nassen Händen. Stromschlaggefahr!
9. Die Geräte dürfen nicht in der Nähe einer Badewanne oder Dusche, oder einem mit Wasser
gefüllten Waschbecken verwendet werden.
10. Sollte das Gerät doch einmal ins Wasser fallen, lassen Sie das Gerät vor dem
Wiedereinschalten von einem Fachmann überprüfen. Nicht ins Wasser fassen! Immer
zuerst den Netzstecker ziehen!
11. Setzen Sie das Gerät nicht dem direkten Sonnenlicht aus. Benutzen Sie das Gerät auch nicht
direkt neben Hitze produzierenden Geräten wie Öfen oder Kochherden.
12. Versuchen Sie nie, das Gerät selbst zu reparieren. Reparaturen dürfen nur von qualifiziertem
Fachpersonal durchgeführt werden.
13. Wenn das Netzkabel dieses Gerätes beschädigt wird, muss dieses durch den Hersteller oder
seinen Kundendienst oder eine ähnlich qualifizierte Person ersetzt werden, um
Gefährdungen zu vermeiden.
14. Bevor Sie das Gerät in Betrieb nehmen, prüfen Sie zuerst, ob die Netzspannung mit den
Angaben auf dem Typenschild übereinstimmt.
15. Dieses Produkt ist ausschließlich für den privaten Gebrauch und nicht für eine gewerbliche
Nutzung bestimmt.
16. Öffnen Sie das Gerät im Schadensfall niemals selbst. Sollten Gerät, Kabel oder Netzstecker
beschädigt sein, lassen Sie es von einem Fachmann reparieren.
17. Achten Sie darauf, dass das Kabel nicht zur Stolperfalle wird.
18. Wenn das Gerät nicht benutzt oder gereinigt wird, immer den Netzstecker aus der Steckdose
ziehen. Auch bei Störungen im Betrieb in jedem Fall sofort den Netzstecker ziehen.
19. Das Gerät immer auf einer geraden, ebenen Oberfläche platzieren und betreiben.
20. Das Gerät darf nicht betrieben werden, wenn es sichtbare Schäden aufweist oder
heruntergefallen sein sollte.
21. Den Stecker nicht an der Anschlussleitung aus der Steckdose ziehen.
22. Das Bügeleisen eignet sich nicht für den Außenbetrieb bzw. für den Betrieb in Räumen mit
erhöhtem Feuchtigkeitsgrad.
23. Ziehen Sie den Netzstecker immer aus der Steckdose, wenn das Gerät nicht betrieben wird,
sowie jedes Mal vor dem Ein- und Ausgießen des Wassers.
24. Halten Sie das Gerät außer Reichweite von Kindern und lassen Sie besondere Vorsicht
walten, wenn Sie in Ihrer Nähe bügeln.
25. Lassen Sie das eingeschaltete bzw. heiße Bügeleisen nicht ohne Aufsicht, besonders wenn
es auf dem Bügelbrett steht.
26. Jedes Mal, wenn Sie beim Bügeln Pausen einlegen, stellen Sie das Bügeleisen auf keinen
Fall auf die Sohle. Es ist empfehlenswert, das Gerät auf metallenen bzw. rauen Oberflächen
abzustellen.

D
2
27. Verlassen Sie das Bügeleisen auch nur für kurze Zeit, immer ausschalten, in senkrechte
Lage bringen und Netzstecker ziehen. Das Bügeleisen darf von Kindern nicht erreichbar sein.
28. ACHTUNG! Um Überspannung des Stromnetzes auszuschließen, schließen Sie das
Bügeleisen nicht gleichzeitig mit anderen leistungsstarken Haushaltsgeräten an einer und
derselben Stromnetzzuleitung an.
29. Sollte ein Brand entstehen, ziehen Sie zuerst den Stecker aus der Steckdose oder trennen
Sie das Gerät anderweitig von der Stromversorgung, bevor Sie geeignete Maßnahmen zur
Brandbekämpfung einleiten. Achtung: Schütten Sie kein Wasser auf das noch unter
Spannung stehende Gerät: Stromschlaggefahr!
30. Dieses Gerät ist ausschließlich zum Bügeln von Textilen entwickelt. Benutzen Sie es nicht für
andere Materialien oder zum Aufheizen.
31. Es dürfen keine Kleider oder andere Textilen gebügelt werden, wenn diese gerade von
Menschen oder Tieren getragen werden.
Dieses Gerät dient ausschließlich für den privaten Haushaltsgebrauch und darf nicht für
kommerzielle Zwecke benutzt werden.
TEILE
1. Sprühtaste
2. Dampfausstoßtaste
3. Dampfregler
4. Abdeckung der Wassereinfüllöffnung
5. Messbecher
6. Sprühdüse
7. Bügelsohle
8. Selbstreinigungstaste
9. MAX-Markierung
10. Handgriff
11. Netzkabel mit Netzstecker
12. Standfuß
13. Betriebsanzeige
14. Markierung
15. Temperaturregler
1
2
3
4
6
5
7
8
9
15
14
13
12
11
10

D
3
VOR DER ERSTEN INBETRIEBNAHME
HINWEIS: Beim Erstgebrauch kann eine leichte Geruchs- und Rauchbelastung entstehen. Dies
stellt jedoch kein Fehler des Gerätes dar, sondern das Verbrennen von Herstellungsrückständen.
Sorgen Sie für ausreichende Raumbelüftung. Die Geruchs- und Rauchbelastung verschwindet
nach dem Erstgebrauch.
1. Entfernen Sie sämtliches Verpackungsmaterial. Überprüfen Sie den Lieferumfang auf
Vollständigkeit und eventuelle Transportschäden. Sollten Transportschäden vorhanden oder
der Lieferumfang unvollständig sein, so kontaktieren Sie Ihren Fachhändler (siehe
Gewährleistung).
2. Die Originalverpackung aufheben. Diese können Sie zum Transport oder der Lagerung
wieder nutzen. Sorgen Sie für eine fachgerechte Entsorgung von Verpackungsmaterialien.
Informieren Sie sich über Sammelstellen bzw. Mülltrennung bei Ihrer Kommune.
Erstickungsgefahr! Halten Sie jegliches Verpackungsmaterial von Kleinkindern und Kindern
fern.
3. Ziehen Sie die Schutzfolie von der Bügelsohle (7) ab.
1. Wassertank füllen
4. Den Netzstecker (11) aus der Steckdose ziehen und den Dampfregler (3) auf die Position 0
() stellen. Öffnen Sie die Abdeckung der Wassereinfüllöffnung (4).
5. Füllen Sie kaltes Wasser in die Wassereinfüllöffnung ein und stellen das Bügeleisen danach
auf dessen Standfuß (12) (senkrechte Lage). Sie können zum Einfüllen von Wasser auch den
beiliegenden Messbecher (5) verwenden. Um den Wassertank aufzufüllen benötigen Sie ca.
2 Messbecher Wasser. Füllen Sie den Messbecher jeweils bis zur MAX-Markierung.
6. Die Markierung MAX (9) der Wasserstandanzeige auf dem Wassertank darf nicht
überschritten werden. Um das Wasserniveau im Wassertank kontrollieren zu können, stellen
Sie das Bügeleisen senkrecht auf den Standfuß. Sie können mit diesem Bügeleisen
normales Leitungswasser verwenden. Sollte das Wasser Ihrer Gegend sehr hart sein,
so empfiehlt sich das Leitungswasser mit 50% destilliertem Wasser zu mischen. Sollte
sich Spritzwasser ergeben, dieses immer abwischen.
2. Bügeleisen ein- und ausschalten
7. Stellen Sie das Bügeleisen auf den Standfuß und verbinden Sie den Netzstecker mit einer
vorschriftsmäßig installierten Schutzkontaktsteckdose.
8. Stellen Sie den Temperaturregler (15) auf MAX. Die Betriebsanzeige (13) leuchtet auf.
9. Wenn die gewünschte Temperatur erreicht ist, erlischt die Betriebsanzeige.
10. Stellen Sie den Dampfregler auf die Position ein ( ).
11. Aus den Löchern der Bügelsohle entweicht heißer Wasserdampf.
12. Nehmen Sie nun ein altes Stoffstück zur Hand und bügeln über dieses, um eventuelle
fertigungsbedingte Rückstände an der Bügelsohle zu entfernen. Lassen Sie alles Wasser im
Wassertank verdampfen.
13. Trennen Sie das Bügeleisen vom Netz und lassen es vollständig abkühlen.
14. Reinigen Sie das Gerät wie unter Reinigung und Pflege beschrieben.
HINWEISE ZUM BÜGELN
•Vor dem Bügeln, die Wäsche nach Gewebeart sortieren. Dadurch wird häufiges Ändern der
Temperatureinstellung vermieden.
•Prüfen Sie auch immer das Etikett am Kleidungsstück, um die Gewebeart zu identifizieren.
Wählen Sie die Temperatur anhand der Etikettinformationen.
•Ist keine Temperaturstufenangabe auf dem Etikett vorhanden, so empfiehlt es sich, mit der
niedrigsten Temperatur zu beginnen. Vorsicht! Synthetische Gewebe können schmelzen.
•Folgen Sie den Hinweisen des Herstellers.
•Bevor Sie mit der Bügelarbeit von empfindlichen Stoffen beginnen ist es ratsam einigen
Minuten zu warten. Das Bügeleisen benötigt eine gewisse Zeit zur Anpassung von höheren
auf niedrige Temperaturstufen. Um sicher zu gehen, lassen Sie das Bügeleisen soweit

D
4
abkühlen, bis die Betriebsanzeige aufleuchtet. Es ist empfehlenswert zuerst die Wäsche mit
der niedrigeren Bügeltemperatur zu bügeln und dann die Stoffe mit höherer Temperatur, weil
sich das Bügeleisen schneller erhitzt als abkühlt.
•Bei empfindlichen Stoffen, wie z.B. Seide, Wolle, Samt etc., verwenden Sie am besten ein
Bügeltuch, um Glanzstellen zu vermeiden.
•Bei Mischgeweben beginnen Sie immer mit der niedrigsten Temperatur und führen immer
zuerst an einer unsichtbaren Stelle einen Testversuch durch.
TEMPERATUREINSTELLUNG UND BÜGELMATERIAL
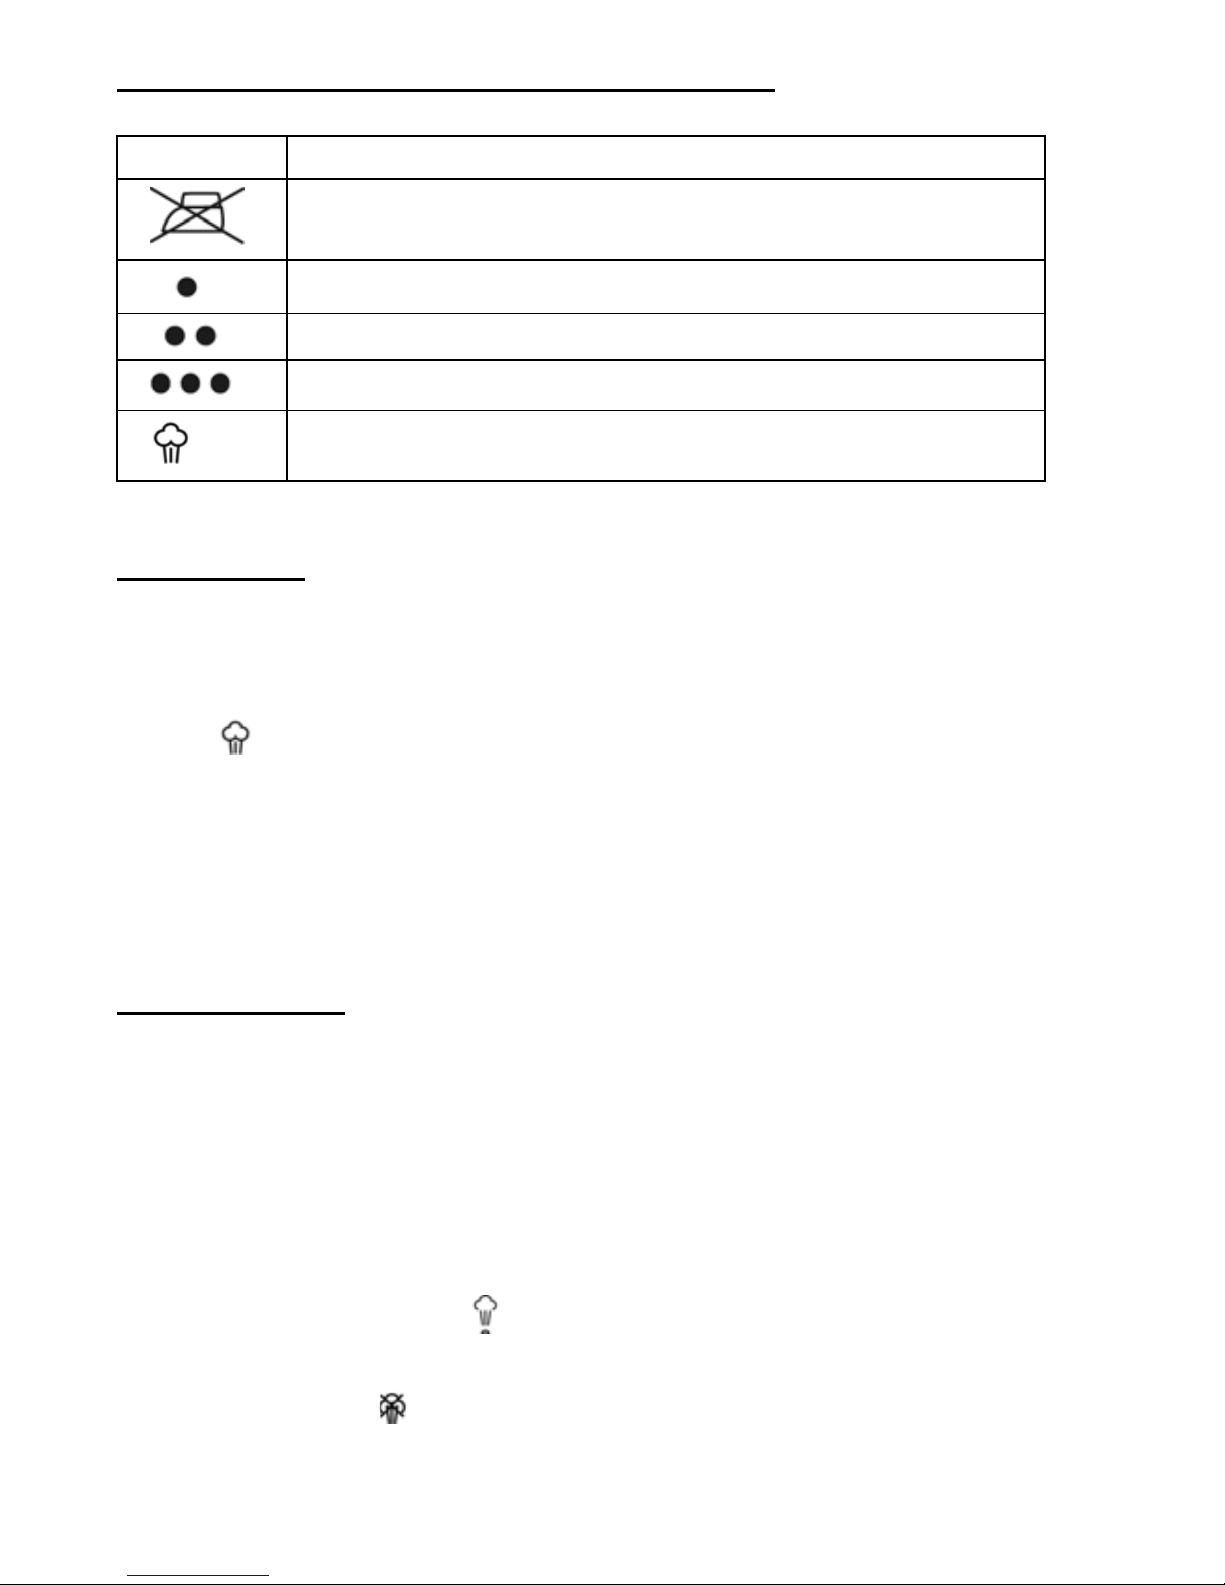
SYMBOL STOFFART
Ware nicht bügeln
Kunstfasern, Polyamid, Acryl, Polyester, Viskose
Wolle, Seide
Baumwolle, Leinen
MAX Höchsttemperatur (Dampfbehandlung)
1. Das Bügeleisen in heißem Zustand nur am Handgriff (10) anfassen.
TROCKENBÜGELN
1. Verbinden Sie den Netzstecker mit einer geeigneten Steckdose.
2. Stellen Sie den Temperaturregler auf die gewünschte Temperatur:
• Niedrige Temperatur
•• Mittlere Temperatur
••• Hohe Temperatur
MAX Maximale Temperatur (Dampfbügeln)
3. Die Betriebsanzeige leuchtet auf.
4. Wenn die gewünschte Temperatur erreicht ist erlischt, die Betriebsanzeige. Während des
Betriebes wird die Betriebsanzeige ein- und ausgehen, was die Konstanthaltung der
eingestellten Temperatur anzeigt.
5. Lassen Sie das Bügeleisen beim Bügeln über das Kleidungsstück gleiten. Das Bügeleisen
nicht andrücken. Die besten Bügelresultate können bei leicht feuchten Kleidungsstücken
erreicht werden.
6. Zum Ausschalten drehen Sie den Temperaturregler auf MIN. Die Betriebsanzeige erlischt.
Nun den Netzstecker ziehen und das Bügeleisen abkühlen lassen.
DAMPFBÜGELN
7. Füllen Sie den Wassertank wie in „Vor erster Inbetriebnahme“ beschrieben.
8. Stellen Sie den Temperaturregler auf Stufe „••“ oder „•••“.
HINWEIS: Stellen Sie zum Dampfbügeln den Temperaturregler vorzugsweise auf MAX.
9. Schieben Sie den Dampfregler in die Position Dampf ( ).
10. Während des Bügelvorganges entweicht heißer Wasserdampf aus der Bügelsohle. Es ist zu
bemerken, dass nur in horizontaler Lage Dampf aus der Bügelsohle austritt.
11. Mit dem Dampfregler kann die Dampfmenge von wenig bis viel reguliert werden.

D
5
Dampfstoßtaste
12. Diese Funktion dient zur einmaligen zusätzlichen Dampfförderung bei der Glättung stark
zerknitterter Stellen.
13. Die Dampfausstoßtaste (2) nur in hohem Temperaturbereich benutzen.
14. Immer warten bis die Betriebsanzeige erlischt, bevor die Dampfstoßtaste betätigt wird.
15. Nach Beendigung des Dampfbügelns oder bevor Sie das Gerät ausschalten, stellen Sie den
Dampfregler wieder auf Position 0( ).
16. Zum Ausschalten drehen Sie den Temperaturregler entgegen dem Uhrzeigersinn auf MIN
und ziehen Sie den Netzstecker.
17. Drücken Sie die Dampfstoßtaste nicht länger als 5 Sekunden, um das Ausfließen von Wasser
zu verhindern.
Vertikales Dampfbügeln
18. Für vertikales Dampfbügeln immer kontrollieren, dass sich genug Wasser im Wassertank
befindet.
19. Den Temperatur- und Dampfregler auf die höchste Leistungsstufe stellen.
20. Halten Sie das Bügeleisen senkrecht und drücken die Dampfstoßtaste .
SPRÜH-FUNKTION
1. Muss eine Bügelstelle angefeuchtet werden, die Sprühtaste (1) drücken. Sprühwasser
entweicht aus der Sprühdüse (6). Drücken Sie die Sprühtaste anfangs mehrmals, bis sich ein
gleichmäßiger Wassernebel bildet.
2. Die Sprühfunktion ist nicht von der Temperatur abhängig und kann jederzeit benutzt werden,
solange sich Wasser im Wassertank befindet.
WASSERTANK ENTLEEREN
1. Nach jedem Gebrauch muss der Wassertank entleert werden.
2. Stellen Sie den Dampfregler auf Position 0( ).
3. Schalten Sie das Bügeleisen aus, ziehen den Netzstecker und lassen es in senkrechter Lage
vollständig abkühlen bevor Sie mit dem Entleeren des Wassertanks beginnen.
4. Öffnen Sie die Abdeckung der Wassereinfüllöffnung.
5. Halten Sie den Handgriff, drehen Sie das Gerät auf den Kopf und gießen Sie vorsichtig das
Restwasser aus dem Wassertank heraus, indem Sie das Gerät vorsichtig schütteln.
6. Eventuell die Sprühtaste betätigen, um eventuell im Gerät befindliches Restwasser leichter
aus dem Gerät laufen zu lassen.
7. Schalten Sie das Bügeleisen nach dem Entleeren des Wassers in senkrechter Lage für 2
Minuten mit Höchsttemperatur ein.
REINIGUNG UND PFLEGE
Achtung! Verwenden Sie auf keinen Fall Alkohol, Azeton, Benzin, aggressive
Reinigungsmittel usw. zur Reinigung. Auch keine harten Bürsten oder metallische
Gegenstände verwenden.
1. Nach der Benutzung den Dampfmengenregler auf Position 0 () stellen.
2. Stellen Sie den Temperaturregler auf MIN und ziehen den Netzstecker aus der Steckdose.
Bringen Sie das Bügeleisen in senkrechte Lage und lassen es an einem sicheren und von
Kindern unerreichbaren Ort vollständig abkühlen.
3. Entleeren Sie den Wassertank wie zuvor beschrieben.
4. Zur Reinigung des Gehäuses ein mit Wasser angefeuchtetes Tuch und ggf. etwas mildes
Reinigungsmittel verwenden.
D
6
5. Die Bügelsohle mit einem leicht angefeuchteten Tuch reinigen. Niemals scheuernde
Reinigungsmittel oder harte Utensilien verwenden.
6. Das Netzkabel zum Verstauen aufrollen. Wickeln Sie das Kabel nicht um das Gerät.
7. Das Gerät vorzugsweise in der Originalverpackung verstauen. Das Bügeleisen sollte an
einem kühlen, vor Feuchtigkeit und direktem Sonnenlicht geschützten und von Kindern
unzugänglichen Ort aufbewahrt werden. Lagern Sie das Bügeleisen nur in senkrechter Lage.
8. Nach der Reinigung alle Teile trockenreiben.
Selbstreinigungsfunktion
1. Füllen Sie den Wassertank bis zur Markierung MAX auf.
2. Stellen Sie den Temperaturregler auf MAX.
3. Verbinden Sie den Netzstecker mit einer geeigneten Steckdose.
4. Warten Sie, bis die Betriebsanzeige erlischt.
5. Halten Sie das Bügeleisen waagerecht über ein Waschbecken, stellen den Dampfregler auf
ein ( ) und drücken Sie die Selbstreinigungstaste Self Clean (8).
6. Der durch die Düsen austretende Dampf und das kochende Wasser beseitigen die
Verunreinigungen im Bügeleisen. Während dem Sie die Selbstreinigungstaste drücken
empfiehlt sich, das Bügeleisen vor und zurück zu bewegen.
7. Bei starker Verunreinigung wiederholen Sie den Vorgang.
8. Um die Bügelsohle zu trocknen, bügeln Sie über ein altes Stoffstück.
TECHNISCHE DATEN
Stromversorgung: 220 – 240V~ 50Hz
Leistungsaufnahme: 2200W
Korrekte Entsorgung dieses Produktes
Innerhalb der EU weist dieses Symbol darauf hin, dass dieses Produkt nicht über
den Hausmüll entsorgt werden darf. Altgeräte enthalten wertvolle recyclingfähige
Materialien, die einer Wiederverwertung zugeführt werden sollten, um der Umwelt
bzw. der menschlichen Gesundheit nicht durch unkontrollierte Müllbeseitigung zu
schaden. Bitte entsorgen Sie Altgeräte deshalb über geeignete Sammelsysteme
oder senden Sie das Gerät zur Entsorgung an die Stelle, bei der Sie es gekauft
haben. Diese wird dann das Gerät der stofflichen Verwertung zuführen.
Wenn das Gebrauchsende erreicht ist, machen Sie das Gerät unbrauchbar, indem Sie den
Stecker aus der Steckdose ziehen und das Kabel durchtrennen.
Dieses Gerät dient ausschließlich für den privaten Haushaltsgebrauch und darf nicht für
kommerzielle Zwecke benutzt werden.
Importiert durch:
Dirk Rossmann GmbH
Isernhägener Straße 16
30938 Burgwedel

7
CAUTION
1. Prior to using the device read the instruction manual carefully.
2. If you pass on the device to a third party please attach this instruction manual as well.
3. This device complies with technical norms and safety requirements for electric devices.
4. The manufacturer is not responsible for damages caused by improper use or non-observance
of this instruction manual.
5. Keep children away from the device.
6. This device is not intended to be used by persons (including children) with reduced physical,
sensory or mental capabilities, or lack of experience and knowledge, unless they have been
given supervision or instruction concerning use of the device by a person responsible for their
safety.
7. Children should be supervised at all times to ensure that they do not play with the device.
8. Never immerse this device, the cord or the power plug into water! Never operate this
device with wet hands. Danger of electric shock!
9. Never use electric devices near a bathtub or shower or near a sink filled with water.
10. If the device does fall into water, have it checked by an authorised professional before
turning it on again. Do not reach into the water! Always disconnect the power plug
first!
11. Do not expose the device to direct sunlight. Do not use the device near heat-producing
objects, like ovens and cookers.
12. Do not attempt to repair the device. Repairs can be conducted by qualified specialist only.
13. If the power cord is damaged, in order to avoid hazards it must be replaced by the
manufacturer, its Customer Service or a similarly qualified person.
14. Prior to using the device make sure that the mains voltage corresponds to the data on the
rating plate of the device.
15. This device is intended solely for private household use and may not be used for commercial
purposes.
16. In the event of damage, never open the device yourself. Should the device, the cord or the
power plug become damaged, have it repaired by an authorised professional.
17. Make sure that the cord does not become a tripping hazard.
18. When the device is not being used or is being cleaned, switch the device off and disconnect
the power plug from the socket. Should a malfunction occur during operation, then
immediately disconnect the power plug.
19. Always place and operate the device on a flat, level surface.
20. This device may not be used if visible damages are found or if it has been dropped.
21. Do not pull the plug out of the power outlet by the connection cord.
22. The steam iron is not suitable for use outdoors or for use in rooms with high degree of
humidity.
23. Always pull the power plug out of the socket when the device is not being used as well as
each time before pouring water in or out.
24. Keep the device out of reach of children and take extra caution when you iron in their
presence.
25. Never leave the switched-on or hot device unattended, especially if it is sitting on the ironing
board.
26. Whenever you take a break from ironing, do not under any circumstance place the steam iron
on its soleplate. It is recommended to put the device on metal or raw surfaces.
27. Even if you only put the steam iron down for a short time, always turn it off, place it in an
upright position and disconnect the plug. Keep the steam iron out of reach of children.
28. ATTENTION! In order to prevent a mains surge, do not plug the steam iron in at the same
time as other high-powered household devices or on the same mains lead.
29. Should a fire break out, then pull the plug out of the power outlet or otherwise separate the
device from the power source before using appropriate fire-fighting measures. Attention: Do
not pour water on the device, especially when it is still plugged in: Danger of electric shock!

8
30. This device was developed solely for the purpose of ironing textiles. Do not use it for other
materials or to heat something up.
31. Do not iron clothes or other textiles if they are worn by people or animals.
This device is intended for private use and must not be used for commercial purposes.
PARTS
PRIOR TO FIRST USE
PLEASE NOTE: During the first use, a slight odour and smoke could develop. However, this does
not mean the device is defective, but rather is a result of the burning off of manufacturing residues.
Ensure for proper room ventilation. The odour and smoke disappears after first use.
1. Remove all packaging material. Check the delivery contents for completeness and possible
shipping damages. Should shipping damages be found or the delivery contents not be
complete, then contact your authorised dealer (see warranty).
2. Keep the original packaging. You can use it for shipping or for storing the device. Dispose of
the packaging materials properly. Inform yourself at the local authorities regarding collection
1. Spray button
2. Steam jet button
3. Steam control button
4. Water tank filler hole cover
5. Measuring cup
6. Spray nozzle
7. Soleplate
8. Self-cleaning button
9. MAX marking
10. Handle
11. Power cord with power plug
12. Base
13. Power indicator light
14. Marking
15. Temperature control
1
2
3
4
6
5
7
8
9
15
14
13
12
11
10
9
points or garbage separation. Danger of suffocation! Keep all packaging materials away
from children, especially small children.
3. Take the protective foil off of the soleplate (7) of the steam iron.
1. Filling the Water Tank
4. Pull the power plug (11) out of the power outlet and put the steam control (3) onto position 0
( ). Open the cover of the water tank filler hole (4).
5. Pour cold water into the water tank filler hole and set the steam iron on its base (12) (upright
position). You can also use the supplied measuring cup (5) for pouring the water. To fill up
the water tank, you need approx. 2 measuring cups full of water. Always fill the measuring
cup to the MAX marking.
6. The MAX (9) level of the water level indicator on the water tank must not be exceeded. To
check the water level in the water tank, set the steam iron in an upright position on its base.
You can use regular tap water in this steam iron. Should the water in your area be very
hard, it is recommended to mix the tap water with 50% distilled water. Always clean up
any water splashes.
2. Switching the Steam Iron On/Off
7. Set the steam iron on its base and connect the power plug with a properly installed, grounded
power outlet.
8. Set the temperature control (15) to MAX. The power indicator light (13) goes on.
9. When the desired temperature has been reached, the power indicator light goes off.
10. Set the steam control button to the on ( ) position.
11. Hot steam comes out of the holes in the soleplate.
12. Now iron an old piece of material first to remove possible manufacturing residues from the
soleplate. Let all of the water in the water tank vaporise.
13. Disconnect the steam iron from the mains and let it cool down completely.
14. Clean the steam iron as described in Cleaning and Care.
IRONING INSTRUCTIONS
•Sort the clothes according to type of fabric before ironing. This helps to avoid frequently
changing the temperature setting.
•Always check the garment label to identify the type of fabric. Select the temperature
according to the instructions on the label.
•If there is no temperature setting instructions on the label, then it is recommended to begin
with the lowest temperature. Caution! Synthetic fabrics could melt.
•Follow the manufacturer’s instructions.
•It is advised to wait a few minutes prior to ironing delicate fabrics. The steam iron needs a bit
of time to adjust from higher to lower temperature settings. To be on the safe side, let the
steam iron cool down until the power indicator light goes on. It is recommended to iron
garments with the lowest ironing temperature first and then those with the higher temperature
because the steam iron heats up faster than it cools down.
•For delicate fabrics, such as for example, silk, wool, satin, etc., it is best to use an ironing
cloth to prevent shiny spots.
•When ironing mixed-fibre fabrics, always begin with the lowest temperature first and try it first
on a hidden spot.
10
TEMPERATURE SETTING AND IRONING FABRIC
SYMBOL TYPE OF FABRIC
Do not iron
Synthetic fibres, polyamide, acrylic, polyester, viscose
Wool, silk
Cotton, linen
MAX Maximum temperature (Steam treatment)
1. When the steam iron is hot, only touch it on the handle (10).
DRY IRONING
1. Connect the power plug to a suitable power outlet.
2. Set the temperature setting to the desired temperature.
• Lower temperature
•• Medium temperature
••• High temperature
MAX Maximum temperature (steam ironing)
3. The power indicator light goes on.
4. When the desired temperature has been reached, the power indicator light goes out. During
operation, the power indicator light will go on and off, indicating the stabilisation of the set
temperature.
5. During ironing, let the steam iron glide lightly over the garment. Do not push on the iron. The
best ironing results can be reached using a slightly damp garment.
6. To switch off the iron, turn the temperature control to MIN. The power indicator light goes off.
Now pull out the power plug and let the iron cool down.
STEAM IRONING
1. Fill the water tank as described in “Prior to first use”.
2. Set the temperature control to the “••“ or “•••“ setting.
PLEASE NOTE: For steam ironing, the temperature control is usually set to MAX.
3. Push the steam control button to the steam setting (&'1;).
4. While ironing, hot steam is emitted from the soleplate. Please note that steam only comes out
of the soleplate when the iron is in a horizontal position.
5. With the steam control button, the level of steam can be adjusted from a little to a lot.
Steam Jet Button
6. This function provides a one-time additional jet of steam to smooth out severely wrinkled
spots.
7. Only use the steam jet button (2) when ironing at high temperatures.
8. Always wait until the power indicator light goes off before using the steam jet button.
9. After you are finished steam ironing or before you turn off the iron, set the steam control
setting to position 0( ) again.
10. To switch off the iron, turn the temperature control counter clockwise to MIN pull out the
power plug.
11
11. Do not push the steam jet button for longer than 5 seconds at a time to prevent water
leakage.
Vertical Steam Ironing
12. For vertical steam ironing, always make sure that there is enough water in the water tank.
13. Set the temperature and steam controls to the highest settings.
14. Hold the iron upright and press on the steam jet button .
SPRAY FUNCTION
1. If an ironing spot need to be dampened, press the spray button (1). Water sprays out of
the spray nozzle (6). Press the spray button frequently to start until a constant mist of water
forms.
2. The spray function is not dependent on the temperature and can be used at any time as long
as there is water in the water tank.
EMPTYING THE WATER TANK
1. Empty the water tank after every use.
2. Set the steam control setting to position 0( ).
3. Before emptying the water tank, turn the iron off, disconnect the power plug and let it cool
down completely in an upright position.
4. Open the cover of the water tank filler hole.
5. Hold the handle, turn the iron upside down and carefully pour the remaining water out of the
Water tank by gently shaking it.
6. You could press the spray button as well to make it easier to get any remaining water out of
the iron.
7. After emptying the water out, place the iron in an upright position and switch it onto the
maximum temperature for 2 minutes.
CLEANING AND CARE
Attention! Do not under any circumstance use alcohol, acetone, petrol, aggressive
cleansers, etc. to clean the iron. Do not use hard brushes or metal objects.
1 After use, set the steam level control to position 0 ( ).
2 Set the temperature control to MIN and pull the power plug out of the power outlet. Place the
iron in an upright position and let the device cool down completely in a location that is safely
out of reach of children.
3 Empty the water tank as previously described.
4 To clean the outer casing, use a slightly damp cloth and a mild cleanser, if necessary.
5 Clean the soleplate with a slightly damp cloth. Never use abrasive cleansers or hard cleaning
utensils.
6 Roll up the power cord for storing purposes. Do not wrap the cord around the iron.
7 Please try to store the iron in the original packaging. Store the steam iron in a dry, cool
location that is protected from moisture and direct sunlight and that is out of reach of children.
Only store the steam iron in an upright position.
8 Dry off all parts after cleaning.
12
Self-cleaning Function
1. Fill the water tank to the MAX marking.
2. Set the temperature control to MAX.
3. Connect the power plug to a suitable power outlet.
4. Wait until the power indicator light goes off.
5. Hold the steam iron horizontally over a sink, put the steam control to on ( ) and press the
self-cleaning button Self Clean (8).
6. The steam coming out of the nozzle and the boiling water eliminate impurities that may be
inside the steam iron. While pushing the self-cleaning button, it is recommended to move the
iron back and forth.
7. Repeat the process for heavier soiling.
8. To dry the soleplate, iron an old piece of fabric.
TECHNICAL DATA
Power supply: 220 – 240V~ 50Hz
Power consumption: 2200W
Proper disposal of the product
Within the EU this symbol indicates that the product must not be disposed of
together with household waste. Old devices contain valuable recyclable materials
which should be reused in order not to harm the environment or people’s health
through uncontrolled waste disposal. Dispose of old devices through appropriate
collection systems or send the device to your retailer. It will then be taken for
recycling
When the device has reached the end of its service life, make it defective by disconnecting
the power plug from the socket and cutting the cord.
This device is intended for private use and must not be used for commercial purposes.
Imported by:
Dirk Rossmann GmbH
Isernhägener Straße 16
30938 Burgwedel

13
POZOR
1. Ped prvním pouitím si pelivpette tento návod k obsluze.
2. Jestlie pístroj pedáte jinému uivateli, prosím, pilote také tento návod k obsluze.
3. Tento pístroj odpovídá technickm normám a píslunm bezpenostním pedpism
vztahujícím se naelektrické pístroje.
4. Vrobce nenese odpovdnost za kody vzniklé v dsledku nesprávného pouívání nebo
nerespektování návodu k obsluze.
5. Pístroj mjte mimo dosah dtí.
6. Tento pístroj není uren pro pouití osobami (vetndtí) se sníenmi fyzickmi,
smyslovmi nebo duevními schopnostmi nebo nedostatkem zkueností a znalostí, ledae by
byly pod dohledem nebo poueny o pouití pístroje osobou zodpovdnou za bezpenost.
7. Dti by mly bt pod dohledem, aby si nehrály s pístrojem.
8. Nikdy neponoujte pístroj, kabel nebo síovou zástrku do vody. Rovn neobsluhujte
pístroj mokrma rukama. Nebezpeí úrazu elektrickm proudem!
9. Pístroje nesmjí bt pouívány v blízkosti vany nebo sprchy nebo umyvadla naplnného
vodou.
10. Pokud by vám pístroj pesto spadl do vody, nechte jej ped novm zapnutím
zkontrolovat odborníkem. Neuchopit ve vod! Vdy nejprve vytáhnout síovou
zástrku!
11. Nevystavujte pístroj pímému slunenímu svtlu. Rovn pístroj nepouívejte v blízkosti
pístrojvyrábjících teplo, jako kamna nebo kuchyské sporáky.
12. Nikdy se nesnate vrobek sami opravovat. Opravu smí provést pouze kvalifikovan
odborník.
13. Jestlie kabel pokozen, aby nedolo úrazu, ml by bt vymnn pouze vrobcem nebo
servisním centrem vrobce nebo osobou s odpovídajíc kvalifikací.
14. Nezasunete síovou zástrku do zásuvky, pesvdte se, e napájení proudem souhlasí s
údaji na typovém títku.
15. Tento produkt je uren vhradnpro privátní pouití, ne pro ivnostenské vyuívání.
16. V pípadpokození neotvírejte nikdy pístroj sami. Je-li pokozen pístroj, kabel nebo síová
zástrka, nechte je opravit odborníkem.
17. Dbejte na to, abyste o kabel nekloptli.
18. Jestlie není pístroj pouíván nebo se istí, vdy vytáhnout síovou zástrku ze zásuvky.
Rovn pi poruchách provozu v kadém pípadokamitvytáhnout síovou zástrku.
19. Pístroj umístit a provozovat vdy na rovném povrchu.
20. Pístroj nesmí bt v provozu, jestlie je viditelnpokozen nebo spadl.
21. Zástrku nevytahovat ze zásuvky pipojovacím vedením.
22. ehlika není vhodná pro venkovní provoz event. v prostorách se zvenm stupnm
vlhkosti.
23. Vytáhnte síovou zástrku ze zásuvky vdy, jestlie není pístroj v provozu a pokadé ped
naléváním a vyléváním vody.
24. Mjte pístroj mimo dosah dtí a dejte zvlátpozor, jestlie v blízkosti ehlíte.
25. Nenechte zapnutou event. horkou ehliku bez dozoru, zvlátjestlie stojí na ehlicím
prkn.
26. Pokadé, jestlie udláte pi ehlení pestávky, v ádném pípadnepokládejte ehliku na
spodní ást. Doporuuje se odstavit pístroj na kovovevent. drsnpovrch.
27. Jestlie odcházíte od ehliky i na krátkou dobu, vdy vypnout, umístit do svislé polohy a
vytáhnout síovou zástrku. ehlika musí bt mimo dosah dtí.
28. POZOR! Pro vylouení peptí sítnepipojujte ehliku nikdy souasns jinmi
vkonnostnsilnmi domácími pístroji k témupívodu proudu.
29. Jestlie by dolo k poáru, vytáhnte nejprve zástrku ze zásuvky nebo oddlte pístroj jinak
od napájení proudem díve, nezahájíte vhodná opatení k potlaení poáru. Pozor:
Nedávejte vodu do pístroje, kterje jetpod proudem. Nebezpeí úrazu elektrickm
proudem!

14
30. Tento pístroj je vyvinut vlunk ehlení textilií. Nepouívejte jej pro jiné materiály nebo k
vytápní.
31. Nesmjí bt ehleny aty nebo jiné textilie, které jsou právnoeny lidmi nebo zvíaty.
Tento pístroj slouí vhradnpro privátní domácí pouití a nesmí bt pouit ke komerním
úelm.
DÍLY
PED PRVNÍM UVEDENÍM DO PROVOZU
POKYN: Ped prvním pouitím me vznikat lehkpach a zatíení kouem. To nepedstavuje
závadu pístroje, nbrspalování zbytkz vroby. Zajistte dostatené vtrání prostoru. Pach a
koupo prvním pouití zmizí.
1. Odstrate vekerobalovmateriál. Zkontrolujte rozsah dodávky na úplnost a event.
transportní pokození. Jestlie dojte k transportním pokozením nebo je dodávka neúplná,
kontaktujte prodejce (viz záruka).
1. Tlaítko na postikování
2. Tlaítko k vrobpáry
3. Regulátor páry
4. Kryt otvoru na plnní vodou
5. Odmrka
6. Postikovací tryska
7. Spodní ást ehliky
8. Tlaítko samoitní
9. Oznaení MAX
10. Rukoje
11. Síovkabel se síovou zástrkou
12. Patka
13. Provozní ukazatel
14. Oznaení
15. Regulátor teploty
1
2
3
4
6
5
7
8
9
15
14
13
12
11
10

15
2. Originální obal uloit. Me bt znovu pouit k transportu nebo skladování. Zajistte
odbornou likvidaci obalovch materiál. Informujte se o sbrnch místech event. tídni
odpadu ve vaí obci. Nebezpeí uduení ! Drte vekerobalovmateriál izolovanod
malch dtí a dtí.
3. Stáhnte ochrannou fólii ze spodní ásti ehliky (7).
1. Naplnní vodní nádrky
4 Vytáhnout síovou zástrku (11) ze zásuvky a nastavit regulátor páry (3) do pozice 0 ( ) .
Otevete kryt otvoru na plnní vodou (4).
5 Naplte studenou vodu do otvoru na plnní vodou a potom ehliku postavte na patku (12)
(svislá poloha). K naplnní vodou mete pouít i piloenou odmrku (5). Aby se vodní
nádrka naplnila, potebujete cca 2 odmrky vody. Naplte odmrku vdy k oznaení MAX.
6 Oznaení MAX (9) ukazatele stavu vody na vodní nádrce nesmí bt pekroeno. Abyste
mohli kontrolovat stav vody v nádrce, postavte ehliku svisle na patku. Pro tuto ehliku
mete pouít normální vodu z potrubí. Jestlie je voda ve vaem okolí velmi tvrdá,
doporuuje se smíchat normální vodu a 50 % destilované. Jestlie se vytvoí stíkající
voda, vdy ji otít.
2. Zapnutí a vypnutí ehliky
7 Postavte ehliku na patku a spojte síovou zástrku s pedpisovnainstalovanou zásuvkou
ochranného kontaktu.
8 Nastavte regulátor teploty (15) na MAX. Provozní ukazatel (13) se rozsvítí.
9 Jestlie je dosaena ádaná teplota, provozní ukazatel zhasne.
10 Nastavte regulátor páry do pozice ein- zapnuto ( ).
11 Z otvorspodní ásti ehliky uniká horká vodní pára.
12 Vezmte nyní do ruky starkousek látky a ehlete pes nj, aby se odstranily ze spodní ásti
ehliky event. vrobou podmínné zbytky. Vechnu vodu ve vodní nádrce nechte odpait.
13 Odpojte ehliku ze síta nechte ji zcela ochladit.
14 istte pístroj dle popisu v itní a údrba.
POKYNY K EHLENÍ
•Ped ehlením roztídit prádlo dle druhu tkaniny. Tím se zamezí asté zmnnastavení
teploty
•Rovn zkontrolujte podle etikety na odvu identifikaci druhu tkaniny. Navolte teplotu podle
informací na etiket.
•Jestlie etiketa neobsahuje informaci o teplot, doporuuje se zaít s nejnií teplotou.
Pozor! Syntetické tkaniny se mohou tavit.
• Dodrujte pokyny vrobce.
•Nezanete ehlit citlivé látky, doporuuje se nkolik minut vykat. ehlika potebuje uritou
dobu k pizpsobení z vyích na nií teplotní stupn. Abyste se ujistili, nechte ehliku
vychladnout tak, ase rozsvítí provozní ukazatel. Doporuuje se ehlit nejprve prádlo s nií
teplotou a potom látky s vyí teplotou, protoe se ehlika rychleji oheje neochladí.
•U citlivch látek, jako nap. hedvábí, vlna, samet ap. pouijte nejlépe hadík na ehlení, aby
se zamezilo vyletnm místm.
•U smsnch tkanin zaínejte vdy s nejnií teplotou a provete vdy nejprve test na míst,
které není vidt.

16
NASTAVENÍ TEPLOTY A MATERIÁL K EHLENÍ
SYMBOL DRUH LÁTKY
Zboí neehlit
Umlá vlákna, polyamid, akryl, polyester, viskóza
Vlna, hedvábí
Bavlna, len
MAX Maximální teplota (oetení napaováním)
1 ehliku v horkém stavu uchopit pouze za rukoje(10).
EHLENÍ NASUCHO
1 Zasute síovou zástrku do vhodné zásuvky.
2 Nastavte regulátor teploty na ádanou teplo
• Nízká teplota
•• Stední teplota
••• Vysoká teplota
MAX Maximální teplota (ehlení snapaováním)
3 Provozní ukazatel se rozsvítí.
4 Jestlie je ádaná teplota dosaena, provozní ukazatel zhasne. Bhem provozu provozní
ukazatel zapíná a vypíná, ímje indikováno konstantní udrování nastavené teploty.
5 Nechte ehliku pi ehlení ehlit kus obleení. ehliku netisknout. Nejlepích vsledklze
dosáhnout s lehce navlhenmi kusy odv.
6 K vypnutí otote regulátor teploty na MIN. Provozní ukazatel zhasne. Nyní vytáhnout síovou
zástrku a nechat ehliku ochladit.
EHLENÍ S NAPAOVÁNÍM
1. Naplte nádrku na vodu tak, jak je popsáno v „Ped prvním uvedením do provozu“.
2. Nastavte regulátor teploty na stupe„••“ nebo „•••“.
POKYN: K ehlení s napaováním nastavte regulátor teploty nejlépe na MAX.
3. Nasute regulátor páry do pozice napaování ( ).
4. Bhem ehlení uniká ze spodní ásti ehliky horká vodní pára. Je teba poznamenat, e
pára vystupuje ze spodní ásti ehliky pouze v horizontální poloze.
5. Regulátorem páry lze mnoství páry více nebo ménregulovat.
Tlaítko rázu páry
6. Tatto funkce slouí k jednorázovému doplkovému erpání páry pi ehlení silnzmakanch
míst.
7. Tlaítko k vrobpáry (2) pouívat pouze ve vysokém teplotním rozsahu.
8. Nese aktivuje tlaítko rázu páry vdy vykat, aprovozní ukazatel zhasne.
9. Po ukonení ehlení s napaováním nebo ped vypnutím pístroje nastavte regulátor páry
vdy do pozice 0( ).
10. K vypnutí otáejte regulátorem teploty proti smru hodinovch ruiek na MIN a vytáhnte
síovou zástrku.

17
11. Nedrte tlaítko rázu páry stisknuté déle ne5 sekund, aby se zamezilo vytékání vody.
Vertikální ehlení s napaováním
12. Pro vertikální ehlení s napaováním vdy zkontrolovat, e se ve vodní nádrce nachází
dostatenvody.
13. Regulátor teploty a páry nastavit na maximální vkonnostní stupe.
14. Drte ehliku svisle a stisknte tlaítko rázu páry. .
FUNKCE POSTIKOVÁNÍ
1. Jestlie musí bt místo na ehlení navlheno, stisknou tlaítko (1). Stíkající voda uniká z
postikovací trysky (6). Stisknte postikovací tlaítko na poátku vícekrát, dokud se nevytvoí
stejnomrná vodní mlha.
2. Funkce postikování není závislá na teplota me bt pouita kdykoliv, pokud se v nádrce
na vodu nachází voda.
VYPRÁZDNNÍ VODNÍ NÁDRKY
1. Po kadém pouití musí bt vodní nádrka vyprázdnna.
2. Nastavte regulátor páry do pozice 0( ).
3. Vypnte ehliku, vytáhnte síovou zástrku a nechte ji ve svislé poloze ádnvychladnout
díve, nezanete s vyprazdováním vodní nádrky.
4. Otevete kryt otvoru na plnní vodou.
5. Podrte rukoje, otote pístroj do písluné polohy a opatrnvylijte zbvající vodu z nádrky
na vodu tak, e pístrojem opatrnpohybujete.
6. Eventuálnaktivovat tlaítko na postikování, aby se mohla snadnji vypustit zbvající voda z
pístroje.
7. Zapnte ehliku po vyprázdnní vody ve svislé poloze na 2 minuty na maximální teplotu.
ITNÍ A ÚDRBA
Pozor! V ádném pípadnepouívejte k itní líh, aceton, benzin, agresivní
isticí prostedky ap. Rovn nepouívat tvrdé kartáe nebo kovové pedmty.
1. Po pouití nastavit regulátor mnoství páry do pozice 0 ().
2. Nastavte regulátor teploty na MIN a vytáhnte síovou zástrku ze zásuvky. Umístte
ehliku do svislé polohy a nechte ji zcela vychladnout na místnedosaitelném dtem.
3. Vyprázdnte nádrku na vodu, jak je popsáno ve.
4. K itní krytu pouít hadík navlhenvodou event. trochu mírného isticího prostedku.
5. Spodní ást ehliky istit lehce navlhenm hadíkem. Nikdy nepouívat drhnoucí isticí
prostedky nebo tvrdé nástroje.
6. Síovkabel navinout k uloení. Nenavíjejte kabel okolo pístroje.
7. Pístroj skladovat nejlépe v originálním obalu. ehlika musí bt skladována na chladném
místchránná ped vlhkostí a pímm sluncem a nepístupná dtem. Skladujte ehliku
pouze ve svislé poloze.
8. Po vyistní vytít vechny díly dosucha.
Funkce samoitní
1. Naplte nádrku na vodu ado oznaení MAX.
2. Nastavte regulátor teploty na MAX.
3. Zasute síovou zástrku do vhodné zásuvky.
4. Vykejte, azhasne provozní ukazatel.
5. Drte ehliku vodorovnnad umyvadlem, nastavte regulátor páry na ( ) a stisknte tlaítko
samoitní Self Clean (8).

18
6. Pára vystupující tryskami a vaící voda odstraní zneitní v ehlice. Jakmile stisknete
tlaítko samoitní se doporuuje, pohybovat ehlikou tam a zpt.
7. Pi silném zneitní proces opakovat.
8. Aby se vysuila spodní ást ehliky, ehlete pes starkus látky.
TECHNICKÁ DATA
Napájení proudem: 220 – 240V~ 50Hz
Píkon: 2200W
Správná likvidace tohoto produktu
V EU tento symbol znamená, e tento produkt nesmí bt odstrann jako domovní
odpad. Staré pístroje obsahují cenné recyklovatelné materiály, které mají bt
dodány k dalímu zuitkování, aby nedolo nekontrolovanm odstranním odpadu
k pokození ivotního prostedí event. pokození zdraví. Prosím likvidujte staré
pístroje pomocí sbrnch systémnebo zalete pístroj k likvidaci na místo, kde
jste ho koupili. To zajistí potom látkové zuitkování pístroje.
Jestlie je pouívání ukoneno, znite pístroj tak, e vytáhnete zástrku ze zásuvky a
oddlíte kabel.
Tento pístroj slouí vhradnpro privátní domácí pouití a nesmí bt pouit ke komerním
úelm.
Dovozce:
Dirk Rossmann GmbH
Isernhägener Straße 16
30938 Burgwedel
Table of contents
Languages:
Other Ideen Welt Iron manuals


