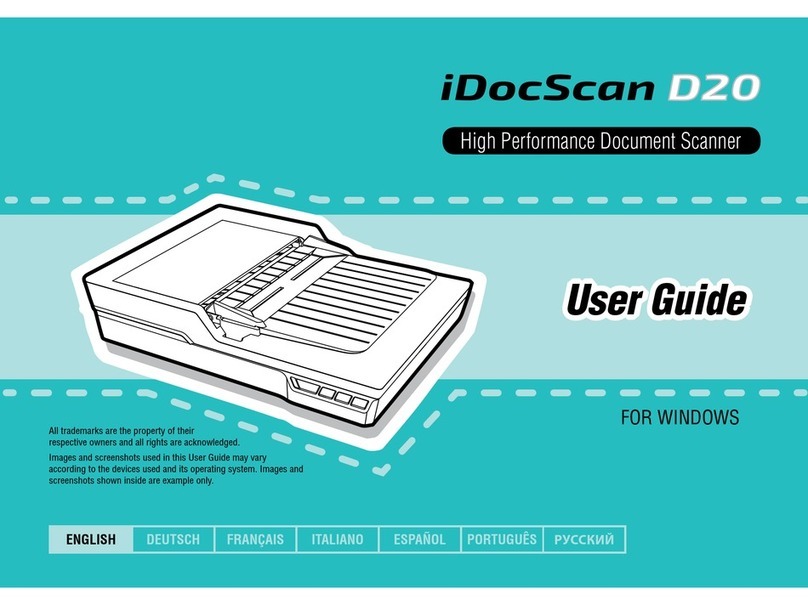
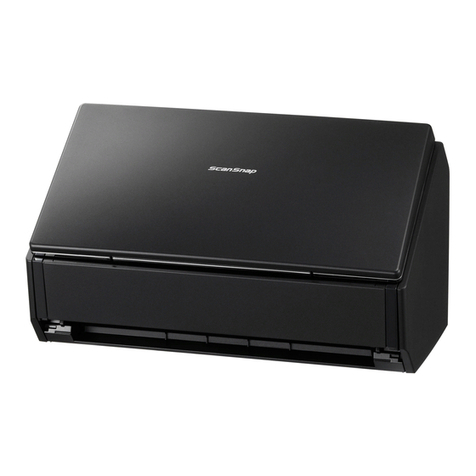
iDocScan D50 User manual

High Performance Document Scanner
User Guide
•All trademarks are the property of their respective owners
and all rights are acknowledged.
•Images and screenshots shown inside this User Guide are example only,
which may vary according to the devices used and its operating system.
•“DXX/SXX” is mentioned In this Guide, refers to the model number D50,
D25, D20 and S20.
•All contents and specifications of this User Guide are subject to change
without notice.
FOR WINDOWS
D50 / D25 / D20 / S20
English
V1.5

2
SAFETY AND PRECAUTIONS
General Precautions
•Never store the unit in hot, or very cold, or humid or dusty places.
•For an extended storage period, we recommend storing the unit in a cool and dry place.
•If the Scanner is left in extreme cold or hot conditions, allow it to adjust to normal room temperatures before use.
•Only use accessories included with the Scanner.
•When left unused for a long period of time, remove the power plug from the outlet.
•Always handle the unit with care. Avoid dropping and strong impact.
•Avoid objects (e.g. neckties, long hair, etc) being caught in the Scanner during a scanning operation.
•Do not scan sharp objects or hard abrasive surfaces to avoid damage to the lens and other parts.
•Do not scan documents with glue, grease, correction fluid, or wet ink on it which can cause malfunctions.
•Operate the unit on a level, well-grounded work surface, and free of excessive vibration.
•Don’t open the unit. Risk of electric shock.
•When moving the Scanner, disconnect the power cord and connection cable.
•Whendoing maintenance on the Scanner, remove the power plug from the outlet.
•Do not leave the Scanner within the reach of children.
Environmental Information
Discarded electrical and electronic appliances are recyclable and should separate from the household waste. Please actively support in
conserving resources and protecting the environment by returning this appliance to the collection centers (if available).

3
CONTENTS
SAFETY AND PRECAUTIONS ..................................................................2
CONTENTS ............................................................................................3
UNPACK ................................................................................................4
SCANNER PARTS....................................................................................5
SYSTEM REQUIREMENTS ......................................................................6
INSTALLATION........................................................................................7
Assembling the Rear Tray .......................................................................7
Installing the Scanner Software ..............................................................7
Uninstalling Scanner Driver ..............................................................9
Connecting the Scanner..........................................................................9
Turning Power On/Off .............................................................................9
Turning Power On.............................................................................9
Turning Power Off...........................................................................10
Power Saving Mode........................................................................10
LOADING ORIGINALS...........................................................................11
Paper Handling Precaution....................................................................11
Loading the Plain Paper in the ADF.......................................................11
Loading Business Cards in the ADF ......................................................12
Loading a Long Sheet of Paper in the ADF............................................13
Placing a Document on the Flatbed.......................................................13
USING THE IDOCSCAN TOUCH.............................................................14
About the IDocScan Touch....................................................................14
Configuring the Scan To Functions .......................................................16
Adjusting the Setting Tabs and Properties ..........................................17
Destination ....................................................................................17
Scan Settings.................................................................................19
Image Adjustments........................................................................23
Configuring the TWAIN Interface .........................................................25
SCAN OPERATION ...............................................................................27
Scanning to a Destination ....................................................................27
Previewing and Saving.........................................................................28
Scanning Using the TWAIN Interface...................................................28
MAINTENANCE ....................................................................................31
Cleaning the Scanner ...........................................................................31
Cleaning the ADF Parts ..................................................................31
Cleaning the Flatbed Glass.............................................................32
Calibrating the Scanner........................................................................34
Replacing the Separation Pad ..............................................................35
Clearing Paper Jams in the ADF...........................................................36
TROUBLESHOOTING ...........................................................................37
SPECIFICATIONS .................................................................................40

4
UNPACK
Make sure following items are included.
Scanner Rear Tray (See p.7) Power Adapter (See p.9)USB Cable (See p.9)
Separation Pad (See p.35)Installation CD (See p.8) (*) User Guide Calibration Sheet (See p.34)
(*) The following are included in the Installation CD:
hScanner Driver (TWAIN Driver / iDocScan Touch DXX / SXX Application / Calibration Utility) (for Windows)
hABBYY FineReader
hPresto! PageManager
hAdobe Acrobat Reader

5
SCANNER PARTS
A B C D E
Parts Functions
1 ADF Cover Opens the cover of the ADF (Auto Document
Feeder) when maintenance is required.
2 Paper Guides Adjusts the Guides to match the paper width.
3 ADF Input Tray Holds the paper stack to be fed into the ADF for
scanning.
4 Operation Panel
A Power LED Emits green light when the Scanner is turn on.
B Power Button Turns on or off the power.
C SCAN Button Scan directly to the selected Scan-To destination.
D PDF Button Scan directly to the selected Scan-To destination.
E PANEL Button Scan directly to the selected Scan-To destination.
5 Flatbed Cover Opens to reveal the Flatbed Glass.
6 Flatbed Glass Used to scan single pages or book pages.
7 Power Jack Connects the Power Adapter.
8 USB Port Connects the USB Cable to a computer.
9 Paper Exit Slot Outputs the paper after scanning.
10 Rear Tray Slots Used to mount the Rear Tray.
123
24
5
6
7
8
10
9

6
SYSTEM REQUIREMENTS
Following minimum system requirements are recommended to obtain the best performance for running your iDocScan DXX/SXX scanner.
•Computer with intel core DUO 2.4 GHz CPU or higher
•XGA (1024 x 768) color screen
•4GB RAM or greater
•USB 2.0 Hi-Speed
•CD-ROM or DVD-ROM drive
•600MB available hard disk space for software installation
•Supported operating systems: Windows XP, Vista, 7, 8, and 10
TIPS:
The scanning speed and performance are determined by the specifications of your computer. The higher specification of your computer,
the better the Scanner will be performed.

7
INSTALLATION
Assembling the Rear Tray
Follow below steps to attach the Rear Tray to the Scanner for holding
the paper as it exits from the ADF.
1. Remove all packaging and
tapes from the Scanner before
use.
2. Locate the Rear Tray Slots on
the lower back of the Scanner.
3. Insert the Rear Tray tabs into
the slots on the Scanner.
4. Flip open the extension on the
Rear Tray.
Installing the Scanner Software
The Scanner comes with the Scanner driver and associated applications
for operating the Scanner. Please install all of the applications to ensure
all functions of the Scanner work properly.
Please complete all software
installation before connecting
the Scanner.
TIPS:
• Do not connect USB Cable
to the Scanner and your
computer when starting
installation process.

8
INSTALLATION (CONTINUED)
1. Insert the Installation CD
into a CD-ROM or DVD-ROM
drive on your computer. The
installation menu will open
automatically.
• If the installation menu does
not open automatically,
double click on the icon for
your computer’s CD-ROM
or DVD-ROM drive.
2. Click the application from the
menu to install them one at a
time.
• Scanner Driver - Scanner
Driver comes with TWAIN
driver, and iDocScan Touch
application for initiating
the one-step scan function.
Note that you must install
it first in order to use the
Scanner.
• ABBYY FineReader Sprint - This application allows to convert
the scanned text into editable text using the Scan To OCR
(Optical Character Recognition) function of the Scanner. For
the detailed information of this application, see the “Help” file
integrated within this application.
• Presto! PageManager - This application is a document
management application designed to assist in scanning, sharing
and organizing documents and files. For the detailed information
of this application, see the “Help” file integrated within this
application.
• Adobe Acrobat Reader - This application allows to open the
scanned data that is converted into PDF format using the Scan
To PDF function of the Scanner. For the detailed information
of this application, see the “Help” file integrated within this
application.
3. Select a preferred language for
the user interface.
4. Click Next when the Welcome
screen appears, then follow
on-screen instructions to
complete installation.

9
5. Click Finish when the
installation completes.
6. Repeat Step 2 ~ 4 to install
all other applications before
starting to scan.
Uninstalling Scanner Driver
1. Unplug the USB cable from the
Scanner.
2. Right-click on the Scanner
icon [ ] from the system tray
to exit the iDocScan Touch
application.
3. Go to the “Start” menu, select
“All Programs”, “iDocScan
DXX/SXX”, and then
“Uninstall”.
4. Follow on-screen instructions
to remove the Scanner driver
INSTALLATION (CONTINUED)
Connecting the Scanner
1. Connect one end of supplied Power Adapter to the Scanner’s DC
IN jack, and the other end to a power socket.
2. With your computer turned on, connect the USB Cable to the
USB Port on your computer and the other end to the side of the
Scanner.
Turning Power On/Off
Turning Power On
1. Press <Power> until Power
LED turns green.

10
INSTALLATION (CONTINUED)
2. Your computer then recognizes
that the Scanner has been
plugged into the USB Port and
automatically loads iDocScan
Touch [ ] in the system tray.
• iDocScan Touch icon might
be hidden, and require that
you click the arrow in the
system tray to reveal it.
Turning Power Off
Press <Power> for 3-5 seconds
until the Power LED turns off.
TIPS:
• When the power is off,
iDocScan Touch icon [ ]
will appear, indicating that
the Scanner is not ready
for use.
Power Saving Mode
By default, when the Scanner has no operations for 15 minutes, the
Scanner will automatically turn the power off, and the Scanner icon in
the system tray will then be disabled [ ] when the power is off.
To resume the function, press the <Power> to turn on the Scanner.

11
LOADING ORIGINALS
Paper Handling Precaution
Please read below tips before scanning to prevent misfeeds, paper jams
and protect your originals.
•Do not use sheets other than those with the specified size, quality,
and weight as the Specification (p.40) to feed in the ADF Input Tray.
•Do not mix different paper types and sizes in the ADF Input Tray.
•Ensures staples and paper clips have been removed prior to
scanning as they may cause damage to the Scanner your originals.
•Do not feed paper with wet ink or liquid correction fluid, curls,
wrinkles, folds, irregular shapes or tears into the ADF Input Tray.
•Do not scan fragile photos, important originals, very thin and thick
paper, and hard and rigid items from the ADF as misfeeding may
wrinkle or damage them. Use the flatbed instead.
•Do not overload the ADF Input Tray. The paper capacity is 60 sheets
for the plain paper or 20 cards for the business cards.
•If a stack of plain paper or business cards cannot be fed into the
ADF properly, try to reduce the number of them in the stack.
•Do not make the Paper Guides too tight against the originals. If the
Paper Guides are too tight, this can cause failures to feed.
•When scanning a stack of small business cards or other small paper,
place the long side of the paper parallel with the Paper Guides.
•It is recommended that long paper to be fed in ADF Input Tray one
sheet at a time.
Loading the Plain Paper in the ADF
1. Flex the paper stack back and
forth, then fan the paper to
loosen them.
2. Straighten the top edges of
the paper stack on a level of
surface.
3. Slightly lift the ADF Input
Tray until the legs are
fully extended and held in
position.

12
4. Slide either side of the Paper
Guide to the mark indicating
the desired paper size. LT R
A4
B5
A5
5. Place your single-sided
documents face down with the
tops in first, and then slide the
stack into the ADF Tray.
Place your double-sided
documents with the first page
face down with the tops in
first, and then slide the stack
into the ADF Tray.
• Adjust the Paper Guides
to touch the edges of the
stack.
LT R
A4
B5
A5
Loading Business Cards in the ADF
TIPS:
• Use the same techniques to loosen and straighten the card stack
as described in the Loading the Plain Paper in the ADF on p.11.
1. Slide the Paper Guides to the
center.
LT R
A4
B5
A5
2. Place the cards face down with
the long side parallel with the
Paper Guides, and then slide
the cards into the ADF Tray.
• Adjust the Paper Guides
to touch the edges of the
stack.
LT R
A4
B5
A5
TIPS:
• Select “Auto” for the Scan Size to scan business cards. See p.20.
• It is recommended to check the “Thick Media Mode” checkbox
when scanning business cards. See p.20.
LOADING ORIGINALS (CONTINUED)

13
Loading a Long Sheet of Paper in the ADF
1. Slide either side of the Paper
Guide to the mark indicating
the desired paper size. LT R
A4
B5
A5
2. Place the long paper straight
with the tops in first, and
then slide it into the ADF
Tray.
• Adjust the Paper Guides to
touch the edges of the stack.
TIPS:
• Select “Long Sheet” from the Scan Size setting when scanning
a long document exceeding 356mm up to 635mm. See p.20.
• If the document exceeded the maximum support length for the
ADF, the scanning will stop with an “Paper jam or misfeed.“
message appeared. The exceeded part of the document will
not be scanned.
LOADING ORIGINALS (CONTINUED)
Placing a Document on the Flatbed
CAUTION: The Flatbed Cover is
heavy. To avoid pinching your
fingers, or damage to the Scanner,
do not drop the cover while lifting
or lowering the cover.
1. Hold the cover firmly, and
lift the Flatbed Cover at a
90-degree angle so it stands
straight up.
2. Place a single-page
document or a book page
face down on the Flatbed
Glass. Position the page as
indicated by the position
arrow mark.
3. Hold the Flatbed Cover firmly
to lower and close it.
TIPS:
• Ensure to select “Flatbed”
from the Scan Source
when scanning. See p.19.

14
USING THE IDOCSCAN TOUCH
About the IDocScan Touch
The iDocScan Touch panel can be
accessed by clicking on the icon
[] in the system tray. The panel
is consisted of 3 Scan To buttons
which act as the respective Scanner
buttons. These 3 Scan To buttons
can be assigned to any of the
following predefined destinations
to perform one-step scanning.
TIPS:
• If an exclamation mark (!)
appears over the icon of
the button, this indicates
the Scan To function does
not exist. Please install
the respective application
or specify the correct
Save Path in the Setting
dialog. See the “Adjusting
the Setting Tabs and
Properties” on p.17.
Folder (Scan to Folder)
Click this button to start scanning to a specified folder. When scanning
completes, the scanned data will be saved directly into your folder on
your computer.
PDF (Scan to PDF)
Click this button to start scanning to PDF file format. When scanning
completes, the scanned data will be saved in PDF format and opened in
Acrobat Reader.
MSPaint (Scan to Application Default: MSPaint)
Click this button to start scanning to an application (Default: MS Paint)
with the files saved in the specified folder. When scanning completes,
the scanned image will open in the application where you can edit it.
TIPS:
• Applications that do not support multi-page scanning will open
and display only the first page of the documents.
Email (Scan to Email)
Click this button to start scanning to your E-mail with the files saved
in the specified folder. When scanning completes, your default E-mail
application will open and the scanned data will be attached to a blank
email.

15
TIPS:
• If the total file size of scanned data exceeded the attachment size
limit set at the mail server, the files will be unable to send.
• Only the JPEG, PDF file formats are available to be sent and
saved as a copy. Maximum of 20 JPEG files can be attached to
one email.
Print (Scan to Print)
Click this button to start scanning to a printer with the files saved in the
specified folder. When scanning completes, the scanned data will be
printed from your default printer connected to the computer.
TIPS:
• Only the JPEG file format is available to be saved as a copy,
when scanning to a printer.
OCR (Scan to OCR)
Click this button to scan and convert documents into editable text
using the supplied ABBYY FineReader Sprint, and open it in the word
processing program or Acrobat Reader according to the File Type
selection.
TIPS:
• ABBYY FineReader Sprint must be installed before using this
function.
Dropbox (Scan to Dropbox)
Click this button to start scanning to the Dropbox shared folder. When
scanning completes, the scanned data will be saved directly into the
Dropbox shared folder on your computer.
TIPS:
• To use this function, you must have a Dropbox account, Dropbox
must be installed on your computer.
• A detection dialog box may appear to detect whether the shared
folder exists before scanning.
Google Drive (Scan to Google Drive)
Click this button to start scanning to the Google Drive shared folder.
When scanning completes, the scanned data will be saved directly into
the Google Drive shared folder on your computer.
TIPS:
• To use this function, you must have a Google Drive account,
Google Drive must be installed on your computer.
• A detection dialog box may appear to detect whether the shared
folder exists before scanning.
USING THE IDOCSCAN TOUCH (CONTINUED)

16
USING THE IDOCSCAN TOUCH (CONTINUED)
Conguring the Scan To Functions
These 3 Scan To buttons can be changed to other Scan To function
and configured with various settings through the Job Settings dialog.
You can edit, rename a scan to button, or reset to the factory default
settings.
1. Click [
] (Job Settings)
following by the button to
open the Job Settings dialog.
2. Select a Scan To function
from the drop-down menu you
want to assign to the Scan To
button.
• If the Auto save after scan
box is checked, the pages
already scanned will be
automatically saved to the
specified Save Path.
• If the Auto save after scan
box is unchecked, the pages
already scanned will be
imported in the Preview and
Save dialog after scanning
finishes. See “Previewing
and Saving” on p.28.
3. You can rename the Scan To
button in the Enter Job Name
field to be displayed in the
iDocScan Touch panel.

17
4. Configure 3 setting tabs
including Destination,
Scan Settings, and Image
Adjustments as described in
the “Adjusting the Setting Tabs
and Properties” on p.17.
5. Click Apply to set the selected
scan function with the
configuration you changed.
6. Click OK to exit the Job
Settings dialog.
• If you want to continue
configure the other Scan To
button, click the Setting [
]
next to the button, and then
repeat above procedure.
USING THE IDOCSCAN TOUCH (CONTINUED)
TIPS:
• If you want to reset the
settings and properties to
the factory default settings,
click Default.
Adjusting the Setting Tabs and Properties
The Job Settings dialog includes Destination, Scan Settings, and
Image Adjustments tabs to configure the Scan To function. The
following table gives function descriptions and examples of the
available settings.
Note that some settings may not be available, depending on other
settings you select.
Destination
After changing any settings
and properties, always make
sure to click Apply or OK at
the bottom of the page.
The Destination tab includes
the following settings and
properties:

18
Item Function
Save Path
Click Browse to specify a file location to save the
scanned data.
File Name Settings: You can create the new file
name for the scanned images from this setting.
•yyyyMMddHHmmss: If this option is
selected, the created file is named in the
“yyyyMMddHHmmss” format.
•Custom: If this option is selected, you can create
the filename with the specified prefix in the File
Name field up to 20 characters.
File Type
Select a file type to save scanned images.
Choices: “JPEG(*.jpg)”, “TIFF (*.tif)”, “Multi-TIFF
(*.tif)”*1, “BMP (*.bmp)”, “PDF (*.pdf)”.
*1Do not attempt to create a multi-page TIFF file
that exceeds 2GB, otherwise no multi-page TIFF
will be created.
USING THE IDOCSCAN TOUCH (CONTINUED)
File Type
(continued)
Searchable PDF: Check this box to convert
document into a text-searchable PDF file when
selecting PDF in the File Type.
Open after Scanning/Saving: Check this box to
open the file automatically after scanning or saving
completes.
OCR
Language
This setting is available with the Scan To OCR
function. Select a language from the drop-down
menu to use for text recognition.
File
Compression
Use the slider to compress a file to reduce the
total size (High, Medium, Low). The higher the
compression level, the lower the file size, and vice
versa.
Printer
This setting is available with the Scan To Print
function. Select your printer to print the scanned
data.
Email Client
This setting is available with the Scan To Email
function. It displays the default email application on
your computer.
Application
This setting is available in the Scan To Application
function.
Select a graphic application from the drop-down
menu available on your computer to import the
scanned images.

19
USING THE IDOCSCAN TOUCH (CONTINUED)
Application
(continued)
If you wish to add a new graphic application, click
Add and navigate to the .exe file in the program’s
folder, which is usually in C drive, under the
Program Files folder (e.g. Adobe - Illustrator). Find
the launch .exe file for the application, and then click
“Open” to add it to the application list.
TIPS:
• Errors will occur if the selected application
doesn’t support to open the scanned files.
• The Add function allows only one new
application to be added and replaced.
Scan Settings
After changing any settings
and properties, always
make sure to click Apply
or OK at the bottom of the
page.
The Scan Settings tab
includes the following
settings and properties:
Item Function
Scan Source
Choices: “Simplex”, “Duplex” , “Flatbed”.
Select “Simplex” to scan single-sided sheets or
“Duplex” to scan double-sided sheets from the ADF.
Select “Flatbed” to scan single pages or book pages
from the Flatbed Glass.
Example:
1
2
3
4
3
2
1
5
6Double-sided
sheets
Single-sided
sheets
Scan Mode
Select a mode to scan your original(s).
Choices: “Color”, “Gray”, “B/W”*1, “Multi-Color
Output (Front Side / Back Side: Color, Gray,
B/W)”*2
*1Use B/W for scanning text or line drawing.
*2Multi-Color Output enables a single scan to be
saved up to 3 separate color modes for both front
side and rear side simultaneously.

20
Scan Mode
(continued)
Example: Select Gray and Color in Multi-Color
Output.
1
2
34
3
2
1
Originals
One scan into 2 separate
color simultaneously
4
4
3
2
1
Gray
Color
Scan Size
Choices: “Auto”*1, “A4(210x297mm)”,
“A5(148x210mm)”, “A6(105x148mm)”,
“B5(182x257mm)”, “B6(128x182mm)”,
“Letter(216x279mm)”, “Legal (216x356mm)”,
“Long Sheet (max. 635mm)”*2.
Thick Media Mode: Check this checkbox only when
scanning thick and rigid card stock such as business
cards, postcards, and etc. When the Thick Media
Mode is enabled, the Stop Scanning After Multi-Feed
function will be disabled.
*1When scanning business cards, postcards, or
any small-size document, select “Auto” to crop
scanned images automatically as following
example.
Scan Size
(continued)
Example:
A4
A5
Mixed-size
originals Documents are automatically
cropped to its original size.
When set to
Auto size
Check
A4
A5
Check
A4
A5
Check
When set to
A4 size
*2 Select “Long Sheet” when scanning long paper
from 356mm up to maximum 635mm in length.
TIPS:
• “Long Sheet” is available when the Scan
Resolution is set to 300 dpi or lower.
• “Legal” and “Long Sheet” are available when
scanning in the Simplex and Duplex mode.
Scan Resolution
Choices : “100dpi”, “200dpi”, “300dpi”, “600dpi”,
“1200dpi”*1.
•The higher the resolution, the bigger the file
size.
•Some resolution may not be available,
depending on other settings you select.
*1 1200dpi is available when scanning in the
Flatbed mode.
USING THE IDOCSCAN TOUCH (CONTINUED)
This manual suits for next models
3
Table of contents
Other iDocScan Scanner manuals
