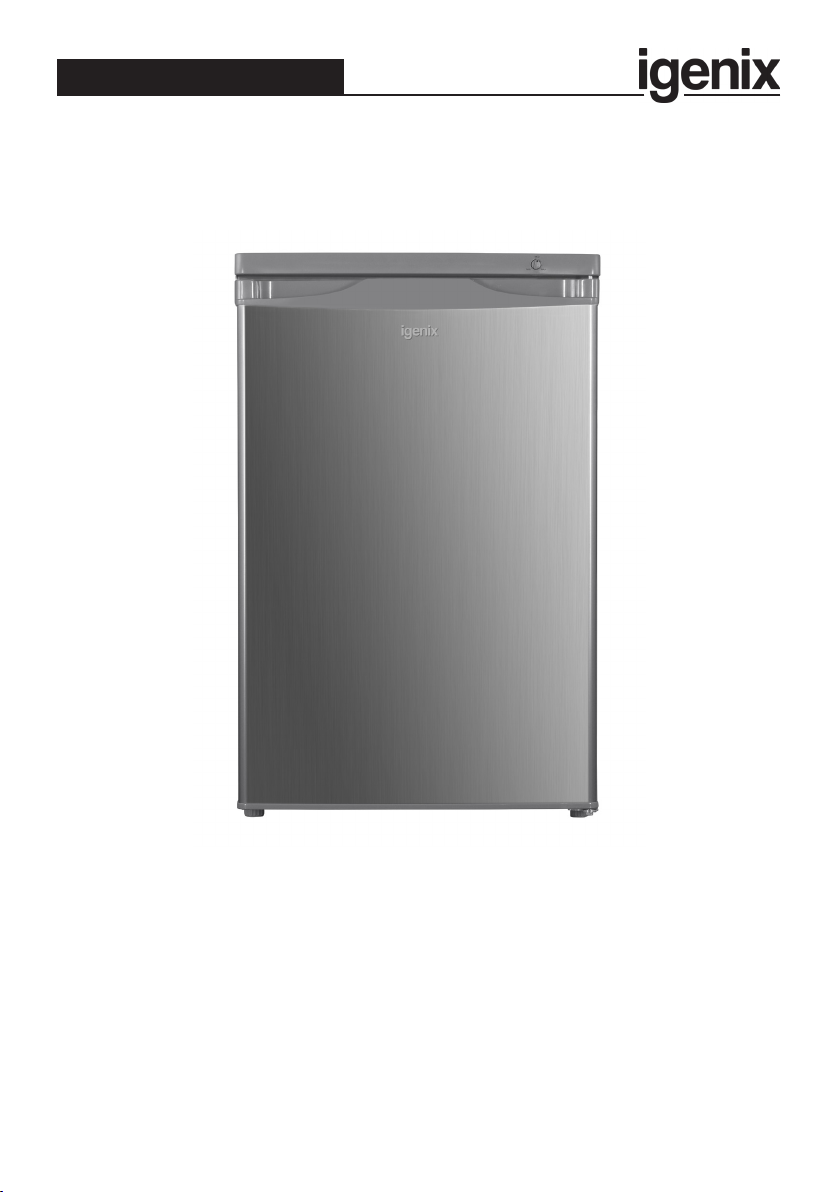
iGenix IG355X User manual
USER MANUAL
55cm Under Counter Freezer
Please read these instructions carefully before use and retain for future reference
Before switching on your appliance,
always check for any damage which may have been caused in transit
IG355X
PO Number

2
CONTENTS
Important Safety Instructions...............................................3-6
Technical Specication ...............................................................7
Appliance Overview...................................................................8
Installation...............................................................................8-12
Operating Instructions...................................................... 12-15
Cleaning and Maintenance ............................................... 15-16
Disposal Information............................................................... 16
Fuse Replacement.................................................................... 16
Trouble Shooting Guide.......................................................... 17
Igenix Warranty Terms & Conditions ............................ 18-19

3
SAFETY INSTRUCTIONS
Important: This appliance is not intended for use by persons
including children with reduced physical, sensory or mental
capabilities, or lack of experience and knowledge, unless they
have been given supervision or instruction concerning use of the
appliances by a person responsible for their safety.
• This product is intended to be used in a household and similar
applications such as: staff kitchen areas in shops, ofces and other
working environments;
- farm houses and by clients in hotels, motels and other
residential type environments;
- bed and breakfast type environments;
- catering and similar non retail applications.
• Do not use mechanical devices or other means to accelerate
the defrosting process, other than those recommended by the
manufacturer.
• Do not use electrical appliances inside the food storage
compartments of the appliance, unless they are recommended
by the manufacturer.
• Do not store explosive substances such as aerosol cans with
a ammable propellant in this appliance.
• Ensure that the electricity supply in your home is rated at 220 -
240 volts before operating the appliance.
• Do not use the appliance if there is any damage to the power
cord.
• Use of an extension cord is not recommended with this product.
• This product is for indoor use only.
• Keep packaging material out of the reach of children! It can
become a choking or suffocation hazard.
• Always unplug the appliance before attempting to move it.
• Children should be supervised to ensure that they do not play
with the appliance.

4
• Ensure that the refrigerant circuit is not damaged.
• The refrigerant of this product is R600a which is ammable.
• Ensure when moving the appliance or during installation that the
cooling system does not get damaged.
• DANGER: Risk of child entrapment
- Before you dispose of your old refrigerator or freezer, remove
the doors and leave the shelves in place so that children cannot
easily climb inside.
• When disposing of the appliance, remove the plug so the
appliance is unusable.
IMPORTANT: Always allow 12 hours before turning on the
refrigerator to allow the coolant gases time to settle after the
refrigerator is in place.
Packaging: The cardboard packaging is recyclable and
should be disposed of according to local regulations. Keep the
packaging materials out of the reach of children.
Before installation take care to remove all cardboard or other
packaging, including material from the condenser tubes and any
material surrounding the motor / compressor unit.

5
WARNING: Risk of re / ammable materials.
• When positioning the appliance, ensure the supply cord is
not trapped or damaged.
• Do not locate multiple portable socket-outlets or portable
power supplies at the rear of the appliance.
• Children aged from 3 to 8 years are allowed to load and
unload refrigerating appliances.
• To avoid contamination of food, pay attention to the
following:
• opening the door for long periods can cause a signicant
increase of the temperature in the compartments of the
appliance;
• clean regularly surfaces that can come in contact with
food and accessible drainage systems;
• clean water tanks if they have not been used for 48 hours;
ush the water system connected to a water supply if
water has not been drawn for 5 days;
• store raw meat and sh in suitable containers in the
refrigerator so that it is not in contact with or drip onto
other food;
• two-star frozen-food compartments are suitable for
storing pre-frozen food, storing or making ice-cream and
making ice cubes;
• one-, two- and three-star compartments are not suitable
for the freezing of fresh food;
• if the refrigerating appliance is left empty for long periods,
switch off, defrost, clean, dry and leave the door open to
prevent mould developing within the appliance.

6
Refrigerator
location
Type of food
Fridge door • Foods with natural preservatives, such as jams,
juices, drinks, condiments.
• Do not store perishable foods.
Crisper bin (salad
bin)
• Fruits, herbs and vegetables should be placed
separately in the crisper bin.
• Do not store bananas, onions, potatoes, garlic in
the refrigerator.
Fridge shelf –
bottom
Chiller bin
• Raw meat, poultry, sh (for short-term storage)
Fridge shelf –
middle
• Dairy products, eggs
Fridge shelf – top • Foods that do not need cooking, such as ready-
to-eat foods, deli meats, leftovers.
Freezer drawer/
shelf
• Foods for long-term storage.
• Bottom drawer/shelf for raw meat, poultry, sh.
• Middle drawer/shelf for frozen vegetables, chips.
• Top drawer/shelf for ice cream, frozen fruit, fro-
zen baked goods.
The table below contains general guidelines on the storage of
food in the refrigerator.
7
TECHNICAL SPECIFICATION
Supplier Name / Trade Mark Igenix
Model Number IG355X
Category Type Under Counter Freezer
Energy Efciency Class (Old) A+
Energy Efciency Class (New) F
EU Eco-Label Award N/A
Annual Energy Consumption 208kWa
Freezing Capacity 4.4Kg/24h
Fridge Storage Volume (Litre) and Applicable Star Rating
Compartment
N/A
Freezer Storage Volume
Applicable Star Rating Compartment N/A
Refrigeration System Static
Temperature Rise Time 720mins
Climate Class N/ST
Noise Emissions (dB) 40
Built-In Appliance N/A
Wine Storage Appliance N/A
Voltage (V) 220-240
Wattage Power (W) 100
Frequency (Hz) 50
Power Source AC
8
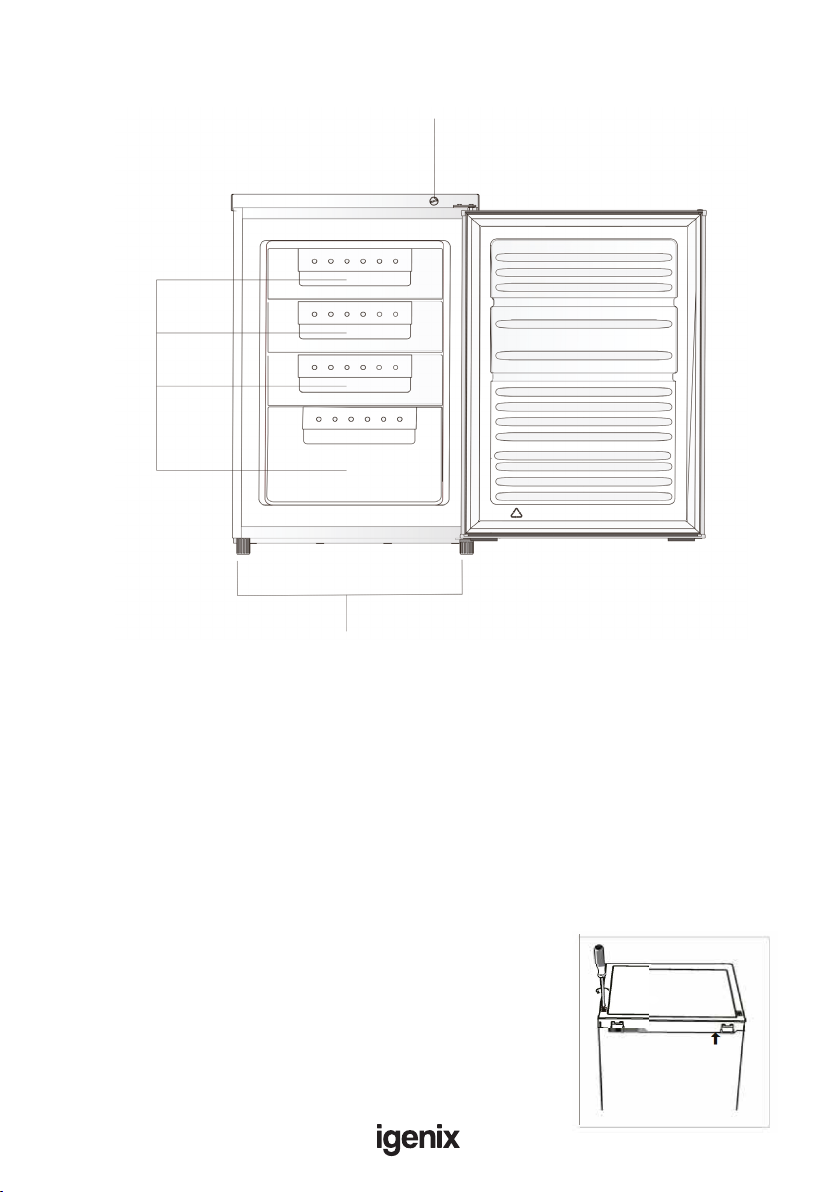
APPLIANCE OVERVIEW
Thermostat Control Dial
Freezer
Drawers
Leveling Feet
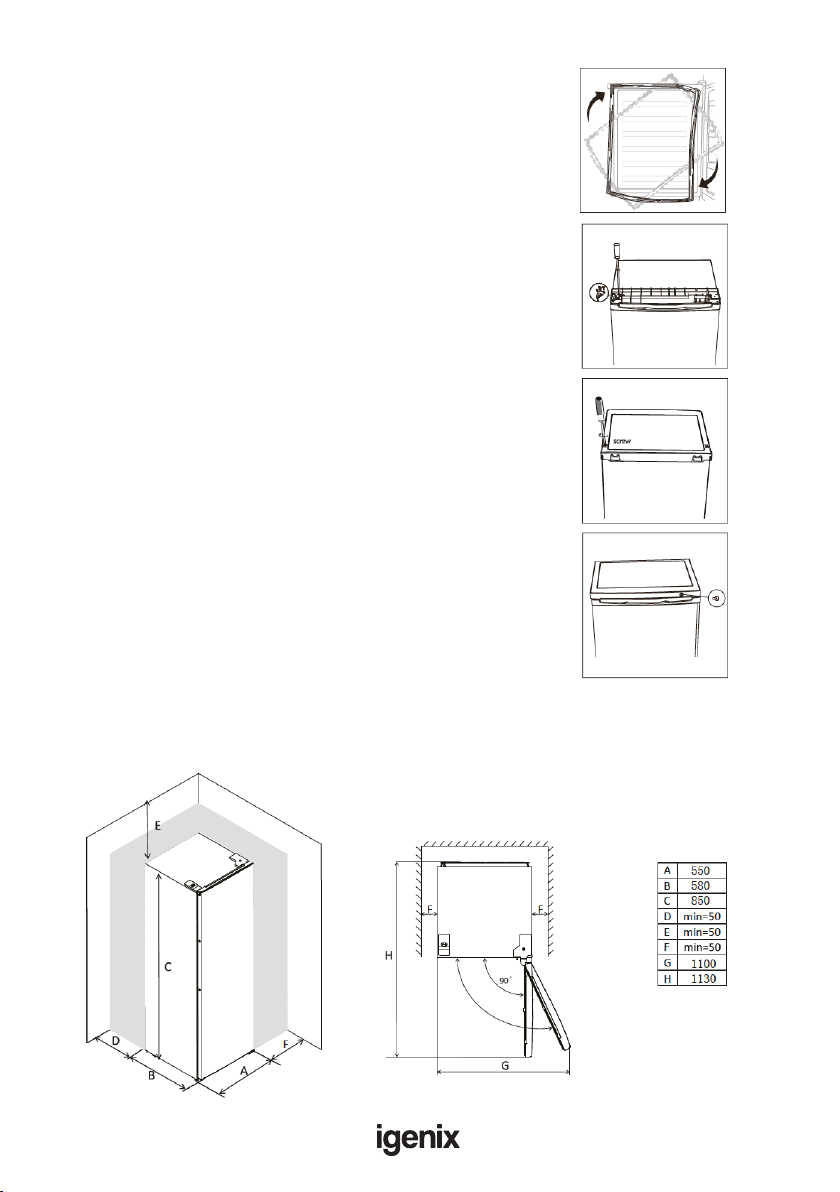
Reversing the door
The appliance door can be tted to open to either the left or the right depending on its
location.The appliance will have to be tilted and supported in order to carry this out. It is
advisable to get some help during this procedure.
• Ensure the unit is unplugged and empty.
• To take the door off, it is necessary to tilt the unit backwards.You should rest the
unit on something solid so that it will not slip during the door reversing process.
• All parts removed must be saved to do the re installation of the door.
• Do not lay the unit at as this may damage the coolant system.
• It’ s better that 2 people handle the unit during assembly.
1. Remove two screws at rear side of top cover.
Unscrew
INSTALLATION

9
2. Remove top cover and thermostat knob and place it
aside.
3. Unscrew top hinge and then remove door and place
it on a soft pad to avoid scratching.
4. Unscrew bottom hinge.Then remove the adjustable
feet from both side.
Unscrew Screw
5. Unscrew and remove the bottom hinge pin, turn the bracket over and replace it.
6. Ret the bracket tting the bottom hinge pin. Replace
both adjustable feet.
10
7. Detach the Fridge and the Freezer door gaskets and
then attach them after rotating.
8. Place the door back on. Ensure the door is aligned
horizontally and vertically, so that the seals are closed
on all sides before nally tightening the top hinge.
9. Put the top cover and x it with 2 screws on the back.
10. Fix the thermostat knob
Location
Keep enough space for the door to open
Table of contents
Other iGenix Freezer manuals


