iGenix IG350F User manual
Please read these instructions carefully before use and retain for future reference
Before switching on your appliance,
always check for any damage which may have been caused in transit
IG350F
Batch code:
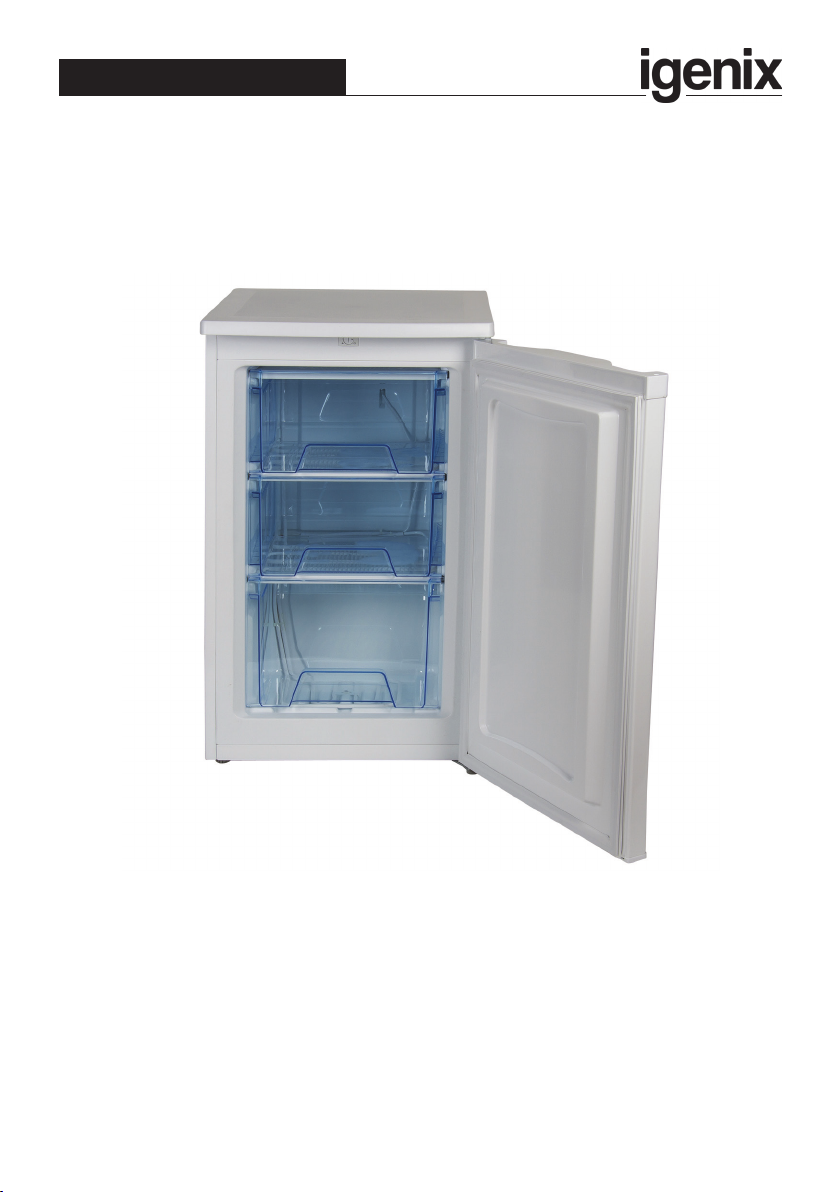
Under Counter Freezer
USER MANUAL

2
CONTENTS
Important Safety Instructions...............................................3-6
Specication .................................................................................7
Appliance Overview...................................................................8
Installation...............................................................................9-10
Operating Instructions...................................................... 11-12
Cleaning and Maintenance ............................................... 13-14
Trouble Shooting Guide.......................................................... 15
Fuse Replacement.................................................................... 16
Disposal Information............................................................... 16
Terms and Conditions and Warranty Information...... 18-19

3
IMPORTANT SAFETY INSTRUCTIONS
Important: This appliance is not intended for use by persons
including children with reduced physical, sensory or mental
capabilities, or lack of experience and knowledge, unless they
have been given supervision or instruction concerning use of
the appliances by a person responsible for their safety.
• This product is intended to be used in a household and
similar applications such as:
• Staff kitchen areas in shops, ofces and other working
environments;
• Farm houses and by clients in hotels, motels and other
residential type environments;
• Catering and similar non-retail applications.
• Do not use mechanical devices or other means to accelerate
the defrosting process, other than those recommended by
the manufacturer.
• Do not use electrical appliances inside the food
storage compartments of the appliance, unless they are
recommended by the manufacturer.
• Do not store explosive substances such as aerosol cans with
a ammable propellant in this appliance.
• Ensure that the electricity supply in your home is rated at
220 - 240 volts before operating the appliance.
• Do not use the appliance if there is any damage to the
power cord.
• Choose the location of the unit away from heat sources
such as radiators or res as the refrigerants are ammable.
• Use of an extension cord is not recommended with this
product.
• This product is for indoor use only.
• Keep packaging material out of the reach of children. It can
become a choking or suffocation hazard.
• Always unplug the appliance before attempting to move it.

4
• Children should be supervised to ensure that they do not
play with the appliance.
• Ensure that the refrigerant circuit is not damaged.
• The refrigerant of this product is R600a which is ammable.
Ensure when moving the appliance or during installation that
the cooling system does not get damaged.
• Important:Always allow 12 hours before turning on the
appliance to allow the coolant gases time to settle after the
unit is in place.
• The cardboard packaging is recyclable and should be
disposed of according to local regulations. Keep the
packaging materials out of the reach of children. Before
installation take care to remove all cardboard or other
packaging, including material from the condenser tubes and
any material surrounding the motor/compressor unit.
WARNING: The appliance is heavy and care is needed
when unpacking and moving it. Get extra help and only
hold the appliance by the casing – never hold by the door
or the trim.
WARNING: Risk of child entrapment.
Before disposal of the old appliance, make sure that any
locking mechanisms have been broken off, doors have
been removed but shelves have been left in so that children
cannot easily climb inside.Also remove the plug so the
appliance is unusable.

5
WARNING: Risk of re / ammable materials.
• When positioning the appliance, ensure the supply cord is
not trapped or damaged.
• Do not locate multiple portable socket-outlets or portable
power supplies at the rear of the appliance.
• Children aged from 3 to 8 years are allowed to load and
unload refrigerating appliances.
• To avoid contamination of food, pay attention to the
following:
• opening the door for long periods can cause a signicant
increase of the temperature in the compartments of the
appliance;
• clean regularly surfaces that can come in contact with
food and accessible drainage systems;
• clean water tanks if they have not been used for 48 hours;
ush the water system connected to a water supply if
water has not been drawn for 5 days;
• store raw meat and sh in suitable containers in the
refrigerator so that it is not in contact with or drip onto
other food;
• two-star frozen-food compartments are suitable for
storing pre-frozen food, storing or making ice-cream and
making ice cubes;
• one-, two- and three-star compartments are not suitable
for the freezing of fresh food;
• if the refrigerating appliance is left empty for long periods,
switch off, defrost, clean, dry and leave the door open to
prevent mould developing within the appliance.

6
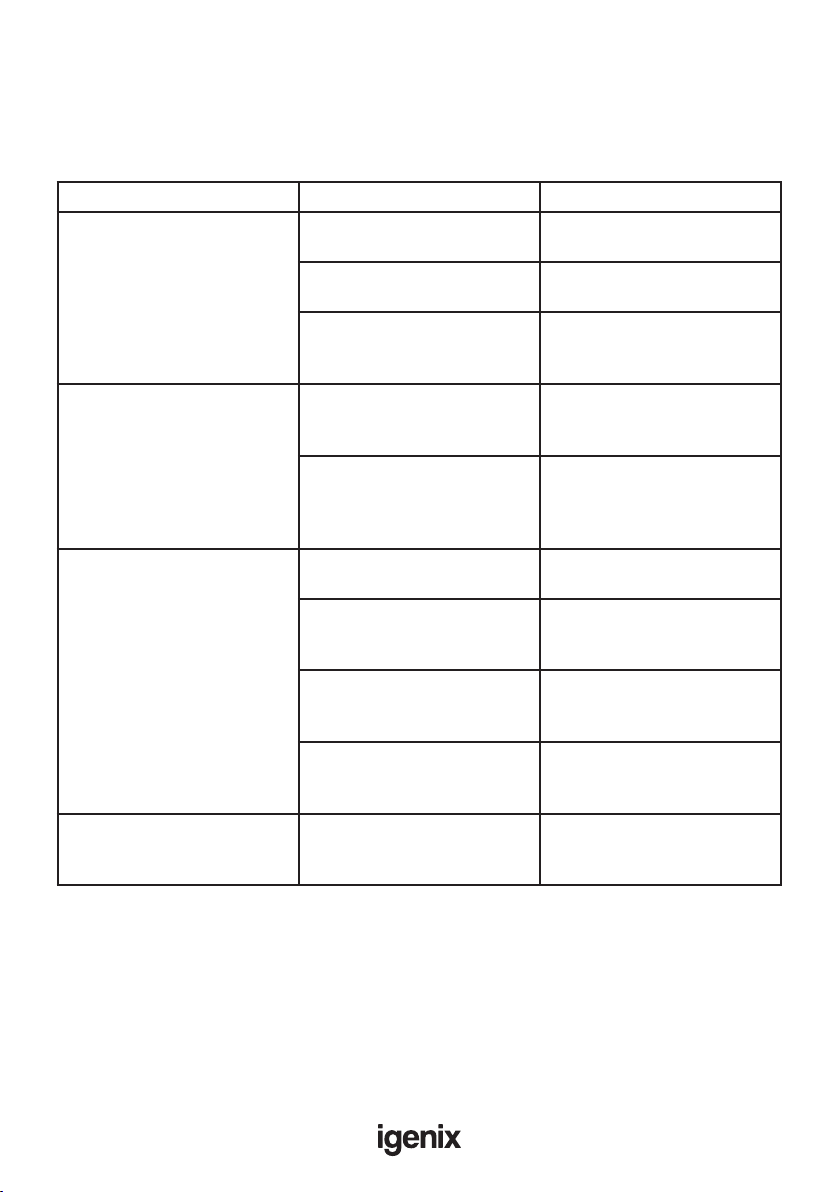
Refrigerator
location
Type of food
Fridge door • Foods with natural preservatives, such as jams,
juices, drinks, condiments.
• Do not store perishable foods.
Crisper bin (salad
bin)
• Fruits, herbs and vegetables should be placed
separately in the crisper bin.
• Do not store bananas, onions, potatoes, garlic in
the refrigerator.
Fridge shelf –
bottom
Chiller bin
• Raw meat, poultry, sh (for short-term storage)
Fridge shelf –
middle
• Dairy products, eggs
Fridge shelf – top • Foods that do not need cooking, such as ready-
to-eat foods, deli meats, leftovers.
Freezer drawer/
shelf
• Foods for long-term storage.
• Bottom drawer/shelf for raw meat, poultry, sh.
• Middle drawer/shelf for frozen vegetables, chips.
• Top drawer/shelf for ice cream, frozen fruit, fro-
zen baked goods.
The table below contains general guidelines on the storage of
food in the refrigerator.

7
SPECIFICATION
Model IG350F
Climate Class N/ST
Electric Protection Type I
Total Gross Capacity (Litres) 70
Total Net Capacity (Litres) 68
Voltage (V) 220 - 240
Frequency (Hz) 50
Current (A) 0.5
Noise (dB) 39
Energy Consumption (kWh / 24h) 0.460
Refrigerant R600a
Gross Weight (kg) 29.1
Interior Temperature (°C) ≤-18
Energy Grading A+
Freezing Capacity 4kg/24h
8
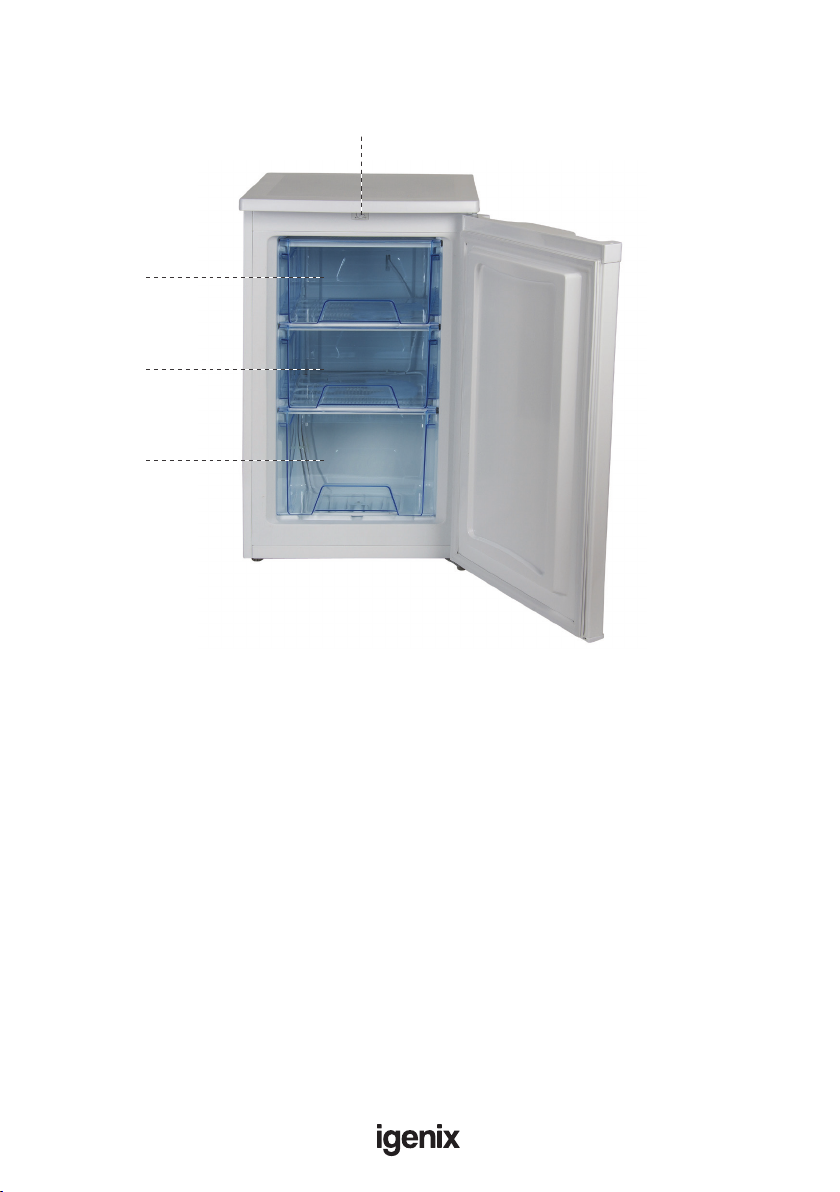
APPLIANCE OVERVIEW
Thermostat Control
To p
Drawer
Bottom
Drawer
Middle
Drawer

9
INSTALLATION
Location and Air Circulation
When selecting a position for your freezer, you should make sure the oor is
at and rm and the room is well ventilated with an average room temperature
of between 16°C and 38°C. If the room temperature drops below this, the
appliance may start to defrost.
Locate your freezer away from sources of heat e.g. cookers, radiators, direct
sunlight as extreme temperatures will affect how efciently your appliance works.
Also avoid direct sunlight as it may increase the electrical consumption, extreme
cold ambient temperatures may also cause the unit not to perform properly.The
freezer is not designed for use in a garage or outdoor installation; do not drape
the unit with a cover.
Never place the freezer in a wall recess or tted cabinets or furniture as this will
not allow adequate ventilation and cause a potential re hazard. When installing
the unit, ensure that 40mm of free space is left at both sides, 15mm at the rear
and 20mm at the top of the unit.This will allow cold air to circulate around and
improve efciency of the cooling process.
Providing you follow the recommended ventilation requirements you will:
• Increase the life of the freezer
• Minimise the risk of condensation on the outside of the freezer
• Minimise the running costs
• Minimise operating noises caused by vibration.
Leveling
Once the appliance is positioned in its nal location, it can be leveled using the
adjustable feet at the front of the appliance until they are rmly placed on the
oor. Correctly leveling the freezer will stop any rocking or vibration and keep
the door aligned, which helps the appliance run reliably and efciently.

10
Door Fitting
The freezer door can be tted to open to either the left or the right depending
on the location.The appliance must be tilted and supported in order to carry this
out. It is therefore advisable to get some help during this procedure.Take care
when tting and tightening the screws.
Tools required: Phillips style screwdriver / Flat bladed screwdriver / Hexagonal
spanner
1. Tilt the unit slowly towards the rear and prop it securely.Two people are
required to tilt the unit during the door reversal process.
2. Remove the 2 screw covers rst, then undo the screws underneath.
3. Remove the 2 screws on the back.
4. Lift the top cover away from the fridge.
5. Remove the 3 screws, then remove the upper hinge that holds the door
in place. Lift the door and place it on a padded surface to prevent it from
scratching.
6. Swap the bottom bushing and bottom bushing cap of the upper door.The
bottom bushing key must be in the correct position to allow it to be inserted
correctly.
7. Remove the lower screws, hinge bracket and adjustable feet from the unit
bottom.
8. Remove the screw-type adjustable feet from another side of the unit bottom
and transfer it to the corresponding position on the opposite side of the unit
bottom.
9. Reattach the 2 lower screws, hinge bracket and adjustable feet to the
opposite side of the unit bottom. Loosely secure.
10. Carefully set the upper door back into place. Ensure the freezer door is
aligned horizontally and vertically so that the seals are closed on all sides
before nally tightening the top hinge. Insert the hinge bracket and screw it
to the top of the unit.
11. Use a spanner to tighten it if necessary.
12. Put the top cover back and x it in place with the screws.
13. With the door closed, check that the door is aligned horizontally and
vertically and that the seals are closed on all sides before nally tightening
the bottom hinge. Re-adjust the leveling feet as needed.

11
OPERATING INSTRUCTIONS
Before Using the Appliance
Before placing food in the freezer, it needs to be cleaned by wiping the interior
using warm water and a soft cloth.Wipe the freezer completely dry before
replacing any drawers.
Important: Always allow at least 12 hours before turning on the freezer to
allow the coolant uid time to settle after the freezer is in place. Failure to do
this may result in damage to the appliance and such damage is not covered by the
guarantee.
Before placing any food in the freezer it is recommended to leave it 24 hours.
This allows you to ensure that the freezer is working correctly and gives enough
time to allow the temperature in the freezer to drop to the correct level.
Using the Appliance
• Before using the appliance, make sure that the thermostat which is located
inside the freezer on the right side of the cabinet is set at position 1.
• Adjust the thermostat control dial to the desired position, bear in mind that
the higher the number, the lower the temperature.
• To ensure the unit is cold enough to freeze food wait 24 hours before lling
with food.
Noises Inside the Unit
You may notice that your unit makes some unusual noises. Most of these are
perfectly normal, but you should be aware of them.
These noises are caused by the circulation of the refrigerant liquid in the cooling
system. It has become more pronounced since the introduction of CFC free
gases.This is not a fault and will not affect the performance of your unit.This is
the compressor motor working, as it pumps the refrigerant around the system.

12
Using the Appliance Efciently
• Take note of foods best before / use by instructions and follow the maximum
storage guidelines on the packaging.
• Keep foods covered to help retain moisture and to help prevent odour
/ avour transference. Plastic bags, aluminium foil, plastic food wrap and
containers with lids are ideal.
• Avoid opening the door for long periods or unnecessarily.
• Allow hot or warm food to cool down in covered containers before placing
in the freezer. Hot food will raise the temperature in the fridge and cause the
compressor to work more.
Storing Food in the Appliance
• Pack and store cooked and fresh food separately.
• Wrap raw or defrosting meats and poultry in polythene or foil and ensure
they are stored below any cooked meats to avoid contamination from any
juices that may drip.
• Empty left over tinned food into plastic containers. Do not store food in tins
in the freezer.
• Position food in the freezer to allow cold air to circulate freely, making sure
that nothing touches the back wall of the freezer.

13
CLEANING AND MAINTENANCE
Switch off the electrical supply and remove the plug from the socket before
cleaning.
Defrosting
Frost might build up in the unit after it has been used for a period of time. Scrape
away the frost using a plastic scraper (not included).
Important: Do not use a metal or sharp instrument to scrape away the frost,
nor should you use any electrical appliances to aid defrosting.
We recommend that defrosting should be carried out when the frost layer builds
up to 10mm (~0.39”). Choose a time when the stock of frozen food is low,
follow these procedures:
1. Take out the food, turn the unit off at the mains supply and leave the door
open. Ideally, the frozen food should be put into another freezer. If this is not
possible, wrap the food in several sheets of newspaper or large towels and
then a thick blanket to keep it cool.
2. Place a dry towel at the foot of the unit. Scrape away the frost using the plastic
scraper. Defrosting the remaining frost can be sped up by placing a bowl of
hot water inside the unit and closing the door.As the solid frost loosens,
scrape it away with the plastic scraper and remove.Wring out the soaked
towel as needed.
3. When defrosting is complete, clean the unit’s interior and exterior.
Interior
Note: The interior of the refrigerator should be cleaned regularly to avoid odor.
1. Remove all food from the appliance and cover to help keep cool.
2. Remove all the shelves and salad crisper carefully from the appliance and
wash in warm clean water with a soft cloth and dry thoroughly. Never
replace the shelves or salad crisper into the appliance if wet.
3. Use a soft cloth or sponge to clean the inside of the refrigerator, with two
tablespoons of baking soda and a quart of warm water. Rinse with water and
wipe clean.
4. For areas that are difcult to clean in the refrigerator (such as narrow
sandwiches, gaps or corners), it is recommended to wipe them regularly with
a soft rag, soft brush, etc. and when necessary, combined with some auxiliary
tools (such as thin sticks) to ensure no contaminant accumulation in these
areas.

14
Exterior
• Use a clean, soft cloth dampened in soapy water to wipe the exterior surface
of the appliance and dry thoroughly.
• Use a vacuum cleaner to remove dust from underneath the appliance and
from around the compressor which is situated at the back of the appliance,
regularly to maintain adequate ventilation. Use caution not to damage the
coolant system.
WARNING: Do not use abrasive powder, household cleaner, bleach or
wax polish to clean the freezer as these can leave a smell in the unit and
damage the exterior.
Door Seal
Check the door seal regularly to make sure there are no debris. Use a clean,
damp soft cloth to wipe the door seal and in between the creases, avoid
damaging the door seal as this will affect the performance of your appliance.
Going away
If you are going away and do not want to leave the appliance left on, switch off at
the socket and remove the plug from the mains sockets ensuring not to pull the
cord.
Remove any food and follow the cleaning instructions in this section.
Note: Leave the door ajar as this will prevent odours accumulating in the fridge
and will allow the unit to dry completely.
5. Open the door and allow the interior to dry naturally before replacing the
shelves and salad crisper.
6. Plug in and switch on and allow the temperature in the appliance to drop
back to an adequate temperature.
7. Replace the food in the appliance.
Important: Avoid getting water into the electric components of the appliance
i.e. the thermostat, as this may damage your appliance.
15
TROUBLE SHOOTING GUIDE
If you experience difculties with the appliance, please check the suggestions below
before contacting customer services on 01473 271272:
Problem Possible Cause Possible Solution
The appliance does not work. Not properly plugged into the
mains wall socket.
Plug in rmly.
No electricity in the mains
wall socket.
Check fuse or breaker.
The door is not closed
properly.
Make sure the door is
properly aligned and creates a
seal around the door.
The appliance is making a lot
of noise.
The pipe work is touching the
wall or skirting board.
Pull the appliance forward so
it does not touch the wall or
skirting board.
The appliance has not been
levelled properly.
Adjust the feet at the front of
the appliance, ensuring they
are in rm contact with the
oor.
The temperature in the
freezer is too warm.
The thermostat is set too high
for the environment.
Turn the thermostat to a
higher setting.
The appliance is too close to a
heat source.
Move the appliance away from
the heat source and out of
direct sunlight.
There is not enough
ventilation around the
appliance.
Ensure there is a minimum
gap of 10mm at each side and
30mm above the appliance.
The door is not closed
properly.
Ensure that the door is
properly closed and the seal is
not damaged.
There is water underneath on
the oor.
There is something touching
the interior back wall of the
appliance.
Ensure no foods are touching
the interior back wall of the
appliance.
16
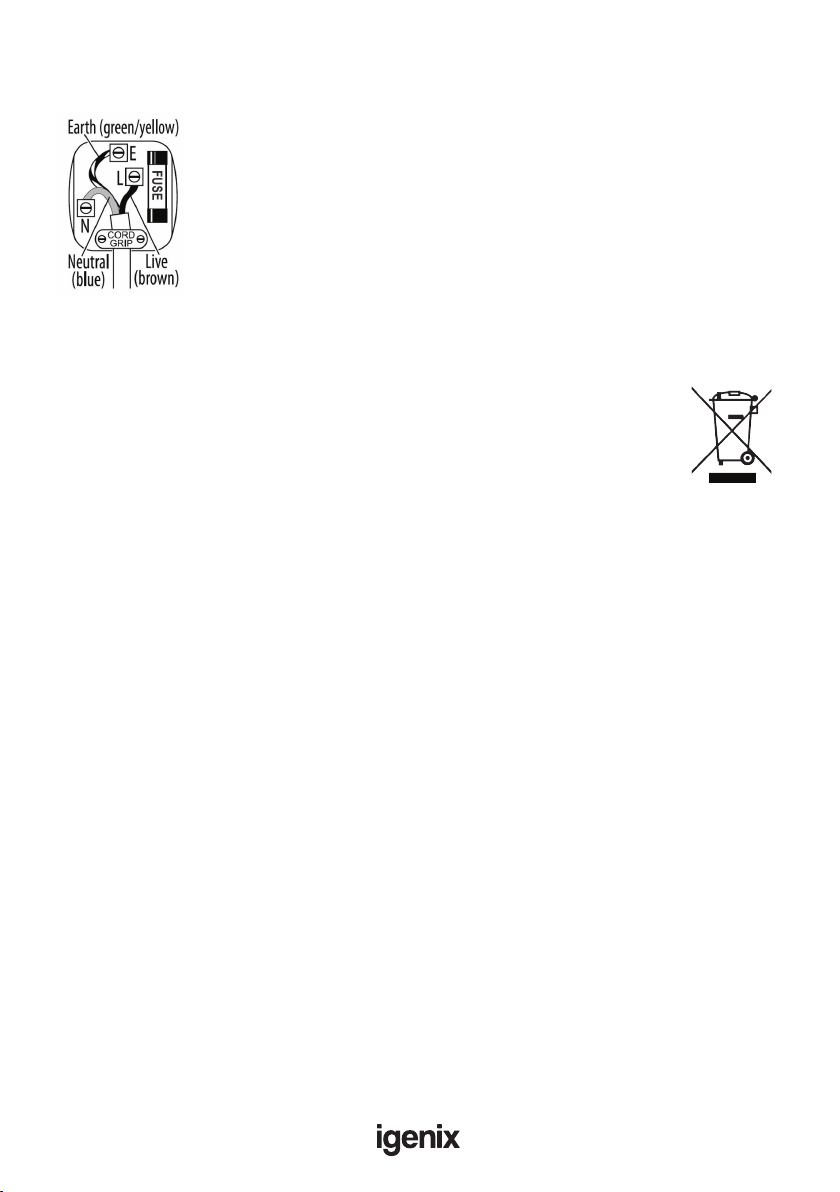
MAINS PLUG FUSE REPLACEMENT
DISPOSAL INFORMATION
The European Directive 2012/19/EU on Waste Electrical and
Electronic Equipment (WEEE), requires that old household
electrical appliances must not be disposed of in normal unsorted
municipal waste.
Old appliances must be collected separately in order to optimise
the recovery and recycling of the materials they contain and reduce the impact
on human health and the environment.
The crossed out “wheeled bin” symbol on the product reminds you of your
obligation, that when you dispose of the appliance it must be separately collected.
Consumers should contact their local authority or retailer for information
concerning the correct disposal of their old appliance.
Fuse Replacement (Class I)
This appliance must be earthed. Remove the central screw on
the plug and open the shell.Take out the fuse and replace with
a new fuse of the same Amp. Install the shell again and tighten
the screws.

17

18
lgenix Warranty Terms & Conditions
This product is guaranteed for a period of 12 months as standard from the date of purchase
against mechanical and electrical defects.You can extend your warranty for a further 12 months by
registering your product.
Upon registration we will cover your product for a period of 24 months from the original purchase
date against any mechanical or electrical defects.
To qualify for the warranty, the product must be used for domestic household use only and in
accordance with the instructions in the user manual.Any misuse of the product will result in the
warranty being void.
The warranty does not cover accidental damage, misuse, neglect, tampering or incorrect adjustment
or installation.
The warranty will be rendered invalid if the product is resold, has had its serial number removed
(or has an invalid serial number), or if an unauthorised person has carried out any repairs or
alterations.
The warranty does not cover accessories or consumable parts that require replacement under
normal use. This includes shelving, dials, lters, belts and trays etc.
In the unlikely event of a breakdown please refer to the Troubleshooting guide in your user manual
and check all plugs, fuses and the electricity supply.
If you still require assistance please contact our Customer Service department on
01473 271 272 or write to us at the following address:
Customer Service Department
38 Bluestem Road, Ransomes Europark
Ipswich, IP3 9RR
Please quote the Product Code which begins ‘IG’ or ‘DF’ and the Batch Coder beginning ‘5’ and give
details of the exact fault.We will then decide whether to repair or replace the item.
Before we arrange the repair or replacement you will be required to return a copy of your proof
of purchase. Please retain your original.
If an item is replaced within the agreed warranty period, the warranty for the replacement item will
be calculated from the purchase date of the original.
In the event that the product is inspected and no fault is found or the product is not within the
guarantee period you will be charged for the repair and any carriage costs.

19
Thank you for choosing lgenix
As a valued customer we would like to offer you a FREE 2 year warranty to cover your product
against any electrical or mechanical defects.
This means that in the unlikely event you develop a fault or problem with your product we will
happily repair or replace the item free of charge.
To qualify for the 2 year warranty you must register your product within 30 days of purchase.The
full Terms & Conditions of our warranty policy are shown on the opposite page.They are also
available on our website. www.igenix.co.uk

38 Bluestem Road, Ransomes Europark, Ipswich, IP3 9RR
Tel. 01473 271 272
Disclaimer: Igenix operate a policy of continual improvement and development.
We therefore reserve the right to change/alter the specication and appearance of our appliances without prior notice.
All diagrams and images shown in this manual are for illustration purposes only.
Other manuals for IG350F
1
Table of contents
Other iGenix Freezer manuals


Popular Freezer manuals by other brands

Pelgrim
Pelgrim PVD25088L Instructions for use

Koenic
Koenic KUF22606nf operating instructions

MYCOOLMAN
MYCOOLMAN CTP 10 Operation manual

SEELEY INTERNATIONAL
SEELEY INTERNATIONAL Braemar Invertair KACV125D1S owner's manual

SEVERIN
SEVERIN KS 9807 Instructions for use

Miele
Miele GT 316 ES operating instructions


