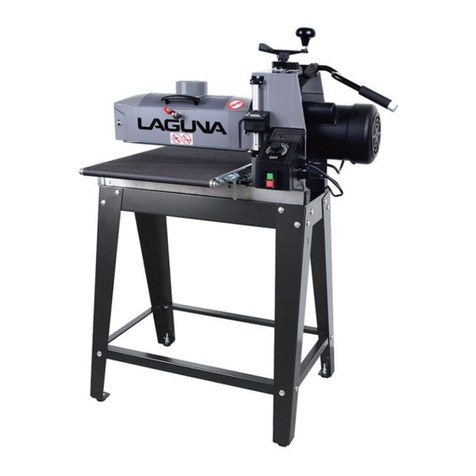
IGM LAGUNA 1938 User manual

Producer:
Laguna Tools Inc
744 Refuge Way, Suite 200
Grand Prairie, Texas 75050
USA
Phone: +1 800-234-1976
Website: www.lagunatools.com
Distributor:
IGM nástroje a stroje s.r.o.
Ke Kopanině 560, 252 67, Tuchoměřice
Czech Republic, EU
Phone: +420 220 950 910
E-mail: [email protected]
Website: www.igmtools.com
2023-02-23
151-1938 LAGUNA Drum Sander Manual EN v1.0.1 A4ob
www.igmtools.info
PDF ONLINE
1938
Drum Sander
Operating Instructions

-2-www.igmtools.com
EC DECLARATION OF CONFORMITY
We
(Manufacturer)
Laguna Tools Inc.
2072 Alton Parkway, Irvine, California 92606, USA
Declare that the product name: Woodworking Drum Sander
Model Name :
71632, 71938, 71938-D, 72550
Conform with the essential safety requirements of the relevant European Directive:
-Machinery Directive 2006/42/EC
-Electromagnetic Compatibility Directive 2014/30/EU
The person who compile technical file established within the EU:
Name:
IGM nastroje a stroje s.r.o.
Address:
Tel.:
Email:
Ke Kopanine 560, Tuchomerice , CZ-252 67
+420 220 950 910
sales@igmtools.com
Mounting and connecting instructions defined in catalogues and technical construction files must be respected
by the user.
They are based on the following standards:
EN ISO 12100:2010 Safety of Machinery - General principles for design / Risk Assessment and Risk reduction.
EN 60204-1:2006+AC:2010 Safety of machinery –Electrical equipment of machines, part 1 : General
requirements.
EN 13849-1:2015 Safety of machinery –Safety –related parts of control systems Part 1: General principles for
design
EN 50370 -1:2005 Electromagnetic compatibility (EMC) –Product family standard for machine tools –Part 1:
Emission.
EN 50370 -2:2003 Electromagnetic compatibility (EMC) –Product family standard for machine tools –Part 2:
Immunity.
EN 61000-4-2: 2009 Electrostatic (ESD)
EN 61000-4-4: 2012 Electrical fast transient/burst requirements (EFT/Burst)
EN 61000-4-6: 2014 Immunity to conducted disturbances, induced by radio-frequency fields (CS)
Responsible for the documentation: Head Product Management, Laguna Tools Inc.
Name : Torben Helshoj
Responsibility
Authorized Signature
Date : Oct. 15, 2021
Place : Laguna Tools Inc.
2072 Alton Parkway, Irvine, California 92606, USA
Telephone: +1 800 234-1976
Fax: +1 949 474-0150

-3-www.igmtools.com
Table of Contents
1. Declaration of Conformity
2. Warranty
3. Safety
Authorized Use
General Safety Notes
Hazards
Grounding Instructions
4. Machine Specication
5. Transport and Setup
Setup
6. Setting and Adjustment
Drum Sander Adjustment
Installing and Wrapping Abrasives
7. Machine Operation
8. Maintenance
9. Troubleshooting
1. Declaration of Conformity
We declare that this product is in compliance with the directive and the
standard mentioned on the previous page of this manual.
2. Warranty
The company IGM Tools & Machinery s.r.o. always strives to deliver a
product of high quality and eciency.
The application of the warranty is governed by the valid Business
Conditions and the Warranty Conditions of the company IGM Tools &
Machinery s.r.o.
3.Safety
3.1 Authorized Use
This machine is designed for sanding wood and wooden products only.
Sanding of other materials is not permitted but can be performed in
specic cases only after consulting the manufacturer.
The machine is not suitable for wet sanding.
The required minimum age must be observed.
The machine must only be used in a technically perfect condition.
In addition to the operating instructions, also read the safety requirements
and your country’s applicable regulations.
You should observe the generally recognized technical rules and safety
requirements concerning the operation of woodworking and metalworking
machines.
Neither the manufacturer nor the supplier is liable for damage resulting
from unauthorized use of the machine. Responsibility is transferred
exclusively to the operator.
3.2 General Safety Notes
Woodworking machines can be dangerous if not used properly.
Read and understand the entire operating manual before attempting
assembly or operation.
Protect this operating manual from dirt and humidity and pass it over to the
new owner if you part with the machine.
No changes to the machine may be made.
Daily inspect the function and existence of the safety appliances before
you start the machine. Correct all defects or damaged safety appliances
immediately. The machine must only be used in a technically perfect
condition.
Protect long hair with a cap or hair net. Remove all loose clothing, rings,
watches and other jewellery. Wear safety shoes; never wear leisure shoes
or sandals. Follow personal protection guidelines.
Do not wear gloves while operating this machine!
Install the machine so that there is sucient space for safe operation and
workpiece handling.
The machine must be bolted on rm and levelled surface and must be
properly lighted.
Always wear a protective mask in a dusty environment.
Keep work area well lighted.
Make sure the machine stands on a board.
Make sure that the power cord does not impede work. Keep work area
clean. Never reach into the machine while it is operating or running down.
Stay alert! Give your work undivided attention. Use common sense. Do
not operate the machine under the inuence of drugs, alcohol or any
medication.
Keep children and visitors a safe distance from the work area. Never
leave a running machine unattended. Before you leave the workplace
switch o the machine.
Do not use the machine in a dump environment and do not expose it to
rain.
Wood dust is explosive and can also represent a risk to health. In
particular dust from tropical woods and hardwoods like beech and oak, is
classied as a carcinogenic substance.
Focus on the position of your ngers and other parts of your body when
working.
Do not start the machine without safety appliances.
It is important to clamp all workpieces.
Machine only stock which rests securely on the table.
Do not remove chips and workpiece parts until the machine is at a
standstill.
Minimum workpiece length is 60 mm.
Do not stand on the machine.
Repair work on the electrical installation may be carried out by a qualied
electrician only.
Have a damaged or worn power cord replaced immediately.
Have a damaged abrasive replaced immediately.
3.3 Hazards
When using the machine according to regulations some remaining
hazards may still exist.
EN - English
Operating Instructions (Original)
Dear Customer,
many thanks for the condence you have shown in us with the purchase of your new Laguna Tools machine. This manual has been
prepared for the owner and operators of an IGM LAGUNA 1938 SuperMax Drum Sander to promote safety during installation,
operation and maintenance procedures. Please read and understand the information contained in these operating instructions and the
accompanying documents. To obtain maximum life and eciency from your machine, and to use the machine safely, read this manual
thoroughly and follow instructions carefully.
We wish you many work and personal pleasures when working with the Laguna Tools machine.

-4-www.igmtools.com
Loose sanding belt can cause injury. The workpiece may bounce o the
sanding belt and turn against the machine operator.
Danger of thrown workpiece.
Dust and noise can be health hazards.
Be sure to wear safety goggles, ear protection and dust mask.
Use a suitable dust exhaust system.
Defective or damaged sanding belt can cause injury.
Do not use damaged or worn power cord.
3.4 Grounding Instructions
Connection cord:
In the case of a defect or malfunction, grounding provides a path of least
resistance to electric current, reducing the risk of electric shock. The
machine is supplied with connection cord with a guard wire and euro plug.
The plug must only be connected to an appropriate outlet in accordance
with all local codes and regulations.
• Do not modify the plug, if it does not t into the socket. Contact a
qualied electrician and have the appropriate socket installed.
• Improper connection may result in a risk of electric shock. Ground wire
is an insulated wire with a green surface with/without yellow stripes. If the
cord or plug needs to be repaired, contact a qualied electrician.
• Damaged cords should be repaired immediately and only by a qualied
electrician.
• Use only three-wire cables with a euro plug and an appropriate socket.
4. Machine Specication
Type: 1938
Power: 230 V / 50 Hz / 1 phase
Recommended circuit breaker: 16 A, rating C (16/1/C)
Current at maximum load: 8,9 A
Power output: 1300 W S1
Conveyor Belt Motor: Direct drive D.C. motor
Speed: 1450 RPM
Feed Speed: 0-3 m/min.
Workpiece Width (one pass): 482.5 mm
Workpiece Width (two passes): 965 mm
Thickness of Material min. / max.: 0,8-101.6 mm
Drum Size: 127 x 482.5 mm
Width of Abrasive: 76 mm
Minimum dust collector capacities: 1000 m3/h
Dust Extraction Outlet: 100 mm
Length x width x height: 1090 x 670 x 1290 mm
Weight: 118 kg
Shipping Dimensions: 1093 x 407 x 610 mm
Shipping Weight: 130 kg (weight varies on how equipped)
1. Height adjustment handle of the drum
2. Shroud
3. Digital Read-out
4. Knob to start feed conveyor and select feed rate
5. Starts and stops drum motor
6. Conveyor table
7. Tension roller contact adjustment
8. Drum carriage
5. Transport and Setup
5.1 Setup
The machine is transported in a shipping package. The machine is
designed to operate in closed rooms and must be placed stable on a
rm and levelled ground. The machine requires assembling.
Package contents
Stand box contents (found inside the main box)
Drum Sander Assembly
Note: For initial stand assembly secure all bolts nger tight. This will allow
for easier levelling after the sanding unit is installed on the stand. The
holes in the legs are spaced so that the short and long top braces will only
line up from one face of each leg.
1. Secure two legs to the outside of each of the two short top cross braces
using the supplied carriage bolts and ange nuts.
2. Secure the two long top rails inside of the legs and on top of the short
rails.
3. Note: Long rail on top of short rail and both rails inside of legs.
1
2
4
5
6
7
8
3

-5-www.igmtools.com
4. Connect the second leg sub-assembly to the top long rails.
5. Attach the lower cross braces to the legs. The longer cross braces
should sit on top of the short ones.
6. Attach a levelling foot to the bottom of each leg (not required if installing
optional caster set).
Note: After nal assembly and sander installation, adjust the nuts on the
threads as needed to level the stand.
IInstalling Drum Sander
1. There will be a small container of hardware included with your sander.
This container will include everything you need to set up your sander.
2. Open box 1 that contains the main sanding unit. Remove the cardboard
liner. Open the plastic bag enclosing the sanding unit.
3. Cut each corner of BOX 1 to fold sides at, providing access to sanding
unit.
4. With one or two helpers, place the sanding unit on stand or bench (lift
points marked).
5. Remove the two wooden packing plates from bottom of the sanding unit
using the enclosed wrench and keep wrench for future adjustments.
NOTE: These bolts that you just removed from the packing plates will
work as your bolts for attaching the sander or as extra bolts for future
replacement.

-6-www.igmtools.com
NOTE: Leave the silver plate, which is near the fast lever and
under the motor, in place when removing bolts.
10. Open box 2 and remove conveyor from packaging and place on
sanding unit. The conveyor motor should be nearest to the main motor
and depth gauge.
NOTE: The fast lever should be in the upright position for installation of
the sanding unit. The fast lever raises the inboard (right) side of conveyor
up. Do not ever tighten the bolts all the way down. The fast lever should
always be able to be moved back and forth between and up/down
position. The bolts should be tightened, but not so tight that the fast lever
doesn’t move. The lever should be able to move from the down to up
position easily.
11. Install lock washer and at washer onto two socket heads (or hex
head bolts) and install into ange of conveyor bed on inboard (right)
(motor side). Keep support plate in place on inboard (right) side and make
sure the fast lever is positioned up.
12. Install two lock washers and two at washers on the studs on outboard
(left) side of the conveyor belt, then tighten all nuts and bolts with wrench.
NOTE: Do not completely tighten bolts with fast lever. See note above.
6. Install knob to height adjustment handle. First, nger tighten nut to
knob. Thread stud from knob into hand wheel and tighten nut against hand
wheel.
7.Turn the handle and raise sanding head to higher position to remove
packing block from under carriage arm.
8. To prepare the unit for the installation of the conveyor belt, rst remove
the 2 bolts on the outboard (left) side of the conveyor belt.
9. Next remove the 2 bolts on the inboard (right) side of the conveyor belt.

-7-www.igmtools.com
13. Plug the short power cord that is attached to the motor into the outlet
on the control box. This cord will provide switched power for the motor
when the machine is plugged into the power source.
14. Check your power supply to make sure that it is adequate (230 V, 1Ph
required) but do not plug the machine into the power supply until it is fully
set-up.
6. Setting and Adjustment
Your sander should now be in place and ready for the nal set-up. The
sander was adjusted and aligned at the factory. However simple alignment
checks will ensure that everything is in perfect order.
Problems can be avoided if these essential checks and set-up procedures
are performed prior to operation.
6.1 Setting the Drum Sander
Checking Drum Alignment
UNPLUG THE MACHINE FROM THE POWER SOURCE!
During initial setup only. Checking the alignment is necessary to make
sure that the drum is parallel.
Before checking the drum alignment make sure that the fast lever between
the conveyor motor and the machine is in the up position
The conveyor table bolts on the inboard side should not be so tight that
the fast lever does not rotate.
1. Remove the abrasive on the drum. Removing the abrasive is necessary
to make sure that the adjustment is as accurate as possible and the
texture on the abrasive will make the adjustment imprecise.
2. Locate the height adjustment handle for raising and lowering the
sanding head.
NOTE: The height adjustment handle controls the drum height. Turning
the handle raises or lowers the sanding head. One revolution of the
handle raises or lowers the head by 1.4 mm.
3. Use a at, uniform piece of wood as a thickness gauge. Insert it
between the conveyor belt and the drum on the inboard (right) side of the
machine.
The tension rollers are set just below the drum enough so that items
cannot pass easily underneath. Use the height adjustment handle as
necessary to ensure that the piece of wood makes contact with the drum.
4. After you place the piece of wood between the conveyor belt and the
drum, rotate the height adjustment handle up one full turn. After the height
has been adjusted the wood piece may be removed.
NOTE: You have to repeat these steps on the outboard (left) side of the
machine using the same procedure. As you check look to make sure that the
drum is parallel. A simple visual check that the drum is parallel is sucient.

-8-www.igmtools.com
If the drum is not parallel, loosen the 4 socket head screws A (these screws
are along the outboard (left) side of the conveyor belt) and raise or lower the
conveyor with the adjustment nut B to achieve parallel alignment. Then
tighten the four socket head screws.
To achieve parallel alignment on the inboard (right) side of the machine,
repeat steps 3 and 4, then adjust the alignment if needed by loosening the 4
socket head screws located along the outboard (left) side of the conveyor and
turning the height adjustment nut of the conveyor.
Connecting Dust Collection
Dust collection is necessary for the drum sander. The sander comes
equipped with a 100 mm (4”) diameter dust exhaust port at the top of
the cover. Make sure that the minimum dust requirements are sucient.
To attach to your collection system, install 100 mm (4”) hose from your
collector. The minimum recommended dust collector capacities is 1000
m³/h. For best results, follow the recommendations of the manufacturer
of your dust collector. When connecting dust collector straight pipe is
preferred because it is the least restrictive for airow. If straight pipe is not
possible Y’s and elbows are preferred because they are less restrictive to
airow than T’s.
Note: Some applications will require more dust collection than the
recommended minimum.
Power and Electrical Safety
11. Make sure that your power supply is adequate (230 V, circuit breaker
16 A, rating C (16/1/C))). After the dust collection system is in place and
the drum alignment is checked your machine is ready to be powered up
and operated.
Abrasive Selection Guide
To attach the abrasive to the drum, follow the procedure below.
Grit Common Application
24 GRIT - Abrasive planing, surfacing rough-sawn boards, maximum stock
or glue removal
36 GRIT - Abrasive planing, surfacing rough-sawn boards, maximum stock
or glue removal
50 GRIT - Surfacing and dimensioning boards, trueing warped boards
60 GRIT - Surfacing and dimensioning boards, trueing warped boards
80 GRIT - Light dimensioning, removal of planer ripples
100 GRIT - Light surfacing, removal of planer ripples
120 GRIT - Light surfacing, minimal stock removal
150 GRIT - Finish sanding, minimal stock removal
180 - GRIT Finish sanding only, not for stock removal
220 GRIT - Finish sanding only, not for stock removal
6.2 Installing and Wrapping Abrasives
Accurate attachment of the abrasive to the drum is critical to achieving
the machine top performance. Abrasive strips do not have to be pre-
measured. The end of the roll is rst tapered and attached to the outboard
(left) side of the drum. Then the strip is wrapped around the drum. The
second taper is made for attachment to the inboard (right) side of the
drum.
Note: Pre-cut abrasives have been factory tapered to the specic width of
your drum. If you are cutting your own abrasive, use the wrap that came
on the drum as a template (abrasive side up).
Installing and Wrapping Abrasives (continued)
UNPLUG THE MACHINE FROM THE POWER SOURCE!
1. Mark and cut a taper at one end of the roll as shown below. Because
the tapered end should use most of the left (outboard) slot width, its end
must be trimmed. Start on the left (outboard) side of the drum. Pinch or
squeeze the clip lever on the left (outboard) side of the drum. Insert the
tapered end through the slot and into the fastener so that it uses most of
the width of the slot. Release the clip lever to securely hold the wrap end
in the fastener.
2. Wind the abrasive around the drum, being careful not to overlap the
windings. The tapered cut of the wrap end should follow the edge of the
drum.
Continue to wrap the abrasive in a spiral fashion by rotating the drum with
your left hand and guiding the abrasive with your right hand. Successive
windings of the wrap should be ush with previous windings without any
overlap.
3. Squeeze the clip lever to open the clip and pull the take-up lever to the
top. Insert the tapered end through the slot in the inboard (right) end of
the drum.
4. The take-up fastener is designed to automatically take up any slack
caused by stretching of the abrasive wrap. The abrasive wrap may stretch
enough in use to allow the take-up lever to reach its lowest position so it
no longer is able to maintain tension on the wrap.
If this occurs, it will be necessary to reset the take-up lever by raising it,
pushing the wrap end into the slot, and then releasing the clip lever.
Note: The drum was removed to show the inboard (right) take-up
fastener.
Drum width: 482,5 mm (19“)
Tip-to-tip: 2 922 mm (114-1/2“)
Abrasive ready to install: 2 770 mm (108-1/2“)
Approximately 76 mm (3“)
76 mm (3“)
400 mm (15-3/4“)
TAPERED END OF THE
ABRASIVE

-9-www.igmtools.com
NOTE: Take notice that for detail only the drum was removed to show the
inboard (right) take-up fastener.
7. Machine Operation
Proper Abrasive Position
Position the abrasive in the slot with sucient room between the inside
of the slot and the tapered end of the wrap to allow it to be pulled into the
drum as needed. If enough space is not left between the wrap and the
inside of the slot the take-up fastener will not operate properly.
Abrasive Tension Adjustment
The abrasive wrap may stretch enough to allow the take-up lever to reach
its lowest position. If this occurs, then the abrasive is no longer tensioned.
To x this reset the take-up lever by raising it. Push the abrasive into the
slot and then release the clip lever.
Maximizing Abrasive Longevity
We recommend a sandpaper cleaning stick to remove deposits and help
extend the life of the abrasive.
1. To use the cleaning stick, operate the sanding drum with the dust cover
open and dust collection on.
2. Hold the cleaning stick against the rotating drum and move it along the
drum surface.
3. Use a brush to remove any cleaning stick remnants before resuming
operation.
ALWAYS WEAR EYE PROTECTION WHILE PERFORMING ABRASIVE
CLEANING. TAKE ALL PRECAUTIONS TO AVOID ANY CONTACT WITH
HANDS OR CLOTHING.
OPERATING THE SANDER
Your sander will be able to perform an innite variety of sanding projects
all designed to your specications. With some time and experimentation
the proper setting and technique for each job will become apparent.
DRUM DEPTH OF CUT
Determining the depth of cut is the most important operating procedure
decision. It may take some experimentation to determine the proper depth
of cut. The crucial variables to keep in mind are abrasive grit, type of
wood, project type, and conveyor feed rate. We recommend practicing on
a scrap of wood prior to sanding a project.
Depth Scale Operation
The depth scale (see opposite picture) measures the distance between
the conveyor table and the bottom of the sanding drum. The sanding head
must be parallel to the conveyor bed surface.
1. To calibrate the depth scale, loosen the two screws holding the scale.
Lower the drum (with abrasive installed) until the drum touches the
conveyor belt.
2. Slide the scale to align with the pointer at the “0” mark. Tighten the two
screws holding the scale.
An optional DRO (digital read out) for depth is available (see opposite
picture). This oers the most precise reading of sanded thickness and
allows for accurate repeatability of a thickness. Great when making
parts that must be an exact thickness or when matching a thickness.
1. To operate, turn ON and select standard inch “in” or metric millimeter
“mm”.
2. Lower drum, with abrasive installed, until it touches the conveyor belt.
Press “zero” button to calibrate.
Using Thickness Gauge
Another method to set depth of cut is to use the thickness gauge attached
to the inboard (right) side of the sander (see opposite picture). The gauge
must be adjusted to the same height as the abrasive in use.
1. Place a at piece of scrap stock under the drum with the abrasive in
place. Lower the durm until the abrasive lightly touches the scrap piece of
stock.
2. Without changing the height, place the scrap stock under the thickness
gauge. Adjust the bottom of the gauge by loosening the large nut and
rotating the gauge up or down until it lightly touches the scrap piece of
stock.
3. Tighten the large nut. Now the stock can be placed under the thickness
gauge and the drum lowered until the gauge lightly touches the stock to be
sanded. By using this method the stock does not need to be carried under
the drum to set depth of cut.
A good rule of thumb when sanding is to place the stock under the drum
and lower the sanding head until the stock is in contact with the drum but
the drum can still be rotated by hand. Normally as the depth of cut is
adjusted the handle will be rotated no more than a third of a turn at any
time. INTELLISAND will help with this process.
Using the DRO
Specications
Resolution: Decimal = .005 in.
Fraction = 1/32 in.
Metric = 0.1 mm
Accuracy: Decimal = +/- .0025 in.
Fraction= +/- 1/500 in.
Metric = +/- .05 mm
Battery: 2 AAA (not included)
Functions: - Constant memory retains calibration even when
OFF
- Incremental measuring mode
- Absolute measuring mode
- Millimeter, Inch and Fraction readout
- Auto shut o

-10-www.igmtools.com
Button Reference and Use
It is helpful to familiarize these buttons and their purpose with the Wixey
DRO
Calibration
There are three typical variations of calibration. The rst variation (Type 1)
is for the DRO to show the sanded thickness of
the material. The second variation (Type 2) is to show how much stock is
being removed with each pass of the sander.
Another method (Type 3) to show the amount of material being removed
per pass without recalibrating the Type 1 setting.
Type 1 Calibration ABS:
Calibration for the DRO to show sanded thickness (Type 1). Calibration is
quick and easy and requires no extra measuring
device. Make sure the machine is turned OFF and power is disconnected!
1. Wrap the sanding drum with the desired grit abrasive.
2. Lower the sanding drum until it lightly touches the conveyor belt.
3. Turn “ON” the DRO.
4. Hold the “CAL” button 3 seconds until “0.00” appears.
Type 2 Calibration ABS:
Calibration for the DRO to show stock removed per sanding pass (Type
2). Calibration is quick and easy and requires no
extra measuring device. Make sure the machine is turned OFF and power
is disconnected after the rst step!
1. Sand a test piece of stock until it is at and uniform on both sides.
2. Turn the Sander OFF and disconnect power to sander.
3. Position the sanding drum (with abrasive still wrapped on drum) on the
test piece until the drum is lightly touching the test
piece.
4. Press and hold the “CAL” button for 3 seconds until “0.00” appears.
Type 3 Calibration INC:
This method allows saving the original calibration from Type 1 and
conrming the amount of material being removed per
pass.
1. Make one pass sanding your stock. Without changing the drum height
press the “ABS/INC” button to read “0.00”. This

-11-www.igmtools.com
changes the readout from “ABS” to “INC” and zero’s the readout on top of
the just sanded piece. Now the readout will show
the amount of stock removed per sanded pass in “INC” mode.
2. To change back to the original (Type 1) calibration press the “ABS/INC”
button to change back to “ABS” mode.
NOTE: When changing the abrasive wrap to a dierent grit the DRO must
be recalibrated for the change of drum
diameter with the new grit abrasive!
NOTE: When setting the depth of cut, never exceed the thickness of the
grit for stock removal.
CONVEYOR AND SPEED RATE
After the depth of cut has been determined, selecting the proper feed rate
is essential. For nish sanding the best nish is usually achieved with a
slow to moderate feed rate. Faster feed rates can be used as long as the
machine is not over-stressed.
When nish sanding with grits ner than 80, the best nish can usually be
obtained if INTELLISAND does not engage. If INTELLISAND does slow
the conveyor when nish sanding, it is best to make another sanding pass
without changing the thickness setting and sand again
Note: INTELLISAND will automatically adjust the conveyor feed rate if
an excess load is detected. This prevents excessive gouging, reduces
the risk of burning and protects the machine from overload or stalling.
The red light by the adjustment knob will come on when INTELLISAND is
operating. When the load is decreased, INTELLISAND will automatically
increase the feed rate to the pre-selected speed.
Stock Feeding Operation
Rest and hold the stock to be sanded on the conveyor table. Allow the
conveyor to carry the stock into the drum. Once the stock is halfway
through, reposition yourself to the outfeed side of the machine to control
the stock as it exits the unit.
Stock Feeding Maximum Performance
The versatility of this drum sander allows it to be used for a wide range of
tasks. Learning to use the multiple controls to make adjustments will allow
you to ne tune the machine for maximum results.
• Sanding stock wider than the drum
When sanding stock wider than the drum the fast lever will be very useful
(see picture). Wide stock requires extra space between the drum and the
conveyor on the outboard (left) edge. The extra space prevents ridge lines
from developing along the part that extends beyond the drum.
Adjusting the fast lever approximately half-way between the full upright
and full downright position allows for easy alteration of the drum position
in relationship to the conveyor without changing the initial drum alignment.
It is a good idea to test a scrap piece of stock prior to sanding. If a line or
ridge is still visible after adjusting the fast lever additional adjustments can
be made to the drum alignment. After sanding stock wider than the drum
the fast lever should be adjusted back to the original position. The fast
lever should be put into the up position.
Note: The fast lever raises the inboard (right) side of the table .003. Never
tighten the bolts all the way down. The fast lever should always be able to
be moved back and forth between and up/down position. The bolts
should be tightened, but not so tight that the fast lever doesn’t move.
• Sanding multiple pieces simultaneously
When sanding multiple pieces at once, make sure to stagger the pieces
across the width of the conveyor belt. This position provides better contact
with the tension rollers. It is best to only process pieces that are all of a
similar thickness. If there is a thickness dierence, the thinner pieces may
not come in contact with the tension rollers and may slip on the conveyor
belt.
• Sanding Imperfect or Tall Stock
To avoid bodily injury, take special care when sanding stock that is twisted,
bowed or otherwise varied in thickness from end to end. If possible,
support such stock as it is being sanded to keep it from slipping or tipping.
Use extra roller stand, assistance from another person, or hand pressure
on the stock to minimize potentially hazardous situations. Special
attention is needed as the stock exits the machine. Special attention is
needed as the stock exits the machine.
• Stock Feeding Position and Angle
Positioning the stock at an angle will allow the most eective stock
removal and least loading on the abrasives. Feeding stock straight
through yields the widest sanding capacity and least noticeable scratch
pattern. Some pieces because of their dimensions will need to be fed into
the sander at a 90-degree angle (perpendicular to the drum). However,
even a slight oset angle of the stock can provide for more eective
sanding. Final pass sanding should be done while following the grain
pattern.
TENSION ROLLER PRESSURE
The tension roller pressure is factory set and should be adequate.
However, the pressure of each roller can be adjusted as needed.
To increase the tension, turn the tension adjusting screw clockwise 1/4
revolution at a time. To decrease tension, turn the adjusting screw counter
clockwise 1/4 revolution at a time.
Note: Too little pressure can result in slippage of stock on conveyor belt or
kick-back Too much tension can cause snipe when drum sanding.
TENSION ROLLER CONTACT ADJUSTMENT
The tension rollers are factory set for the most versatile use.
1. If necessary, to adjust tension roller contact, loosen the four socket
head screws holding the tension roller brackets (two per side; front and
back – shown in picture).
2. Have abrasive wrapped on drum.
3. With machine unplugged, lower sanding drum until it rests on conveyor
belt.
4. Raise drum 2 to 3 revolutions.
5. Tighten the four socket head screws (two per side; front and back).
6. Raise drum up, o of the conveyor belt.
7. Set drum for proper sanding height and process stock.
CONVEYOR BELT TENSION
Insucient belt tension will cause slippage of conveyor belt on the drive
roller. The conveyor belt is too loose if it can be stopped by placing your
hand directly on the conveyor belt.
Excessive belt tension can result in bent rollers, premature wearing of the
bronze bushings or conveyor belt.
To adjust the conveyor belt, rst adjust the take-up screw nut on both
sides of the conveyor to obtain approximately equal tension on both sides.

-12-www.igmtools.com
4. Remove the two nuts and washers from outboard (left) side. Lift the
conveyor and remove it from the sander. Set conveyor on motor side.
Avoid tearing the belt on any edges underneath the conveyor bed during
removal. Reverse the procedure for re-installation.
Cleaning the Sander
The sander may need to be cleaned more frequently depending upon
frequency of use. The drum and the conveyor belt need to be clean.
Allowing excess build-up of dust and debris can adversely aect
performance and increase the likelihood of slippage on the conveyor belt.
Sweep the conveyor belt clean after all operations. When cleaning dust
from the drum leave the dust collection system on.
Optional Accessories:
IGM Stick Abrasive Cleaner
Order code: MCBP
Abrasives
Up to date oer at www.igmtools.com
CONVEYOR BELT TRACKING
Belt tracking adjustments are made while the conveyor belt is
running.
After the proper belt tension is obtained, turn the conveyor on
and set it at the fastest speed setting. Watch for a tendency of the
conveyor belt to drift to one side of the conveyor.
To adjust the belt tracking, tighten the take-up screw nut on the side
the belt is drifting toward, and loosen the take-up screw nut on the
opposite side.
Adjusting the take-up screw nuts does not aect the belt tension.
Note: Adjust the take-up screw nuts only 1/4 turn at a time. Allow
the belt to react to the adjustments before proceeding further. Avoid
over-adjustments.
8. Maintenance
Monthly Maintenance
• Lubricate conveyor bushings and check for wear.
• Lubricate with a dry lubricant spray all of the moving parts.
• Clean dust from conveyor belt.
• Check all set screws for tightness.
• Clean drum and abrasives if necessary.
Replacing Conveyor Belt
To replace the conveyor belt, the conveyor assembly must be
removed from the machine.
Unplug the machine from the power source!
1. Raise the drum carriage to its highest position. Unplug main drive
motor from receptacle on the machine.
2. Loosen the conveyor take-up screws to relieve belt tension and
slide the drive roller fully inward.
3. Remove the two hex bolts on the inboard (right) side that attach
the conveyor assembly to the base.

-13-www.igmtools.com
9. Troubleshooting
Any operating problems will likely occur during the period of becoming familiar with the sander. If you are experiencing a problem aecting the machine’s
performance, check the following listings for potential causes and solutions. Also review the previous sections in this manual on setting up and operating
your machine.
TROUBLESHOOTING GUIDE: MOTOR
Problem Possible Cause Solution
Motor does not start
Main power cord unplugged from receptacle Plug in primary power cord
Drum motor cord unplugged from receptacle
near powerfeed motor
Plug in drum motor cord to receptacle on the
machine
Circuit fuse blown or circuit breaker tripped Replace fuse or retrip breaker (after determining
cause)
Brush motor overloads Inadequate circuit Check electrical requirements
Machine overloaded Use slower feed rate; reduce depth of cut
Conveyor motor oscillates
Motor not properly aligned Loosen housing bolts and hex screw holding
the coupler to drive roller
Shaft collar or bushing worn Replace shaft collar or bushing
Drive roller bent Replace drive roller
Drum motor or Conveyor gear motor stalls Excessive depth of cut Reduce depth of cut; reduce feed rate
TROUBLESHOOTING GUIDE: CONVEYOR
Problem Possible Cause Solution
Conveyor drive rollers run intermittently Shaft coupling loose Align shaft ats of gear motor and drive roller;
tighten shaft coupling set screws
Conveyor belt slips on drive roller Improper conveyor belt tension Adjust belt tension
Excessive depth of cut Reduce depth of cut; reduce feed rate
Stock slips on conveyor belt causing gou-
ging
Excessive depth of cut Reduce depth of cut Tension rollers too high Lower tension rollers
Excessive feed rate Reduce feed rate
Dirty or worn conveyor belt Clean or replace conveyor belt
Conveyor motor stalls
Belt out of adjustment Readjust belt
Roller bushings elongated due to excessive
wear Replace bushings
TROUBLESHOOTING GUIDE: MACHINE
Problem Possible Cause Solution
Drum height adjustment works improperly Improper adjustment of height control Readjust height control
Knocking sound while running Bearing worn Replace the bearing.
Contact distributor
Sniping of wood (gouging near end of
board)
Inadequate support of stock Use roller stands to support stock
Conveyor drive or driven rollers higher than
conveyor bed Readjust rollers
Exessive tension roller pressure Adjust rollers
Burning of wood or melting of nish Feed rate too slow Increase feed rate
Excessive depth of cut Reduce depth of cut
Conveyor motor stalls
Conveyor belt is too loose Adjust belt tension
Excessive depth of cut Reduce depth of cut
Wood slipping on conveyor due to lack of
contact Use alternate feeding procedure

-14-www.igmtools.com
19-38 - WIRING DIAGRAM

-15-www.igmtools.com
19-38 - HEAD ASSEMBLY

-16-www.igmtools.com
# PART NO DESCRIPTION SIZE QTY
1480DS-
-101E MOTOR 1
2480BS-194-
UK STRAIN RELIEF, MOTOR PG-11 1
3480DS-
-103E
MAIN CORD, MOTOR TO CONTROL
BOX 1
4 480BS-104 KEY 3/16”SQX3/4” 2
5 480BS-105 NYLON INSERT LOCK NUT 5/16”-24 4
6 480BS-106 FLAT WASHER 5/16” 10
7 480BS-107 OILITE WASHER 8
8 480BS-108 MOTOR PLATE 1
9 480BS-109 SET SCREW #8-32X1/4” 1
10 480BS-110 HEX CAP SCREW 5/16”-18X1-1/4” 6
11 480BS-111 LOCK WASHER 3/8” 4
12 480BS-112 SOCKET HEAD CAP SCREW 3/8”-16X1-1/2” 4
13 480BS-113 SET SCREW 1/4”-20X1/4” 5
14 480BS-114 COUPING 2
15 480BS-115 COUPING SPIDER 1
16 480BS-116 HEIGHT PLATE 1
17 480BS-117 SCREW, PHIL PAN HEAD M4X0.7X6 9
18 480BS-118A LABEL, DEPTH GAUGE (MM) 1
19 480BS-119 DEPTH GAUGE POINTER 1
20 480BS-120 KNOB 1
21 480BS-121 HEIGHT ADJUSTMENT HANDLE 1
22 480BS-122 NYLON INSERT LOCK NUT 5/8”-11 1
23 480BS-123 HEIGHT ADJUSTMENT SCREW 1
24 480BS-199 ROTATING DIRECTION LABEL 1
25 480BS-125 THRUST BEARING 51103 1
26 480BS-126 SHROUD 1
27 480BS-127 STUD 4
28 480BS-128 HEX CAP SCREW 3/8”-16X1-1/4” 4
29 480BS-129 FLAT WASHER 3/8” 8
30 480BS-130 HINGE 2
31 480DS-131A DUST COVER 1
32 480BS-132 HANDLE 1
33 480BS-133 PAN HEAD MACHINE SCREW #8X1/2” 2
34 480DS-134 LOCK WASHER M3 2
35 480BS-135 DUST COVER LATCH 1
36 480DS-136 PHILLIPS FLAT HEAD SCREW M3X0.5X10 2
37 480DS-137 SANDING DRUM 1
38 480DS-138 NYLON INSERT LOCK NUT M3X0.5 2
39 480DS-139 INBOARD ABRASIVE FASTENER 1
40 480DS-140 OUTBOARD ABRASIVE FASTENER 1
41 480DS-141 CARRIAGE BOLT 5/16”-18X” 4
42 480DS-142 BEARING 6205LLU 2
43 480DS-143 C-RING S25 2
44 480DS-144 DRUM CARRIAGE 1
45 480BS-145 FLAT WASHER 1/4” 5
46 480BS-146 ROUND SOCKET HEAD CAP
SCREW 1/4”-20X1” 4
47 480BS-147 FLAT WASHER 5/16” 4
48 480DS-148 BEARING SEAT 2
49 480BS-149 HEX CAP SCREW W/ WASHER #10-24X3/8” 1
50 480BS-150 DUST COVER CATCH 1
51 480BS-151 STUD 1
52 480BS-152 SPRING 1
53 480BS-153 TENSION ROLLER 2
54 480BS-154 BUSHING, OILITE 4
55 480BS-155 TENSION ROLLER BRACKET,
INNER LEFT 1
56 480BS-156 SCREW #8-32X1” 4
57 480BS-157 SPRING, TENSION ROLLER 4
58 480BS-158 TENSION ROLLER BRACKET,
INNER RIGHT 1
59 480BS-159 PAD, BRACKET-TENSION ROLLER 2
60 480BS-160 BRACKET 2
61 480BS-161 PLATE 1
62 480BS-162 BASE 1
63 480BS-163 ADJUSTING PLATE 1
64 480BS-164 ADJUSTING ROD 1
65 480BS-165 HEIGHT ADJUSTING PLATE 1
66 480BS-166 ROUND SOCKET HEAD CAP
SCREW 5/16”-18X1/2” 4
67 480BS-167 LOCK WASHER 5/16” 5
68 480BS-168 SPRING 3
69 480BS-169 NYLON INSERT LOCK NUT 1/4”-20 1
70 480BS-170 SOCKET HEAD CAP SCREW M8X1.25X40 1
71 480BS-171 HEX NUT W/ WASHER 5/16”-18 4
72 480BS-172 BLOCK, MEASURING DEVICE 1
73 480BS-173 HEX NUT M12X1.75 1
74 480BS-174 STOP BOLT 1
75 480BS-198 WARNING LABEL, POWER 1
76 480BS-195 WARNING LABEL, FINGER 2
77 480BS-177 HEX CAP SCREW 3/8”-16X3/4” 4
78 480BS-1106 SAFTY LUCK 1
79 480BS-179 TENSION ROLLER BRACKET, OU-
TER RIGHT 1
80 480BS-180 TENSION ROLLER BRACKET,
OUTER LEFT 1
81 480BS-181 E-RING E5 1
83 71632-124 WASHER, WAVE D17 1
84 480DS-184 LABEL 1
85 480BS-196 HEIGHT DIRECTION LABEL 1
86 480BS-186 MAINTENANCE LABEL 1
87 480BS-187 WARNING LABEL 1
88 480BS-1105 LOCK WASHER #10 1
89 480BS-1104 HEX NUT #10-24 1
90 480BS-1103 HEX CAP SCREW W/ WASHER #10-24X1” 1
92 480BS-1102 ABRASIVE STRIP #80 1
93 72550-197 SCREW, PHIL PAN HEAD M4X0.7X12 2
96 635DS-280 FASTENER TOOL 1
# PART NO DESCRIPTION SIZE QTY
19-38 - PARTS LIST - HEAD ASSEMBLY

-17-www.igmtools.com
19-38 - CONVEYOR AND MOTOR

# PART NO DESCRIPTION SIZE QTY
1 480BS-201A GEAR MOTOR 180 VDC 1
2480BS-194-
UK STRAIN RELIEF PG-11 1
3 72-5336-JG POWER CORD 1
4 480BS-204 FLAT WASHER 5/16” 4
5 480BS-205 SOCKET HEAD CAP SCREW #10-32X1/2” 4
62244PLUS-
-112E EMC FILTER 1
7 480BS-207 KNOB 1
8 480BS-208 SPEED ADJUSTMENT LABEL 1
9 480BS-209 WIRING GUARD 1
10 480DS-210A CONTROLLER 1
11 480DS-211A CONTROL HOUSING BRACKET 1
12 480BS-212 PAN HEAD SELF-TAPPING SCREW 5/32”X1/2” 2
13 480BS-213 RECEPTACLE, MAIN CORD 1
14 480BS-214 SCREW #10-32X1/2” 4
15 480BS-215 WASHER, LOCK-INT. TOOTH #10 4
16 480BS-216 HEX NUT #10-32 4
17 480BS-217 SCREW, HEX HEAD-SLOTTED #10-32X3/8” 5
18 480BS-218 SCREW, PHIL PAN HEAD #6-32X1/2” 2
19 635DS-356 SWITCH, ON/OFF 1
20 480BS-220 COUPLER, SHAFT 1
21 480BS-113 SET SCREW 1/4”-20X1/4” 4
22 480BS-222 BRACKET, BASE- CONTROLLER 1
23 480BS-223 COVER, BASE-CONTROL HOUSING 1
24 480BS-224 HEX CAP SCREW 1/4”-20X3/4” 4
25 480BS-225 WASHER, WAVE 1/4” 4
26 480BS-145 FLAT WASHER 1/4” 4
27 480BS-227 BRACKET, TAKE UP-SLIDE 2
28 480BS-154 BUSHING, OILITE 4
29 480BS-229 ROLLER, DRIVEN 1
30 480BS-230 WRENCH 2
31 480BS-231 HEX NUT 1/4”-20 2
32 480BS-232 WASHER, LOCK-INT. TOOTH 1/4” 2
33 480BS-233 SCREW, ROUND HEAD- SLOTTED 1/4”-20X1-3/4” 2
34 480BS-234 BRACKET, TAKE UP-BASE 2
35 480BS-167 LOCK WASHER 5/16” 4
36 480BS-236 ROLLER, DRIVE 1
37 480BS-237 BRACKET, SUPPORT-DRIVE ROLLER 1
38 480BS-238 BED, CONVEYOR 1
39 480BS-239 ROUND SOCKET HEAD CAP SCREW 5/16”-18X3/4” 2
40 480DS-240 BELT CONVEYOR, ABRASIVE (NOT SHOWN) 1
41 480BS-204 FLAT WASHER 5/16” 1
42 480BS-242 HEX NUT 5/16“-24 1
43 480BS-243 SLOTTED SET SCREW #8-36X5/16” 1
44 PG-9 STRAIN RELIEF, GEAR MOTOR PG-9 1
45 480BS-245 HEX NUT 5/16”-18 2
47 480BS-247 HEX CAP SCREW 1/4”-X1/2” 8
IGM nástroje a stroje s.r.o., Ke Kopanině 560,
Tuchoměřice, 252 67, Czech Republic, EU
+420 220 950 910,www.igmtools.com
© 2023 IGM nástroje a stroje s.r.o.
19-38 - PARTS LIST - CONVEYOR AND MOTOR
Table of contents
Other IGM Sander manuals
