Ignis Pixel JellyPoi User manual

1
Manual for LED digital poi Ignis Pixel JellyPoi
Dear customer!
Thank you for purchasing Ignis pixel poi. To make its lifetime as long as possible, as well as to keep
the warranty valid, please read the instruction entirely and follow our advice.
Controls
The only button to control JellyPoi is placed on the cord’s side.
There are easy-to-feel little pimples on the rib opposite to the button, that makes you find the
button easier.
Hold the button pushed for 3 seconds to turn on/off the poi.
After you turn on the JellyPoi, a timeline menu with a blue blinking cursor lights up.
This menu consists of 2 preset timelines (the sequence of pictures) of orange color, and 4 custom
timelines of green color:
ORANGE 1. Successive displaying of all loaded pictures for 4 seconds.
ORANGE 2. Random displaying of all loaded pictures for 4 seconds.
You can synchronize green custom timelines with your music in Ignis Pixel Utility (currently
available for Windows-10. MacOS coming soon).
2
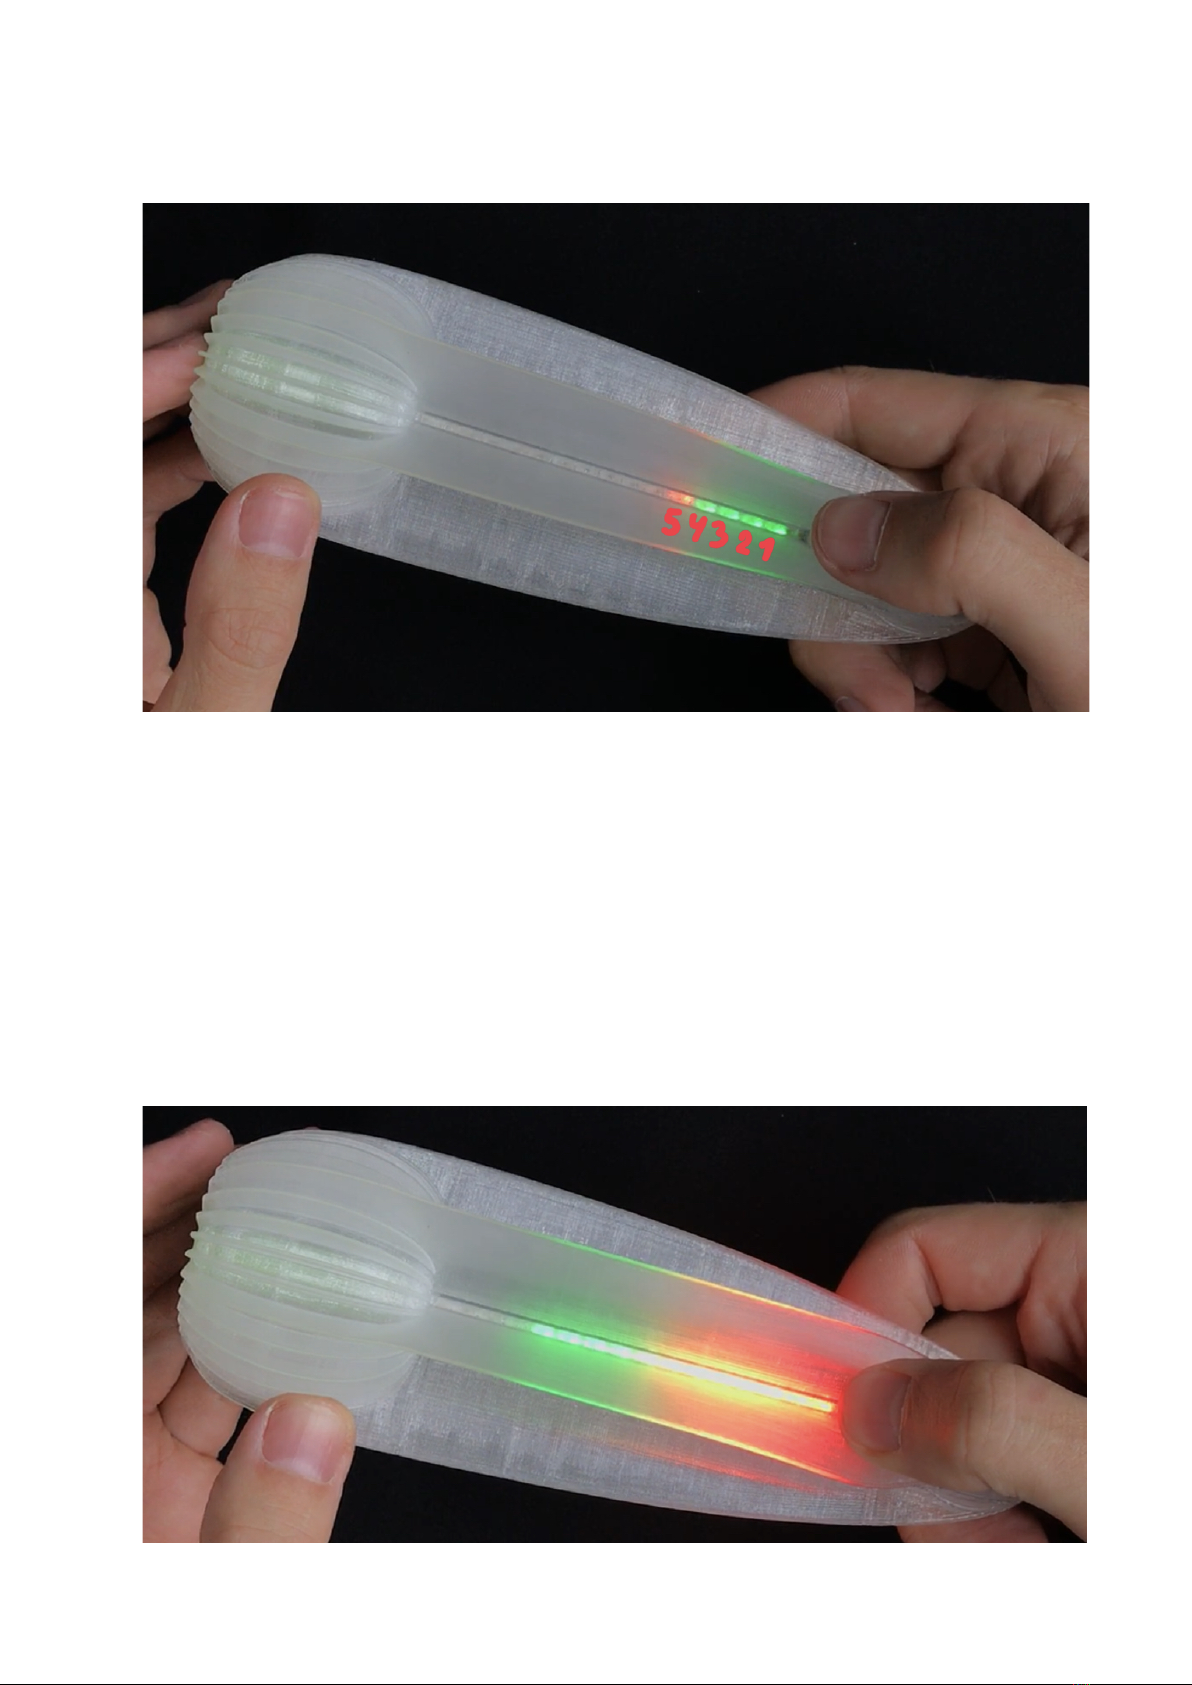
When you shift the cursor up above the timelines (blue cursor), there begins a row of 32 single
images (red cursor). Single image mode can be useful, for example, for a photo session. On the
photo below, the cursor is on 5th position.
How to operate the control button
• Long push (3 seconds) turns on/off the poi.
• Press and hold the button for 0,4-0,8 sec to shift the cursor up. As soon as the cursor shifts
up, release the button.
• Short push (less than 0,4 second) launches the selected timeline/image.
• To return to the menu from play mode, press and hold the button for more than 0,4
second (the delay protects from incidental presses when you spin the poi)
• Push the button for more than 0,8 second to see the current battery level:
3
After 10 minutes of inaction in menu mode, the poi automatically turns itself off.
In timeline/picture mode the poi works until the battery is discharged.
When the battery is low, the LEDs blink red for 10 seconds. To maintain the lifetime of the battery
it’s highly recommended to charge the JellyPoi the same day.
Charging
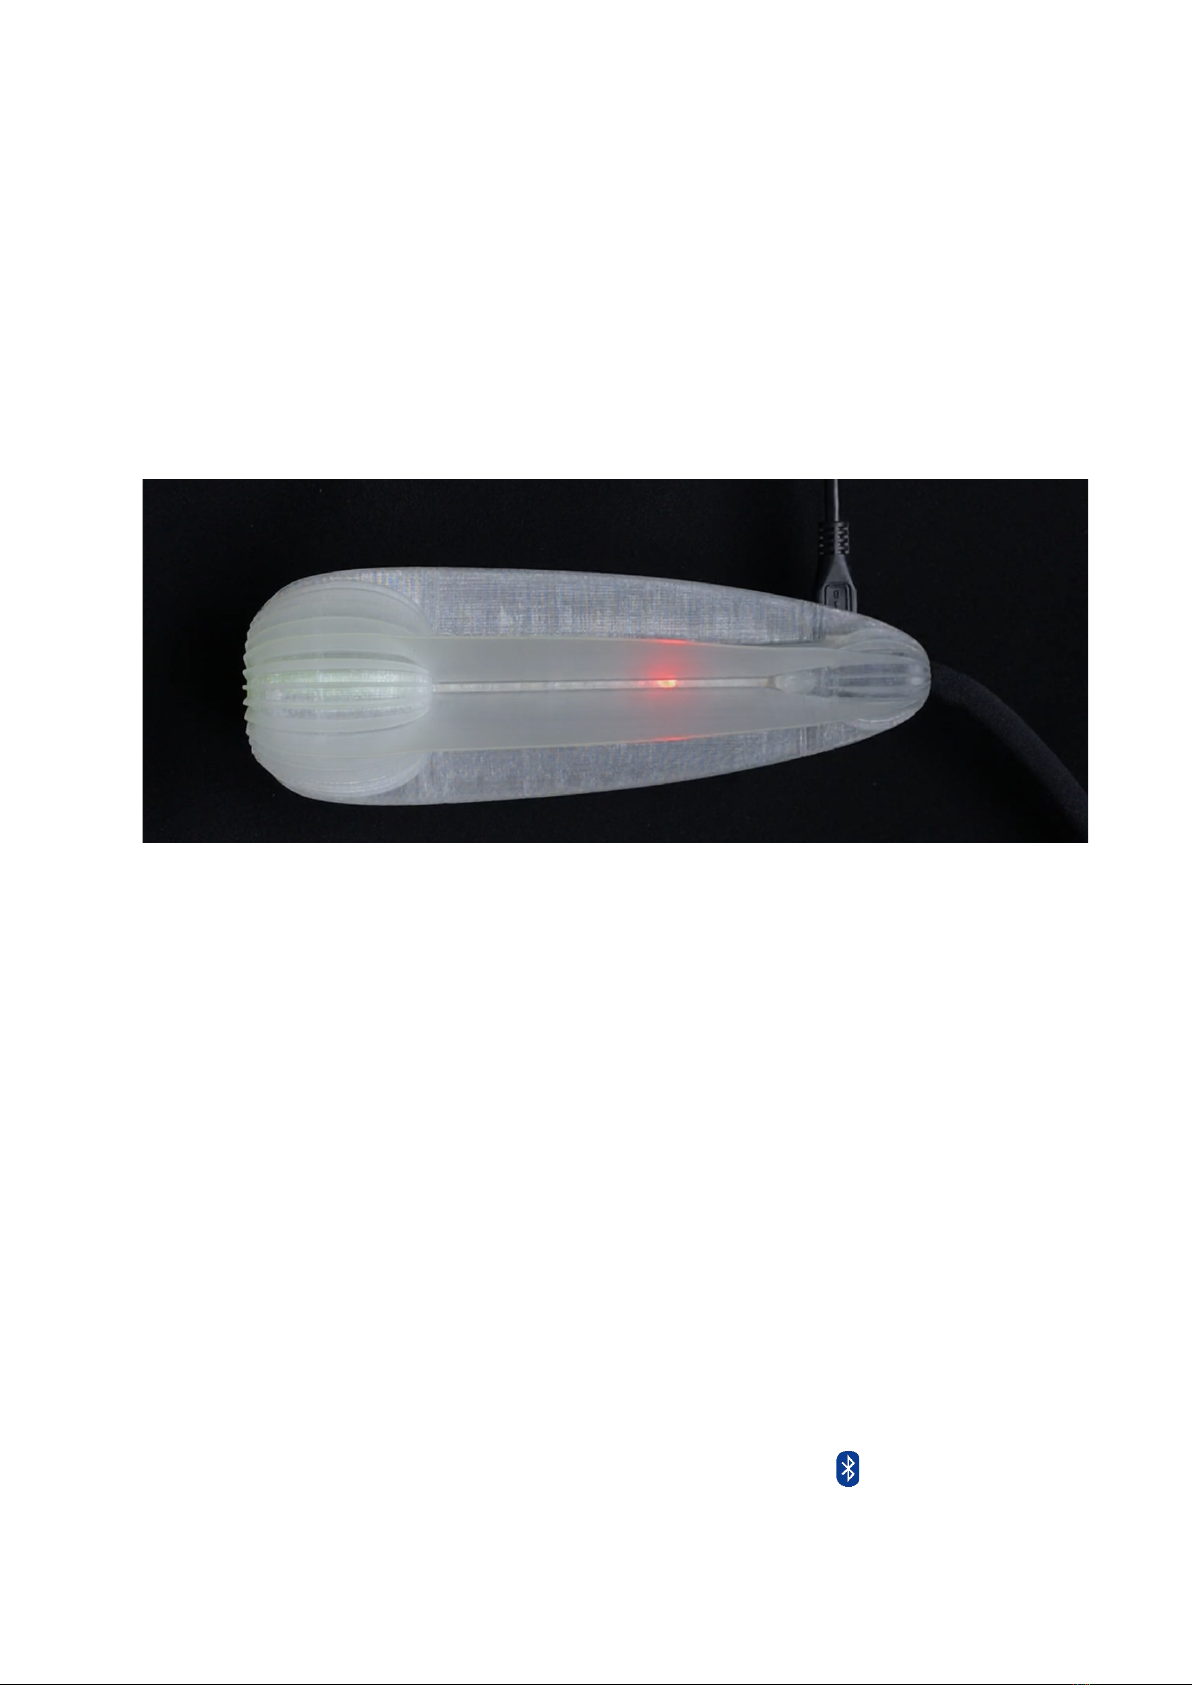
• To charge the JellyPoi plug them to USB-charger or computer – you will see a red light. You can
see the level of charge by position of the red light. On the figure below the position of the red
light roughly shows 30% charge.
When the poi is on charge, the red light slowly moves towards the end of the poi. When the
poi is completely charged, the light finally turns green.
• Lithium batteries don’t have a memory effect, that is why we recommend to charge the poi
every time after using them; don’t wait till they are totally discharged. If you charge the poi
every time, it makes the lifetime of the battery longer.
• Avoid deep discharge of your digital poi! Otherwise, it may result in loss of battery capacity
and reduction of working time.
Bluetooth connection JellyPoi to PC
Pictures can be uploaded into JellyPoi only by Bluetooth. Currently it works for Windows 10.
We are working on release for MacOS version, and finally it will work through an app for Android and
iOS (iPhone).
Uploading pictures into JellyPoi for Windows:
1. Plug a USB-Bluetooth adapter (comes with JellyPoi) into your PC with Windows 10. In the right
lower corner of the screen, in the task panel, you will see a Bluetooth icon. If you have a laptop
with embed Bluetooth, then move to the next point.
2. Switch JellyPoi on.

4
3. Click the Bluetooth icon and add the Bluetooth device.
4. In the opened window click “+ Add Bluetooth…“ and “Bluetooth” again.
5. Windows will start to search Bluetooth devices and in a few seconds you will see all JellyPoi.
Connect to each JellyPoi by repeating all the previous steps.
6. Now launch Ignis Pixel Utility and wait to see JellyPoi in Device List – the right column. It may take
up to one minute. If you still don’t see JellyPoi or some of them, then press Scan button.
Now your JellyPoi are connected and you can upload pictures into them.
Work with timelines (change of modes)
You can set up time of duration for each picture, thus making a succession from them,
synchronizing with music. For JellyPoi you can make up to 4 successions for different
performances. In Ignis Pixel Utility they are marked T1-T4.
To make a Timeline:
1. Run Ignis Pixel Poi Utility and plug a turned on pixel poi to the computer.
2. Load pictures through the menu Add –> Image, or drag files into Image List (the left column).
3. Choose pictures in Image List. To choose several pictures use Ctrl and/or Shift. Drag them into
a timeline (T1-T4) into the lower part of the window.
4. Now you get a succession of pictures – a timeline. You can change the order of pictures by
dragging them, as well as you can change their duration, shifting their borders like in a video-
editing software. Use Ctrl keys (Cmd for MacOS) to change the method of adjusting the
duration of a picture – to change the duration of a definite picture (Rolling edit) or to move all
the tail of pictures (Ripple edit).
5. To make a timeline synched with music, load a music file through Add –>Music or drag an MP3-
file right into the music track above the timeline area.
6. Plug your pixel device to the computer via mirco-USB cable and click Scan button in the right
side of the Device List window.
7. Click Upload All – the process may take a few minutes, depending on a type of a model, length
of pictures and their number. To upload only some pictures, tick them and the timelines where
they are placed into, and click Upload checked.
8. If you change the duration or the order of the timeline, no need to upload the pictures again.
It’s enough to mark only the timeline and click Upload сhecked – in this case the recording
process takes a couple of seconds.
Saving your project
Ignis Pixel Utility allows to save a project, and you can send it by email or transfer it into another
computer.
Thereby original pictures are not necessary; they are kept in the project file.

5
Temperature recommendations
• Operating temperature to keep and use pixel equipment is from -20°C to 50°C (from -4°F to
122°F). On low temperature, the time of working can be diminished due to reduced battery
capacity when a battery is kept on cold. When you come back to room temperature, all
characteristics get back to the former level.
• If you really need to perform in the freezing cold, keep the poi in a warm place and take them
right before the show. In this case, the batteries don’t have enough time to cool off, and the
working time remains almost the same.
• Selfheating by bright modes can also be used when performing in the cold – it doesn’t allow
the battery to freeze during the performance.
Warranty
We give 2-year warranty for our pixel equipment. If during this time some defect or malfunction
comes out, we either fix it or make a free replacement of a faulty element. All shipping charges
are laid upon a customer, except cases when a device came initially defected or a failure was
revealed right after using the device.
Ignis pixel equipment is strong enough to survive collisions on normal spinning speed (about 2 revs
per sec). Anyway, it cannot be called indestructible. Warranty does not cover damages caused by
hard collisions, drops, and water.
Estimated lifetime of Ignis Pixel equipment is 5-10 years and limited only by battery life (like in
mobile phones). If the battery becomes worthless, get in touch with us to replace it with a new
one, or we can tell how to change it by yourself.
If the equipment shows any failure, first and foremost reach us out and tell what happened. In
most cases, a failure is possible to fix on place, without sending back to us – this will save you a lot
of time and money to send it to and fro.
It’s really important for us to know all weak spots of our equipment so we could make it even
more reliable and durable. We would appreciate if thus you help us to evolve.
To get in touch with us and ask questions about the props, go to contacts area on our website:
https://ignispixel.com/contacts
or by email: [email protected]
Kindest regards,
Ignis team
Table of contents
Popular Light Fixture manuals by other brands

High End Systems
High End Systems Technobeam user manual

Acuity Brands
Acuity Brands NaviLite N1L installation instructions

ETI Solid State Lighting
ETI Solid State Lighting TWPK-1-LB4-CP3-MV-LVD Use and care guide

Robe
Robe Color Wash 750 AT Tungsten user manual

Elation
Elation FUZE PENDANT user manual

Chauvet DJ
Chauvet DJ INTIMIDATOR SPOT 160 Operating and maintaining guide


