ikeGPS Spike User manual

1Mounting Your Spike
2Installing the Spike App
3Starting Up
4Measuring With Your Spike
5Exporting & Sharing
6Mobile App Icon Guide
User Manual
This User Manual will guide you through the steps to set up
your Spike and take measurements.
Spike User Manual v1.0
Spike User Manual 2
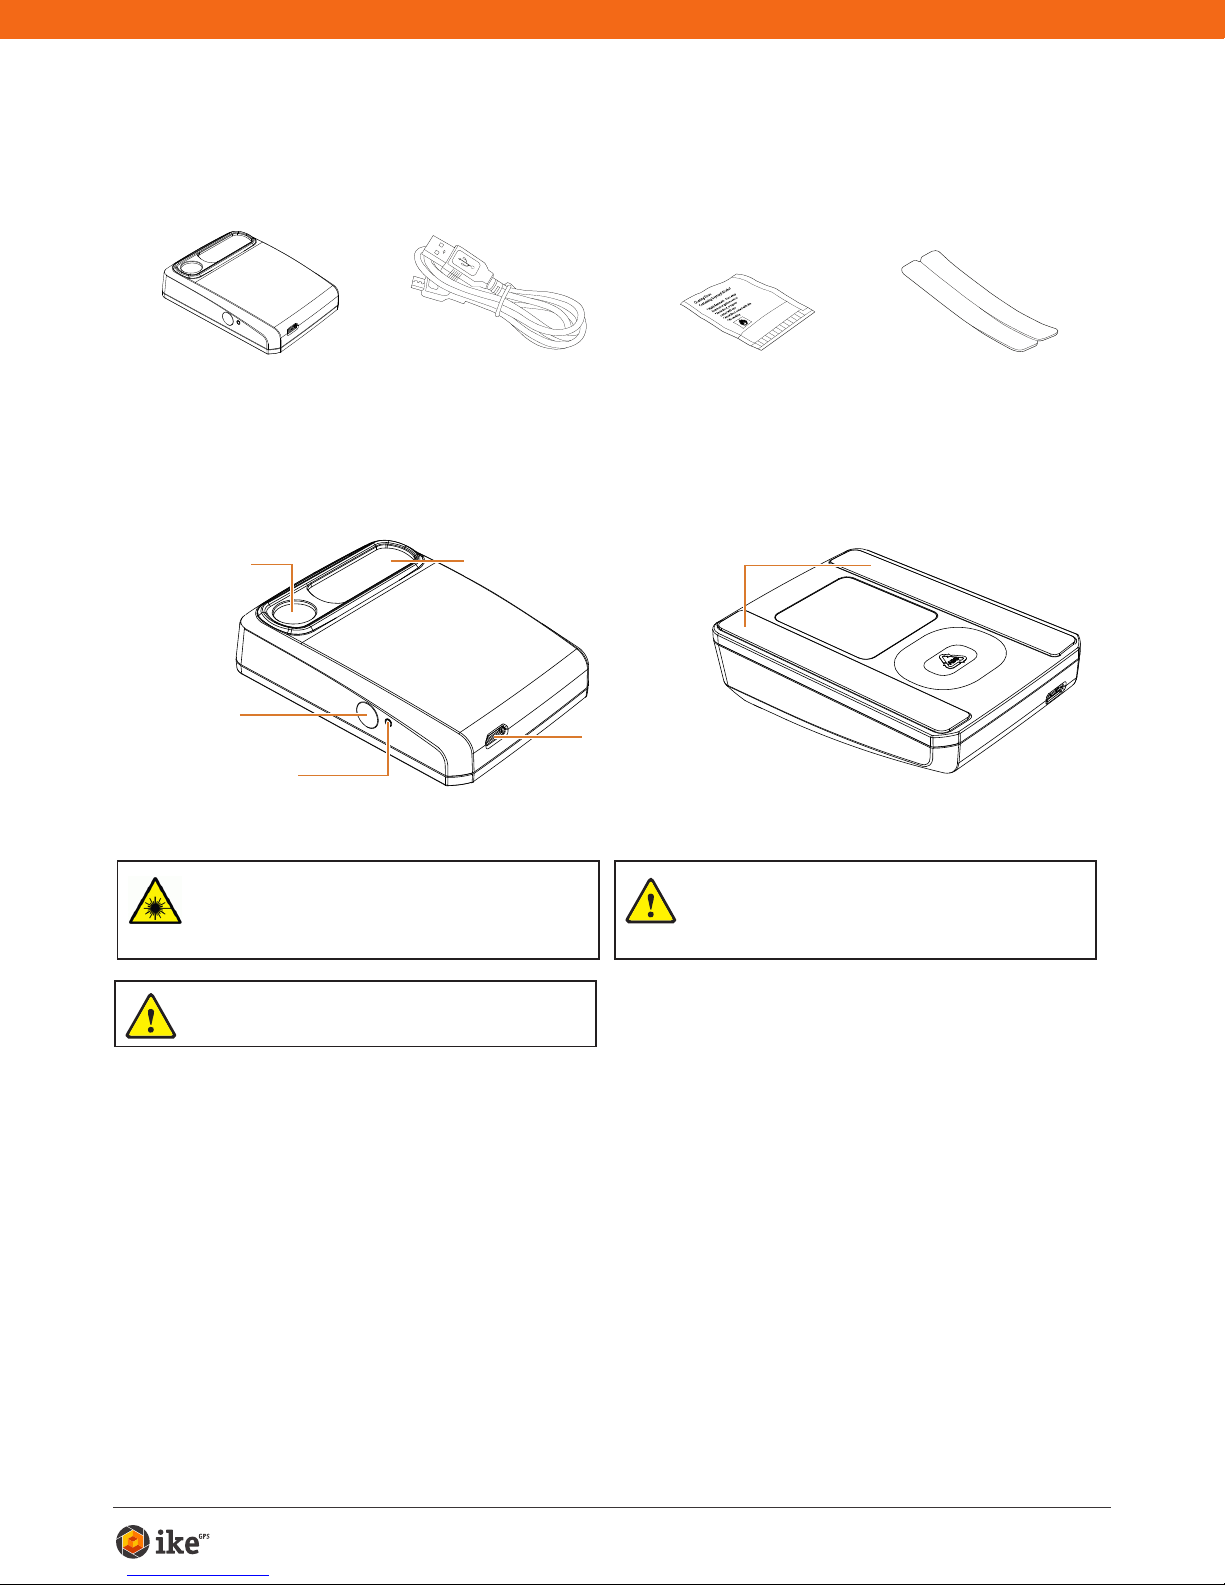
Receive Lens
Micro USB
Charging Port
Adhesive Strips
Power Button
LED Indicator
Laser Transmit
Lens
What’s in the Box
For Technical Support
WARNING This device contains an eye safe class 1 laser product.
Invisible laser radiation is emitted from (and received into) the front
apertures. Avoid staring into the laser beam. This product complies
with IEC60825-1 Ed 2.0 and 21CFR1040.10 except for deviations
pursuant to Laser Notice No.50, dated July 26 2001.
CAUTION Use of controls or adjustments, or performance of
procedures other than those specied herein may result in
hazardous radiation exposure.
Cleaning Tissue to
clean the mounting
surface (contains
Isopropyl alcohol)
Spike Unit Extra double sided
adhesive tape for
mounting to another
Smartphone case
USB Cable for
charging
Packaged and Distributed by:
Health Pak Ltd
Auckland, NZ
WARNING This equipment complies with FCC radiation exposure
limits set forth for an uncontrolled environment. In order to avoid the
possibility of exceeding the FCC radio frequency exposure limits,
human proximity to the antenna shall not be less than 20cm during
normal operation.
Visit the Spike Support Center for FAQs, video tutorials, resources, and to
contact technical support: www.ikegps.com/support
Contact Technical Support:
toll-free: +1 844 445 3477 ext 3
Spike User Manual 3
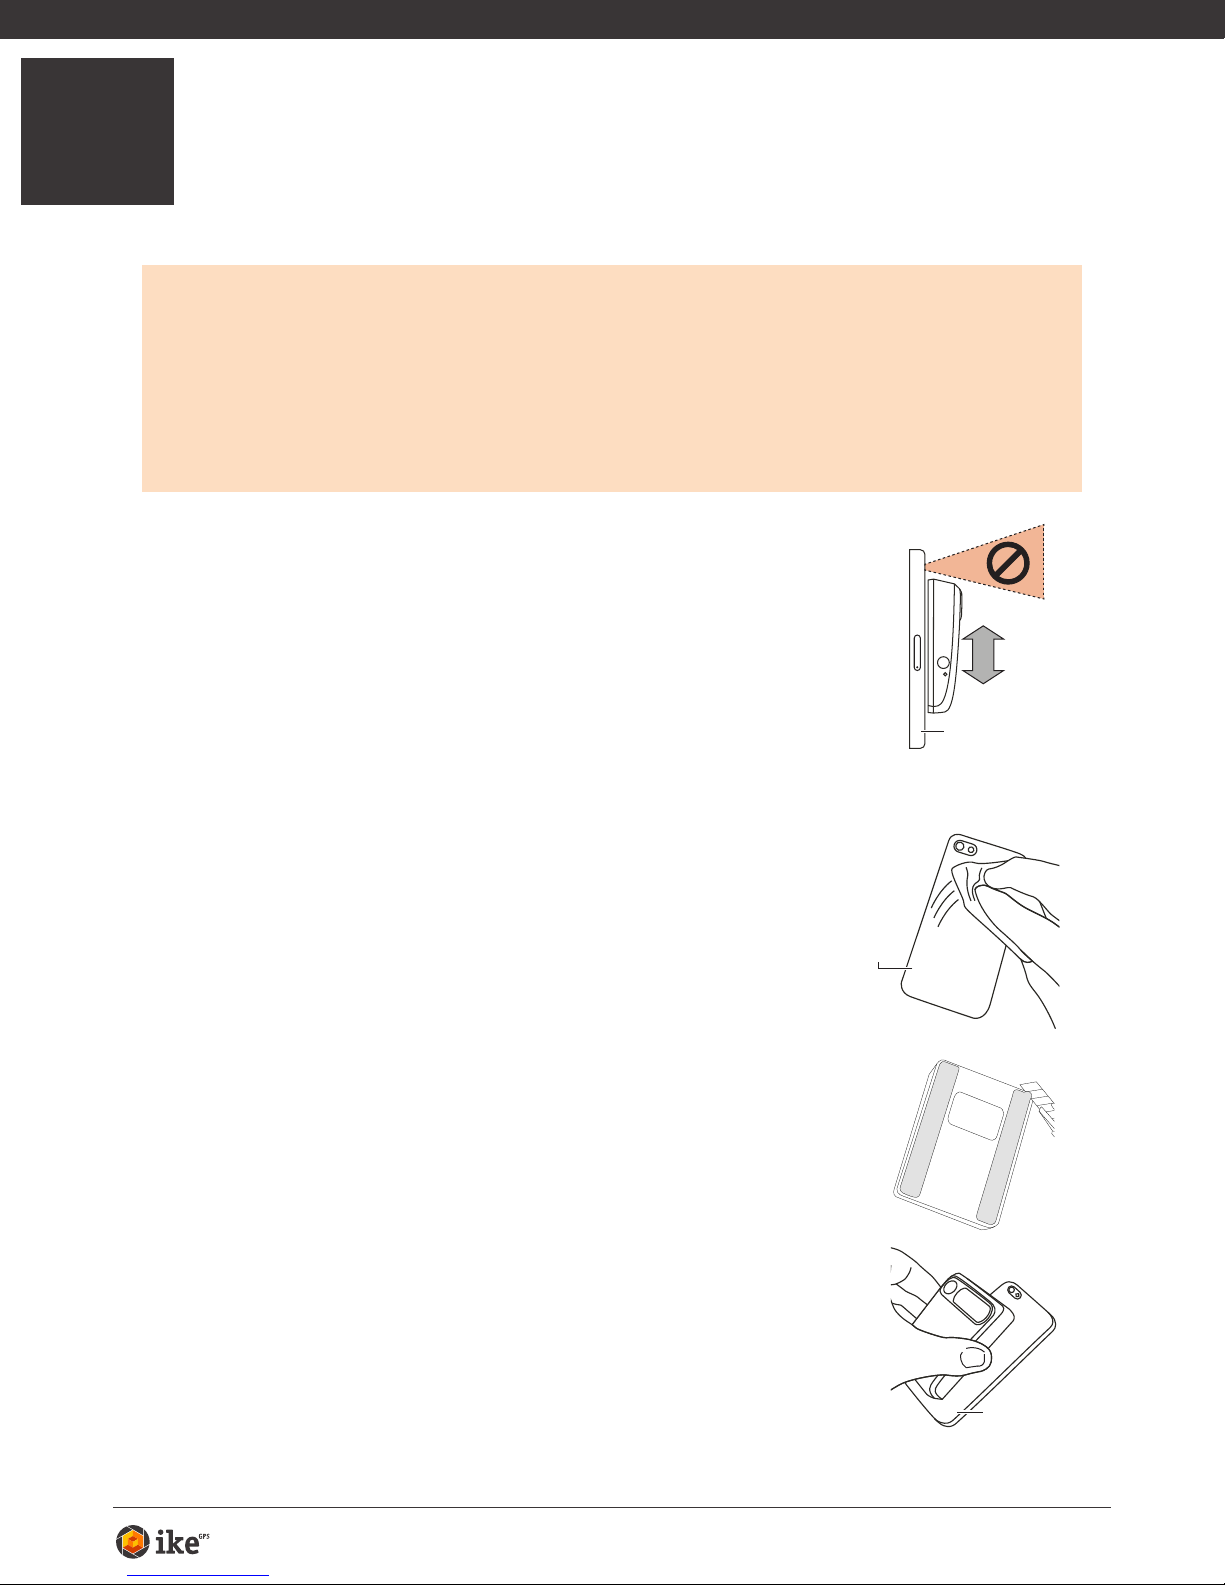
1Mounting Your Spike
IMPORTANT TO NOTE...
•Mount your Spike to a Smartphone or Tablet case. You may wish to use two
cases - one with Spike attached to it and the other for general day-to-day use.
• We recommend attaching your Spike to a hard case with a at back. It will not
attach securely to a soft or curved back design.
•Optimal surfaces to attach Spike to are metal and hard plastic surfaces.
1 Find the best location for your Spike on the
back of your Smartphone or Tablet case.
• Place Spike close to the camera, but ensure that Spike
does not obstruct the view from your camera or ash.
• For Tablets, Spike may be orientated in a position that is
most comfortable when holding your Tablet in landscape.
• To verify, start your camera app and hold your Spike
against the back of your Smartphone or Tablet to validate
correct placement.
2 Use the Cleaning Tissue provided to thoroughly
clean the area on the back of your case where
Spike will be attached.
Important: Do not use the Cleaning Tissue to clean
lenses as it may cause damage.
3 On the back of your Spike, peel off the protective
backing to expose the adhesive tape.
• Use a sharp knife to lift the edge of the backing strip.
• The adhesive tape adheres best at room temperature.
4 Make sure the cleaned area on your case is
completely dry, then position Spike onto your
case, and press down rmly for approximately
60 seconds.
• Allow approximately 1 hour for useable bond strength.
• Ultimate bond strength is dependent upon the amount
of adhesive-to-surface contact developed. Be sure to
press rmly to develop this bond strength.
Smartphone case
Smartphone
case
Smartphone
case
Spike User Manual 4
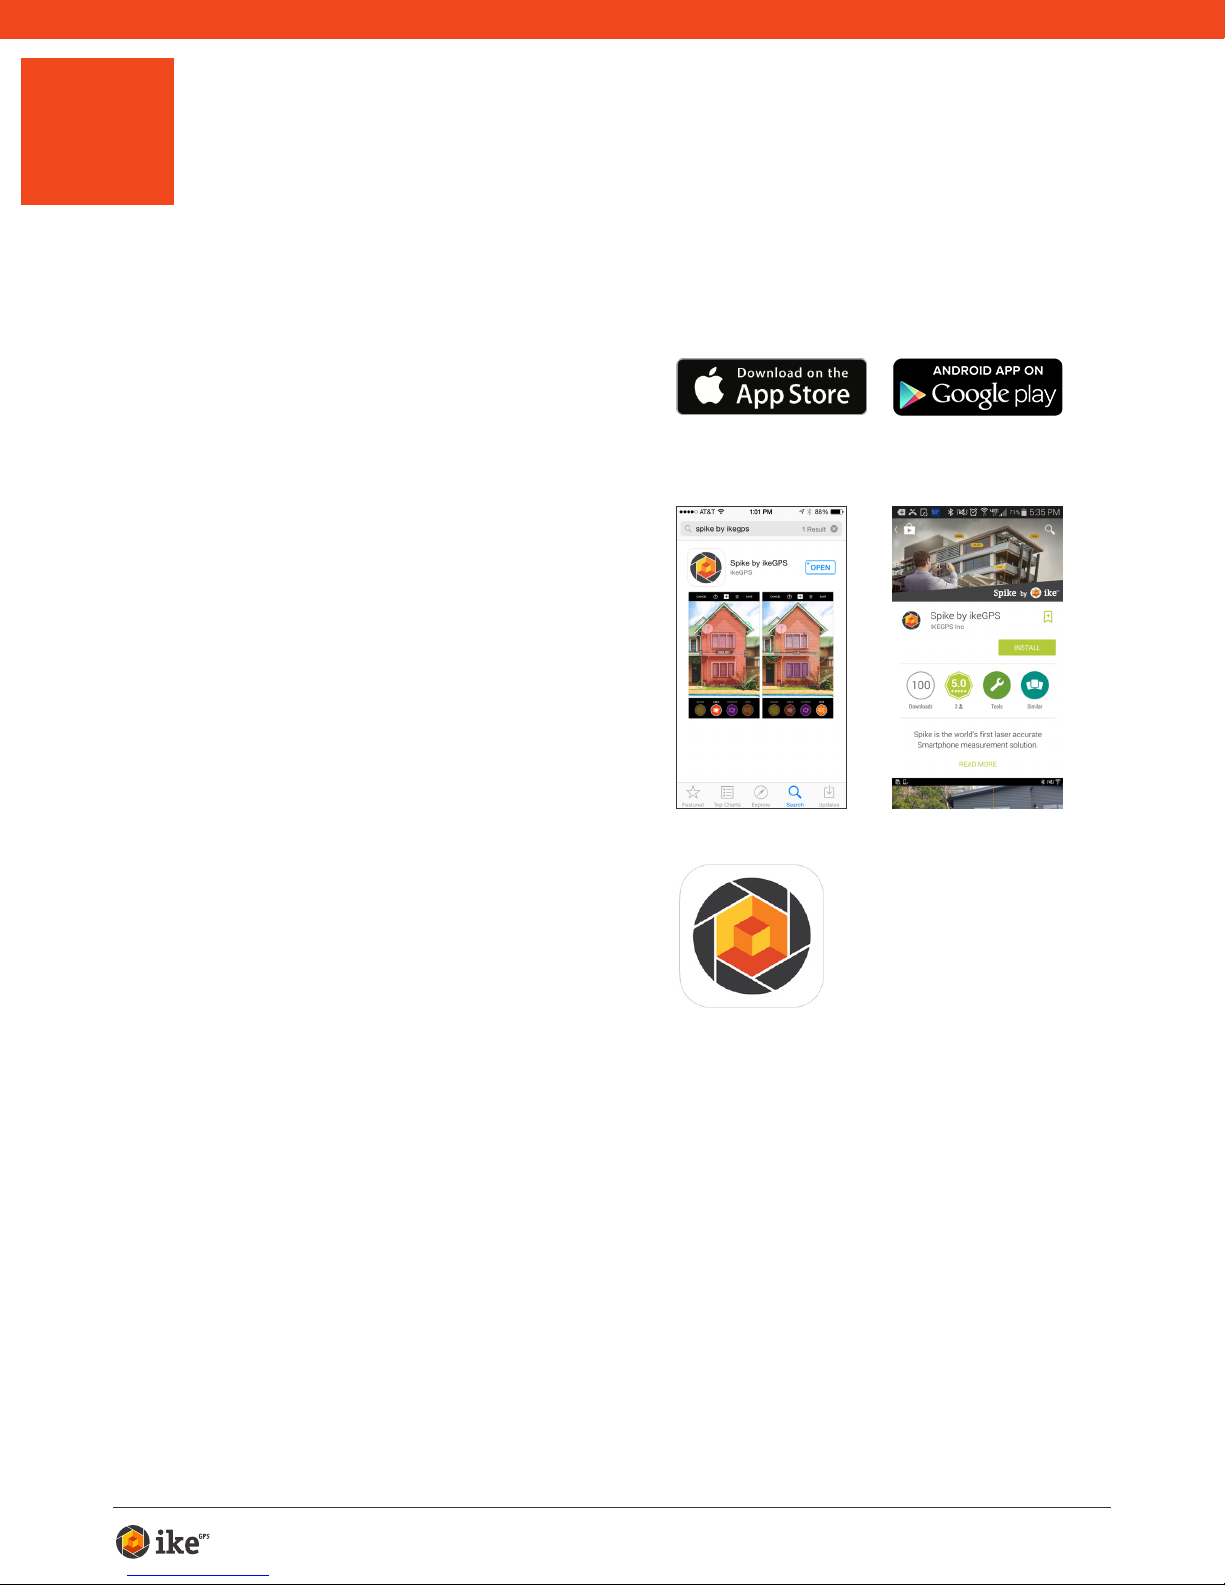
2Installing the Spike App
The Spike app is available for download from the App Store or Google Play.
1 On your Smartphone or tablet,
launch the App Store or Google
Play.
2 Within the search box, search for
ikeGPS. Select Spike by ikeGPS.
3 Follow the instructions to
download and install the app on
your Smartphone.
4 Once installed, the Spike app icon
will appear.
You can launch the Spike app and test
it out in Demo mode. Demo mode can
be used to explore Spike functionality,
but does not provide accurate
measurements or location data without
the Spike device.

Spike User Manual 5
3Starting Up
1 Turn on Bluetooth on your Smartphone or Tablet.
2 On your Spike, press the Power button.
• The LED indicator ashes blue indicating that the
Spike is discoverable over Bluetooth.
• If the LED indicator remains off, Spike may need
charging.
3 On your Smartphone, tap on the Spike app to
launch it.
The app will display “Searching for Spike Devices” and then
displays the Spike unit name available for pairing.
If no unit name appears, ensure that the Spike unit’s
LED indicator is ashing blue (see Step 2).
4 When your Spike unit name appears, tap on
it to pair it with your Smartphone (no need to
wait for the spinning circle to stop).
This step is necessary the rst time you use Spike. For
subsequent uses, your Spike will automatically be paired
with your Smartphone.
TIP: After connecting your Spike, go into the Spike app settings
, and select your preferred units of measurements: feet,
inches, meters, or centimeters.
Blue flashing: Spike discoverable over Bluetooth
Blue on: Spike connected to Smartphone
Green flashing: Spike charging
Green on: Spike fully charged
Off: Power off
IMPORTANT TO NOTE...
The LED indicator shows the status of your Spike:
Other manuals for Spike
2
Table of contents


