manuals.online logo
Brands
  1. Home
  2. •
  3. Brands
  4. •
  5. Ikelite
  6. •
  7. Camera Accessories
  8. •
  9. Ikelite Nikon Coolpix L1 User manual

Ikelite Nikon Coolpix L1 User manual

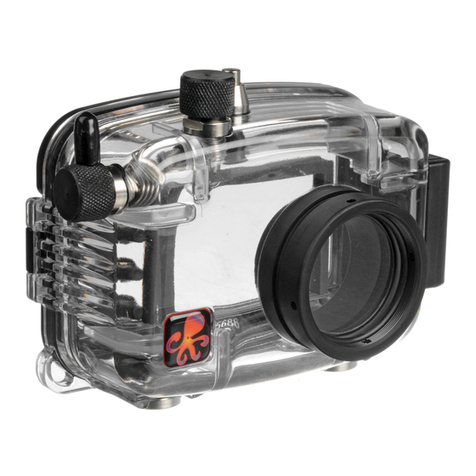
Digital Housing
instruction manual
for
Nikon
Coolpix L1
Housing
#6182.21
Congratulations on your purchase of an Ikelite Digital Camera
Housing. Ikelite has over 40 years of experience in the underwater
photographic and lighting market. Our products are designed and
built in the USA by Ikelite for both the professional and amateur
photographer.
The clear housing permits instant visual inspection of the camera
and all sealing surfaces as well as complete monitoring of controls
and camera LCD screens.
Ikelite Digital Housings are slightly negative in salt water for
stability. This housing has been water pressure tested at the
factory. Housing is pressure tested to 200’ (60m).
Ikelite Digital Housing
instruction manual
#6182.21 for Nikon CoolPix L1
2
P
Pl
le
ea
as
se
eR
Re
ea
ad
d
We suggest that you read this instruction booklet thoroughly
before use. If you are new to underwater photography be sure
to read the General and Photo Tips.
We also suggest that you read the camera manual thoroughly
to have a full understanding of where each camera control is
located and what function each control provides.
P
Pl
le
ea
as
se
eR
Re
ea
ad
dI
If
fU
Us
si
in
ng
ga
an
nE
EV
V-
-C
Co
on
nt
tr
ro
ol
ll
le
er
r
The EV-Controller used with Ikelite DS Substrobes have two
user settings. One setting is for strobe selection, the other is for
pre-flash or non pre-flash. T
Th
hi
is
sc
ca
am
me
er
ra
au
us
se
es
sp
pr
re
e-
-f
fl
la
as
sh
h, thus the
EV-Controller should be set to the pre-flash position when used
with this camera.
3
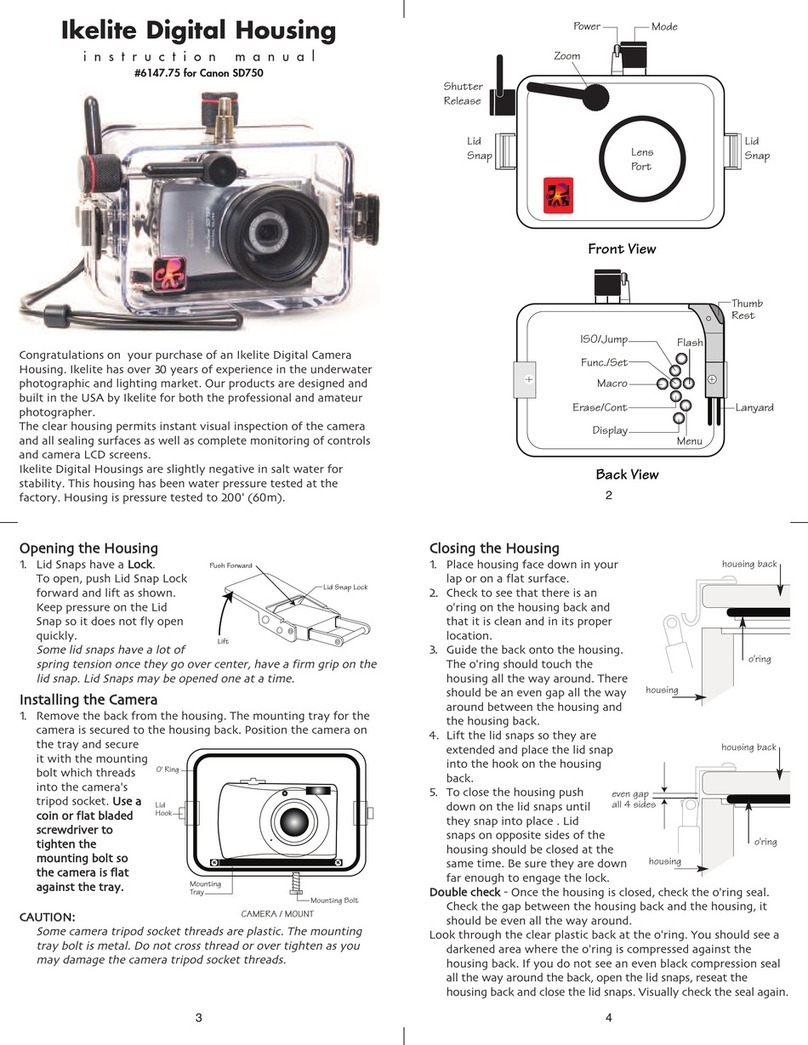
Front View
Shutter
Release
Lid
Snap
Menu
Play
Delete
Multi
Selector/OK
Lid
Snap
Lens
Port
Back View
Zoom
Mode
Lanyard
Thumb
Rest
Power
6
C
Ch
he
ec
ck
ki
in
ng
gC
Co
on
nt
tr
ro
ol
ls
s
Once the housing has been closed, push the controls back into
place. Make sure they line up with the camera’s controls.
T
Tu
ur
rn
nC
Ca
am
me
er
ra
aO
On
n
Turn the camera on and operate each of the housing controls to
get a feel for using the camera in the housing. Take a few
pictures above water with the camera in the housing.
4
O
Op
pe
en
ni
in
ng
gt
th
he
eH
Ho
ou
us
si
in
ng
g
1. Lid Snaps have a L
Lo
oc
ck
k.
To open, push Lid Snap Lock
forward and lift as shown.
Keep pressure on the Lid
Snap so it does not fly open
quickly.
Some lid snaps have a lot of
spring tension once they go over center, have a firm grip on the
lid snap. Lid Snaps may be opened one at a time.
I
In
ns
st
ta
al
ll
li
in
ng
gt
th
he
eC
Ca
am
me
er
ra
a
Remove the back from the housing. The mounting tray for the
camera is secured
to the housing
back. Position the
camera on the tray
and secure it with
the mounting bolt
which threads into
the camera’s tripod
socket. U
Us
se
ea
ac
co
oi
in
n
o
or
rf
fl
la
at
tb
bl
la
ad
de
ed
d
s
sc
cr
re
ew
wd
dr
ri
iv
ve
er
rt
to
o
t
ti
ig
gh
ht
te
en
nt
th
he
e
m
mo
ou
un
nt
ti
in
ng
gb
bo
ol
lt
ts
so
o
t
th
he
ec
ca
am
me
er
ra
ai
is
sf
fl
la
at
t
a
ag
ga
ai
in
ns
st
tt
th
he
et
tr
ra
ay
y.
.
C
CA
AU
UT
TI
IO
ON
N:
:
Some camera tripod socket threads are plastic. The mounting
tray bolt is metal. Do not cross thread or over tighten as you
may damage the camera tripod socket threads.
Lift
Push Forward
Lid Snap Lock
CAMERA / MOUNT
Lid
Hook
O' Ring
Mounting Bolt
Mounting
Tray
5
C
Cl
lo
os
si
in
ng
gt
th
he
eH
Ho
ou
us
si
in
ng
g
1. Place housing face down in your
lap or on flat surface.
2. Check to see that there is an
o’ring on the housing back and
that it is clean and in its proper
location.
3. Guide the back onto the housing.
The o’ring should touch the
housing all the way around. There
should be an even gap all the way
around between the housing and
the housing back.
4. Lift the lid snaps so they are
extended and place the lid snap
into the hook on the housing
back.
5. To close the housing push
down on the lid snaps until
they snap into place . Lid
snaps on opposite sides of the
housing should be closed at the
same time. Be sure they are down
far enough to engage the lock.
D
Do
ou
ub
bl
le
ec
ch
he
ec
ck
k- Once the housing is closed, check the o’ring seal.
Check the gap between the housing back and the housing, it
should be even all the way around.
Look through the clear plastic back at the o’ring. You should see a
darkened area where the o’ring is compressed against the
housing back. If you do not see an even black compression seal
all the way around the back, open the lid snaps, reseat the
housing back and close the lid snaps. Visually check the seal again.
o’ring
housing back
housing back
housing
housing
o’ring
even gap
all 4 sides
7
L
Lu
ub
br
ri
ic
ca
an
nt
ts
s
1. Ikelite provides silicone lubricant with the housing. We recommend
you use only Ikelite lubricant on Ikelite products as some other
brands may cause the o’ring to swell and not seal properly.
2. Use only enough lubricant to lightly cover control shafts and
o’rings. Wipe off any excess lubricant with a clean cloth.
Lubricant is not a sealant, it is used to reduce friction. Excessive
lubricant can collect sand and dirt which may interfere with
proper sealing.
C
CA
AU
UT
TI
IO
ON
N
N
Ne
ev
ve
er
ru
us
se
es
sp
pr
ra
ay
yl
lu
ub
br
ri
ic
ca
an
nt
ts
sa
as
st
th
he
ep
pr
ro
op
pe
el
ll
la
an
nt
ti
in
ng
gr
re
ed
di
ie
en
nt
tc
ca
an
n
c
ca
au
us
se
et
th
he
ep
pl
la
as
st
ti
ic
ch
ho
ou
us
si
in
ng
gt
to
oc
cr
ra
ac
ck
k.
.
8
D
Di
if
ff
fu
us
se
er
r&
&D
De
ef
fl
le
ec
ct
to
or
rI
In
ns
st
ta
al
ll
la
at
ti
io
on
n
Housing shown with
Diffuser installed.
Diffuser
U
Us
si
in
ng
gF
Fl
la
as
sh
h
U
Us
si
in
ng
gt
th
he
eC
Ca
am
me
er
ra
a’
’s
sB
Bu
ui
il
lt
t-
-i
in
nF
Fl
la
as
sh
h.
.
If you do not have an external flash the camera’s built-in flash
can be used. See Diffuser instructions.
9
D
Di
if
ff
fu
us
se
er
ra
an
nd
dD
De
ef
fl
le
ec
ct
to
or
rc
co
on
nt
t.
.
A diffuser and deflector are
included with the housing. The
diffuser is white transparent
plastic. The deflector is also
white but is not transparent
and has a decal on the front.
To install the diffuser or
deflector spread the port clamp
at the spring end and slide over
the lens port. The white plastic
should be placed in front of the
camera flash. The port clamp
should be pushed back against
the front of the housing.
D
Di
if
ff
fu
us
se
er
r
The diffuser should be installed when using the camera’s built in
flash. When shooting with the camera’s built-in flash at
approximately 2 feet (0.6 m) or less, the lens port on the
housing may block a portion of the light from the camera’s
built-in flash, creating a shadow in the lower left of the photo.
If this occurs, zoom the lens slightly to eliminate the shadow.
(You can test this above water)
D
De
ef
fl
le
ec
ct
to
or
r
The deflector should be installed when using an external strobe
such as the DS51 or DS125 Substrobe and EV Controller. The
deflector will redirect the camera’s flash to the EV Controller
which controls the external strobes output.
Diffuser/Deflector material
Port Clamp
Spring
Spread to Install
10 11
O
Op
pt
ti
io
on
na
al
lA
Ac
cc
ce
es
ss
so
or
ri
ie
es
s
B
Ba
ac
ck
kO
O’
’r
ri
in
ng
g##00110099
O’rings last for several years if properly maintained. (See
maintenance) Always carry a spare.
U
UR
R/
/P
Pr
ro
oF
Fi
il
lt
te
er
r##66444411..4411
The UR/Pro underwater color correcting filter is designed to
restore some of the warm colors filtered out by the water. For
available light use only, not recommended for use with flash.
T
Tr
ra
ay
yw
wi
it
th
hR
Re
el
le
ea
as
se
eH
Ha
an
nd
dl
le
e##99552233..3311
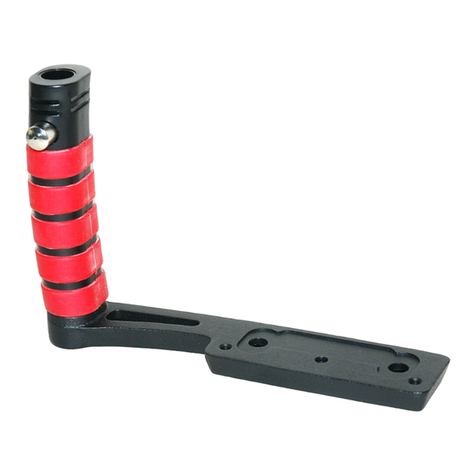
Tray and Release Handle is required to mount external
Substrobes.
L
Le
en
ns
sP
Po
or
rt
t
The Lens Port is factory sealed, do not remove.
Treat the glass in the lens port as a camera lens. After use, rinse
and gently dry the lens port to avoid water spotting. To clean
use a mild soap solution or lens cleaner.
Do not use alcohol or window cleaner on the Lens Port.
The Lens Port is threaded so that accessory lenses can be
screwed onto the port. The threads are very fine, take care not
to cross thread the lens.
Wide angle lenses are available from Inon, Sea & Sea and
Epoque. These lenses can be screwed onto the lens port above
or below water. These lenses are designed to have water
between the front of the port and the accessory lens. Make sure
no air bubbles are trapped between the port and the accessory
lens. There may be slight vignetting when these wide angle
lenses are installed. Any vignetting that occurs can be
eliminated by zooming the camera lens slightly. To properly
light subjects when using
a wide angle lens an
external strobe should be
used. Due to the wide
angle of coverage of the
Inon,Sea & Sea and
Epoque lenses, the DS125
Substrobe is
recommended or two
DS51 Substrobes.
Wide Angle Lens
Housing shown with
accessory wide angle lens.
13
Substrobe
DS125
EV Controller
Ball Socket
Arm
O
Op
pt
ti
io
on
na
al
lA
Ac
cc
ce
es
ss
so
or
ri
ie
es
s
S
Su
ub
bs
st
tr
ro
ob
be
eD
DS
S1
12
25
5P
Pa
ac
ck
ka
ag
ge
e##33994444..7777
The Substrobe DS125 package
includes the Substrobe DS125, the EV
Controller, ball socket arm and
charger. The EV Controller provides
10 manual power settings in 1/2 stop
increments. An external strobe offers
several advantages over using the
camera’s built-in flash. External
strobes move the flash away from
the camera lens which helps reduce
backscatter. They also expand
lighting options to achieve the best
lighting for different subjects. A
second external digital strobe
package can be added to fill the
shadows and produce more realistic
photographs.
The Substrobe DS125 covers the
equivalent of a 18mm lens, 100
degrees. It is the ideal choice when
using accessory wide angle lenses
greater than 28mm.
N
NO
OT
TE
E:
:
Optional Tray and
Release Handle
required to mount
Substrobes.
12
Substrobe
DS51
EV Controller
Ball Socket
Arm
O
Op
pt
ti
io
on
na
al
lA
Ac
cc
ce
es
ss
so
or
ri
ie
es
s
S
Su
ub
bs
st
tr
ro
ob
be
eD
DS
S5
51
1P
Pa
ac
ck
ka
ag
ge
e##33994444..5577
The Substrobe DS51 package includes
the Substrobe DS51, the EV
Controller and ball socket arms. The
EV Controller provides 10 manual
power settings in 1/2 stop
increments. An external strobe
offers several advantages over using
the camera’s built-in flash. External
strobes move the flash away from
the camera lens which helps reduce
backscatter. They also expand
lighting options to achieve the best
lighting for different subjects. A
second external digital strobe
package can be added to fill the
shadows and produce more realistic
photographs.
The Substrobe DS51 covers the
equivalent of a 28mm lens. It is the
ideal choice when using only the
camera lens or the camera lens with
a macro accessory lens.
If an accessory wide angle lens wider
than 28mm is used, the ideal
lighting choice is the Substrobe
DS125, which covers 100 degrees, or
two Substrobe DS51’s can be used.
N
NO
OT
TE
E:
:
Optional Tray and
Release Handle
required to mount
Substrobes.
14
M
Ma
ai
in
nt
te
en
na
an
nc
ce
e
The Ikelite Digital Housing should be given the same care and
attention as your other photographic equipment. In addition to
normal maintenance we recommend that the housing be returned
to Ikelite periodically to be checked and pressure tested.
1. D
Do
oN
No
ot
tleave the camera and housing in direct sunlight for
prolonged periods. Heat may damage the camera.
2. D
Do
oN
No
ot
tship the camera in the housing.
3. Before using the housing, always check the tightness of the s
se
et
t
s
sc
cr
re
ew
win each control knob.
Check each c
co
on
nt
tr
ro
ol
lg
gl
la
an
nd
dpenetrating the housing to make sure
they are tight. There is a slight chance that either could vibrate
loose during travel.
4. Keep the back o’ring clean and lightly lubricated. To lubricate
remove the o’ring from the back. Put a small amount of lkelite
lubricant on your fingers. Draw the o’ring through your fingers
to apply a light coating of lubricant. Only apply enough
lubricant to make the o’ring feel slick. D
Do
oN
No
ot
ts
st
tr
re
et
tc
ch
ht
th
he
eo
o’
’r
ri
in
ng
g.
This light coating of lubricant will help to keep the o’ring from
drying out and will help to show a dark sealing line when the
housing back is properly sealed.
5. Keep the area where the o’ring fits and the sealing surface of
the housing clean.
6. Rinse the housing exterior thoroughly in fresh water after each
salt water use. Dry with a soft cloth. Dry lens port to eliminate
water spotting.
After several uses in salt water soak the housing exterior in a
mild soap solution, rinse and dry before storage. When storing
the housing, remove the back o’ring, lightly lubricate and place
in a plastic bag. Place the plastic bag with o’ring inside the
housing for safe keeping.
C
CA
AU
UT
TI
IO
ON
N
N
Ne
ev
ve
er
ru
us
se
es
sp
pr
ra
ay
yl
lu
ub
br
ri
ic
ca
an
nt
ts
sa
as
st
th
he
ep
pr
ro
op
pe
el
ll
la
an
nt
ti
in
ng
gr
re
ed
di
ie
en
nt
tc
ca
an
n
c
ca
au
us
se
et
th
he
ep
pl
la
as
st
ti
ic
ch
ho
ou
us
si
in
ng
gt
to
oc
cr
ra
ac
ck
k.
.

This manual suits for next models

1

Other Ikelite Camera Accessories manuals

Ikelite 6950.53 User manual

Ikelite

Ikelite 6950.53 User manual

Ikelite 6038.91 Owner's manual

Ikelite

Ikelite 6038.91 Owner's manual

Ikelite 6973.07 User manual

Ikelite

Ikelite 6973.07 User manual

Ikelite 6842.35 User manual

Ikelite

Ikelite 6842.35 User manual

Ikelite iTTL User manual

Ikelite

Ikelite iTTL User manual

Ikelite 6182.71 User manual

Ikelite

Ikelite 6182.71 User manual

Ikelite 6130.80 User manual

Ikelite

Ikelite 6130.80 User manual

Ikelite 6910.61 User manual

Ikelite

Ikelite 6910.61 User manual

Ikelite 6973.06 User manual

Ikelite

Ikelite 6973.06 User manual

Ikelite Fuji E-900 Operating and maintenance manual

Ikelite

Ikelite Fuji E-900 Operating and maintenance manual

Ikelite SLR-DC Housing User manual

Ikelite

Ikelite SLR-DC Housing User manual

Ikelite 6182.77 User manual

Ikelite

Ikelite 6182.77 User manual

Ikelite 46045 User manual

Ikelite

Ikelite 46045 User manual

Ikelite ST1K User manual

Ikelite

Ikelite ST1K User manual

Ikelite 200DL User manual

Ikelite

Ikelite 200DL User manual

Ikelite 69531 User manual

Ikelite

Ikelite 69531 User manual

Ikelite 6871.06 User manual

Ikelite

Ikelite 6871.06 User manual

Ikelite 71301 User manual

Ikelite

Ikelite 71301 User manual

Ikelite 6184.7 User manual

Ikelite

Ikelite 6184.7 User manual

Ikelite W-120 Owner's manual

Ikelite

Ikelite W-120 Owner's manual

Ikelite 6146.16 User manual

Ikelite

Ikelite 6146.16 User manual

Ikelite 4405 User manual

Ikelite

Ikelite 4405 User manual

Ikelite Nikon S200 User manual

Ikelite

Ikelite Nikon S200 User manual

Ikelite 6147.89 User manual

Ikelite

Ikelite 6147.89 User manual

Popular Camera Accessories manuals by other brands

CamRanger CamRanger user manual

CamRanger

CamRanger CamRanger user manual

Custom Brackets HDV CAGE KIT Instructions for use

Custom Brackets

Custom Brackets HDV CAGE KIT Instructions for use

Aegis ABL052010P user manual

Aegis

Aegis ABL052010P user manual

Saft SRA Series Installation and operating instructions

Saft

Saft SRA Series Installation and operating instructions

Kodak TIB5200 technical information

Kodak

Kodak TIB5200 technical information

Videotec HEG instruction manual

Videotec

Videotec HEG instruction manual

Pentax Auto Bellows Slide Copier K user manual

Pentax

Pentax Auto Bellows Slide Copier K user manual

Nikon UT-1 user manual

Nikon

Nikon UT-1 user manual

dji RONIN 4D quick start guide

dji

dji RONIN 4D quick start guide

SLIK ABLE 300DX user manual

SLIK

SLIK ABLE 300DX user manual

Rebelcell 36V70 user manual

Rebelcell

Rebelcell 36V70 user manual

Trojan GC2 48V quick start guide

Trojan

Trojan GC2 48V quick start guide

Calumet 7100 Series CK7114 operating instructions

Calumet

Calumet 7100 Series CK7114 operating instructions

Ropox 4Single Series User manual and installation instructions

Ropox

Ropox 4Single Series User manual and installation instructions

Cambo Wide DS Digital Series Main operating instructions

Cambo

Cambo Wide DS Digital Series Main operating instructions

Samsung SHG-120 Specification sheet

Samsung

Samsung SHG-120 Specification sheet

Ryobi BPL-1820 Owner's operating manual

Ryobi

Ryobi BPL-1820 Owner's operating manual

TBB power Energy Hub EH128L user manual

TBB power

TBB power Energy Hub EH128L user manual

manuals.online logo
manuals.online logoBrands
  • About & Mission
  • Contact us
  • Privacy Policy
  • Terms and Conditions

Copyright 2025 Manuals.Online. All Rights Reserved.