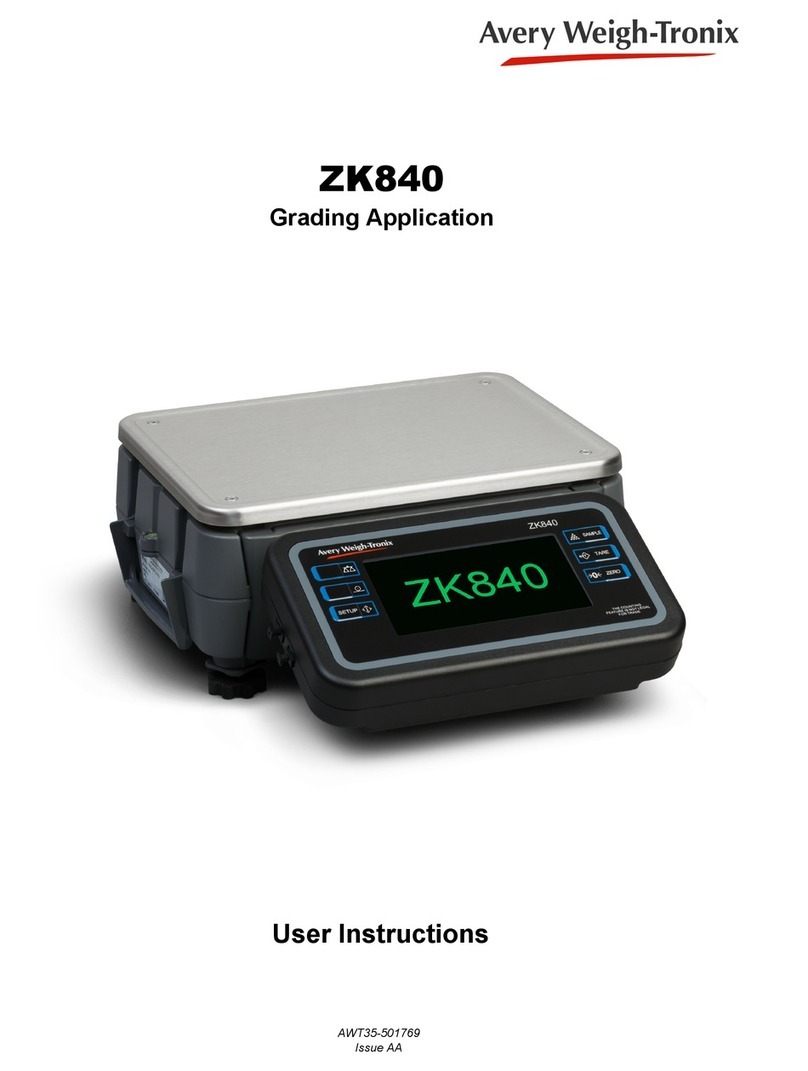
Illinois Tool Works Avery Weigh-Tronix ZK840 User manual

ZK840
Balance Application
User Instructions
AWT35-501770
Issue AA

ZK840_lab_balance_app_u_en_501770.book
Avery Weigh-Tronix is a trademark of the Illinois Tool Works group of companies whose ultimate parent company is Illinois Tool
Works Inc (“Illinois Tool Works”). Copyright © 2017 Illinois Tool Works. All rights reserved.
No part of this publication may be reproduced by making a facsimile copy, by the making of a copy in three dimensions of a two-dimensional
work and the making of a copy in two dimensions of a three-dimensional work, stored in any medium by electronic means, or transmitted in
any form or by any means, including electronic, mechanical, broadcasting, recording or otherwise without the prior written consent of the
copyright owner, under license, or as permitted by law.
This publication was correct at the time of going to print, however Avery Weigh-Tronix reserves the right to alter without notice the
specification, design, price or conditions of supply of any product or service at any time.

ZK840 Balance Application User Instructions 3
Table of Contents
page
Table of Contents ...................................................................................................................................... 3
Chapter 1 General information and warnings ......................................................................................... 5
About this manual ..............................................................................................................5
Text conventions ......................................................................................................... 5
Special messages ....................................................................................................... 5
Installation .......................................................................................................................... 5
Safe handling of equipment with batteries .................................................................. 6
Wet conditions ............................................................................................................. 6
Routine maintenance ......................................................................................................... 6
Cleaning the machine ........................................................................................................ 7
Training .............................................................................................................................. 7
Sharp objects ..................................................................................................................... 7
Chapter 2 Introduction .............................................................................................................................. 9
Front panel keys .............................................................................................................. 10
Annunciators .................................................................................................................... 10
Powering up a ZK840 indicator ........................................................................................ 10
Menu access and navigation ........................................................................................... 11
Escaping or exiting from a menu ............................................................................... 12
Adjusting screen contrast ................................................................................................. 12
Touch screen calibration .................................................................................................. 12
Chapter 3 Operating Instructions ........................................................................................................... 13
Power up .......................................................................................................................... 13
Printing ............................................................................................................................. 13
Balance application .......................................................................................................... 14
Balance mode plus percentage weighing ............................................................. 14
Percentage recipe mode ......................................................................................... 14
Density mode ........................................................................................................... 15
Other features ........................................................................................................... 17
Chapter 4 Menus ...................................................................................................................................... 21
User menu ....................................................................................................................... 21
About menu ...................................................................................................................... 22
Audit menu ....................................................................................................................... 24
Chapter 5 Error messages ...................................................................................................................... 25
Printing errors .................................................................................................................. 25
‘Copying to or from USB’ errors ....................................................................................... 25
BSQ errors ....................................................................................................................... 25
Accumulation errors ......................................................................................................... 25
Chapter 6 Supervisor menu .................................................................................................................... 26
CONFIG key .................................................................................................................... 27
Application Mode ....................................................................................................... 27
Invert Display Enabled .............................................................................................. 27
GLP ........................................................................................................................... 27
Percentage Accuracy ................................................................................................ 28
Battery key ....................................................................................................................... 28
Chapter 7 Print formats ........................................................................................................................... 30

4 ZK840 Balance Application User Instructions

ZK840 Balance Application User Instructions 5
1.1 About this manual
1 General information and warnings
1.1 About this manual
This manual is divided into chapters by the chapter number and the large text at the top
of a page. Subsections are labeled as shown by the 1.1 and 1.1.1 headings. The
names of the chapter and the next subsection level appear at the top of alternating
pages of the manual to remind you of where you are in the manual. The manual name
and page numbers appear at the bottom of the pages.
1.1.1 Text conventions
Key names are shown in bold and reflect the case of the key being described. If a key
has a dual function it may be referred to by its alternate function.
Displayed messages appear in bold italic type and reflect the case of the displayed
message.
Annunciator names appear as italic text and reflect the case of the annunciator.
1.1.2 Special messages
Examples of special messages you will see in this manual are defined below. The
signal words have specific meanings to alert you to additional information or the relative
level of hazard.
1.2 Installation
CAUTION!
This is a Caution symbol.
Cautions give information about procedures that, if not observed, could result
in damage to equipment or corruption to and loss of data.
NOTE: This is a Note symbol. Notes give additional and important information, hints
and tips that help you to use your product.
NO USER SERVICEABLE PARTS.REFER TO Q U A LIFIED SERVICE
PERSO N N EL FO R SERVICE.

6 ZK840 Balance Application User Instructions
General information and warnings
1.2.1 Safe handling of equipment with batteries
1.2.2 Wet conditions
Under wet conditions, the plug must be connected to the final branch circuit via an
appropriate socket / receptacle designed for washdown use.
Installations within the USA should use a cover that meets NEMA 3R specifications
as required by the National Electrical Code under section 410-57. This allows the unit
to be plugged in with a rain tight cover fitted over the plug.
Installations within Europe must use a socket which provides a minimum of IP56
protection to the plug / cable assembly. Care must be taken to make sure that the
degree of protection provided by the socket is suitable for the environment.
1.3 Routine maintenance
Always isolate the indicator from the power supply before starting any routine
maintenance to avoid the possibility of electric shock.
CAUTION: Danger of explosion if battery is incorrectly replaced. Replace only
with the same or equivalent type recommended by the manufacturer. Dispose
of used batteries according to the manufacturer’s instructions.
ATTENTION: Il y a danger d'explosion s'il y a remplacement incorrect de la
batterie, remplacer uniquement avec une batterie du même type ou d'un type
équivalent recommandé par le constructeur. Mettre au rebut les batteries
usagées conformément aux instructions du fabricant.
IMPORTANT: This equipment must be routinely checked for proper operation
and calibration.
Application and usage will determine the frequency of calibration required for
safe operation.

ZK840 Balance Application User Instructions 7
1.4 Cleaning the machine
1.4 Cleaning the machine
1.5 Training
Do not attempt to operate or complete any procedure on a machine unless you have
received the appropriate training or read the instruction books.
To avoid the risk of RSI (Repetitive Strain Injury), place the machine on a surface which
is ergonomically satisfactory to the user. Take frequent breaks during prolonged usage.
1.6 Sharp objects
Do not use sharp objects such as screwdrivers or long fingernails to operate the keys.
Table 1.1 Cleaning DOs and DON’Ts
DO DO NOT
Wipe down the outside of standard products
with a clean cloth, moistened with water and
a small amount of mild detergent
Attempt to clean the inside of the machine
Use harsh abrasives, solvents, scouring cleaners or
alkaline cleaning solutions
Spray the cloth when using a proprietary
cleaning fluid
Spray any liquid directly on to the display windows

ZK840 Balance Application User Instructions 9
2 Introduction
The ZK840 is a fully programmable indicator which, when attached to a BSQ digital
scale base, creates a highly accurate counting and weighing system. With custom
programming the indicator and its touch-screen graphic display can perform many
other functions. This manual applies to the Balance application. See Operating
Instructions on page 13 for information about this application.
The indicator, shown in Figure 2.1, requires 100 VAC - 240 VAC, 50 or 60 Hz or 9-
36VDC. The indicator has two full duplex RS232 ports, two USB host ports, Ethernet
port, one Micro SD slot, three logic level inputs with configurable functions, three
setpoint outputs and an expansion card slot for 1 of 2 option cards:
l802 Wireless card
l5V Analog scale card
Other options available are a stack light kit for visual confirmation of outputs, two
columns for mounting the indicator above the BSQ base, battery packs and scanners.
The ZK840 allows five bases to be used (one local BSQ base, two remote BSQ bases
and two analog platforms). Other base combinations are available.
See the Specification literature for a full list of specifications.
For information on the BSQ bases please refer to the manuals for the BSQ line.
Figure 2.1 shows the front panel of the ZK840 indicator. The front panel consists of the
keys and the graphic display.
Figure 2.1 ZK840 front panel
ZK840
T HE CO UN TI NG
FEATURE IS NOT LEGAL
FOR TRADE
SETUP ZERO
TARE
SAMPLE
Never press a key with anything but your finger. Damage to the overlay may result if
sharp or rough objects are used.

10 ZK840 Balance Application User Instructions
Introduction
2.1 Front panel keys
The keys and their functions are listed below.
2.2 Annunciators
On screen you will see various annunciators. Below are the annunciators and what
they mean.
Motion - This appears when the indicator senses scale motion.
Center of Zero - This appears when the scale is in the zero window.
Scale - If multiple scales are attached and active, this annunciator shows
which scale’s information is being displayed.
W1 Weight Range 1 - For multi-range operation, this shows which weight
range the weight is in. May also be W2 or W3.
PT Appears when a Preset Tare is active.
2.3 Powering up a ZK840 indicator
The indicator is always active as long as power is received. Power must be 100-240
VAC with a frequency of 50 or 60 Hz, or 9-36 VDC.
The SAMPLE key can be used to perform custom application
functions.
Press the TARE key to perform a pushkey tare function or with zero
weight on the scale press the TARE key to enter a known tare. To
clear a tare, press and hold the TARE key.
Press the ZERO key to zero the display.
The SETUP key can be used to perform custom application
functions. It can also be used to access the password entry screen
for menu access. Press to choose a custom unit of measure. See
Other features on page 17.
Press the PRINT key to print the configured information through the
configured port. A long key press will print and clear the Count totals.
Press the SCALE key to switch the display between different
connected scale bases.
SAMPLE
TARE
ZERO
SETUP
SCL#1

ZK840 Balance Application User Instructions 11
2.4 Menu access and navigation
2.4 Menu access and navigation
The menus used to configure the ZK840 are accessed with passwords. Press and hold
the SETUP key to access the password entry screen, shown below.
In general, a menu is made up of a group of top level items, sub levels under each of
those and lists of items to view or configure. There are variations on this theme.
Sometimes there may be no sub level or there maybe two sub levels before you get to
a list of items to set.
You will see on-screen lists with instructions on how to choose and set an item in each
menu list. On-screen prompts guide you as you move through the menus.
When icons are on screen the bold box around an icon means it is the highlighted icon.
See the example below.
When a text list appears on screen the highlighted item is shown by a green bar over
the text. See the example below.
Press the up or down arrow to move the highlight and then press the Enter key to
accept the choice. Press Esc to return to the previous screen without making a change.
The main menu is made up of the User, About and Audit menus. See Chapter 4for
complete information.
Note that the display shown above and throughout the manual is not proportional to
the actual screen. It is shortened vertically to save space on the page when practical.
User AboutAudit
Highlighted icon

12 ZK840 Balance Application User Instructions
Introduction
2.4.1 Escaping or exiting from a menu
In any menu you will have either UP or ESC keys listed on-screen.
If ESC is listed use it until it disappears then use the UP key until you are asked if you
want to save any changes or not. Highlight your choice and press ENTER to accept.
The indicator will reboot and return to the startup screen.
2.5 Adjusting screen contrast
To adjust the screen contrast press and hold the middle key on the left side of the
ZK840 and repeatedly press the SAMPLE key to increase contrast or the TARE key to
decrease the contrast. You may need to press the key many times until the change is
visible.
2.6 Touch screen calibration
If you need to calibrate the touchscreen, press and hold the top key on the left side of
the ZK840 on powerup and the touch calibration screen appears. Follow the prompts
to calibrate the screen.

ZK840 Balance Application User Instructions 13
3.1 Power up
3 Operating Instructions
3.1 Power up
The indicator can be powered by one of the battery options on the BSQ scale or by AC
power supply. If the battery option is used, there is a power key on the rear of the scale.
Press and hold the key until the screen lights up. If AC power is used, when the power
is on, the indicator is on.
When the indicator is powered up, you will see a start screen similar to the one below.
With the Balance application active the screen shows the user name and time and date
in the top line. Below that is the current weight. Below that are softkeys used in this
application.
Touch the User area of the screen and a keyboard pops up so that you can enter your
desired user name. Press Enter to accept. The user name will remain active until
changed or deleted.
Below are short descriptions of three softkeys’ functions.
UNIT key Use this key to toggle through a list of four active units of measure.
The fourth is a custom unit you can pick from a list that appears
when you press the SETUP key. You can choose from 15 custom
units.
HI-RES key Use this key to temporarily display an increase in the resolution by
a factor of 10. The display will revert to its former resolution after
five seconds.
GLP key Use this key to use the Good Lab Practices. This allows you to
record how accurate the scale is by recording the weight at zero
and the weight with a known test load. The results can be printed
and are stored for future reference.
SELECT key Use this key to scroll through the active display values. By default
they are: Gross, Net, Tare and Percent.
3.2 Printing
Press the PRINT key when there is no scale motion. What is printed is typically
controlled by the custom program.

14 ZK840 Balance Application User Instructions
Operating Instructions
3.3 Balance application
The Balance application has 3 modes: Balance, Percentage Recipe and Density.
These modes are configurable using the supervisor menu. See the Supervisor menu
on page 26.
3.3.1 Balance mode plus percentage weighing
Balance mode is a general weighing mode. You can zero, tare, cycle units and print.
The significant difference from your normal weighing mode is percentage weighing.
Percentage weighing is for showing a percentage gain or loss of the weight of an
object. For example, you could see the amount of evaporation from a container of
liquid, etc. Follow these steps for percentage weighing:
1. Be sure the scale is at zero and then press the SELECT softkey repeatedly until
the Prcnt annunciator appears on the right side of the screen
2. Place the item to be weighed on the scale and press the SAMPLE key …
0will be displayed on the screen.
3. Any weight gained or lost from this item will show as a percentage ( a positive
or negative number).
For this example a 100kg gross weight is placed on the scale. If it loses 10kg from
evaporation, the scale will show -10 percent.
3.3.2 Percentage recipe mode
This mode allows for manual filling of containers using a percentage of the main or
majority ingredient. The lesser items added are calculated as a percent of this main
ingredient. For example, if you want to mix colored paint, you start with a gallon of your
base color - white. All pigments added to make your final color can be added as a
percentage of this gallon’s weight. First set the weight of the main ingredient as the
target weight and then weigh each successive ingredient as a percentage of this target
weight. Follow these steps:

ZK840 Balance Application User Instructions 15
3.3 Balance application
The startup screen for this mode is shown below:
1. Place an empty container on the scale and press the START key …
The weight of the container is tared and the following screen is
displayed:
2. Fill the container with the main ingredient and press the Target key …
The application switches into percentage mode and shows the
percentage weight.
3. Add the next ingredient until the percentage reaches the desired level.
4. Repeat this process using the NEXT key. Every time new material is added to
the main ingredient, a counter is incremented. When finished, press the DONE
key.
3.3.3 Density mode
This application allows the density of material to be calculated. The application works
by weighing the material on the scale and then weighing the material suspended in
water, typically using an underbody hook.
The startup screen for this mode is shown below:
1. Press the SETUP key …
You are asked to enter the temperature of the water.

16 ZK840 Balance Application User Instructions
Operating Instructions
2. Enter the water temperature in Celsius and press the Enter key …
The main screen appears again showing the temperature you entered.
Also the 1st Weight in Air: line is flashing to prompt for the next step.
3. Apply weight to the scale and press the Accept key …
The next line flashes, prompting you to take the second weight while the
object is submerged in the water.
4. Place the item in the water and press the Accept key …
The density of the object is calculated and displayed as g/cm3, as shown
in the example below:

ZK840 Balance Application User Instructions 17
3.3 Balance application
3.3.4 Other features
Custom unit of measure
In all modes the 4th weighing unit can be temporarily set by pressing the SETUP key
while viewing the 4th unit. A list of alternate units of measure are displayed. The
optional units are: gram, kilogram, milligram, carat, newton, pounds, ounces, troy
ounces, grains, pennyweight, Mommes, Taels (Hong Kong), Taels (Singapore), Taels
(Taiwan), dram, Tica (Asia).
Highlight the desired unit and press the Enter key.
Good Lab Practices (GLP)
In all modes a Good Lab Practices (GLP) feature can be enabled in the supervisor
menu. When enabled all applications show a GLP softkey, as shown below:
Use the GLP function at the beginning of a shift or on another regular interval to record
how accurate the scale is by recording the weight at zero and the weight with a known
test load. The results can be printed and are stored for future reference. The
information saved is the operator name, the time/date, and the recorded weights at
zero and at the test weight you’ve chosen.
Follow these steps:
1. Press GLP …
The following screen is displayed:

18 ZK840 Balance Application User Instructions
Operating Instructions
2. Press the Setup key …
The following screen is displayed:
3. Key in the user name and press Enter …
The following screen is displayed:
4. Key in the weight of your test weight and press Enter …
The following screen is displayed:
The top line flashes prompting you to remove all weight.
5. Press the Accept key to capture this zero point …
The following screen is displayed:
This screen shows the captured weight for the zero point (0.000) and
flashes the amount of weight to place on the scale.

ZK840 Balance Application User Instructions 19
3.3 Balance application
6. Place the 20 lb weight on the scale and press Accept …
The following screen is displayed:
7. Press the Record key to save the test data …
The following screen is displayed:
8. Press the Report key to view the record of tests that exist.
Press the Print key to print the report.
Press the Export key to export the report as a CSV format file through FTP or
USB.
9. When you are finished, press the Back key to return to the main screen.
Web access
The ZK840 can be accessed from a web browser. This allows you to access basic
functions of the scale, such as zero, print, and tare.
If you export a file, a Filter key appears that lets you search for a file by date.

20 ZK840 Balance Application User Instructions
Operating Instructions
You must have the scale connected to the internet and when you enter the IP address
of your scale in the browser address bar, the following screen will appear allowing
access to the scale.

ZK840 Balance Application User Instructions 21
4.1 User menu
4 Menus
The ZK840 three user accessible menus:
lUser menu - Use to set Time, Date, Site ID, check Seal status and check
Archive information.
lAbout menu - Use to see information on the software, firmware, application,
serial number, options, ethernet and downloads
lAudit menu - Use this to check and/or print the calibration and configuration
counters.
The password for these menus is 111. Follow these steps to access and use these
menus.
1. Press and hold the SETUP key until …
the password entry screen appears.
2. Key in 111 and press the ENTER key …
This screen is displayed:
The bold box around the center image means that is the highlighted
menu item.
3. Use the Left and Right keys to highlight the menu you want to enter and press
the ENTER key. Below are the explanations for these menus.
4.1 User menu
When the User menu is selected, these choices appear:
Use the Left and Right keys to highlight the menu item you want to access and press
the ENTER key.
Time Set - Use the numeric keys to enter the correct time in the style chosen
below.
Style - Choose the style of time display from these choices:
l12HR - Shows time in the 12 hour style
l12HR-AP - Shows time in the 12 hour style with AM/PM
l24HR - Shows time in the 24 hour style
User AboutAudit
Time Date Site ID Seal Archive
No matter which style you pick, time must always be entered in the 24 hour style. The
display of the time will follow the style you pick.
Other manuals for Avery Weigh-Tronix ZK840
1
Table of contents
Other Illinois Tool Works Scale manuals
