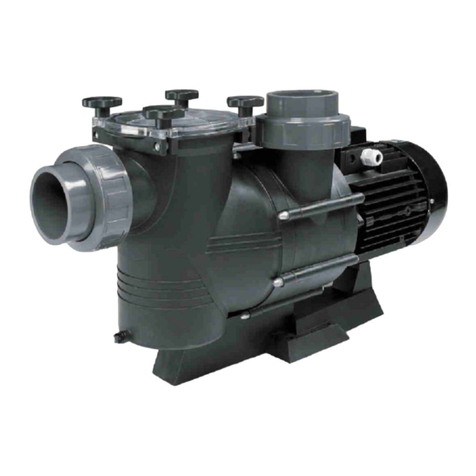
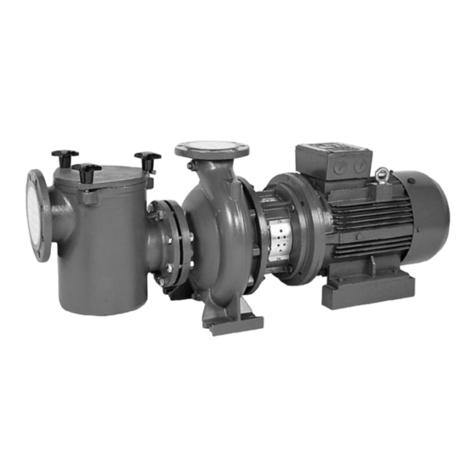
IML NEW MP-025-M Manual

"-Ê1/"-*, /-Ê*,Ê*- -*, Ê*1*-Ê",Ê-7 *""-*"*-Ê1/"", /-Ê*"1,Ê*- -
--/ -1 Ê*1* Ê4,Ê-7
NEWMINIPUMP
MANUAL DE INSTALACIÓN Y MANTENIMIENTO
INSTALLATION AND MAINTENANCE MANUAL
MANUEL DʼINSTALLATION ET DʼENTRETIEN
HINWEISE FÜR EINBAU UND WARTUNG

17
ENGLISH
IMPORTANT: The manual you are reading contains fundamental information
regarding the safety measures to be adopted when installing and starting up.
It is therefore of utmost importance that both the installer and the user read the
instructions before assembling and starting up.
1. GENERAL SAFETY INSTRUCTIONS
These symbols ( ) represent the possibility of danger as a result of not
following the corresponding instructions.
DANGER. Electrocution risk.
Non-compliance with this instruction involves a risk of electrocution.
DANGER. Non-compliance with this instruction involves a risk of danger to
people or things.
ATTENTION. Non-compliance with this instruction involves a risk of damaging
the pump or the unit.
2. GENERAL SAFETY RULES
GENERAL OBSERVATIONS.
• The machines mentioned in this manual are especially designed to carry out the
pre-filtration and the circulation of water in swimming pools.
• They are designed to work with clean water at a temperature that does not exceed
35ºC.
• Installation should be carried out in accordance with the specific indications for
each step.
• The regulations in force for the prevention of accidents should be heeded.
• Any modification that may be made to the pump requires the previous authorisation
of the manufacturer. The original manufacturer-authorised spares and accessories
guarantee greater safety. The pump manufacturer is exempt from all responsibility
for damage caused by the use of unauthorised spares or accessories.
• During operation the electrical parts of the pump are live. Work can only be carried
out on each machine or on connected-equipment after having disconnected
them from the electrical supply network and having disconnected the starting
mechanisms.
• The user must make sure that assembly and maintenance work is carried out by
qualified and authorised people who have previously carefully read the installation
and service instructions.
• The operating safety of the machine is only guaranteed with the compliance and
respect for that mentioned in the installation and service instructions.
• The value limits stated in the table of technical specifications must under no
circumstances be exceeded.
• In the case of defective operation or breakdown, contact the nearest manufacturerʼs
agent or the manufacturerʼs Technical Customer Service.

18
INSTALLATION AND ASSEMBLY WORK WARNINGS
• While connecting electrical cables to the machineʼs motor, take care of the
mechanism inside the connection box, check that no pieces of cable remain inside
after closure and that the earth contact is correctly connected. Connect the motor
using the electrical diagram attached to the machine.
• Check that the electrical cable connections to the machineʼs terminal box are well
set and firmly attached to the connection terminals.
• The pump electrical installation should have a differential the value of which is not
greater than 30mA.
• Check that the terminal box joint is used correctly, thus preventing water from
entering the terminal box of the electric motor. Likewise, check that the packing
gland has been placed and pressed correctly inside the joint.
• The pumps must be installed on a flat and solid surface, at a distance of minimum
3,5 meters from the pool (according to regulation NF C 15-100 or analogue, valid
in each region or country).
• They are equipped with a pre-filter therefore they must be fixed in a horizontal
position. These pumps are self-priming and they should be installed below water
level. In the case they need to be installed above water level, the geometric height
should not exceed 2 meters. The suction pipe should be as short as possible in
order to reduce the suction time. The place where the pump is installed should be
dry and aired at all times.
• Special attention should be paid to ensure that under no circumstances water gets
into the motor and the electric voltage parts.
• Should the envisaged use not be different from that mentioned, adaptations and
supplementary technical regulations may be necessary in case the envisage use
would be different.
STARTING-UP WARNINGS.
Before starting the pump for the first time, verify the calibration of the motor electric
protection mechanisms and check that the protectors against electrical and mechanical
contacts are correctly positioned and well fixed.
It is recommended not to use the pool during that first check of the pumping equipment
installation.
ASSEMBLY AND MAINTENANCE WORK WARNINGS.
• National installation regulations should be taken into account when assembling
and installing the pumps.
• Special attention should be paid to ensure that under no circumstances water gets
into the motor and the electric voltage parts.
• Any contact, even accidental, with the machineʼs moving parts should be avoided
while the machine is operating and/or before it completely stops.
• Wait until the machine has completely stopped in order to carry out any work on
it.
• Before undertaking any electrical or mechanical maintenance make sure that
the machine has been disconnected from the supply network and starting-up
mechanisms are blocked.

19
• Before working on the machine it is advisable to follow the steps below:
1. Cut the machine voltage.
2. Block the starting-up mechanisms.
3. Check that there is no voltage in the circuits, including the auxiliaries and
supplementary services.
4. Wait until the wheel has stopped completely.
The mentioned list should be considered indicative and not binding, since there may
be specific safety rules within specific safety procedures.
• Periodically control:
- The mechanical parts are firmly secured and the machine support screws
are in good condition.
- Correct positioning and fixing and the condition of the leading-in wires and
isolation components.
- Machine and electric motor temperature. In case of irregularity, stop the
machine immediately and proceed with its repair.
- Machine shake. In case of irregularity, stop the machine immediately and
proceed with its repair.
Because of the complexity of cases dealt with, the installation, use and maintenance
instructions in this manual do not intend to examine and deal with all possible
service and maintenance situations. If supplementary instructions are necessary or
if specific problems arise, do not hesitate to contact the machine distributor or the
manufacturer.
3. INSTALLATION AND ASSEMBLY
GENERAL
• Assembly and installation of our pumps is only permitted in swimming pools or
tanks complying with regulation HD 384.7.702. In case of doubt please consult a
specialist.
• The pumps come with a pre-filter with an interior basket to collect large particles
since these may damage the interior hydraulic part of the pump. This pre-filter
means that the pump assembly must be done in a horizontal position.
• All pumps come with a two-drill foot to allow for them to be fixed in the floor by
means of an anchor. (Fig. 1).

20
TUBING
• The tubing connection must be done stuck to the connecting pipe that is supplied
along with the pump; joints from the connecting pipes with the suction and
impulsion nozzles are of a screw-thread type and come with sealing joints to avoid
water loss. (Fig. 2).
• Impulsion tube installation is done totally perpendicularly and is well centred with
respect to the nozzle to be connected so as to avoid external pressure being
exerted on the pump and the tube. Apart from making assembly more difficult, this
pressure could even break them. (Fig. 2)
• Suction tube installation is done at a slight angle of 2 % towards the pump, thus
avoided siphon formation. (Fig.2).
• For the pumpʼs good working, you must primed the pump pre-filter until water dips
into the suction tube.( Fig.3)

21
POSITIONING
• The pumps are of a self-suction type even though assembly below the swimming
pool or tank water level is advised to improve performance.
• Should it be necessary to install the pump above the water level, the difference in
height should not be more than 2 metres (see Fig. 4). Ensure that the suction tube
is as short as possible since a long tube increases suction time and facility load
loss.
• It should be ensured that the pump is free from possible flooding and it is given dry
ventilation.
SAFETY INDICATIONS
ALL THE ELECTRICAL INSTALLATIONS MUST COMPLY WITH STANDARD: EN
60335-2-41. “All 230 v electrical units must be installed at a minimum distance of 3,5
meters from the edge of the pool. In the case of a modification on the filtration system,
the manufacturer must be informed”.

22
ELECTRICAL UNIT
• The electrical unit should have a multiple separation system with contact opening
of at least 3 mm.
• Connection to the mains can only be done using a rigid cable. In the event that a
flexible cable is used this should have terminals to connect it to the pump motor
terminals.
• A heat protector is incorporated into single-phase pumps. In these, switch
installation is sufficient as in the “Network connection” diagram
• A protection differential of 0.03 A is needed for any pump in order to protect from
electrical escapes (shown in diagrams).
• The heat relay regulation data for the single-phase motor are merely illustrative
since the motor comes with an incorporated protector.
CONEXIONES ELÉCTRICAS - ELECTRICAL CONNECTIONS
BRANCHEMENTS ELÉCTRIQUES - ELEKTRISCHE ANSCHLÜSSE

23
HEAT PROTECTOR TABLE
-OD0UMP#ODE6)NTENSITYRELAYREGULATION!.EW-0-.EW-0-.EW-0-.EW-0-• For 230 V single-phase pumps use a H07 RN-F3 1,0 mm2-type connection cable.
• Before connecting the motor, check the necessary fuse type.
• Check the correct arrangement and connection of the earth wire in the equipment
installation.
• It is very important to keep to the installation and electrical connection conditions.
Should they not be heeded, the pump manufacturer does not accept any
responsibility and considers the guarantee void.
• The motors are subject to EEC regulations with IP-55 protection.
• Special installation regulations may exist.
• Incorrect mains connection could result in death.

24
4. START-UP INSTRUCTIONS
QUESTIONS PRIOR TO START-UP
• Before starting up the pump, carry out the following operations:
1. Open the pre-filter cover (See Fig.5).
2. Fill the pump with water through the pre-filter until it dips into the suction
tube.
3. If, during these operations the basket should have been taken out, do not
forget to replace it inside the pre-filter so as to prevent large particles from
entering the inside of the pump and thus blocking it
4. Check that voltage and network power corresponds to those indicated on
the pump specification board.
• Put the cover on the pre-filter and close it, without forgetting to place the joint in its
housing. (Fig.5)
• Under no circumstances should pumps work without previously having filled the
pre-filter with water. If this is not done, the mechanical joint could be damaged thus
producing water loss through this.
• Check that the pump axle turns freely.

25
START-UP
• Open all valves and connect the motor.
• Wait a suitable time for tubing auto-priming to take place.
5. MAINTENANCE.
• Clean the pre-filter basket regularly in order to avoid drops in pressure. In order
to avoid possible basket breakage it is recommended not to knock it during the
cleaning process.
• If the pump stops, check that the motor amp consumption during his working is
the same or less than that indicated on the manufacturerʼs specification board, or
failing him, contact the nearest Customer Technical Service.
• If the amp rate is higher, consult the manufacturer.
• Empty the pump in cases where it must remain without use for some time, mainly
in cold countries where there may be danger of freezing.
• To empty the pump, remove the draining plug from the pump body (see explosion
drawing).
• Each time the pre-filter is opened, clean impurities from the joint seating and the
joint itself, to ensure sealing on closure of the cover. (Fig.5).
6. DISMANTLING
• The motor unit may be dismantled from the pump body without needing to
disconnect the pumpʼs suction and impulsion tubing.
• To disconnect the motor unit from the pump body, remove the screws that join them
(see explosion drawing).

26
POSSIBLE BREAKDOWNS, CAUSES AND SOLUTIONS
7. SPECIFICATIONS
7.1. PRODUCT AND ACCESSORY DESCRIPTION.
The pump body is built from state of the art thermoplastics. The pumps are of a self-
suction type from newMP-025-M to newMP-075-M and are supplied with single-phase
motors. A pre-filter has been incorporated into the pump body to prevent the foreign
bodies entering and damaging the pumpʼs hydraulic parts.
The motors supplied with the motor pump unit have been protected by IP-55 and
are prepared to withstand hot atmospheres and high humidity levels. The motors are
also provided with a heat protector that avoids damage to the pump due to excess
current.
7.2. ELEMENTS SUPPLIED
• Self-suction pump for water circulation in private swimming pools.
• Pre-filter incorporated in the pump body.
• Pre-filter basket.
• Handle for pre-filter basket open / close.
• Joints and linking hose unions for impulsion and suction tubing connections.
• Pump installation and maintenance manual.
The motor pump unitʼs functional features are given in the different characteristic
curves.

27
8. REGULATION
Tests carried out on the New Minipump pump series have been done in accordance
with the regulation “EN-ISO-9906:1999 “.

28

POSITION DESCRIPTION CODE
1 PRE-FILTER COVER HD006000
2 PRE-FILTER BASKET WITH HANDLE HD016010
3 PRE-FILTER JOINT COVER HD021000
4 ALLEN SCREW M6x50 (4 PCS) HD026020
5 WASHER M6 (8 PCS) HD031005
6 NUT DIN 934 M6 (4 PCS) HD031050
7 DRAIN PLUG 1/4” HD036000
8 DRAIN PLUG OʼRING Ø13x2,5 HD021100
9 PUMP BODY HD041025
10 DIFFUSER JOINT Ø41x4 HD021050
11 DIFFUSER HD046020
12 IMPELLER FIXING NUT M8 HD031070
13 IMPELLER NEWMP-025 HD051105
13 IMPELLER NEWMP-033 HD051110
13 IMPELLER NEWMP-050 HD051115
13 IMPELLER NEWMP-075 HD051125
14 PUMP BODY JOINT Ø143x4 HD021075
15 MECHANICAL SEAL Ø13 HD056000
16 PUMP BODY LID HD061025
17 PUMP BASE HD066000
18 SILENT-BLOCK 9x45x13 HD071000
19 V-RING JOINT VA-14 (2 PCS) MT001000
20 MOTOR FLANGE MT006010
21 ALLEN SCREW M6x25 (4 PCS) HD026010
22 BALL-BEARING 6202 (2 PCS) MT026000
23 ROTOR WITH SHAFT 0,33 HP MT031075
23 ROTOR WITH SHAFT 0,50 HP MT031080
24 HOUSING + STATOR 0,33 HP 1-PH MT043000
24 HOUSING + STATOR 0,50 HP 1-PH MT043005
29

POSITION DESCRIPTION CODE
25 GROUND CONN. TOOTHED WASHER M4 MT076000
26 GROUND CONN. SCREW M4x6 DIN 7985-5,6 MT076005
27 CABLE CONNECTOR SET 1-PH MT081000
28 CABLE CONN.FIXING SCREW 1-PH M4x16 MT076010
29 COMPLETE CONNECTING BOX 1-PH MT088000
30 CAPACITOR 12 µF MT091000
31 SPRING WASHER M35 MT096000
32 MOTOR COVER MT016010
33 ROD M5x130 (3 PCS) MT101000
34 MOTOR FAN MT086040
35 MOTOR FAN RING MT086050
36 MOTOR FAN COVER MT086055
37 FAN COVER SCREW (3 PCS) MT076035
38 ADAPTOR SOCKET NUT Ø50 (2 PCS) HD076010
39 SOCKET OʼRING Ø53x3 (2 PCS) HD021115
40 ADAPTOR SOCKET Ø50 (2 PCS) HD076005
41 PREFILTRE COVER HANDLE HD076000
42 COMPLETE MOTOR 0,33 HP 1-PH MT999140
42 COMPLETE MOTOR 0,50 HP 1-PH MT999145
30
This manual suits for next models
3
Table of contents
Other IML Water Pump manuals
Popular Water Pump manuals by other brands

DP
DP DPHM Installation and operating instructions

Oase
Oase Neptun 1600 Warranty, safety and operating instructions

GORMAN-RUPP PUMPS
GORMAN-RUPP PUMPS J Series Installation, operation, and maintenance manual with parts list

SKF
SKF EPB-Pump-ECO Original operating and maintenance instructions

Theiling
Theiling River 2700 Operation manual

dosatron
dosatron ANIMAL HEALTH D25AL2-N owner's manual