immerSUN iLink Operation manual

iLINK
Installation & User Guide
This is a guide to the installation and setup of the iLINK to
enable remote data monitoring and control of IMMERSUN via
the MYIMMERSUN app and website.
Installing the CT clamp
This part of the installation concerns the IMMERSUN unit only
To get the full functionality of the MYIMMERSUN
app, it is necessary for the IMMERSUN to measure
the power from the inverter. This is done by
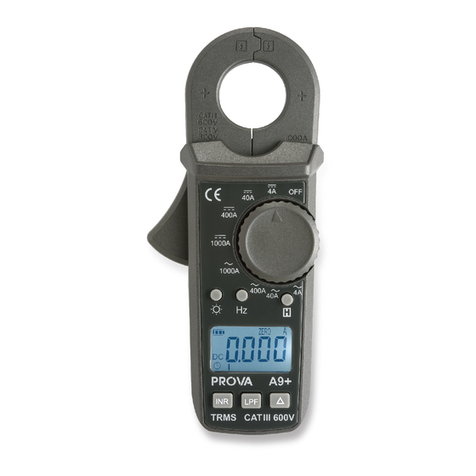
installing an additional CT clamp around the
inverted AC Live cable.
WARNING LIVE CABLES!
CT clamp wired to CT2 in
IMMERSUN or Wireless Sensor
Often the easiest place to install the additional CT is
in the consumer unit that houses the MCB for the
inverter. Alternative the CT can be installed inside
the AC isolator or the inverter.
Isolate the MAIN SWITCH in the consumer unit and
clip the CT clamp around the LIVE cable to the
microgeneration inverter.
CT Clamp around the PV LIVE cable in
consumer unit
Wireless Sensor
If your IMMERSUN is using a Wireless Sensor, you
MUST connect the additionl CT clamp to the CT
plugin the Wireless Sensor unit.
Connecting the iLINK
Screw the supplied antenna to the antenna connector on the iLINK
Fit the corrent plug type to the mains adapter for your country
Pluf the mains adapter cable into the bridge and into the socket nearby your router
Connect the bridge to a spare LAN port on your internet router using the supplied
Ethernet lead
1.
2.
3.
4.
Pairing the iLINK
Pairing mode
The iLINK LED will flash red when the Bridge is in paring
mode. The Bridge should automatically enter pairing mode
when first plugged in.
Press and hold the pairing button for about 5 seconds to put the
bridge in pairing mode, if required.
Pairing with your IMMERSUN
Make sure the Bridge is in pairing mode (the iLINK
status LED should be flashing RED).
On the IMMERSUN unit bring up the menu with the ✔
button and scroll down the Advanced Settings, press
✔ again to enter the Advanced Settings.
You will be asked for a passcode, the default passcode is 0000.
Once in the advanced settings menu, scroll down to the iLINK as and press the ✔.
Now scroll down to Cloud IP and press the ✔. Set this 51.52.112.77 if not already.
Press X and then scroll down to iLINK Search, highlight this option and press the tick
button. After a few minutes the IMMERSUN should find the iLINK.
Paired and linked to Gateway
When both LEDs are green the bridge is working as it should.
It is normal to see the iLINK LED occasionally light-up
orange, this signifies that data was missed for that instant.
Note: The range of the wireless communication is usually
around 30m indoors and 200m outdoors.
Paired the IMMERSUN but not linked to Gateway
If you see the LEDs lit-up like this, the iLINK is not connected
to the Gateway.
If you are sure everything is connected and your internet is
working, try updaring the IMMERSUN firmware as detailed
below.
Updating the IMMERSUN firmware
To support all functions of the MYIMMERSUN app, it is
likely that you will need to update the firmware in the
IMMERSUN.
On the IMMERSUN unit bring the menu with the ✔ button
again and enter Advanced Settings.
You will be asked for your Passcode, the default
passcode is 0000. Once here troll down to immerLINK
and press ✔.
In this menu, you will see Update Firmware, highlight and press this option with ✔.
The current firmware and latest versions will be shown. Wait a few seconds for this to
update. Pick the latest upto date firmware and and press ✔ to update your firmware. NOTE:
This can take a long time (about an hour)
Remote control options
The remote control options of the MYIMMERSUN app
can be enabled or dissbaled via the IMMERSUN
menu within Advanced Settings under Remote
Control, press ✔ to activate.
Updating iLINK firmware
Unplug the mains adapter lead from the back of the iLINK
Press and hold the Pair button, with the button still held, plug the mains
adapter back in.
Keep the Pair button held for 10 seconds, then release the button. the
immerLINK LED should flash RED and GREEN very rapidly
When the LED has stopped flashing the update is completed
If there is a problem with the iLINK or new features added, the firmware in the
iLINK may need to be updated. If required the process is as follows:
1.
2.
3.
4.

Registering with MYIMMERSUN
Obtaining first-time login details
To regisister your IMMERSUN for the first
time, on the MYIMMERSUN monitoring
website, you will need some details which
are stored in the IMMERSUN.
On the IMMERSUN unit , bring up the
menu with the ✔ button, scroll down to
View Configuration and press ✔.
Go to the myimmersun website: www.myimmersun.com
Click Login/Register
You will be prompted for a username and password, enter the MI
Username and MI Password from your IMMERSUN unit. Multiple
units can be added later. DO NOT SAVE your login details if asked by
the browser.
Fill in your details to complete the registration
Login with the email address and password you provided during
registration
First-time login to create account
1.
2.
3.
4.
5.
Adding additional IMMERSUN units
If you have more than one IMMERSUN unit, you can add additional units
to your MYIMMERSUN account. This will enable you to switch between
units to view data from diffrent sites or units. To do this click on the
MYIMMERSUNS button on the menu of the MYIMMERSUN app
Live power readings Remote boost control
The manual boost function of the IMMERSUN can be controlled
remotely via the Remote Boost function in the menu of the
MYIMMERSUN website.
The heater and duration are selected before clicking the start boost
function. Once started, the boost can also be canceled remotely.
Setting boost times remotely
The boost times programmed in the IMMERSUN can be altered
remotely via the Boost Times function in the menu of the
MYIMMERSUN website.
Start by clicking the Get boost times from IMMERSUN button, this will
update the table of boost times.
Edit the boost times as yuou wish by clicking the Edit button in the
appropriate row.
When you have finished editing the boost times, click Send boot times
to IMMERSUN.
Event logs
The event logs are accessible from the MYIMMERSUN menu. Events
logged include things like Started/Stopped Generation, Started/Stopped
Heating, Started/Stopped Boosting etc.
Important events are marked with *
The log for any particular day can be viewed by using the day navigation
buttons at the top of the event log page.
Energy bar charts
Menu
