IMOUMLIVE DJD30 User manual

USER MANUAL
ELECTRIC PRUNING SHEARS
MODELS:DJD30
Please read all safety rules and instructions carefully before operating this tool.
Dear Customer:
Product Questions or Concerns?Contact US:support@imoum.com
BRUSHLESS

Product Diagram
Product Description
Charging the Battery
Battery Use Precautions
Safety Precautions
Personal Safety
Operation
Operation Instruction
Faulty Operation
Extended functions
Maintenance
Services
EN.01
EN.02
EN.02
EN.03
EN.04
EN.04
EN.05
EN.07
EN.09
EN.10
EN.11
EN.11
English

4.Brushless Motor
Product Diagram
1.SK5 Blade
2.trigger
3.LCD Screen 6.Ergonomics
Non-slip Handle
5.Power switch 7.Battery indicator
Dear users, thank you for choosing our product!
Please read this user manual carefully to take full advantages of the
product. Please keep this user manual in a safe place for future
references.
EN.01

Product Description
Our cordless electric pruning shears package includes fixed blade, moving blade, Li-ion battery,
charger, and other accessories. This pruning shears are designed for cutting work in gardens and
vineyards. It is easy to use and is 8-10 times more efficient compared to traditional manual
pruners. The cutting quality of the electric pruning shears is also sigificant higher than the manual
pruners.
Electric Pruning Shears
Battery Pack
DJD30
10-40MM
200W
1.25KG
Model No
Cutting Diameter
Power
Weight
Battery pack type
Voltage
Capacity
Charger Input
Charger Output
Charging time
Endurance time
LI-lon
21V
2.0AH 37Wh
100-240V-50/60HZ 0.8A MAX
21V 1.2A
2H
6H
Charging the Battery
It is recommended to fully charge the battery before the first time use.
Insert the charger output plug into the charging jack on the battery, and then plug the charger
into the power outlet. The LED indicator on the charger turns red during charging and green
when the battery is fully charged.
It takes approximately 2 hours on average to fully charge the battery. The fully charged battery
can support 6 hours of continuous operation.
EN.02

1. It is normal that the battery and charger heat up during charging.
2. It is recommended to charge the battery every 3 months during long-term storage to perserve
the full life-time of the battery.
3. It takes approximately 5 charging-discharging cycles to reach the full capacity of a new or
stored battery.
4. Please do NOT charge the fully-charged battery again after a few minutes of use. This can
potentially reduce the lifetime and efficiency of the battery.
5. Please do NOT use damaged batteries, disassemble the charger or the battery.
6. Do NOT charge the battery outdoor or in a humid environment.
7. The pruning shears' cutting strength decreases when the battery level is low.
8. Do NOT store the battery in a humid environment.
charging jack
Red
Green Charging completed
Charging
Status
Battery Use Precautions
1. Do NOT charge the battery when the ambient temperature is below 32°F (0°C) or above 139°F
(45 °C).
2. Please ONLY use the charger that is designated to this pruning shears. Charging the battery
with off-spec chargers can cause fire.
3. Keep the battery away from any conductive objects, such as paper clips, coins, keys, nails,
screws, etc.
4. Please do NOT disassemble the battery by yourself.
5. Please do NOT short-circuit the battery.
6. Please keep the battery away from heat sources during operation.
7. Please do NOT put the battery in fire or water.
8. Please do NOT use the battery if it is damaged or deformed.
charging jack
EN.03

Safety Precautions
Personal Safety
WARNING! Please carefully read all instructions. Failing to follow the
instructions can cause electric shocks, fire, or other serious damages.
Workplace Safety
1. Always keep the workplace well-lit.A cluttered and dark workplace may cause accidents.
2. Do NOT operate the pruning shears in an explosive, flammable, or humid environment.
3. Keep children or other personnel away from the tool during operation. Operator's distraction
can lead to accidential injuries.
4. The battery socket of the pruning shears must be compatible with the power cord plug. Do NOT
alter the socket or the plug.
5. Do NOT expose the pruning shears under the rain or in a humid environment, where electric
shocks can occur.
1. Before operating the electric pruning shear, make sure to wear appropriate personal protective
equipment, including safety goggles, earplugs or earmuffs, gloves, and durable work clothing.
These gear will effectively protect your eyes, ears, hands, and body from potential injuries.
2. Before using the electric pruning shear, carefully read and understand the operation manual
and safety guidelines. Familiarize yourself with the machine's features, operating procedures,
and safety requirements to ensure proper and safe operation of the pruning shear.
9. Please do NOT perform soldering or welding on the terminals of the battery.
10. Please do NOT connect the battery directly to a power outlet or a vehicle cigarette lighter.
11. Avoid direct contact with the Li-ion cells in the battery pack.
12. Please do NOT use the battery if it is leaking.
13. Keep the battery out of the reach of children.
14. Do NOT use or store the battery under direct sunlight (or inside a vehicle under direct
sunlight). Failing to do so can lead to battery overheating and burning, reducing the lifetime of
the battery.
15. If your skin or clothes come into direct contact with the electrolyte, please rinse with water
immediately.
16. Please keep the battery fully charged before putting the pruning shears into storage.
EN.04

Operation
1. Align the base of the pruning shears to the channel of the battery pack and slide the battery
into the base until you hear a click. Please confirm that the battery pack is secured in place.
2.After installing the battery in the electric pruning shear, press the power switch of the shear
(note: not a long press) and listen for the buzzer to beep. Then, press the trigger twice consecu-
tively to wake up the pruning shear.
3. Normal operation: Pull the trigger to close the blades. Release the trigger to open the blades.
4. Please open and close the blades a few times before cutting anything to make sure that the
pruning shears are functioning normally.
5. The best cutting angle of the pruning shears is 45 degrees from the branches. Please move the
bottom blades close to the branches before pulling the trigger.
3. When using the electric pruning shear, ensure that there are no other people or animals in the
vicinity and maintain a safe distance. Clear the workspace from any obstacles to ensure your
safety and the safety of others.
4. The cutting direction of the pruning shear is typically downward, so pay attention to the
direction and positioning of the cut to avoid accidental injury to yourself or others. Make sure the
cutting portion of the shear is away from your body and other objects.
5. After using the electric pruning shear, store it safely in a place where children cannot reach.
Properly store the blades and power cord or battery to prevent damage or accidental contact.
EN.05

6.Electric pruning shears have four cutting diameter modes, which can be customized according
to the size of branches in different environments, just press the power switch and hear a "beep",
the indicator light will light up according to the switching diameter, and then pull the trigger, the
switching of the cutting diameter mode is successful. Switching diameter mode is done in
sequence from small to large diameter, again just press the power switch and pull the trigger for
the diameter you want to cut.
①
②
③
④
EN.06

Operation Instruction
WARNING: Please power off the tool and remove the battery
before the adjustment.
WARNING: Keep fingers or other body parts away from the blades
during operation. Failing to do so may cause personal injuries!
WARNING: Children are not allowed to operate this tool!
WARNING: Please power off the tool (press and hold the power
button) and remove the battery for storage after each use. Please
keep the tool out of the reach of children.
Blades Tightness Adjustment
1. Check the tightness of the blades before operation. If the blades are moving side to side when
they are closed, they need to be tightened. Loose blades can cause gear damage.
2. Use an Allen wrench to turn the screw counterclockwise to loosen it. Then, use a hex socket to
adjust the locking nut until it reaches the appropriate state. Note: Avoid overtightening during
adjustment, as it may prevent the blade from closing properly.
EN.07

Replacing the blade
2. Unscrew the fixed shaft screw counterclock-
wise with a suitable hexagonal wrench and
remove the washer, then unscrew the shaft
screw counterclockwise with a hexagonal socket
wrench and remove the spacer from the shaft.
4. Separate the support arm from the
upper blade (if the blade is too tight
against the support arm, use an Allen
socket wrench to gently tap the support
arm to loosen the upper blade).
3. Remove the upper blade (if the blade
is too tight, tap it with an Allen socket
wrench to loosen it and remove it).
1. Unscrew the screws with a Phillips
screwdriver and push the blade gear
guard upwards to remove the gear guard.
EN.08

WARNING: Please Power off the tool and remove the battery before
lubricating the blades.
Faulty Operation
Blades Lubrication
To install the blades,
follow the reverse
order of the disassem-
bly steps.
1. Keep the blades open when adding lubricants.
2.Squeeze lubricating oil from the oil bottle into the
moving area between the upper and lower blades,
then make a few empty cuts to evenly distribute the
lubricant. Note: Add an appropriate amount of
lubricating oil, avoid adding excessive amounts.
1. Please release the trigger immediately to bring the moving blade back to its opening
position if the pruning shears fail to cut the branches.
2. Please release the trigger immediately to bring the moving blade back to its opening
position if the branch is too hard to cut through.
3. If the battery cannot be charged, please check whether you are using the original
charger that comes in the package. Please also make sure that the power outlet voltage
matches the specifications on the charger.
4. Please power off the tool immediately if any electrical or mechanical malfunctions
occur.
EN.09

Extended functions
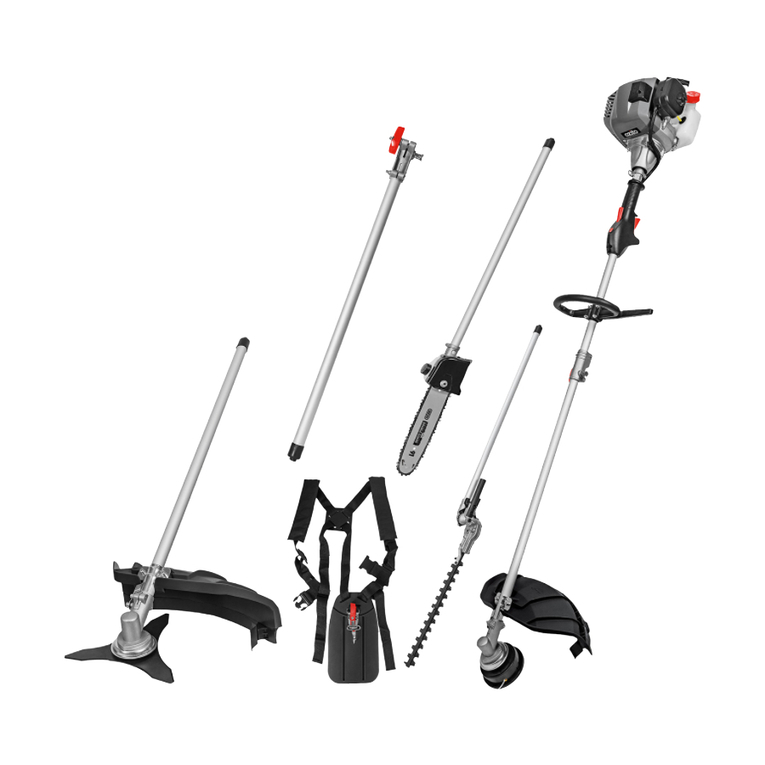
You can use this product along with the IMOUMLIVE extension rod to achieve the best results.
6-inch Chainsaw
8-inch Chainsaw
Electric pruning shears
Leaf Blower
Hedge Trimmer
4-inch Chainsaw
!
Note:
The package does not Include the high rod, tou can visit the imoumlive brand in the
amazon store to buy this ac cessory!
Various Applications
BRUSHLESS
EN.10

Maintenance
Services
1. Do NOT cut branches with a diameter larger than the maximum opening of the blades.
Do NOT cut hard objects, such as metal, rock, or anything other than plants. If this is
done, it will cause damage to the blade.
2. Please keep the pruning shears clean. You can use a clean cloth to clean the pruning
shears, battery, and charger (do NOT use any cleanser that contains abrasives or
solvents). Please use a soft brush to wipe off the dusts on the blades.
3. Please do NOT immerse the pruning shears, battery, or charger in any liquids.
4. Please follow the instructions in this manual to operate the tool. Do NOT use the
pruning shears if the pruning shears, battery, or charger is damaged.
5. Do NOT use the tool if it is faulty. Please contact our official website immediately if a
faulty tool is identified.Operating a tool when it is not functioning properly or cannot be
powered off can cause serious consequences.
6. Please make sure that the pruning shears are powered off during any adjustments,
accessory replacements, or storage.This protective measure can reduce of risk of the
tool during an unintentional start-up.
7.The pruning shears must be stored in a toolbox out of reach of children when not in
use. The pruning shears can not be operated by a personnel who is not faimilar with the
tool, otherwise serious accidents can occur. Operators must receive proper trainings and
fully understand the operations of the tool before use.
8. Please follow the instructions in this user manual and pay attention to the workplace
surroundings and the nature of the work undertaken. It is dangerous to perform cutting
work that is out of the capability and specification of the tool.
9. Please clear any dirt and debris on the moving and fixed blades after each use. Please
apply lubricant on the cutting edges of both blades.This ensures that the blades are well
maintained and reduces the frictions during operation, which increases the lifetime of
the pruning shears and the blades.
10. Please make sure that the tool is powered off and the battery is removed before
cleaning the blades. Please wear protective gloves to avoid cutting yourself.
11. Please make sure that the tool is powered off and the battery is removed before
polishing the blades. Please wear protective gloves to avoid cutting yourself.
Every imoumlive product automatically includes a 1-year warranty. To make the customer
support process quick and easy, register your product online at www.imoum.com.
If you discover that your product is defective within the specified warranty period, please contact
Customer Support via [email protected]. DO NOT dispose of your product before
contacting us. Once our Customer Support Team has approved your request, please return the
product with a copy of the invoice and order ID.
Support Hours:Mon-Fri, 9:00 am-5:00 pm PST/PDT
*Please have your order invoice and order ID ready before contacting Customer
Support.
EN.11

Contact Us:support@imoum.com
Brand: IMOUMLIVE
Product name: Electric pruning shears
Model number: DJD30
Manufacture: Chongqing Dianche Technology Co., Ltd.
Address: 4-24-0082, No. 111, Fuzhuangcheng Avenue, Huixing district, Yubei
District, Chongqing,401120
P.R.C.
C&E Connection E-Commerce (DE) GmbH
Zum Linnegraben 20,65933, Frankfurt am Main, Germany
Table of contents

