Impecca OM-1400 User manual

Microwave Oven —
User Guide
Horno de Microondas — Guía de Usuario
Four Micro-ondes — Guide de l’utilisateur
Model OM-1400
www.impecca.com
v .1.1

ii
ENGLISH ESPAÑOL FRANÇAIS
TABLE OF CONTENTS
Important Safety Instructions................................................................................................. 3
Electrical Grounding................................................................................................................. 4
Cautions & Warnings................................................................................................................. 4
What’s in the Box ....................................................................................................................... 6
Getting to Know Your Microwave Oven................................................................................. 7
Control Panel.............................................................................................................................. 8
Operating Your Microwave Oven............................................................................................ 9
Additional Features and Functionality................................................................................ 12
Utensils and Materials............................................................................................................ 13
Cooking Techniques ............................................................................................................... 15
Cleaning and Care................................................................................................................... 16
Troubleshooting Tips ............................................................................................................. 19
Technical Specifications ........................................................................................................ 20
Customer Support................................................................................................................... 20
One Year Limited Appliance Warranty (US)........................................................................ 21
Español...................................................................................................................................... 22
Français ..................................................................................................................................... 44

3
ENGLISH
FRANÇAIS ESPAÑOL
IMPORTANT SAFETY INSTRUCTIONS
PLEASE SAVE THESE INSTRUCTIONS. YOU MAY NEED THEM IN THE FUTURE.
Please adhere to the safety instructions throughout both the Installation and User Guides for
your appliance. If you are uncomfortable or unable to perform any of the steps in this guide,
please consult with a certified professional. All governing codes and ordinances must be
observed.
Product failure due to improper installation is not covered under the warranty. The appliance
and its accessories should not be adjusted or repaired by anyone except qualified service
personnel.
WARNING: BEWARE OF EXPOSURE TO EXCESSIVE MICROWAVE ENERGY
To reduce the risk of burns, electric shock, fire, injury to persons (yourself or others) or
exposure to excessive microwave energy when using your appliance, follow basic safety
precautions, including the following:
Do not attempt to operate this oven with the door open, as this can result in harmful exposure
to microwave energy. Do not override or tamper with the internal safety components.
Do not place any object between the oven front face and the door or allow dirt or other
residues to accumulate on the sealing surfaces.
Do not cover or block any openings on the oven or its ventilation.
Do not operate the oven if it is damaged. The oven door must close properly so that there is no
damage to the:
• Door (bent)
• Hinged and latches (broken or loosened)
• Door seals and sealing surface
Please do not dispose of this appliance in a domestic garbage receptacle. It should be
disposed of at the disposal center provided and recommended by your municipality.
FOR HOUSEHOLD USE ONLY
SAVE THESE INSTRUCTIONS

4
ENGLISH ESPAÑOL FRANÇAIS
ELECTRICAL GROUNDING
DANGER: ELECTRICAL SHOCK HAZARD
To avoid severe or fatal shock injury, remove the house fuse or open the appropriate circuit
breaker before beginning installation to ensure power is disabled to the area of installation.
Touching the internal components of this oven can cause serious personal injury or even death.
Do not disassemble this appliance.
Improper use of the grounding plug can result in electric shock. Do not plug the oven into an
outlet unless the outlet is properly installed and grounded.
THREE-PRONGED (GROUNDING) PLUG
This appliance must be used with a properly installed and grounded 120 volt 60 Hz, 20 amp AC
outlet. In the event of an electrical short circuit, grounding reduces the risk of electric shock by
providing an escape wire for the electric current. This appliance is equipped with a grounding
-wire cord which has a third, round grounding plug. Consult a qualified electrician or serviceman
if the grounding instructions are not completely understood or if doubt exists as to whether the
appliance is properly grounded.
An outlet box should be located in the cabinet above the microwave oven. The outlet box and
supply circuit should be installed by a qualified electrician and conform to the National Electrical
Code or the prevailing local code.
RADIO INTERFERENCE
This equipment generates, uses and can radiate radio frequency energy. If the unit is not
installed and used in accordance with the instructions, it may cause interference to radio
communications. Operation of the microwave oven may cause interference to your radio, TV
or similar equipment. Any interference may be reduced or eliminated by taking the following
measures:
• Clean the door and sealing surface of the oven
• Reorient the receiving antenna of the radio or television.
• Relocate the microwave oven with respect to the receiver.
• Move the microwave oven away from the receiver.
• Plug the microwave oven into a dierent outlet so that the microwave and receiver are on
dierent branch circuits.
CAUTIONS & WARNINGS
Carefully review all of these instructions and warnings in the installation and user guides BEFORE
operating your microwave oven. Failure to do so may cause fires, damage, injury or bodily harm
including permanent disability and/or death.

5
ENGLISH
FRANÇAIS ESPAÑOL
Only use containers known to be microwave safe!
1. This appliance should only be serviced by qualified service technicians. Contact technical support
for information regarding your closest authorized service center for further examination, repair, or
adjustment to your appliance.
2. Do not store or use this appliance outdoors. Do not use this oven near water, (for example, near a
kitchen sink), in a wet basement, near a swimming pool, or other wet locations.
3. Some cabinets or building materials are not made to withstand the heat produced by this microwave
oven. Check with your builder or supplier to ensure that there is no damage or safety hazard in this
regard.
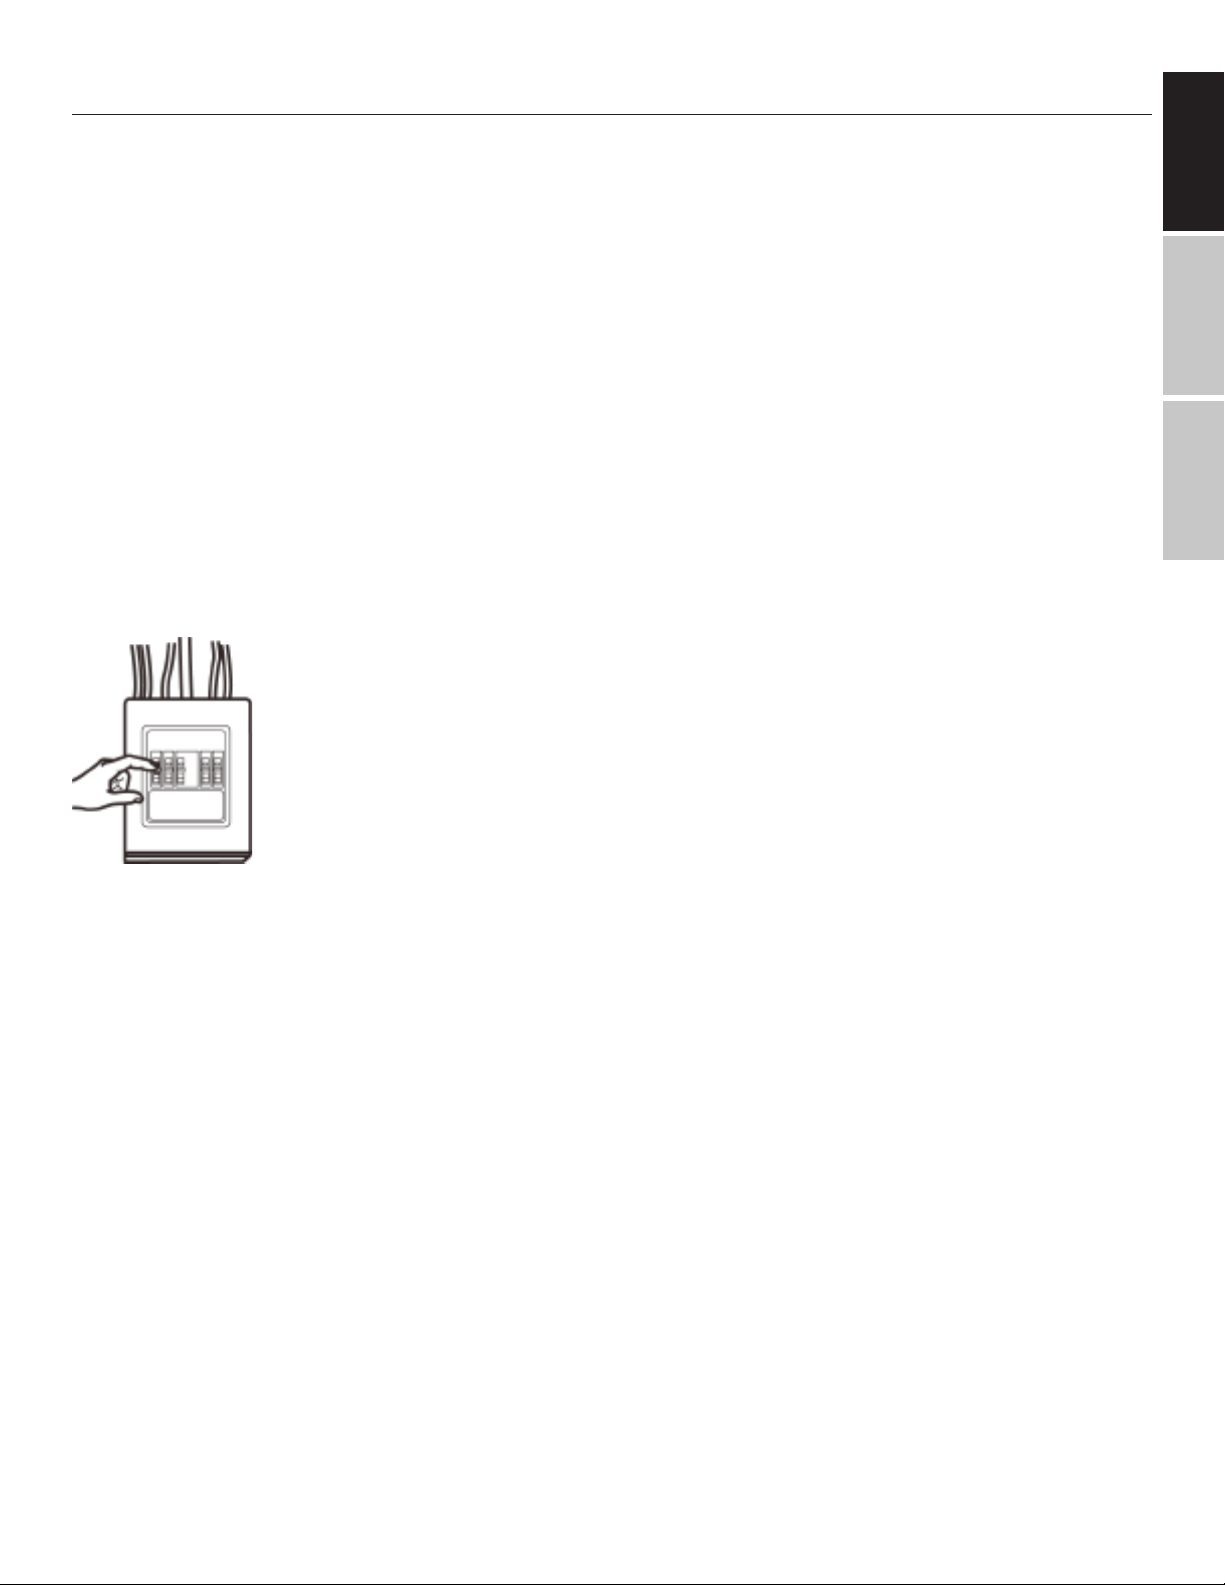
4. This oven must be grounded with a properly grounded outlet. See the previous section:
“ELECTRICAL GROUNDING"
5. Do not immerse the cord or plug in water. Keep cord away from heated surfaces. Do not let the cord
hang over the edge of a table or counter. Do not operate this oven if the cord or plug is damaged or is
not working properly.
6. Use this appliance only for its intended uses as described in this manual. Do not use corrosive
chemicals or vapors in or near the appliance. This oven is specifically designed to heat, cook or dry
food in a home consumer setting. It is not designed for industrial or laboratory use.
7. Clean ventilating hoods frequently. Grease should not accumulate on the hood or filter.
8. As with any cooking appliance, closely supervise any use to reduce the risk of a fire in the oven.
Close supervision is especially necessary when the appliance is used by children.
9. Remove wire twist-ties and metal handles from containers and bags before placing them in the oven.
10. If materials inside the oven ignite, keep the oven door closed! Turn the oven o and unplug the
appliance. Disconnect the power cord and shut o power at the fuse or circuit breaker panel.
11. Do not use the oven cavity for storage purposes.
12. Do not overcook food. Carefully monitor the appliance when paper, plastic, or other combustible
materials are placed inside the oven.
13. Some products, such as whole eggs and sealed containers such as glass jars, are prone to explode
and should not be heated in the oven. Pierce foods with heavy skins such as potatoes, whole squash,
apples and chestnuts before cooking.
14. The contents of feeding bottles and baby jars should be stirred or shaken and the temperature
should be checked before serving in order to avoid burns. Make sure these items are microwave
safe!
15. Liquids such as water, coee, or tea can be overheated beyond the boiling point without appearing
to boil. Bubbling or boiling is not always visible. This can result in scalding liquids suddenly boiling
over when the container is disturbed or a spoon or if another utensil is inserted into the liquid. Stir
liquids both before and halfway through heating.
16. Aer heating, allow the containers to stand in the microwave oven for a short time before removing
the container. Use extreme care when inserting a spoon or other utensil into the container. Do not
use straight-sided containers with narrow necks.
17. Cooking utensils may become hot due to heat being transferred from the heated food. Potholders
may be needed to handle the utensil.
18. Use only thermometers that are specifically designed for use in microwave ovens.
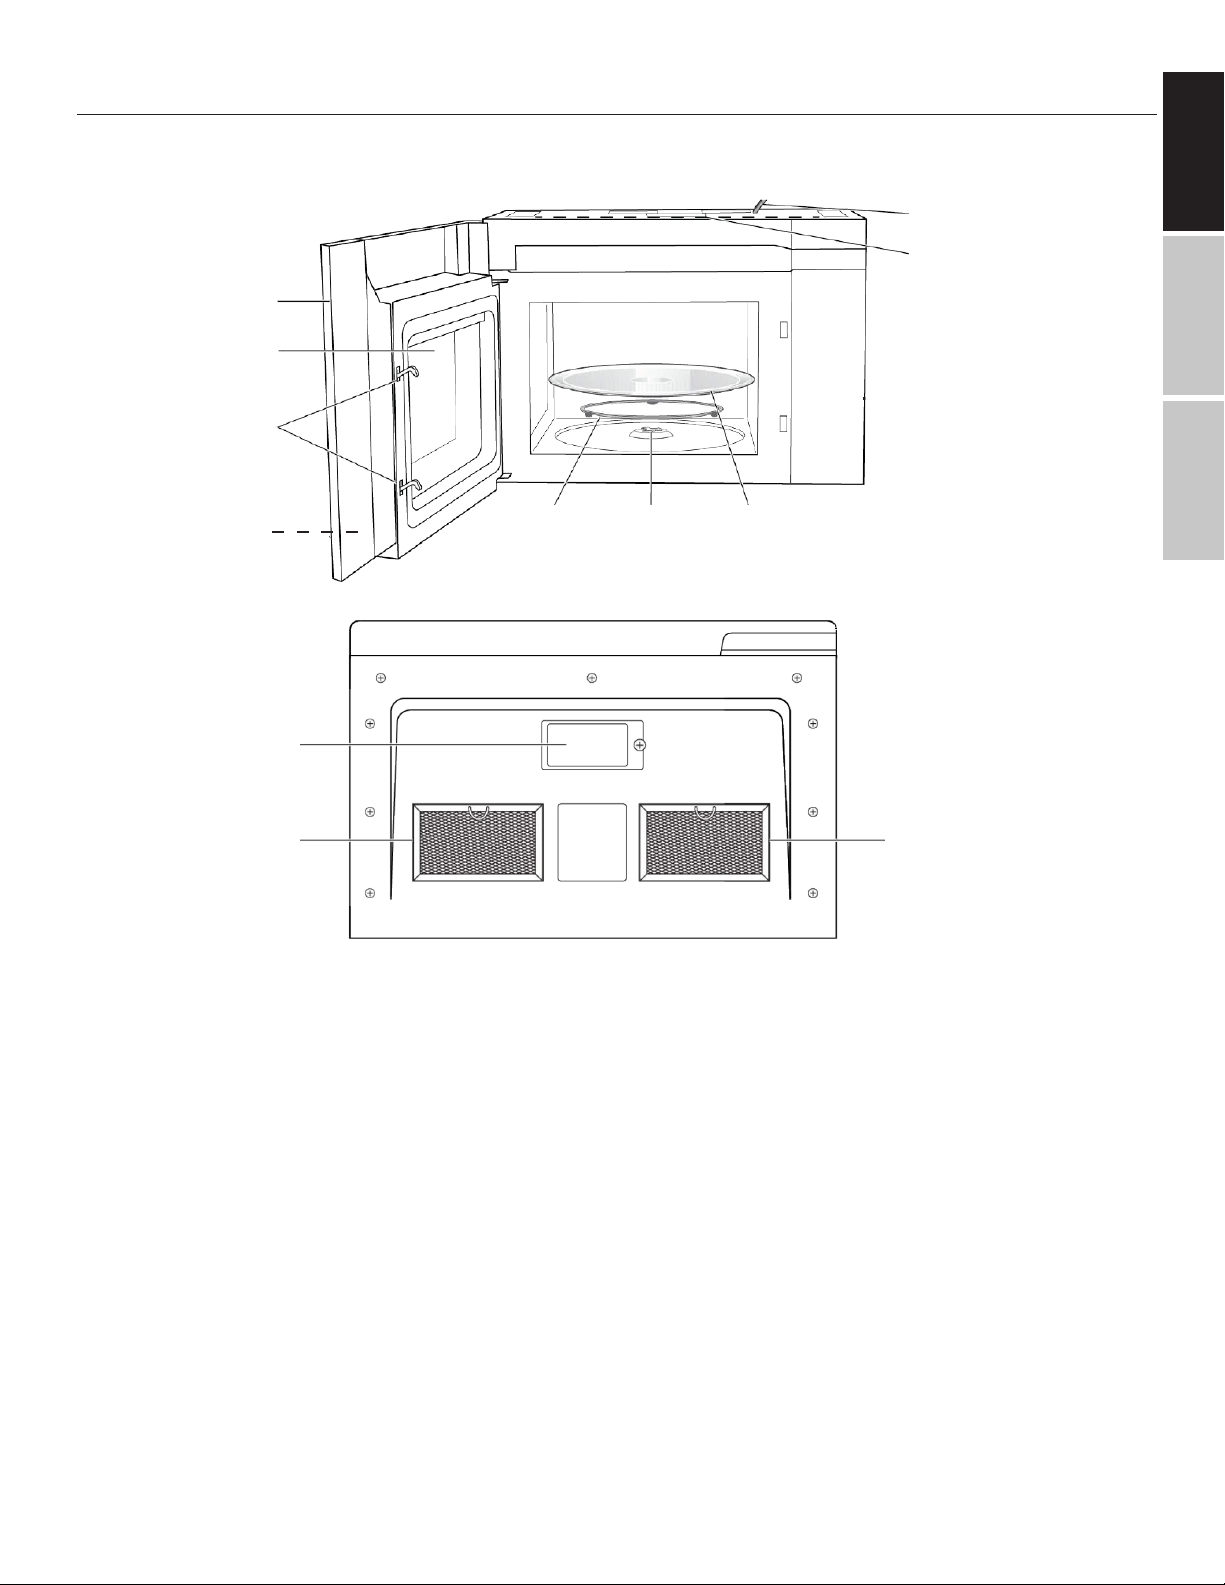
19. Be certain the glass tray and roller rings are in place when you operate the oven.

6
ENGLISH ESPAÑOL FRANÇAIS
WHAT’S IN THE BOX
You should have received the following in your appliance's box.
MICROWAVE PARTS
PART QUANTITY
Microwave Oven 1
Microwave Glass Tray 1
Roller Ring 1
Installation Guide 1
This User Guide 1
REAR WALL TEMPLATE
Rear Wall Template 1
TOP CABINET TEMPLATE
Top Cabinet Template 1
Grease Filters 2

7
ENGLISH
FRANÇAIS ESPAÑOL
GETTING TO KNOW YOUR MICROWAVE OVEN
Items shown are for illustrative purposes only and may vary in appearance.
1
2
3
45 6 7
8
9
10
11 11
1. Door
2. Window
3. Interlock System
4. Control Panel
(on the front door)
5. Roller Ring Assembly
6. Turntable Coupler /
Sha
7. Glass Turntable
8. Top Grill
9. Power Cord
10. Surface Lights
11. Grease Filters

8
ENGLISH ESPAÑOL FRANÇAIS
1. Sensor (Cook)
2. Popcorn
3. Sensor Reheat
4. Power Level
Set the cooking power level
5. Kitchen Timer
Set a kitchen timer. This timer does not
start or stop the microwave oven.
6. Defrost
Auto-Defrosting based on the weight of the
food
7. Turntable ON/OFF
Turn turntable rotation on/o
8. Light ON/OFF
Turns the oven light on and off
9. Vent Fan HI - LO - OFF
Turns the oven vent fan on and off or
changes the fan speed
10.Clock
Set the oven clock display
11.Number Pads
Touch to set time, weight or quantity of food
12.Stop/Cancel
Press to stop cooking or hold for 3 secs to
engage the child lock feature.
13. Start/ 30Sec.
Press this button to start cooking for the
selected time or to add 30 Seconds to
existing cook time. You can also press this
from standby mode to start cooking for 30
seconds.
14.Display Screen
Clock, cooking time and power level are
displayed here
1
6 7 8 9 10
11 12
13
14
2 3 4 5
CONTROL PANEL

9
ENGLISH
FRANÇAIS ESPAÑOL
OPERATING YOUR MICROWAVE OVEN
Before first using the microwave oven unit:
1. Make sure the tvt oven has been installed according to the instructions in the
installation guide.
2. Be sure to familiarize yourself with the safety precautions in the previous sections. In
addition, please review the UTENSILS AND MATERIALS and COOKING TECHNIQUES sections
covered later in this manual.
3. Remove all packing material from inside the microwave oven, but do not remove the
waveguide cover, which is on the right inside wall of the oven.
4. Install the turntable
Your microwave should come with the roller ring already installed. The glass tray must rest
perfectly centered on the roller ring to operate properly. Do not operate the oven without the
glass tray and roller ring in their proper positions.
5. Replace the house fuse or turn the breaker back on.
SETTING THE CLOCK
When the microwave is first plugged in, you will need to set the clock.
1. From standby mode, press the CLOCK button (press this a second time for 24 hr clock).
2. Use the number pads to enter the correct time.
3. Press the Start / 30Sec button.
NOTE: During cooking, the time may be seen by pressing the CLOCK button.
THE "START / 30 SEC" BUTTON
3 important facts about this useful button:
1. If you press this button when there is no time entered and the microwave is on standby,
the oven will automatically start at 100% power and begin cooking for 30 seconds.
2. Press this button during cooking to add another 30 seconds of cooking time. You may
press it multiple times.
3. This function does not work during sensor cook or defrost.

10
ENGLISH ESPAÑOL FRANÇAIS
TIME COOK
1. Enter the desired cooking time on the number pad.
The maximum time allowed is 99 min. 99 sec.
2. Press POWER LEVEL once or repeatedly to set the
power level:
Press Power Display Power
level
Once (PL-HI) 100%
Twice (PL-90) 90%
3 times (PL-80) 80%
4 times (PL-70) 70%
5 times (PL- 60) 60%
6 times (PL-50) 50%
7 times (PL- 40) 40%
8 times (PL-30) 30%
9 times (PL-20) 20%
10 times (PL-10) 10%
3. Press START/ 30SEC to begin cooking.
Note: If cooking is paused due to opening the door, press START aer the door is closed to resume
cooking...
During cooking, press the POWER LEVEL button to show the current cooking power.
When cooking at 100% power, you can simply enter the cooking time from standby mode (when
the oven is not cooking) and press START (Step 2 can be skipped).
DEFROST BY WEIGHT
1. Press DEFROST once. The screen will display "MEAT".
2. Keep pressing DEFROST for other food types. (See chart below).
Program No. Food Weight Range
1Meat 0.1 - 6.0 lbs
2Poultry 0.1 - 6.0 lbs
3Fish 0.1 - 6.0 lbs
4Bread 0.1 - 6.0 lbs
3. Press START/ 30SEC to confirm.
4. Use the number pad to enter the weight of the food.
5. Press START/ 30SEC to begin cooking.
During the WEIGHT DEFROST program, the system will pause and beep to remind you to turn
the food over. Aer turning the food over, press the START/ 30SEC button to resume cooking.

11
ENGLISH
FRANÇAIS ESPAÑOL
SENSOR COOK
For some food types, it is not necessary to program the time or the cooking power level. You can
use the SENSOR button instead.
1. Press SENSOR once. The screen will display "POTATO".
2. Press SENSOR repeatedly until the desired food program appears on the display (see the
chart below).
Program No. Menu Quantity
1Potato 1 - 4 potatoes
2Fresh Vegetable 6/16 oz
3Frozen Vegetable 8/16 oz
4Frozen Dinner 10/20 oz
5Rice 1 - 2 cups
6Frozen Breakfast 8 - 12 oz
7Meat 9 - 19 oz
3. Press START/ 30SEC to start sensor cook mode. The appliance will start the sensing process.
When sensing is complete, a beep will sound and cooking will begin for the calculated time.
Note: Do not open the door during the sensing process, or the program will be canceled.
SENSOR REHEAT
When reheating some food types, it is not necessary to program the time or power level. You can
use the SENSOR REHEAT button instead.
1. Press SENSOR REHEAT once. The screen will display "BEVERAGE".
2. Press SENSOR REHEAT repeatedly until the desired food program appears on the display
(see the chart below).
Program No. Menu Quantity
1Beverage 1 - 3 cups
2Dinner Plate 1 plate
3Pizza 1 - 4 slices
4Soup/Sauce 1-3 cups
5Casserole/
Lasagna
10.5 oz
3. Press START/ 30SEC. to start sensor reheat mode. The appliance will start the sensing
process. When sensing is complete, a beep will sound and cooking will begin for the calculated
time.

12
ENGLISH ESPAÑOL FRANÇAIS
POPCORN MODE
Press Popcorn once or twice until the serving you require appears on the display.
For example, if you press Popcorn once, "3.2" is shown.
Press Popcorn once: App 3.2 ounces
Press Popcorn twice: App 1.75 ounces
Press START/ 30SEC to begin cooking.
ADDITIONAL FEATURES AND FUNCTIONALITY
LIGHT CONTROL
Press Light On/O to set the light on High Brightness, Low Brightness, or O.
VENT FAN CONTROL
Your oven can be used as a range hood. When food is cooking on the range underneath the
hood, turn the fan on. When it is turned on, the fan motor starts filtering out smoke, odors, and
grease generated from cooking. In standby mode, the vent fan is manually controlled. Press the
VENT button to toggle between High, Low or to turn the vent o. If the vent is o and cooking
starts, the vent will automatically start at a low setting for the duration of cooking.
CHILD LOCK
The appliance has a safety lock that prevents unsupervised operation by children. To activate
this feature, press and hold the STOP/CANCEL button for 3 seconds while the microwave is in
standby (not cooking). The "lock" indicator will light.
To turn o the lock, press and hold STOP/CANCEL for 3 seconds in standby mode. A beep will
sound, noting that the lock is released.
KITCHEN TIMER
The kitchen timer is used independently of the cooking cycle. To set the timer:
1. Press KITCHEN TIMER once.
2. Enter the amount of time, using the number buttons. The max allowed is 99 minutes and 99
seconds.
3. Press the Start / 30Sec button to start.
NOTE: When the kitchen timer is active, you can check the countdown time by pressing the
Kitchen Timer button. Press STOP/CANCEL to cancel the timer.
TURNTABLE ON / OFF
Automatic rotation for the glass turntable can be turned on or o. It should generally be le on
but can be turned o as needed for large dishes or other purposes. To turn the turntable o,
press Turntable On/O once from standby mode. The screen will display "OFF" for 2 seconds.
You must then start a cooking program, else the turntable mode will switch back to "on"

13
ENGLISH
FRANÇAIS ESPAÑOL
ADDITIONAL NOTES
• When cooking is interrupted for 1 minute, the system returns to standby mode automatically.
• Pressing STOP/CANCEL twice will stop cooking and erase the current program.
• Aer cooking, the microwave will display "end" and beep every 30 seconds until STOP is
pressed or the door is opened.
• If the oven beeps twice in a row during programming, there has been an invalid entry.
UTENSILS AND MATERIALS
The microwaves generated by this oven are attracted to and absorbed by fat, sugar and water
molecules in the food, causing them to move, producing friction and heat which cooks the food.
1. Do not heat oil or fat for deep-frying. It is diicult to control the temperature of oil in a
microwave oven.
2. Pierce foods such as potatoes, hot dogs, whole squash, apples, chestnuts and other things
with a heavy skin before cooking.
3. The contents of feeding bottles and baby jars should be stirred or shaken and the
temperature should be checked before serving in order to avoid severe burns.
The amount, size, shape, starting temperature, composition and density of the food all aect
cooking results. Cookware and dinnerware must fit on the turntable. Always use oven mitts
or pot holders when handling because dishes may become very hot. Do not use cookware or
dinnerware with a gold or silver trim.
TESTING COOKWARE, UTENSILS, AND DINNERWARE FOR MICROWAVE USE
All cookware and utensils need to be known as microwave-safe. We know that metal doesn't go
in the microwave, but there may be certain non-metallic utensils, cookware, and dinnerware that
are not safe to use for microwaving. If in doubt, you can test the utensil in question by following
the procedure below.
1. Put cookware, utensils, or dinnerware in the oven with 1 cup (250 ml) of water beside it.
2. Cook at 100% cooking power for 1 minute.
Note: When performing the test, do not exceed 1 minute of cooking time.
3. Do not use cookware, utensils, or dinnerware if they become hot, yet the water stays cool.
RECOMMENDED MATERIALS
The following may be used if they are labeled as microwave-safe:
• Microwave browning dish — Use to brown the exterior of small items such as steaks,
chops, or pancakes. Follow the directions provided with your browning dish.
• Microwaveable plastic wrap — Use to retain steam. Leave a small opening for some steam
to escape and avoid placing it directly on the food.
• Paper towels and napkins — Use for short-term heating and covering, as these absorb
excess moisture and prevent spattering. Do not use recycled paper towels, which may
contain metals and could ignite.

14
ENGLISH ESPAÑOL FRANÇAIS
• Glass and glass-ceramic bowls and dishes — Use for heating or cooking.
• Paper plates and cups — Use for short-term heating at low temperatures. Do not use
recycled paper, which may contain metals and could ignite.
• Wax paper — Use as a cover to prevent spattering.
LIMITED USE
Aluminum foil and some metal can be used in the microwave oven. If not used properly, arcing
(a blue flash of light) can occur and cause damage to the microwave oven.
• Aluminum foil — Use narrow strips of foil to prevent overcooking of exposed areas. Using
too much foil can damage your oven, so be careful. You should keep a distance of 1 inch
(2.54cm) between aluminum foil and cavity or oven walls.
• Ceramic, porcelain, and stoneware— Use these if they are labeled as "Microwave Safe."
• Plastic — Use only if labeled "Microwave Safe." Other plastics can melt.
• Thermometers — Use only those labeled as "Microwave Safe" and follow all directions.
Check the food temperature in several places.
NOT RECOMMENDED
• Glass jars and bottles — Regular glass is too thin to be used in a microwave. It can shatter
and cause damage or injury.
• Paper bags — These are a fire hazard, except for popcorn bags that are designed for
microwave use.
• Styrofoam plates and cups — These can melt and leave an unhealthy residue on food.
• Plastic storage and food containers — Containers such as margarine tubs can melt in the
microwave and/or leave an unhealthy residue on food.
• Metal utensils — These can damage your oven. Remove all metal before cooking.
• Metal cookware and bakeware, gold, silver, pewter, non-approved meat thermometers,
skewers, twist ties, foil liners such as sandwich wrappers, staples and objects with gold or
silver trim or a metallic glaze should not be used in the microwave oven.

15
ENGLISH
FRANÇAIS ESPAÑOL
COOKING TECHNIQUES
Your microwave makes cooking easier than conventional cooking, provided you keep these
considerations in mind:
STIRRING
Stir foods such as casseroles and vegetables while cooking (stop cooking, stir, then resume) to
distribute heat evenly. Food at the outside of the dish absorbs more energy and heats more
quickly, so stir from the outside to the center. The oven will turn o when you open the door to
stir your food and you can press the START button to resume cooking.
ARRANGEMENT
Arrange unevenly shaped foods, such as chicken pieces or chops, with the thicker, meatier parts
toward the outside of the turntable where they receive more microwave energy. To prevent
overcooking, place delicate areas such as asparagus tips toward the center of the turntable.
SHIELDING
Shield food with narrow strips of aluminum foil to prevent overcooking. Areas that need shielding
include poultry wing tips, the ends of poultry legs, and corners of square baking dishes. Use only
small amounts of aluminum foil as larger amounts can damage your oven.
TURNING
Turn foods over midway through cooking to expose all parts to the microwave energy. This is
especially important with large foods such as roasts.
STANDING
Foods cooked in the microwave build up internal heat and continue to cook for a few minutes
aer heating stops. Let foods stand to complete cooking, especially foods such as cakes and
whole vegetables. Roasts need this time to complete cooking in the center without overcooking
the outer areas. All liquids, such as soup or hot chocolate, should be shaken or stirred when
cooking is complete. Let liquids stand a moment before serving. When heating baby food, stir it
well aer it is removed from the oven and test the temperature before serving.
ADDING MOISTURE
Microwave energy is attracted to water molecules. Food that is uneven in moisture content
should be covered or allowed to stand so that the heat disperses evenly. Add a small amount of
water to dry food to help it cook.

16
ENGLISH ESPAÑOL FRANÇAIS
CLEANING AND CARE
• The oven should be cleaned regularly and any food deposits should be removed. Failure to
maintain the oven in a clean condition could lead to deterioration of the surface. This could
adversely aect the life of the appliance and potentially result in a hazardous situation.
Turn o the oven and remove the power plug from the wall socket before cleaning.
• Keep the inside of the oven clean. When food splatters or spilled liquids adhere to oven
walls, wipe it down with a damp cloth. Mild detergent may be used if the oven gets dirty.
Avoid the use of spray and other harsh cleaners as they may stain, streak or dull the door
surface.
• The outside surfaces should be cleaned with a damp cloth. To prevent damage to the
operating parts inside the oven, water should not be allowed to seep into the ventilation
openings.
• Wipe the window on both sides with a damp cloth to remove any spills or spatters.
• Do not allow the control panel to become wet. Clean it with a so, damp cloth. When
cleaning the control panel, leave the oven door open to prevent the oven from accidentally
turning on.
• If steam accumulates inside or around the outside of the oven door, wipe it down with a so
cloth. This may occur when the microwave oven is used under high humidity conditions. In
such a case, it is normal.
• It is occasionally necessary to remove the glass tray for cleaning. Wash the tray in warm
sudsy water or in a dishwasher. Ensure it is fully dry before placing it back into the
microwave and then ensure that it is aligned properly before cooking again!
• The roller ring (for the glass tray) and oven floor should be cleaned regularly to avoid
excessive noise or buildup. Simply wipe the bottom surface of the oven with mild detergent.
The roller ring may be washed in mild sudsy water or in a dishwasher. Be sure to replace the
ring and glass tray in the proper position before using the oven again.
• Remove odors from your oven by combining a cup of water with the juice and peel of one
lemon in a deep, microwaveable bowl. Microwave it for 5 minutes. Dry it thoroughly with a
so cloth.

17
ENGLISH
FRANÇAIS ESPAÑOL
Waveguide Cover
The waveguide cover is located on the right side of the oven cavity. It is made from mica and
requires special care. Keep the waveguide cover clean to assure good oven performance.
Carefully wipe it with a damp cloth and clear any food spatters from the surface of the cover
immediately aer they occur. Buildup or residue may cause smoke or fire.
DO NOT REMOVE THE WAVEGUIDE COVER.
Oven and Surface Light Replacement
If either the light inside the oven or the surface light underneath the oven need to be replaced,
do not attempt this. Contact customer service and/or have an authorized technician replace
the light bulb.
Grease Filters
The grease filters should be cleaned at least once a
month. Grease should not be allowed to accumulate on
the ventilating hood or its filters. Never operate the fan
or oven without these filters in place. Pull down slightly
on the tab toward the front of the oven and remove the
filter. Repeat this for the other filter. Soak the filter in a
sink or dish pan filled with hot water and detergent. DO
NOT use ammonia or other alkalies as they will react with
the filter material and darken it. Corrosive cleaning agents, such as lye-based oven cleaners,
may damage the filter. Agitate and scrub with a brush to remove any embedded dirt. Rinse
thoroughly and shake dry. Place the clean, dry filter back into the opening.

18
ENGLISH ESPAÑOL FRANÇAIS
Charcoal Filter Replacement
The charcoal filter is replaceable. The charcoal filter may need to be changed every 6 to 12
months, depending on use. To replace the filter:
1. Unplug or disable the power source to the microwave.
2. Open the microwave door, then remove the two screws to the vent at the top of the unit.
3. Note the position of the filter before you replace it. Remove the charcoal filter by pushing
the top of the filter inwards, then pull it out of the opening.
4. Slide the new charcoal filter in. Press the bottom of the filter to place it into the same
position as the filter that was removed.
5. Replace the filter and screws that were removed in Step 1.

19
ENGLISH
FRANÇAIS ESPAÑOL
TROUBLESHOOTING TIPS
PROBLEM POSSIBLE CAUSE POSSIBLE REMEDY
Oven will not
start
• Electrical cord is not plugged in
• Oven door is open
• Wrong procedure or sequence entered
• Be sure that the unit is
plugged into the outlet
• Close the oven door and
retry
• Check instructions to be
sure that the procedure
is correct
Sparking or arcing
inside oven while
cooking
• Materials to be avoided in microwave
oven were used
• The oven is operated while empty
• Spilled food remains in the cavity
• Use microwave-safe
cookware only
• Do not start cooking
when oven is empty.
• Clean the oven with a
wet towel
Unevenly cooked
foods
• Materials to be avoided in microwave
oven were used.
• Food is not defrosted completely
• Cooking time or power level is not
suitable for the food
• Food has not been turned or stirred
• Use microwave-safe
cookware only
• Completely defrost food
• Use correct cooking time
and/or power level
• Turn or stir food.
Overcooked
foods • Cooking time, power level is not
suitable • Use correct cooking time
and/or power level.
Undercooked
foods
• Materials to be avoided in microwave
oven were used
• Food is not defrosted completely
• Oven ventilation ports are restricted
• Cooking time or power level is not
enough
• Use microwave-safe
cookware only
• Completely defrost food
• Check to see if the oven
ventilation ports are
restricted
• Use correct cooking time
and/or power level.
Food is not
defrosting
properly
• Materials to be avoided in microwave
ovens were used
• Cooking time or power level is not
suitable for the food
• Food has not been turned or stirred
• Use microwave-safe
cookware only.
• Use correct cooking time
and/or power level.
• Turn or stir food.

20
ENGLISH ESPAÑOL FRANÇAIS
TECHNICAL SPECIFICATIONS
Power Consumption: 120V~60Hz, 1500W (Microwave)
Output: 1000W (Microwave)
Operation Frequency: 2450MHz
Outside Dimensions(W×DxH): 23 " 16 " x 17"
Oven Capacity: App 1.3 cu.
Net Weight: Approx. 57.3 lbs.
CUSTOMER SUPPORT
Before contacting customer support, please see the troubleshooting section above.
Visit our website to contact us, find answers to Frequently Asked Questions, and for other resources
which may include an updated version of this user's guide.
WWW.IMPECCA.COM
If you wish to contact us by phone, please be sure to have your model number and serial
number ready and call us between 9:00am and 6:00pm ET, at +1 866-954-4440.
Keep tabs on Impecca's newest innovations & enter contests via our social network feeds:
www.facebook.com/Impecca/
www.instagram.com/impecca/
@impeccausa
Table of contents
Languages:
Other Impecca Microwave Oven manuals

Impecca
Impecca CM07M2 User manual

Impecca
Impecca CM-0774ST User manual

Impecca
Impecca OM-1600ST User manual

Impecca
Impecca CM-1396 User manual

Impecca
Impecca CM-1295ST User manual

Impecca
Impecca CM-0995ST User manual

Impecca
Impecca CM-0773 User manual

Impecca
Impecca CM-1100K User manual

Impecca
Impecca CM-0674 User manual

Impecca
Impecca CM-0770 User manual