Inalsa Micro WD10 Guide

WET & DRY
VACUUM CLEANER
Instruction Manual
Cum
Warranty Card

Dear Customer,
Congratulations! On the purchase of your INALSA Wet & Dry Vacuum Cleaner this is
designed to include many superior features that permit you the fullest expression of your
cleaning skill and enthusiasm. You are now on the threshold of a whole new world of cleaning
pleasure.
At INALSA, we have a reputation of manufacturing innovative, high quality appliances such as
Food Processors, Mixer Grinders, Juicer Mixer Grinders, Cooking Ranges, Juice Extractors,
Sandwich Toasters, Oven Toaster Grillers, Hand Blenders, Electric Kettles, Rice Cookers, and
Electric Chimneys. Your newly acquired INALSA Wet & Dry Vacuum Cleaner bears the
same distinctive hallmark of excellence.
It is all the result of vigorous quality consciousness in INALSA's design and development
where uncompromising standards are maintained and rigid quality control measures are
exercised on raw materials, components and finally, the finished product.
Your INALSA Wet & Dry Vacuum Cleaner has a lot of thoughtful features built in to make
your ironing convenient. Please read these instructions carefully, so that you may get the best
out of the power packed features in your INALSA Wet & Dry Vacuum Cleaner.
Welcome to the INALSA world of living pleasure!!
1

Parts Identification:
Part No. Part Name
1. Carry handle
2. Motor unit
3. Blowing port
4. Power cord
5. Plastic bucket
6. 360° rotation wheel
7. Side locks
8. Flexible hose pipe
9. Lock catch (Air flow controller)
10. Hose handle
11. Suction port
12. ON/OFF switch (0-ON, 1-OFF)
13. Floor cum carpet brush
14. Dry & Wet squeezing brush
15. Crevice brush
16. Small round brush
17. Extension tubes (3 - piece)
18. Cloth filter (Dry use)
19. Sponge filter (Wet use)
20. Filter holder ring
2
12
3
4
5
8
9
10
7
6
11
12
13
14
15
16
17
18
19
20

Technical Specifications*
Product Wet & Dry Vacuum Cleaner
Model Micro WD10
Rating 230V, 50Hz, AC
Power consumption 1000W
* Due to continuous improvements in product, specifications are subject to change without prior notice.
How to Assemble/Install Wet & Dry Vacuum Cleaner
Cord plug 2 pin VDE plug with 4.0 mtr. PVC cord
10 L (dry use),
Tank Capacity 5L (wet use with hose pipe only),
4L (wet use with other brushes)
Vacuum Pressure > 14 Pa
Wind Volume of Flow 25 L/s
Noise Level 75 dB
Safety Auto shut float valve
3
Attention!
•Invert drum to install wheel. Insert
the four wheels into the socket of
wheel base. Be sure that wheels
spin freely.
•Carry handle is detachable Connect
the handle on top of the motor unit
by tighting through 2 screws.
•For Wet use : Put the spong filter
into float holder firmly to the end
of the holder.
•For Dry use : Put the cloth bag
filter into float holder and place
filter ring upto the end of the
holder to tight its assembly.
If any part is missing or damaged,
please do not assemble unit until
you have all the parts.
Fixed Mount
For Dry Use For Wet Use

Important Instructions
1 Please read operating instructions before using the appliance.
2 The input supply from the mains must comply with the rated input.
Do's
1 Only use the accessories that have been supplied with the vacuum cleaner.
2 Before starting vacuuming, any pointed, sharp-edged or very large items should be
removed so that they do not damage the paper filter.
3 Always ensure that the surface you are vacuuming is dry (while using Dry cloth filter),
otherwise you can end up damaging the vacuum cleaner. If the carpet has been recently
shampooed, ensure that it has completely dried out.
4 Always remove the plug from the socket after you have finished using the vacuum cleaner,
before you replace the dust bag and filter, and before you clean it.
5 The appliance is intended for household use only.
6 In the event of any malfunctions or damage, remove the plug from the socket immediately.
7 If you have an extension cable, it must be suitable for use with corresponding power rating.
8 In case of any defect, contact the nearest INALSA authorized service centre.
Don'ts
1 Do not use near the direct flames or acid.
2 Do not use the vacuum cleaner to vacuum any type of fluid.
3 Never allow this appliance to be operated by children, or other people who are unaware of
the dangers of working with electrical apparatus.
4 Never touch the plug if your hands are wet or damp.
5 Do not insert any objects into the interior of the cleaner's housing.
6 Never use the vacuum cleaner without a filter inserted.
7 Do not wind the cable around the vacuum cleaner.
8 Do not place the vacuum cleaner near appliances such as cookers, radiators, heaters etc.
9 Do not use the cleaner to vacuum hot or incandescent items.
10 Do not immerse in water.
11 Do not try to clean the product when it is in running condition.
4
5
(fig.1)
(fig.2)
(fig.3)
(fig.4)
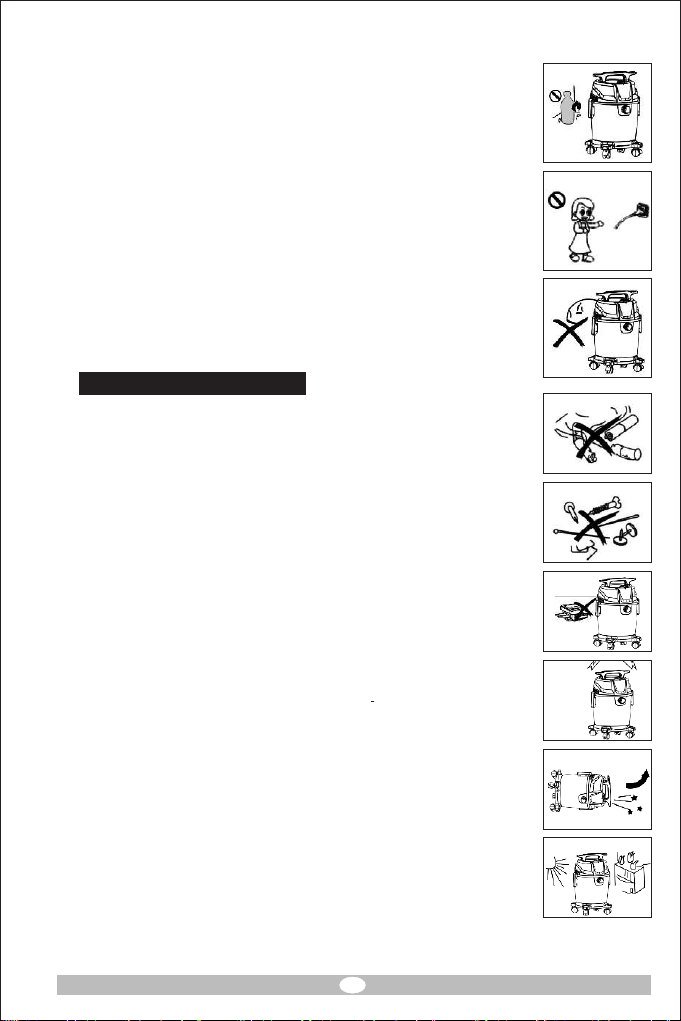
Attention ! before use the products
1. Please do not use the vacuum cleaner near some liquids or gases which
is inflammable and explosive in order to avoid the fire.(fig.1)
2. Before plug in and out, please turn off the power in order to avoid the
fire and get an electric shock.
3. Please do not touch the plug when your hands are wet, in order to avoid
getting an electric shock.(fig.2)
Warning
1. Please do not plug up the vent in order to avoid damaging the machine
because the temperature inside is too high.(fig.3)
2. Do not suck the following objects: None extinguished cigarette, gas,
kerosene, and other objects which is inflammable explosive and
volatile.(fig.4)
4. The toner lime powder gypsum and other subtle thing which easy to
suck on the filter bag, It will blocking airiness, damage the motor.(fig.6)
5. During the using process there is some possibility that the tube and the
machine generate electricity , so please pay attention.(fig.7)
6. Please do not overset the cleaner, in order to avoid the water in and
damage the mathine. (fig.8)
7. When water coming out of the air outlet, mending or checking up the
cleaner, please do not overset it, in order to avoid the water in, and
damage the motor. do not use this product as water pump, in order to
avoid damaging the machine.
6. Every time, after finish dusting, maintaining and checking-up, please
turn off the power and plug out.
7. Please do not put the cleaner under the sun or other high-temperature
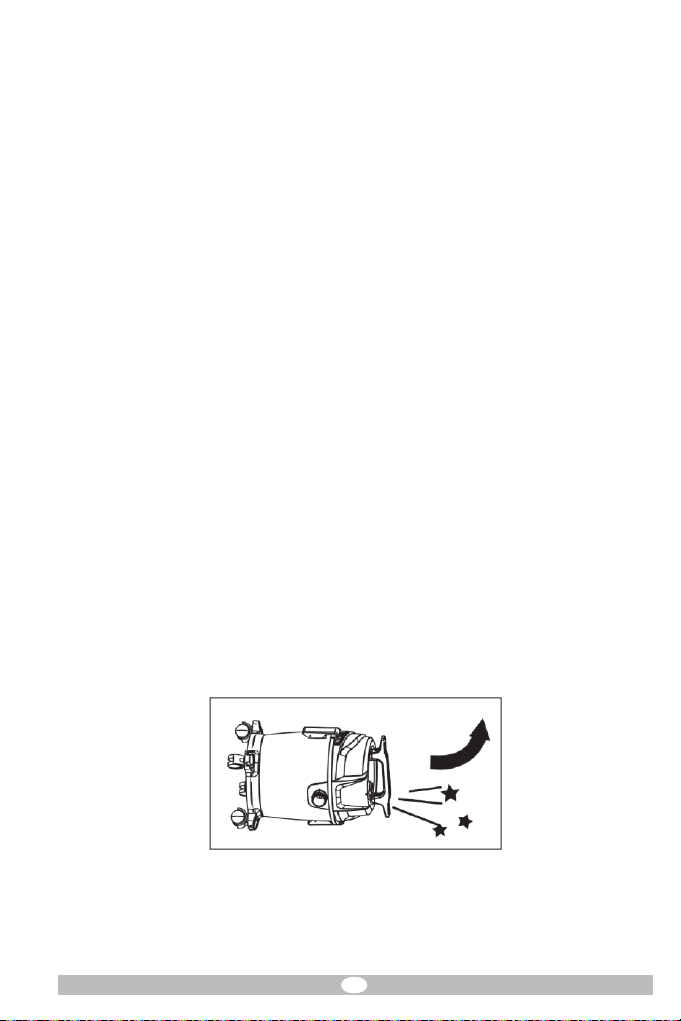
places, in order to avoid the plastic deforming. (fig.9)
8. The tube should not bend excessively, stretch force, or it will damage
the tube.
9. Do not immersed the container in the water or rinse the container with
water, in order to avoid water flow into the electrical components, and
causing the personal accident. You should use soft cloth and twisting
very dry of water, then wipe the surface lightly.
Do not pick up sharp object.(fig.5)
(fig.5)
(fig.6)
(fig.7)
(fig.8)
(fig.9)

6
How to Use
1. Used for dry
Use the dust bag when used for dry only ,easy to clean.
• Open the clip, take out the machine head, then cover the dust bag on the bottom basket, then
fix with a fixator. (filter holder ring)
• After the machine head is put into the plastic bucket, the machine can start to work after
locked two sides of the locks.
• When finish the cleaning or too much garbage is sucked into the bucket, the suction force
drops obviously. Please cut off the power and clean up the garbage in the barrel timely.
I. Open the clip, take out the machine head.
II. Clean up the garbage in the barrel, then put machine head and locked it.
(The filter bag is consumable, please clean or replace timely)
2. Used for water
Use the sponge filter when used for vacuum water.
• Open the clip, take out the machine head, take off the dust bag and put sponge filter on the
bottom basket.
• When finish the cleaning or the tank is full of water (that time safety valve works) please
power off and pull out the water in the bucket.
I. Open the clip, take out the machine head.
II. Pull out water, then put machine head and locked it.
III. Please dry the sponge filter after finish vacuum water.
NOTE: Never use wet or damp cloth filter for dry vacuum process. In that case always
dries the cloth filter in sun light and use it in accordance.

7
The hose pipe and the Vacuum Cleaner linking up
1. Insert: Insert the tube connector into the cleaner, and then rotate it clockwise until it locked.
2. Exsert: Hand the tube connector, rotate it counter-clockwise until exsert the tube.
3. When using the blowing function, insert the main suction pipe into the blowing port, then
rotate it clockwise until it locked. When exserting it, rotate it counter-clockwise, exsert the
main suction pipe.
Hose Pipe connect with other attachments
1. Contact joint: insert one end of the tube into the brush, then rotate it clockwise until it's very
tight.
2. Exsert: Hand both ends of the brush, rotate it counter-clockwise until it's out.
Function Instruction
1. Power on
• Insert the plug into the socket.
•. Turn on the switch.
2. Air register
• Adjust the suction-assisted, when the lock catch open, the suction gradually
decreases, when it closed, the suction is gradually increasing.
According to different occasions, you could choose a
suitable accessory.
1. Small round brush is suit for the floor, carpet and so on.
2. Small crevice brush is suit for the crevice corner and other places' dusting
and sopping up.
3. Blowing Port is suit for blowing out the dust in the crevice of the machine.
4. Floor cum carpet brush cleans your tiles, wooden and granite floors as
well as your carpets, through a single touch switch.
5. Dry & wet squeezer brush can be used as mops and cleans wet spillage
and even dries your floor.
8
Protection Device
Special instructions concerning protective device
1. When the water in the container/basket is full. The device begin to work. The suction power
will vanish at this moment. The machine will make a noise which indicates the motor is
running at a high speed. Under this circumstance, you should cut off the electricity, clean
out the water. Then equip the machine and turn it on, it will begin to work normally.
2. Only connect to a proper 230V~, 50Hz socket.
3. If the supply cord is damaged, it must be replaced by the manufacturer or its service agent to
a similarly qualified person in order to avoid a hazard.
4. This appliance is not intended for use by persons (including children) with reduced
physical, sensory or mental capabilities, or lack of experience and knowledge, unless they
have been given supervision or instruction or instruction concerning use of the appliance by
a person responsible for their safety.
5. Children should be supervised to ensure that they do not play with the appliance.
6. The plug must be removed from the socket before cleaning or maintaining the appliance.
SafeguardAbout the float valve
1. When water is full of the dust container, the float valve starts, at this time, the sucking is
pause, but it will make some unusual sounds, it means the machine is high-speed operate,
when this situation happens, please quickly turn off the power supply, pour out of water, and
then install the machine, turn on the power again , the vacuum cleaner still can operate
normally.
2. When vacuum cleaner is overset, the float valve starts, please quickly turn off the power
supply, set upright the vacuum cleaner , and then turn on the power again.
3. When the float valve starts, using vacuum cleaner could cause the motor's damaging, then
cause the fire. In that case , we should stop using it , and pour out of water , then use it again.

Problem Cause Corrective Action
The appliance does not Power cord not firmly Plug in the unit firmly
switch ON plugged into socket.
No power in the main Take it to the authorized service
Supply center.
The appliance has weak Dust bag is full Empty dust bag.
suction power Unit clogged Turn unit off and unplug from
wall socket. Remove dust bag
and check for objects in air duct
and remove.
Dust bag needs cleaning Clean or replace dust bag
The dust escapes from Dust bag is full Empty dust bag
the appliance Dust bag is not installed Review dust bag instruction
correctly.
Puncture/Hole in dust bag Replace dust bag
The hose or brushes do Hose clogged Remove hose and/or brushes
not pick up Remove obstruction from hose.
Dust bag is full Empty and clean dust bag
Heat produced during A small amount of heat is normally produced by the
use vacuum cleaner due to high motor RPM.
9
Trouble Shooting

WARRANTY
The “Inalsa Wet & Dry Vacuum cleaner” is fully warranted against any manufacturing defect
for a period of One Year from the date of purchase. Should any defect develop in the Wet & Dry
Vacuum cleaner during the warranty period, TUAREG MARKETING PVT. LTD.
undertakes to get the Wet & Dry Vacuum cleaner or any part thereof, repaired at any of its
Authorised Service Center.
The above warranty shall be subject to the following terms and conditions:-
1. Any defective product or part thereof will be repaired within the above s t a t e d w a r r a n t y
period on receipt of the same with this card duly filled in and stamped by dealer from whom
the product was purchased along with the purchase bill/ invoice, provided the product is
brought to our nearest service center freight paid and packed securely.
2. In the event of repairs/ replacement of any part of product, this warranty will thereafter
continue and remain in force only for the unexpired period of warranty.
3. This warranty is valid only when:-
- The product is purchased from the company's authorized dealer and accompanied by this
warranty card / cash memo.
- The product has not been serviced by the Inalsa authorized service personnel.
- The product has been installed, used and maintained in accordance with the instruction
manual.
4. The warranty does not apply to :-
- Normal wear and tear of the product
- Damage due to chipping, peeling, plating and denting.
- Damages arising due to running of the appliances on the alternate sources of power such as
Inverter, generator or any such auxiliary power supply aid resulting in variation/ fluctuating
voltage
- Breakage or damage to components made of ABS, SAN, Bakelite, Glass and such
plastic/rubber parts, cord, bulbs and surface coating.
- Damages resulting from accidents, mishandling or negligence on the part of the customer
- Product if used for the commercial purposes.
- Product, the serial number of which has been removed obliterated or altered on the
specification plate.
5. The warranty is in lieu of all other warranty, expressed or implied and does not cover indirect
or consequential damages/ loss.
10

Product : Wet & Dry Vacuum Cleaner
Model : Micro WD10
Serial No ....................................................................................................................................
Date of purchase.........................................................................................................................
Bill/ Cash Memo no....................................................................................................................
Purchaser' name………………………………………………..................................................
Address……………………………………………………………...........................................
……………………………………………………………………............................................
……………………………………………………………………............................................
Dealer's stamp and Signature
WARRANTY CARD
TUAREG MARKETING PVT. LTD.
154, Bhalswa, Delhi- 110033
11
Table of contents
Other Inalsa Vacuum Cleaner manuals


