Installing the Easy-Mount Box Into the Wall
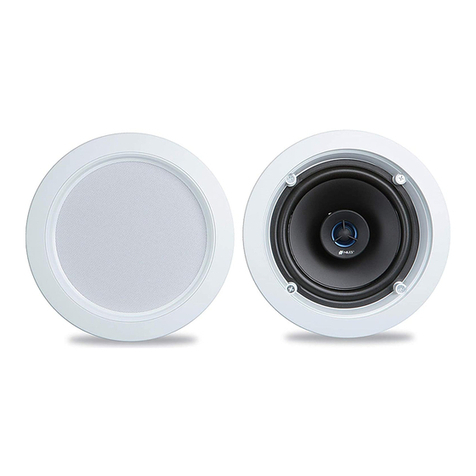
1. The in-walls are shipped preassembled with the faceplate attached to the easy-mount box with bolts. In order to install the
in-wall easy-mount box into the wall, you will rst need to separate the faceplate from the box. First, remove the grille mounting
anges, using the grille mounting ange driver. Note that there may be shims under some of the grille mounting anges. You will
need to save these shims to use when you reinstall the faceplate. Then unscrew the faceplate mounting bolts using a 1/4” hex
key or driver. You will later reattach the faceplate with these same faceplate mounting bolts.
2. There are two speaker wire access holes located at the top of the easy-mount box. The box comes with a solid grommet
preinstalled in the large hole and a small size grommet preinstalled in the smaller hole. The grommet hole size you will need
depends on the size of the wire you are putting through the hole. In the parts pouch you will nd a selection of large and small
grommets that have holes through them of various sizes. Use a grommet of the appropriate size to get a snug t around the
speaker wire where it enters the box. Put a solid grommet in the other hole. Make sure there is enough extra speaker wire
feeding into the box for easy handling of the loudspeaker faceplate.
3. Place the easy-mount box into the mounting hole.
4. Snug the Stud Grabber™ bolts against the left and right wall studs just enough to cause the easy-mount box to be suspended
in the cutout opening. Do not overtighten these bolts to avoid distorting the studs or box. Make all necessary adjustments to
level and position the easy-mount box in the wall. The preferred method is a small level held against the inner side of the easy-
mount box to make sure it is perfectly vertical. Upon completion, the box should be level and centered in the cutout opening
with the box gasket protruding 1/4” out from the drywall surface.
5. Tighten the Stud Grabber lock nuts with a wrench.
6. Place the 4” stud screws into the hole in the inside of the Stud Grabber bolts. Carefully pound them in about 1/4” with a
hammer to get the threads started. Tighten each of the screws with a #2 square head screwdriver until the screws are snug.
Installing the Faceplate
While installing the faceplate, we recommend that an assistant help hold the faceplate. Be careful working with the assembly
that you don’t damage any of the speaker components. If the midrange gets dented in, you can work it back out with your
ngertips or use a vacuum cleaner to suck it out.
1. Hold the speaker faceplate up to the wall opening and attach the speaker wire to the terminal block on the back of the
faceplate, observing the proper polarity. To make the connections to the terminal block, solder or crimp with high pressure the
insulated fork terminals provided in your parts packet. Soldering is best. For in-wall, use make sure the compensator switch is
in the proper position.
2. Position the speaker faceplate over the easy-mount box. Gently move it around from side to side and up and down until
the rubber gasket slides around the faceplate mounting inserts. Screw in the faceplate mounting bolts, gently tightening each
one a little at a time, until the faceplate is approximately 1/32” from the drywall all around. DO NOT TIGHTEN THE BOLTS ANY
FURTHER. The faceplate should not contact the drywall. This avoids any vibration or distortion of the drywall.
Installing the Faceplate (cont.)
3. Install the grille mounting anges that came in the parts packet using the grille mounting ange driver. Any shims that were
removed should be replaced back under the grille mounting anges to make them level with the faceplate. The grille mounting
anges should be used even if the grilles are not, as this gives the loudspeakers a nished appearance.
4. Attach the cloth grille by carefully pressing it into the grille mounting anges.
Connecting to an Amplifier
1. Be sure the amplier is turned off to avoid damage to the speakers.
2. Connect the speaker wires to the speaker outputs on your amplier. Observe proper polartity (red to red and black to black).
3. Make sure each speaker is connected to the correct amplier output (e.g. left front loudspeaker to left front output).
Warranty
All Induction Dynamics®products come with a limited ten (10) year warranty and a limited three (3) year warranty comes on all
electronics. Products not purchased through MSE Audio or an authorized reseller may not be supported by a factory warranty.
Should your Induction Dynamics product require service, please call the MSE Audio customer service department for a return
authorization. All merchandise returned to MSE Audio without prior authorization will be refused. For your return authorization
This warranty may be registered online at www.mseaudio.com/product-registration/ or by calling the number on the back.
Please write the serial number along with the name and address of the retailer from whom you purchased the amplier(s). This
may be done at the time of purchase or before requesting repair service under this warranty.
Limits and Exclusions: There are no warranties except as mentioned above. Neither Induction Dynamics®, Inc. nor anyone else
who has been involved in the creation, production, or sale of this product shall be liable for any direct, indirect, consequential
or acidental damages arising out of the use or inability to use this product, or arising out of breach of this warranty. Induction
Dynamics®, Inc. makes no other warranties, express or implied, including without limitation warranties of merchantability or
tness for a particular purpose. There are no warranties that extend beyond the description on the face hereof.


