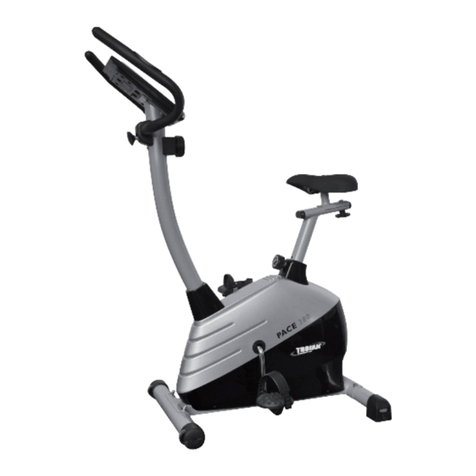
INFINITI FITNESS Concept Cycle PG4700 User manual

1

2
PARTS LIST
NO Description Specification Q'ty
1Computer 1pcs
2Handlebar 1pcs
3Screw for fixing handlebar cover M3x14L 6 pcst
4Rear handlebar cover 1 pcs
5Screw for fixing screw M5xP0.8x12L 4 pcs
6Handlebar post 1pcs
7Handlebar cover Black 1pcs
8Screw M7xP1.0x30L 1pcs
9T-knob 1pcs
10 bushing f7xf12x40mmL 1pcs
11 Flatwasher f7xf12x1t 2pcs
12 Springwasher f7x2t 2pcs
13 Iron cover for handlebar 1pcs
14 Handlebar postcover ABS 1pcs
15 Screw M8xP1.25x16L 4pcs
16 washer f8xf19x2t 8pcs
17 Front stabilizer 1pcs
18 Carriage bolt M8xP1.25x75L 2pcs
19 Nut \M8 4pcs
20 mainframe 1set
21 Pedal ( right ) P.P. 1pcs
22 Rear stabilizer 1pc
23 Carriage bolt M8xP1.25x90L 2pcs
24 Seat post knob 1pcs
25 Seat post 1pcs
26 Knob forseat slider 1pcs
27 Flatwasher f10xf25x2t 1pcs
28 Seat slider 1pcs
29 Saddle 1pcs
30 Cable upper 1pcs
31 Cable lower 1pcs
32 Pedel ( left ) 1pcs
33 Foam grip 2pcs
34 Hand pulse set 1set
35 Cap for foam grip 2 pcs
36 Pulse cable 3/8”*4.5T 1 pcs
37 Leftcover 1 pcs
38 Disc 1pcs
39 Nut M10xP1.25x10T 2pcs
40 Disc bar 1pcs
41 Screw M3x8 2pcs
42 Transportationwheel 2pcs
43 Gear box 1pcs
44 Spring washer f62pcs
45 Flastwasher f6xf13x1t 2 pcs
46 Hexagonal screw M6xP1.0*16L 2pcs
47 Hexagonal nut M6 2pcs
48 Adjustorforflywheel 1pcs
49 Screw for fixing gear box M8 1pcs
50 Nylon nut M8 2pcs
51 Flat washer f8xf16x1t 2pcs
52 Bushing 1pcs
53 Bearing 2pcs
54 Spring 1pcs

3
55 Axle 1pcs
56 Hexagonal screw M8xP1.25x20L 1pcs
57 Screw 1pcs
58 Nut 2pcs
59 Flywheel 1pcs
60 Screw M4x50L 5pcs
61 Cap for disc 2pcs
62 Screw 8pcs
63 Right cover 1pcs
64 Disc bar 1pcs
65 Flatwasher f5xf16x1t 8pcs
66 Screw M3*8L 8pcs
67 Driving belt 1pcs
68 Driving pulley 1pcs
69 Bearing 2pcs
70 Sensor box 1pcs
71 Screw M3x8L 2pcs
72 Screw 2pcs
73 Rear stabilizer 2pcs
74 Cap 1pcs
75 Seat sleeve 1pcs
76 Washer f17.5xf25x0.3t 1pcs
77 Flatwasher f17.5xf25x0.3t 1pcs
78 C-type ring 1pcs
79 Front handlebar cover 1pcs
EXPLODED DRAWING

4
DRAWING FOR ASSEMBLY
Step 1
Install the front stabilizer(17) to the front bracket of the main frame, using 2
bolts (18), 2 washers (16)and 2 nuts (19). Fix the rear stabilizer (22) to the
back bracket of the main frame using2 bolts(23), 2 washers (16 )and 2 nuts
(19). Then fix the pedal right and left ( 21 & 22 ) to the connection of disc

5
Step 2
Install the saddle (29) to the panel of the seat slider (28) And fix the slider to
the seat post ( 25) by knob ( 26) & washer (27).Then insert the seat post (25)
into the seat post sustain tube while pulling out the spring lock (24).Select
the right height of the seat by pushing or pulling the seat post. Whenthe lock
pin lock into the hole, screw the spring lock completely into theseat post
sustain tube.
Put the handlebar post (6) through the handlebar post cover (14). Assembly
the cable upper & lower (30 & 31). Then the handlebar post to the mainframe
by 4 screw (15) & 4 washer (16)
Step 3
Attach the handlebar (2) to the bracket which is welded on the
handlebar post; use the arrester (13) to cover the central position of
the handlebar. Fix the two bracket using one flat washer (11), one
spring washer (12)and one Allen bolt (8). Do not tighten completely.
Put the plastic cover (7) onto the bracket, Then use one flat washer
(8), spring washer (12),flat washer (11) and one T shape knob (9) to
fix the lower side of the two brackets and the plastic cover. Adjust
the right angle of the handlebar; tighten fully the Allen bolt and the T
shape knob.

6
Step 4
Put the cable connector with the socket of back side of computer.
Then assembly the computer ( 1) on the handlebar post by 4 screw
(5)

7
Allen key*1pcs
30mm
86mm
120mm
13mm
15mm
Screwdriver *1pcs
N-Wrench *1pc
100mm
15mm
13mm
14mm

8
Programable TrainingComputer -SM3156-7
Initial operating process: (After the computer is power on with batteries installed)
Step One You may use UP or DOWN to select training mode in MANUAL or PROGRAM (12 different
profiles) or USER or TARGET HEART RATE control (4 different options for training). If you
select training with Target Heart Rate control mode, you need to input AGE data, and
switch to next procedure.
Step Two You may use UP or DOWN to adjust the training LOAD/DIFFICULTY level from 1 to 16 under
MANUAL, PROGRAM and USER mode .(Exclude TARGET HEART RATE CONTROL mode)
Step Three You may use UP or DOWN to preset training function datas, when each function data has
been preset, press MODE/ENTER.
Available preset training functions:
TIME: Preset area is from 00:00 to 99:00, each increment is 1:00 (minute).
DISTANCE: Preset area is from 0.00 to 99.90, each increment is 0.10 km or ml.
CALORIE:Preset area is from 0 to 990, each increment is 10 cal.
WATT:Preset area is from 10 to 350, each increment is 10 watt.
(WATT can be preset under MANUAL mode only)
PULSE: Preset area is form 30 to 240, each increment is 1 BPM.
(Exclude in TARGET H.R control mode)
Step Four Press START/STOP button to start training.
Training Mode Instruction:
To start your training :
As soon as you press START/STOP button without any presetting (functions and programs),
the computer starts working under Manual mode.
Training without preset Time:
If you do not preset TIME, each unit of the profile switches forth to another per 0.1 km or ml
in counting up (no preset DISTANCE) or counting down (has preset DISTANCE).
Training with preset Time:
If you have preset TIME, each unit of the profiles switches forth to another per preset TIME
divided by 16.
Tension difficulty adjustment:
You may adjust the tension load from 1 to 16 during training under Manual mode if you did
not preset Watt function.
If you have preset WATT, tension load will be auto-adjusted depends on the current speed and
watt values you are working out.
There will be four different symbols shows up to help your training:
You need to slow down the training speed.
You need to speed up the training.

9
This is to remind the current WATT is OVER SPEC, and you need to speed up or slow down training
speed accordingly.
** When the WATT is over spec, computer has Bi-Bi-Bi/second to remind you. If you
keep training under this mode for over 3 minutes, the computer has an ALARM with
6 beeps sounds for 30seconds and the computer system STOP automatically, at this moment, LOAD is
down to 1, and preset WATT data is zero. During the ALARM
period, you can stop ALARM by pressing any function buttons.
Training with 12 profiles -You can select from P1 to P12 profiles for training, also you can adjust
training levels any time during training.
Training with USER -You can preset your personal training profiles under this mode. During training,
you can also adjust training levels any time.
Training in TARGET H.R. control -The tension difficulty will be auto-adjusted according to the
current heart rate figure. If your heart rate figure is under the target pulse, the tension difficulty will be
up-adjusted one level per 30 seconds, up to the maximum level 16. As soon as your heart rate figure is
achieved at the target pulse, tension difficult will be down adjusted one level immediately, and keep
down-adjusted one level per 15 seconds until level 1. If your current heart rate is still over (or equal to)
the target pulse for 30 seconds when tension is level 1, the computer system will STOP and ALARM
for 6 beeps to remind you as the training protection.
You may select fixed preset target heart rate percentage or input your personal training target heart rate
figures.
Target Pulse with different percentage selected-
You may use UP or DOWN to have the TARGET HEART RATE figure be zero, and
press MODE/ENTER button. At this moment, you may select the percentage of
the heart rate that you will achieve in the training. The computer provides 3 different percentage of the
maximum heart rate which is calculated by the CPU according to the AGE data you inputted.
Remark: 55%MAXH.R. -If you input age in 30, the figure will be 104, this figure
is 55% of the max. heart rate figure which is 190, the proper figure
calculated by the CPU compared the age of 30. The same formula
can be used to have the result for 75%, and 90%.
Target Pulse figure input by yourself -
You may preset your target pulse figure by pressing UP and DOWN buttons. As
soon as you have preset the target pulse figure, the level will be fixed on level
1, and you may only start training from level 1. When your actual heart rate has reached over the target,
the computer starts to alarm to remind you, and it stops when your heart rate comes under the target.
To stop your training:
Training with PRESET function data:
As soon as the preset function data counting down to zero, (pulse figures excluded)

10
the computer has 8 beep sounds and remind you. At this moment, the computer will
stop working. You may press START/STOP button to start the computer working and
counting up from the previous data.
Interrupt training:
You may press START/STOP button to stop computer working during training any time.
To reset program:
You may press RESET button to reset the PROGRAM and select the training mode and
tension load or difficulties under STOP mode. If you hold on pressing the RESET button
for 2 seconds, all data(including personal data) will be total reset.
Buttons:
ST/STOP To start or stop training.
MODE To select each function of Time, Distance, Pulse, Watt for presetting.
UP To up adjust data.
DOWN To down adjust data.
RESET 1. To reset each function of Time, Distance, Pulse, Watt function figures.
2. To reset program setting and back to initial selection mode with Manual, Program,
user, or Target Heart Rate all blinking display.
RECOVERY To have pulse recovery function work.
Functions:
TIME Count Up -The computer starts counting up from 00:00 up to 99:59 during training.
Count Down -The computer will count down from the preset Time to 00:00.
SPEED Displays the current SPEED from 0.0 to maximum 99.9 km or ml.
DISTANCE
Count Up -The computer accumulates total workout distance from 0.00 to the
max. 99.90 km or ml during training.
Count Down -The computer will count down from the preset Distance to 0.00.
CALORIES
Count Up
-The computer accumulates the calories consumption from 0 to the max.
990 cal during training.
Count Down -The computer will count down from the preset Calories to 0.
This data is a rough guide for comparison of different exercise sessions that can not
be used for medical treatment.
PULSE The monitor can detect your handpulse. You may preset target pulse between 30 to 240
bpm to assist the training. The options you may have are as the following:
Alarm -If you preset the target pulse under training with Manual or other target the
computer will alarm to remind as soon as your current heart rate is achieved at the
preset figure.
Load tension adjustment -If you preset the target heart rate ( or select different
target heart rate percentage), the load resistance will be auto-adjusted according to
your actual heart rate figure compared with the preset heart rate which is heart rate
control program.
RECOVERY
After exercising for a period of time, keep holding on grips and press
“RECOVERY”button, all function display will stop except "Time".

11
Time starts counting down from 00:60 -00:59 -00:58 -to 00:00. As soon as 00:00
is reached, the bottom area of LCD will show your heart rate recovery status with
the grade F1, F2… F6. F1 is the best, and F6 is the worst. You may keep exercising
to improve the heart rate recovery status day by day from F6 up to F1.** Press the
RECOVERY button again to return the main display.
WATT After training for a while, the monitor will display current workout watt.
Note:
1. When there is no signal been transferred into the computer for 4 minutes, the LCD display will shot
off automatically, and all previous training data will be stored. You may press any button to have the
computer restart working.
2. The monitor has the same result as abovementioned point 2 if you press and hold on RESET button
for 4 seconds.
3. If the LCD display is improper, please remove the power connection and connect it again.
4. The monitor can be power on with an AC adaptor input (500mA, 6V)
Table of contents
Other INFINITI FITNESS Exercise Bike manuals
