InfoSight INFOTAG KE28 Series User manual

KE28XX INFOTAGMARKER
OPERATIONS and MAINTENANCE MANUAL
KE2800, KE2852, KE2856
Revision G1
August 2016
INFOSIGHT CORPORATION
20700 U.S. Hwy 23
P.O. Box 5000
Chillicothe, Ohio 45601
+1 (740) 642-3600 Tel. (M-F 8am-5pm US Eastern Time Zone)
+1-800.401.0716 Emergency Service U.S. & Canada (outside normal business hours)
+1.740.642.4666 Emergency Service International (outside normal business hours)
+1.740.642.5001 Fax.
http://www.infosight.com

Copyright © 2016 InfoSight Corporation All Rights Reserved KE-28XX InfoTag®Marker
This page intentionally left blank.

KE-28XX InfoTag® Marker Copyright © 2016 InfoSight Corporation All Rights Reserved Page i
COPYRIGHT
Copyright
2000-2016 INFOSIGHT CORPORATION
All rights reserved, Printed in U.S.A.
First Printing: April, 1997
INFOSIGHT CORPORATION reserves the right to make changes in specifications and other information
contained in this manual without prior notice, and the reader should consult INFOSIGHT CORPORATION to
determine whether any such changes have been made.
In no event shall INFOSIGHT CORPORATION be liable for any incidental, indirect, special, or consequential
damages whatsoever (Including but not limited to lost profits) arising out of, or relating to this manual or the
information contained in it, even if INFOSIGHT CORPORATION has been advised, knew, or should have
known of the possibility of such damages.
INFOSIGHT CORPORATION expressly warrants the equipment manufactured by it as set forth in the
Standard Terms and Conditions of Sale. INFOSIGHT CORPORATION makes no other warranties, either
expressed or implied (including without limitation warranties as to merchant ability or fitness for a particular
purpose).
The information contained in this manual is confidential information and proprietary products of INFOSIGHT
CORPORATION, or its licensers.
InfoTag, LabeLase, PermaLabel®, Pic-Anneal®, and Kettle Tag®Plus are registered trademarks of InfoSight
Corporation.
LabeLaseProducerTM, Info-TintTM, Foam TagTM, Tough TagTM, AlumaTagTM, and X-TagTM are trademarks of InfoSight
Corporation.
Windowsis a registered trademark of Microsoft Corporation.
Page ii Copyright © 2016 InfoSight Corporation All Rights Reserved KE-28XX InfoTag®Marker
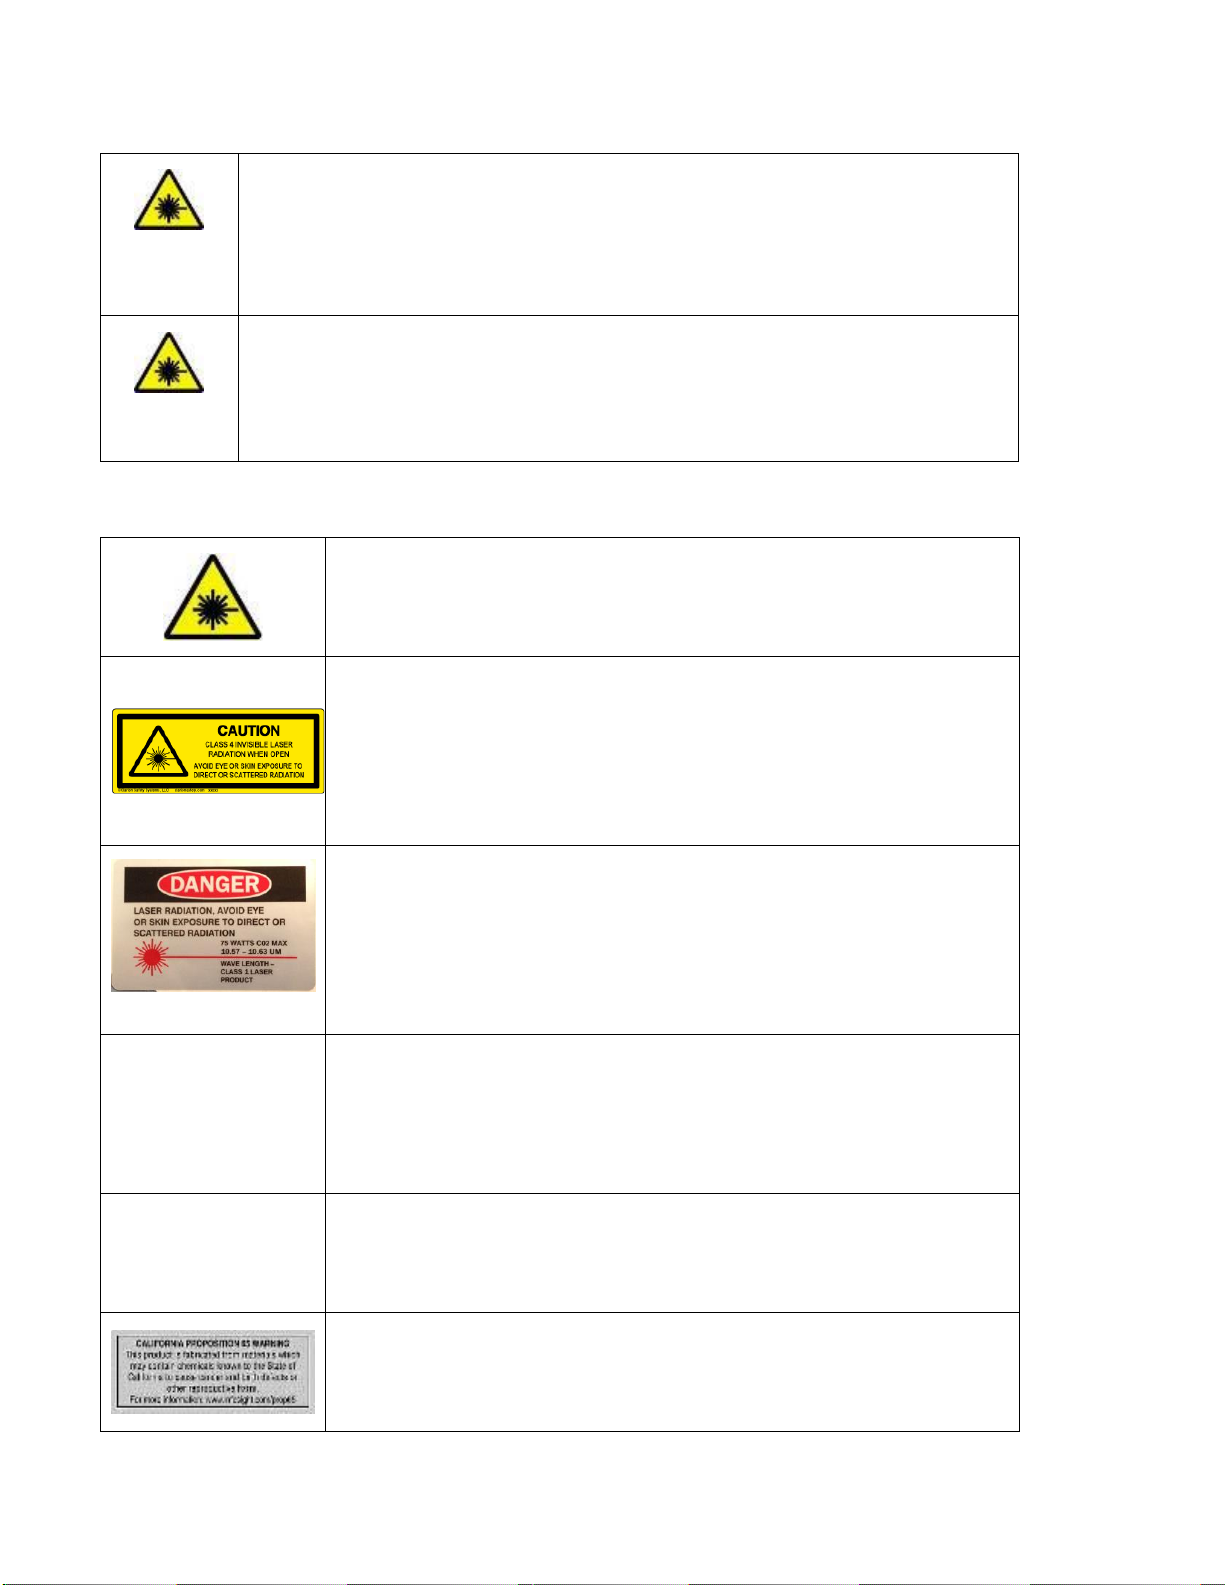
Optical/Laser Safety
INVISIBLE LASER RADIATION
AVOID EYE OR SKIN EXPOSURE TO
DIRECT OR SCATTERED RADIATION
CLASS 1 LASER PRODUCT, USING
A CLASS 4 EMBEDDED LASER ( 25W or 50W, 10.57 –10.63 μm)
The laser beam Exits the Final lens 7.5 inches from the tag
Never attempt to operate the Laser Tag Marker without the protective covers in place.
Never attempt to override any of the safety interlocks on the tag printer.
Never attempt to dismantle or repair the tag printer. In case of malfunction contact an Infosight service
representative.
Any of the actions mentioned above may result in permanent eye or skin damage. Refer to Laser Safety
section for more information on laser safety.
Labels / Warnings
Caution, Laser Radiation –See Appendix
Warning label located on the side near the communications ports:
CLASS 4 INVISIBLE LASER
RADIATION WHEN OPEN
AVOID EYE OR SKIN EXPOSURE TO
DIRECT OR SCATTERED RADIATION
Warning label located above the rating plate on the side of the Laser
Marker:
CLASS 1 LASER PRODUCT
Environmental
Conditions
The LabeLase®Printer is intended for Indoor use only. Altitude up to 6500
feet, operating temperature 40 to 100 degrees F, 80% maximum relative
humidity, rated 220VAC 5A 50/60Hz or 110VAC 10A 50/60Hz according to
Job Number ( Legend plate on marker ), pollution degree 2. NOTE: 220V
models both sides of the incoming line voltage are fused.
CAUTION
If this printer is not used in the manner specified by this manual, the
safety features provided may be insufficient.
Warning Label located on the side of the printer, near
the communications ports, regarding California
Proposition 65.

KE-28XX InfoTag® Marker Copyright © 2016 InfoSight Corporation All Rights Reserved Page iii
SOFTWARE/FIRMWARE LICENSE AGREEMENT
IMPORTANT: THE SUBJECT PROGRAMS ARE LICENSED BY INFOSIGHT CORPORATION TO END-
USERS FOR THEIR USE ONLY ON THE TERMS BELOW. ACCEPTING AND USING THESE PROGRAMS
INDICATES YOUR ACCEPTANCE OF THESE TERMS. THIS IS A LEGAL AGREEMENT BETWEEN YOU,
THE END USER, AND INFOSIGHT CORPORATION.
1) GRANT OF LICENSE. INFOSIGHT CORPORATION ("INFOSIGHT") agrees to grant to you a non-
exclusive license to use the INFOSIGHT software/firmware program (the "PROGRAM") subject to the terms
and conditions of this license agreement.
2) DEFINITION OF TERMS. The term SOFTWARE refers to a computer program stored on a floppy
diskette, hard disk, magnetic tape, or paper tape that must be loaded into the computer's memory to be
executed. The term FIRMWARE refers to a computer program stored in semiconductor memory (ROM,
PROM, EPROM, EEPROM, NVRAM, etc.) that is an integral part of the computer's memory. Together, these
forms of computer programs are referred to as the "PROGRAM".
3) COPYRIGHT. The PROGRAM(s) and Documentation is owned by INFOSIGHT and is protected by
United States copyright laws and international treaty provisions. The PROGRAM(s) contain trade secrets and
proprietary property of INFOSIGHT. You may make one copy of the PROGRAM(s) solely for backup or
archival purposes provided that the copy clearly displays the INFOSIGHT copyright notice. Additional copies
may be made when authorized to do so in writing by INFOSIGHT. In addition to any other right of INFOSIGHT,
INFOSIGHT has the right to terminate this license if the terms of this license are violated.
4) RESTRICTION ON USE AND TRANSFER. The single-processor version(s) of the PROGRAM(s) and
Documentation are to be used on one computer or embedded system at any one time. The multi-processor
version(s) of the PROGRAM(s) and Documentation may be used over a network provided that the number of
computers accessing the network simultaneously shall not exceed the number authorized by INFOSIGHT or
for which you paid the corresponding multi-processor fee. You may not distribute the programs or
Documentation to a third party. You may transfer the license and complete package (retaining nothing) if the
transferee agrees to the terms of this License Agreement. Neither the PROGRAM(s) nor the Documentation
may be changed or translated without express written permission of INFOSIGHT. You may not reverse
engineer, decompile or disassemble the PROGRAM(s).
5) WARRANTY for the subject PROGRAM(s) is covered under the INFOSIGHT STANDARD TERMS AND
CONDITIONS OF SALE.
6) TERM. The license is effective until terminated. It will be terminated if you fail to comply with any term or
condition of this License Agreement. You may terminate this License Agreement at any time. In the event of
termination, you agree to destroy the PROGRAM(s) and Documentation together with all copies and related
material.
7) YOUR USE OF THIS PROGRAM(S) acknowledges that you have read this License Agreement and
agree to its terms. This agreement is complete and supersedes any other agreement that may have related to
the subject matter of this agreement.

Page iv Copyright © 2016 InfoSight Corporation All Rights Reserved KE-28XX InfoTag®Marker
Table of Contents
TABLE OF CONTENTS............................................................................................................................IV
1. SYSTEM SETUP.................................................................................................................................1
1.1 PRINTER SETUP ......................................................................................................................................1
1.2 AFFIXING THE KE28XX TO SOLID PLATFORM..........................................................................................2
1.3 TERMINAL SETUP ...................................................................................................................................3
1.4 COMMON PRINTER SETTINGS FOR VARIOUS MODELS ..............................................................................3
1.5 POWER ON...............................................................................................................................................4
1.6 LOADING NEW TAGS ..............................................................................................................................4
1.6.1 Tag Break Off...............................................................................................................................5
2. OPERATIONS.....................................................................................................................................6
2.1 PRINTING ATAG.....................................................................................................................................6
2.1.1 Printing From The Operator Screen............................................................................................6
2.1.2 Printing From The Main Screen ..................................................................................................6
2.2 KE28XX SCREENS.................................................................................................................................7
2.2.1 Main Screen .................................................................................................................................7
2.2.2 Edit Screen...................................................................................................................................8
2.2.3 BARCODE SETUP SCREEN.....................................................................................................10
2.2.4 LOGO SETUP SCREEN ............................................................................................................11
2.2.5 OPERATOR SETUP SCREEN...................................................................................................11
3. DESIGNING TAGS...........................................................................................................................13
3.1 TAG DESIGN .........................................................................................................................................13
3.2 TAG LAYOUT SOFTWARE......................................................................................................................13
3.3 BARCODE EXAMPLES ...........................................................................................................................13
3.4 SERIAL NUMBERING.............................................................................................................................14
3.5 LOGO AND IMAGE DOWNLOAD ............................................................................................................14
4. MAINTENANCE...............................................................................................................................15
4.1 PERIODIC MAINTENANCE .....................................................................................................................15
4.2 LASER OPTICS CLEANING AND ALIGNMENT.........................................................................................15
4.3 CLEANING OPTICS ................................................................................................................................15
4.4 TROUBLE SHOOTING.............................................................................................................................16
5. APPENDIX.........................................................................................................................................17
LASER SAFETY........................................................................................................................................21
SECTION I: INTRODUCTION TO..........................................................................................................22
SECTION II: TYPES OF SAFETY INTERLOCKS...............................................................................23
DECLARATION OF CONFORMITY .....................................................................................................26

KE-28XX InfoTag®Marker Copyright © 2016 InfoSight Corporation All Rights Reserved Page 1
1. SYSTEM SETUP
1.1 PRINTER SETUP
The KE28XX requires either:
220VAC 5A (Fused at 5 amps) 50/60Hz or
110VAC 10A (Fused at 10 amps) 50/60Hz
Refer to the Legend Plate on your marker.
Caution High Leakage Current: this device must be fitted with a Type B (twist lock) plug.
Use a properly approved IEC 309 plug for 220V power connection. Unit must be connected
to a branch circuit with a dedicated circuit breaker. Warning: 220V models both sides of the
incoming line voltage are fused.
Recommended AC plug type is:
Woodhead 1447 for 110V
IEC 309 for 220V
Note: Complete AC Disconnect is accomplished at the power plug
UK Deviation:
Cores in this main are colored in accordance with the following code:
Green and yellow: earth, Blue: neutral, brown: live.
The KE28XX should be positioned at least a foot away from the wall to allow room for the
ventilation. The three inch ventilation hose should be attached to the top of the marker to
remove residue from the marking area and should be discharged outside the pulpit area.
This will require an external exhaust fan.
The KE28XX LASER MARKER should be placed in a temperature controlled environment.
This marker, though designed for steel mill use, should be treated as any typical computer
system and printer.
Legend Plate

Page 2 Copyright © 2016 InfoSight Corporation All Rights Reserved KE-28XX InfoTag®Marker
1.2 AFFIXING THE KE28XX TO SOLID PLATFORM
Important:
The KE28xx support legs are designed to be anchored to the floor or concrete
to prevent the unit from tipping over in the unlikely event of a force exerted
upon the side surfaces of the units. Incorporated in the design of the support
legs are four (4) 33/64" thru-holes. These four (4) thru-holes are to have
placed through them, suitable anchor bolts to affix the KE28XX to the floor.
The type of anchor bolt used will depend upon the base material the KE28XX
will be set upon. Recommended anchor bolts are listed below.
Note:Anchor bolts used are to withstand a tension weight of at least 50
lbs. each.
Manufacture Description Floor type
------------------------------------------------------------------------------------------
Hilti KB II 38-3 3/8" Kwik bolt Concrete
Cast in place 3/8-16UNC 2" Concrete
3/8" x 2" Lag bolts Wood
3/8" x 4 " J bolts Steel Grating

KE-28XX InfoTag®Marker Copyright © 2016 InfoSight Corporation All Rights Reserved Page 3
1.3 TERMINAL SETUP
The Terminal is attached to the top DB-25 connector on the back side of the marker using
the supplied cable. The terminal facilitates the interface between the user and the marker. A
terminal or terminal program is required. The Terminal settings should be:
Emulation -- VT220
Keyboard Type -- 108
Main Port Speed -- 19200
Data Width -- 8
Parity -- None
Stop -- 1
Transmit Flow Control -- X-ON / X-OFF
Receive Flow Control -- X-ON / X-OFF
Host Interface -- RS232
If a terminal was supplied with the KE28XX to enter or exit the terminal settings screen
press SHIFT-F3. To check correct settings on the terminal, power on the marker by
switching the key switch located on front panel to the ON position. The software contained
within the marker should present the user with a bordered windowed screen.
1.4 COMMON PRINTER SETTINGS FOR VARIOUS MODELS
Printer Model
KE2800
KE2856/54
KE2852/53
Heat: (4:1)
10
50
150
Stepper Resolution
0.00505
0.00505
0.0103
Stepper Delay
150
450
600
Mirror Resolution
0.006
0.006
0.012627
Reverse Take-up
1
1
1
Laser Off Tickle
7
7
7
Tear Off Location
7
7/ Application
Dependent
7 / Application
Dependent
Cache
ON[X]
ON[X]
ON[X]
High Definition
ON[X]
ON[X]
OFF [ ]
Number of Lasers
1
2
2
Pixels Per Row
560
560
280
Galvo Divider
5
5
10

Page 4 Copyright © 2016 InfoSight Corporation All Rights Reserved KE-28XX InfoTag®Marker
1.5 POWER ON
1. Insert the key into the key switch slot.
2. Turn the key to the “1” position.
3. Pull out the Red Emergency Stop (E-Stop) Jumbo Pushbutton
4. Press the Amber lighted Reset/Tag Feed Pushbutton.
1.6 LOADING NEW TAGS
1. Mount the new roll atop the circular platform to the left of the marker.
2. Feed by hand the tip of the tag stock, pushing it into first roller until it stops “the drive
roller”.
3. Once reaching the drive roller press the Amber Lighted Tag Feed Pushbutton.
Reminder - The marker is not ready for use until the laser E-stop is RESET by pressing
the amber reset button .

KE-28XX InfoTag®Marker Copyright © 2016 InfoSight Corporation All Rights Reserved Page 5
1.6.1 Tag Break Off
After pressing the orange tag feed button the tag should align itself to the breakoff location
on the right side of the printer. After each print cycle the printer automatically aligns the tag
stock to the breakoff location. The tag that has exited can then be bent front to back twice
and the tag will break off and release itself. Each tag should be broken off individually so
that there are no more then a single tag at the exit at one time. Allowing more than one
printed tags to hang at the exit can cause several situations to happen that can damage the
printer and cause the printer to malfunction.
Each TAG as Printed should be broken off.

Page 6 Copyright © 2016 InfoSight Corporation All Rights Reserved KE-28XX InfoTag®Marker
2. OPERATIONS
2.1 PRINTING A TAG
Note - The following assumes the KE28XX marker has already been set up with your particular
tag layout.
The KE28XX marker can be used as a stand-alone marker or data can be downloaded via
RS232 data communications. For demonstration purposes, we will assume the marker will be
used as a stand alone marker.
Tags can only be printed from two screens on the terminal; the MAIN SCREEN, and the
OPERATOR SCREEN. At each of these screens, simply press the PRINT button located on
the front panel. DO NOT hold the PRINT button in for more than 3 seconds. The Laser Marker
is set up to perform a “TEST PRINT” when the PRINT button is depressed for more than 3
seconds.
2.1.1 Printing From The Operator Screen
The OPERATOR SCREEN is a supervisor selectable screen. When the laser marker is
powered ON, the OPERATOR SCREEN is the screen that is displayed if this option is turned on
by the supervisor.
The OPERATOR SCREEN can be customized with up to ten prompted fields. At each prompt
the operator types in the required data and presses ENTER. If the supervisor has set up
verification parameters, the data will be checked for accuracy before the next field can be
entered. If the information is entered incorrectly (i.e. an alpha character where a numeric is
supposed to be), an error message appears and prompts the operator to re-enter the
information in the correct format. Once the correct data has been entered, the OPERATOR
should press the PRINT button on the front control panel. A typical 6” tag will take about 20 -30
seconds, depending on model, to print. After printing the tag is fed through the presentation
slot for easy break off at the nick of the tag.
2.1.2 Printing From The Main Screen
The MAIN SCREEN is the factory default screen. The MAIN SCREEN contains the pull down
menus available for tag editing and laser marker setup. This screen is displayed when the
marker is powered ON if the OPERATOR SCREEN is disabled.
The MAIN SCREEN can be customized with the same prompted fields as the OPERATOR
SCREEN. At each prompt, type the desired information and press ENTER. Once the correct
information has been entered, press the PRINT button on the front control panel to print a tag.
Printing can also be accomplished by using the pull-down menu (top of screen) MARKER.
Simply choose PRINT from the MARKER pull-down menu to print the desired information typed.
The printed tag will be presented to the operator through the presentation slot for easy break off
at the nick of the tag.

KE-28XX InfoTag®Marker Copyright © 2016 InfoSight Corporation All Rights Reserved Page 7
2.2 KE28XX SCREENS
The KE28XX is equipped for easy supervisor flexibility and contains many pull down screens
and menus. To move quickly and easily through these screens, the software has been
designed with quick keys. The quick key letters are highlighted on each screen. To use the
quick keys, simply press CTRL-(highlighted letter). You can also use the arrow keypad or the
TAB key to move within each window.
2.2.1 Main Screen
╔══════════════[ InfoSight Corporation - InfoTag Marking System ]══════════════╗
║ ║
║ General Tag Marker Setup Monitor ║
╠══════════════════════════════════════════════════════════════════════════════╣
║ SYSTEM ║
║ ╔══════════════ Current Message ═════════════╗ ╔══════════ Status ══════════╗║
║ ║ ║ ║ ║║
║ ║ Assignment : 2 ║ ║ MODE : ?? ║║
║ ║ ║ ║ STATE : IDLE ║║
║ ║ ║ ║ ║║
║ ║ ║ ║ TAGS LEFT : 267 ║║
║ ║ ║ ║ ║║
║ ║ ║ ║ QTY REQ. : [6 ] ║║
║ ║ ║ ║ COUNT : 6 ║║
║ ║ ║ ║ ║║
║ ║ ║ ║ START NO: [496749 ] ║║
║ ║ ║ ║ S/N Lower : [1 ] ║║
║ ║ ║ ║ S/N Upper : [999999 ] ║║
║ ╚════════════════════════════════════════════╝ ╚════════════════════════════╝║
║ ║
║ ╔═══════════════╗ ╔══════════╗ ║
║ ║ Print Batch ║ ║ Pause ║ ║
║ ╚═══════════════╝ ╚══════════╝ ║
╚══════════════════════════════════════════════════════════════════════════════╝
The MAIN SCREEN is the factory default screen. When the laser marker is powered ON, this
screen will appear. Only certain menus and fields are accessible unless the supervisor
password has been entered. The MAIN SCREEN has 5 pull-down menus available at the top
of the screen; GENERAL, TAG, MARKER, SETUP, MONITOR. The following is a brief
description of each menu and what they contain:
1. GENERAL -
a. ABOUT - About the KE28XX Marker.
b. SUPERVISOR - Allows password access to EDIT SCREENS.
c. OPERATOR - To return to OPERATOR SCREEN.
d. REDISPLAY - Redisplays the screen should the screen become corrupted.
2. TAG -
a. ASSIGN - Change assignment buffers (10 tag layouts available)
b. EDIT - Allows you to edit the tag layout and OPERATOR SCREEN.
3. MARKER –
a. ON-LINE - Brings the marker on-line/off-line from the screen.
b. PRINT - Allows user to print from the screen.
c. FEED A TAG - Allows user to feed tags from screen.
4. SET UP -
a. MARKER - Set: tag width/length, tags per roll, heat of laser, half laser active.
b. COMM PORT - Set: baud rate, bits, stop, parity.
c. HOST - Set: protocol, offsets and lengths.

Page 8 Copyright © 2016 InfoSight Corporation All Rights Reserved KE-28XX InfoTag®Marker
d. UNITS - English or metric
e. SUPER PASSWORD - Allows user to set the supervisor password.
f. EDIT PASSWORD - Allows to edit supervisor password.
g. USER TABLE - Allows set up of shift, day, month, or year, audit tracking.
h. TIME/DATE - Sets time and date.
i. DEFAULTS - DO NOT USE. Sets system defaults.
5. MONITOR –For InfoSight field service use only!
2.2.2 Edit Screen
The EDIT SCREEN allows the Supervisor to change the tag layout (size and dimensions) of up
to 20 available fields. See DESIGNING TAGS for details of designing tag layouts. The EDIT
SCREEN is accessed via the Main Screen, Tag Menu, Edit Option.
╔══════════════[ InfoSight Corporation - InfoTag Marking System ]══════════════╗
║╔══════════════════════════════[ Tag Editor ]══════════════════════════════╗ ║
║║ Buffer Number : [2 ] ║ ║
╠║ Text X Y Height Width Pitch Rot ║ ═╣
║║ 1 :[%1O ] [0.80 ][0.55 ][2.200 ][1.50 ][2.00 ][0 ] ║ ║
║║ 2 :[%2O(1,1) ] [0.00 ][0.00 ][0.375 ][0.00 ][0.00 ][0 ] ║ ╗║
║║ 3 :[%2O(2,1) ] [0.00 ][0.00 ][0.375 ][0.00 ][0.00 ][0 ] ║ ║║
║║ 4 :[45%3S ] [0.00 ][0.00 ][0.375 ][0.00 ][0.00 ][0 ] ║ ║║
║║ 5 :[ ] [0.00 ][0.00 ][0.375 ][0.00 ][0.00 ][0 ] ║ ║║
║║ 6 :[ ] [0.00 ][0.00 ][0.375 ][0.00 ][0.00 ][0 ] ║ ║║
║║ 7 :[ ] [0.00 ][0.00 ][0.375 ][0.00 ][0.00 ][0 ] ║ ║║
║║ 8 :[ ] [0.00 ][0.00 ][0.375 ][0.00 ][0.00 ][0 ] ║ ║║
║║ ║ ║║
║║ START NO: [496749 ] Qty Required :[6 ] Prefix :[ ] ║ ║║
║║ Lower : [1 ] Count :[6 ] Suffix :[ ] ║ ║║
║║ Upper : [999999 ] ║ ║║
║║ Increment : [-1 ] Slash in Zero :[ ] ║ ║║
║║ ║ ║║
║║╔══════════╗╔══════════╗╔══════════╗╔══════════╗╔══════════╗╔════════════╗║ ╝║
║║║ Ok ║║ Cancel ║║ Barcodes ║║ Logos ║║OperSetup ║║ FlagHelp ║║ ║
║║╚══════════╝╚══════════╝╚══════════╝╚══════════╝╚══════════╝╚════════════╝║ ║
║╚══════════════════════════════════════════════════════════════════════════╝ ║
║ ║
╚══════════════════════════════════════════════════════════════════════════════╝

KE-28XX InfoTag®Marker Copyright © 2016 InfoSight Corporation All Rights Reserved Page 9
Example 2.2.2-1
Field
Text
Special Code Description
1
%1O
Denotes - Print the information from line 1 of the OPERATOR
SCREEN at the given dimensions in the X and Y locations and the
specified height and width.
2
%2O(1,1)
Denotes - Start at the 1st character of line 2 from the OPERATOR
SCREEN, and include only 1 character at the given dimensions (X, Y,
Height, Width).
3
%2O(2,1)
Denotes - Start at the 2nd character and include only 1 character from
line 2 of the OPERATOR SCREEN.
4
45%3S
Denotes - Print 4 5 then a 3 digit serialized number starting at the
given S/N value prompt.
Note –Be careful to note the difference between “O” and “0” on the screens. The flags in the
example above (%1O) are the letter “O”, referring to the Operator.
Note - You must go back to the MAIN SCREEN to print a tag with the new settings.

Page 10 Copyright © 2016 InfoSight Corporation All Rights Reserved KE-28XX InfoTag®Marker
The bottom of the EDIT SCREEN has 5 prompts; OK, CANCEL, BARCODE, LOGO,
OPERATOR SETUP. These keys perform the commands listed:
1) OK - Returns to the MAIN SCREEN and saves the new layout information.
2) CANCEL - Returns to MAIN SCREEN without saving the new layout information.
3) BARCODE Setup Screen - Allows the customization of bar codes.
4.) LOGO Setup Screen - Allows the customization of LOGOS
5) OPERATOR SETUP - Customizes and verifies prompts for the OPERATOR
SCREEN.
2.2.3 BARCODE SETUP SCREEN
The barcode setup screen allows the user to define the barcode symbology and appearance of
the barcode. The example below denotes - Print a Code 128 (type b,c) barcode linking the
input data from fields 2 and 3 from the EDIT SCREEN with a scale of 2 (number of scan lines)
at the given X, Y locations and the given height rotated at 90 degrees.
╔══════════════[ InfoSight Corporation - InfoTag Marking System ]══════════════╗
║╔══════════════════════════════[ Tag Editor ]══════════════════════════════╗ ║
║║ ╔═══════════════════════[ Tag Barcode Editor ]═══════════════════════╗ ║ ║
╠║ ║ ║ ║ ═╣
║║ 1║ Symbology Scale X Y Height Link Rot ║ ║ ║
║║ 2║ 1 : [ 128bc ]v [2 ] [8.00 ][0.00 ][0.400 ] [23 ] [90 ] ║ ║ ╗║
║║ 3║ 2 : [ None ] [3 ] [0.00 ][0.00 ][0.375 ] [1 ] [0 ] ║ ║ ║║
║║ 4║ 3 : [ None ] [3 ] [0.00 ][0.00 ][0.375 ] [1 ] [0 ] ║ ║ ║║
║║ 5║ 4 : [ None ] [3 ] [0.00 ][0.00 ][0.375 ] [1 ] [0 ] ║ ║ ║║
║║ 6║ 5 : [ None ] [3 ] [0.00 ][0.00 ][0.375 ] [1 ] [0 ] ║ ║ ║║
║║ 7║ 6 : [ None ] [3 ] [0.00 ][0.00 ][0.375 ] [1 ] [0 ] ║ ║ ║║
║║ 8║ 7 : [ None ] [3 ] [0.00 ][0.00 ][0.375 ] [1 ] [0 ] ║ ║ ║║
║║ ║ 8 : [ None ] [3 ] [0.00 ][0.00 ][0.375 ] [1 ] [0 ] ║ ║ ║║
║║ ║ ║ ║ ║║
║║ ║ ╔══════════╗ ╔══════════╗ ║ ║ ║║
║║ ║ ║ Ok ║ ║ Cancel ║ ║ ║ ║║
║║ ║ ╚══════════╝ ╚══════════╝ ║ ║ ║║
║║ ╚════════════════════════════════════════════════════════════════════╝ ║ ║║
║║╔═ ╗║ ╝║
║║║ Ok ║║ Cancel ║║ Barcodes ║║ Logos ║║OperSetup ║║ FlagHelp ║║ ║
║║╚══════════╝╚══════════╝╚══════════╝╚══════════╝╚══════════╝╚════════════╝║ ║
║╚══════════════════════════════════════════════════════════════════════════╝ ║
║ ║
╚══════════════════════════════════════════════════════════════════════════════╝

KE-28XX InfoTag®Marker Copyright © 2016 InfoSight Corporation All Rights Reserved Page 11
2.2.4 LOGO SETUP SCREEN
The Logo Setup Screen allows the user to setup logos to be printed.
╔══════════════[ InfoSight Corporation - InfoTag Marking System ]══════════════╗
║╔══════════════════════════════[ Tag Editor ]══════════════════════════════╗ ║
║║ ╔═════════════════════════[ Tag Logo Editor ]════════════════════════╗ ║ ║
╠║ ║ ║ ║ ═╣
║║ 1║ Logo X Y Height Width Rot ║ ║ ║
║║ 2║ 1 : [None ]v [0.00 ][0.00 ][1.000 ] [1.00] [0 ] ║ ║ ╗║
║║ 3║ 2 : [None ] [0.00 ][0.00 ][1.000 ] [1.00] [0 ] ║ ║ ║║
║║ 4║ 3 : [None ] [0.00 ][0.00 ][1.000 ] [1.00] [0 ] ║ ║ ║║
║║ 5║ 4 : [None ] [0.00 ][0.00 ][1.000 ] [1.00] [0 ] ║ ║ ║║
║║ 6║ 5 : [None ] [0.00 ][0.00 ][1.000 ] [1.00] [0 ] ║ ║ ║║
║║ 7║ 6 : [None ] [0.00 ][0.00 ][1.000 ] [1.00] [0 ] ║ ║ ║║
║║ 8║ 7 : [None ] [0.00 ][0.00 ][1.000 ] [1.00] [0 ] ║ ║ ║║
║║ ║ 8 : [None ] [0.00 ][0.00 ][1.000 ] [1.00] [0 ] ║ ║ ║║
║║ ║ ║ ║ ║║
║║ ║ ╔══════════╗ ╔══════════╗ ║ ║ ║║
║║ ║ ║ Ok ║ ║ Cancel ║ ║ ║ ║║
║║ ║ ╚══════════╝ ╚══════════╝ ║ ║ ║║
║║ ╚════════════════════════════════════════════════════════════════════╝ ║ ║║
║║╔═ ╗║ ╝║
║║║ Ok ║║ Cancel ║║ Barcodes ║║ Logos ║║OperSetup ║║ FlagHelp ║║ ║
║║╚══════════╝╚══════════╝╚══════════╝╚══════════╝╚══════════╝╚════════════╝║ ║
║╚══════════════════════════════════════════════════════════════════════════╝ ║
║ ║
╚══════════════════════════════════════════════════════════════════════════════╝
2.2.5 OPERATOR SETUP SCREEN
The OPERATOR SCREEN is designed for the normal manual use of the marker. To provide
ease of use, the OPERATOR SCREEN has 8 supervisor selectable prompts on the screen. At
each prompt, the operator types in the required data in the correct format and presses RETURN
or ENTER to enter the data.
To move from the OPERATOR SCREEN to the MAIN SCREEN, press CTRL-X, this step
requires the supervisor password to enter the MAIN SCREEN.
The supervisor can design the look and prompts available on the Operator Screen. The
example below is the Operator Setup Screen (accessed via the Edit Screen, OperSetup
Option).

Page 12 Copyright © 2016 InfoSight Corporation All Rights Reserved KE-28XX InfoTag®Marker
╔══════════════[ InfoSight Corporation - InfoTag Marking System ]══════════════╗
║╔══════════════════════════════[ Tag Editor ]══════════════════════════════╗ ║
║║ ╔══════════════════════[ Operator Setup Editor ]═════════════════════╗ ║ ║
╠║ ║ ║ ║ ═╣
║║ 1║ Active Prompt Verify Auto Clear ║ ║ ║
║║ 2║ 1 : [X] [HEAT # : ] [####### ] [X] ║ ║ ╗║
║║ 3║ 2 : [X] [SEQ NUM: ] [## ] [X] ║ ║ ║║
║║ 4║ 3 : [ ] [ ] [ ] [ ] ║ ║ ║║
║║ 5║ 4 : [ ] [ ] [ ] [ ] ║ ║ ║║
║║ 6║ 5 : [ ] [ ] [ ] [ ] ║ ║ ║║
║║ 7║ 6 : [ ] [ ] [ ] [ ] ║ ║ ║║
║║ 8║ 7 : [ ] [ ] [ ] [ ] ║ ║ ║║
║║ ║ 8 : [ ] [ ] [ ] [ ] ║ ║ ║║
║║ ║ ║ ║ ║║
║║ ║ Qty Req [X] [START NO: ][X] Lower [ ] Upper [ ] ║ ║ ║║
║║ ║ ║ ║ ║║
║║ ║ ╔══════════╗ ╔══════════╗ ╔══════════╗ ║ ║ ║║
║║ ║ ║ Ok ║ ║ DEFAULT ║ ║ Cancel ║ ║ ║ ║║
║║ ║ ╚══════════╝ ╚══════════╝ ╚══════════╝ ║ ║ ╝║
║║║ ╚════════════════════════════════════════════════════════════════════╝ ║ ║
║║╚═ ║ ║
║╚══════════════════════════════════════════════════════════════════════════╝ ║
║ ║
╚══════════════════════════════════════════════════════════════════════════════╝
There are 8 available prompt fields. The prompts in this example are explained below.
The first line will print HEAT # : on the OPERATOR SCREEN and limit the operator to entering
only 4 numbers.
The second line will print SEQ NUM: on the OPERATOR SCREEN and limit the operator to
entering only 2 numbers.
Both will auto clear once the operator starts to type.
The following describes each heading:
ACTIVE - Toggle field (RETURN). Makes prompt show up on OPERATOR SCREEN
PROMPT - Up to a 10 character messages for each prompt.
VERIFY - Verifies information typed is accurate using special characters:
$ - Alpha Upper Case Characters (A,B,C,D...)
# - Numeric Digits (1,2,3,4...)
? - Any Character (A,B,C,1,2,3,?,/,%...)
* - Any Character for any length up to the next instruction.
[ ] -The Characters in the brackets are the only valid characters, exactly as typed.
AUTO CLEAR - Clears the data field when the operator starts to type in the data.
Also causes a clear after each cycle print completed
At the bottom of the OPERATOR SETUP SCREEN has 3 prompts; OK, CANCEL, DEFAULTS.
The following explains each:
OK - Returns to the EDIT SCREEN and saves the operator input layouts.
CANCEL - Returns to the EDIT SCREEN without saving the operator layouts.
DEFAULTS - Restores the operator setups to the defaults.

KE-28XX InfoTag®Marker Copyright © 2016 InfoSight Corporation All Rights Reserved Page 13
3. DESIGNING TAGS
3.1 TAG DESIGN
Tags are designed using the Tag Edit screen. As in above screen it can be seen that up to 20
sets of characters along with up to eight different barcodes along with eight logos. The
characters, barcodes, and logos can be sized and rotated independently. This can all be done
with the tag edit screen. Character sizes range from 0.1 inches to 2.5 inches per character.
3.2 TAG LAYOUT SOFTWARE
Tags may also be designed using the tag layout software available free from InfoSight. Contact
the factory to obtain this software. The software is only available in a windows environment.
InfoSight phone number: 1.888.642.3600 (outside the USA call +1.740.642.3600)
3.3 BARCODE EXAMPLES
Barcode types:
Code 128
Interleaved 2 of 5
Code 39
Numbra
Code 39N
Code 391
Data Matrix
╔══════════════[ InfoSight Corporation - InfoTag Marking System ]══════════════╗
║╔══════════════════════════════[ Tag Editor ]══════════════════════════════╗ ║
║║ ╔═══════════════════════[ Tag Barcode Editor ]═══════════════════════╗ ║ ║
╠║ ║ ║ ║ ═╣
║║ 1║ Symbology Scale X Y Height Link Rot ║ ║ ║
║║ 2║ 1 : [ 128bc ]v [2 ] [8.00 ][0.00 ][0.400 ] [23 ] [90 ] ║ ║ ╗║
║║ 3║ 2 : [ None ] [3 ] [0.00 ][0.00 ][0.375 ] [1 ] [0 ] ║ ║ ║║
║║ 4║ 3 : [ None ] [3 ] [0.00 ][0.00 ][0.375 ] [1 ] [0 ] ║ ║ ║║
║║ 5║ 4 : [ None ] [3 ] [0.00 ][0.00 ][0.375 ] [1 ] [0 ] ║ ║ ║║
║║ 6║ 5 : [ None ] [3 ] [0.00 ][0.00 ][0.375 ] [1 ] [0 ] ║ ║ ║║
║║ 7║ 6 : [ None ] [3 ] [0.00 ][0.00 ][0.375 ] [1 ] [0 ] ║ ║ ║║
║║ 8║ 7 : [ None ] [3 ] [0.00 ][0.00 ][0.375 ] [1 ] [0 ] ║ ║ ║║
║║ ║ 8 : [ None ] [3 ] [0.00 ][0.00 ][0.375 ] [1 ] [0 ] ║ ║ ║║
║║ ║ ║ ║ ║║
║║ ║ ╔══════════╗ ╔══════════╗ ║ ║ ║║
║║ ║ ║ Ok ║ ║ Cancel ║ ║ ║ ║║
║║ ║ ╚══════════╝ ╚══════════╝ ║ ║ ║║
║║ ╚════════════════════════════════════════════════════════════════════╝ ║ ║║
║║╔═ ╗║ ╝║
║║║ Ok ║║ Cancel ║║ Barcodes ║║ Logos ║║OperSetup ║║ FlagHelp ║║ ║
║║╚══════════╝╚══════════╝╚══════════╝╚══════════╝╚══════════╝╚════════════╝║ ║
║╚══════════════════════════════════════════════════════════════════════════╝ ║
║ ║
╚══════════════════════════════════════════════════════════════════════════════╝
The above example denotes - Print a Code 128 (type b,c) barcode linking the input data from
fields 2 and 3 from the EDIT SCREEN with a scale of 2 (number of scan lines) at the given X, Y
locations and the given height rotated at 90 degrees.

Page 14 Copyright © 2016 InfoSight Corporation All Rights Reserved KE-28XX InfoTag®Marker
3.4 SERIAL NUMBERING
Serial numbering of tags is accomplished in the Edit screen filling out the appropriate data
fields. These data fields are self-explanatory.
3.5 LOGO AND IMAGE DOWNLOAD
Logos may be downloaded via the host connected using a separate utility available from
InfoSight.
Image downloads are explained in the Extended Protocol Manual.
This manual suits for next models
3
Table of contents
Other InfoSight Label Maker manuals


Popular Label Maker manuals by other brands

Rifu Packaging Machinery
Rifu Packaging Machinery RF-230 instruction manual

Citizen
Citizen CL-S321 Series Service manual

Tally Dascom
Tally Dascom DL3100 user manual

Rockwell Automation
Rockwell Automation Allen-Bradley ClearMark 1492-PRINT110 user manual

Dymo
Dymo LabelPoint 150 quick guide

Pinnacle Technology
Pinnacle Technology PP4X Operation manual


