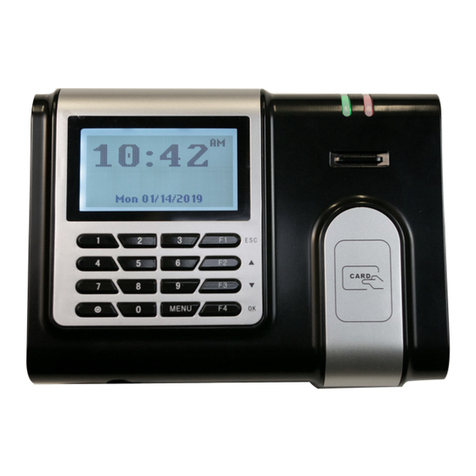
InfoTronics IDpunch 7 User manual

IDpunch 7 Finger Reader User Guide
for
Attendance on Demand
(Latest update: http://www.attendanceondemand.com/IDpunch7_fingerreader_userguide.pdf )

© InfoTronics, Inc. 2011
All Rights Reserved
Attendance on Demand is a registered trademark of Attendance on Demand, Inc.
All other company and product names are registered trademarks or trademarks of their respective holders.
Information in this document is subject to change without notice.

©2011, Attendance on Demand®, Inc. Information in this document is subject to change without notice.
3
Document Revision History
Date
Notes
10/27/11
The following information is updated:
The clock menu structure. See Appendix A: IDpunch 7 Finger Reader Menu
Structure on page 18.
Employee Menu is updated. See Appendix D: Employee Menu on page 32.

©2011, Attendance on Demand®, Inc. Information in this document is subject to change without notice.
4
Introduction...............................................................................................................................6
IDpunch 7 Finger Reader Features......................................................................................................... 6
Meet the IDpunch 7 Finger Reader ........................................................................................................ 7
Clock Face ....................................................................................................................................... 7
Clock Bottom................................................................................................................................... 8
Maintenance of the IDpunch 7 Finger Reader........................................................................................ 8
IDpunch 7 Finger Reader Lifecycle..........................................................................................9
Customer Steps....................................................................................................................................... 9
If using card reader … ..................................................................................................................... 9
If using a biometric reader … ........................................................................................................ 10
Using the IDpunch 7 Finger Reader.......................................................................................11
QuickStart Guide for Using IDpunch 7 Finger Reader ........................................................................ 11
Working with the Biometric Reader.......................................................................................12
Understanding Biometric Technology and Enrollment........................................................................ 12
Enrolling Employees ............................................................................................................................ 13
Punching In or Out ............................................................................................................................... 14
Working with Proximity Badges.............................................................................................15
Understanding Proximity Technology ................................................................................................. 15
Punching In or Out ............................................................................................................................... 15
Preparing Badges for Use..................................................................................................................... 15
Registering Badges in the System.................................................................................................. 15
Issuing Badges to Employees ........................................................................................................ 16
Printing Badge Labels.................................................................................................................... 16
Changing Badge Assignments.............................................................................................................. 16
When an Employee Leaves Work.................................................................................................. 16
When an Employee Loses a Badge................................................................................................ 17
When an Employee Damages a Badge Label .................................Error! Bookmark not defined.
Appendix A: IDpunch 7 Finger Reader Menu Structure .......................................................18
Appendix B: IDpunch 7 Finger Reader Station Properties in Attendance on Demand ......23
Attendance on Demand Professional Edition 1.0................................................................................. 23
Basic Tab ....................................................................................................................................... 23
Recent Activity Tab ....................................................................................................................... 24
Attendance on Demand Professional Edition 1.1................................................................................. 25
Station Activities............................................................................................................................ 27
Appendix C: Supervisor Menu ...............................................................................................28
Add Punch ............................................................................................................................................ 29
Credit Hours ......................................................................................................................................... 29
Credit Dollars ....................................................................................................................................... 30

©2011, Attendance on Demand®, Inc. Information in this document is subject to change without notice.
5
Add Schedule ....................................................................................................................................... 30
Lift Restriction ..................................................................................................................................... 30
Lift Badge Restriction .......................................................................................................................... 31
Appendix D: Employee Menu.................................................................................................32
Employee Review................................................................................................................................. 32
Enter Tips ............................................................................................................................................. 32
Simple Workgroup Entry ..................................................................................................................... 32
Callback Transaction............................................................................................................................ 33
Lift Next Restriction............................................................................................................................. 33
Lift Next Restriction for Employee...................................................................................................... 33
Appendix E: Printing Badge Labels in Attendance on Demand ..........................................36
Configuring Badge Label Printing ....................................................................................................... 36
Printing Badge Labels Using a Template............................................................................................. 38
Appendix F: Issuing a Badge to a Single Employee in Attendance on Demand ................39

©2011, Attendance on Demand®, Inc. Information in this document is subject to change without notice.
6
Introduction
The IDpunch 7 Finger Reader is a simple, low-cost way to gather employee In and Out punches and
perform many comprehensive functions using a badge, PIN entry or finger. This manual covers daily use
of IDpunch 7 Finger Readers, as well as maintenance.
IDpunch 7 Finger Reader Features
The IDpunch 7 Finger Reader has a capacity of approximately 250 employees. Additionally, the IDpunch
7 Finger Reader stores 5000 transactions. The IDpunch 7 Finger Reader provides the following key
features:
Two reader modules. Both the biometric reader and the proximity card reader are supported.
Ease of use. Once the IDpunch 7 Finger Reader is installed, plugged into the power outlet and
Ethernet port, and configured, it can communicate with the hosted system immediately.
Comprehensive function key operations. Employees can review worked hours, check benefits, enter
tips, and so on. See Appendix A: IDpunch 7 Finger Reader Menu Structure on page 18 for details.
The supervisor menu is used to perform transactions on behalf of employees. See Appendix C:
Supervisor Menu on page 28 for details.
Employee punch time restriction. Using punch restrictions prevents employees from punching In or
Out on the IDpunch 7 Finger Reader at unauthorized times.
Highly secured. IDpunch 7 Finger Reader authority levels help you to control the access to MENU
items or function keys.
Automatic central time synchronization and daylight savings adjustments.

©2011, Attendance on Demand®, Inc. Information in this document is subject to change without notice.
7
Meet the IDpunch 7 Finger Reader
The IDpunch 7 Finger Reader is a time recorder with streamlined technology that is easy to use and easy
to configure. Let’s review the basic parts of the time recorder.
Clock Face
Display. It displays time, information, and instructions for the user.
Finger reader. Place the finger on the platen to punch.
ESC. It is used to indicate lack of acceptance, halt a process, or go back a menu.
Up & Down arrows. They are used to browse configuration menus in the time recorder, switch
between Yes and No in the menus, and scroll down to view long messages on the screen.
OK. It is used to indicate acceptance or move processes forward.
F1 to F4 function keys. They are used to perform comprehensive employee functions or supervisor
functions.
MENU. Press MENU to access configuration options or navigate among options (OK, Cancel, and an
edit field).
Synchronization button. It is used to perform full synchronization operation and other operations,
such as navigate among options (OK, Cancel, and an edit field), or erase numbers entered using the
keypad.

©2011, Attendance on Demand®, Inc. Information in this document is subject to change without notice.
8
Clock Bottom
Power port. Plug in the 5V power supply.
Ethernet port. Plug in the Ethernet cord.
RS232, half-duplex RS485 port. It is not used.
Maintenance of the IDpunch 7 Finger Reader
The IDpunch 7 Finger Reader works well in any temperature-controlled environment. The keypad and
LCD screen should maintain their new appearance with proper use. We recommend using a small amount
of hexane or 90% alcohol on a piece of cotton to clean the LCD or keypad, if necessary.

©2011, Attendance on Demand®, Inc. Information in this document is subject to change without notice.
9
IDpunch 7 Finger Reader Lifecycle
Several steps are required to use the IDpunch 7 Finger Reader. Understanding the steps helps you to have
a great experience with the clock.
Customer Steps
You must complete some steps before supervisors and employees can use the clock. Several videos and
this end user manual are provided to assist you.
If using card reader …

©2011, Attendance on Demand®, Inc. Information in this document is subject to change without notice.
10
If using a biometric reader …
Customer enrolls finger at the clock
Press MENU
Enter the administrator PIN if the menu is locked
Select Employee Enrollment in the Enrollment Menu
Place the finger firmly on the platen twice.
Press the synchronization button to synchronize the clock and the hosted system
Supervisors/Employees perform their own functions:
Employee punches In/Out
Employee uses Function Keys
Supervisor uses Function Keys

©2011, Attendance on Demand®, Inc. Information in this document is subject to change without notice.
11
Using the IDpunch 7 Finger Reader
A few procedures are required for customers to begin using the IDpunch 7 Finger Reader. The QuickStart
Guide lists the overall procedure. The remaining sections describe the steps in detail. Become familiar
with these steps in order to guide customers in the installation and use of the IDpunch 7 Finger Reader.
QuickStart Guide for Using IDpunch 7 Finger Reader
To use IDpunch 7 Finger Readers in HTTP mode with the hosted system, a few steps are required. This
section gives an overview of the process.
1. Based on your reader type, you can:
Scan employee badges at the clock. See Registering Badges in the System on page 15.
Enroll employee fingers at the clock. See Enrolling Employees on page 13.
2. (Optional) Print the badge labels if necessary. See Printing Badge Labels on page 16.
3. (Optional) If the card reader is used, issue badges to employees. See Issuing Badges to Employees on
page 16.
4. Employees punch In and Out as usual. See Punching In or Out on page 15 to use badges to punch.
See Punching In or Out on page 14 to use fingers.
5. Supervisors and employees use their own function keys to perform transactions. For supervisor
function keys, see Appendix C: Supervisor Menu on page 28. For employee function keys, see
Appendix D: Employee Menu on page 32.
6. (Optional) If the card reader is used, learn what to do when badge events occur. See Changing Badge
Assignments on page 16.
7. (Optional) Administrators use menu commands for system management. See Appendix A: IDpunch 7
Finger Reader Menu Structure on page 18.
8. (Optional) See Recent Activity Tab on page 24 to check clock activities in Attendance on Demand
Professional Edition 1.0. See Station Activities on page 27 to check clock activities in Attendance on
Demand Professional Edition 1.1.
9. (Optional) Modify the IDpunch 7 Finger Reader station properties, such as modifying the
synchronization interval, or adding a user with the supervisor authority level in Attendance on
Demand Professional Edition 1.0 or Attendance on Demand Professional Edition 1.1. See Appendix
B: IDpunch 7 Finger Reader Station Properties in Attendance on Demand on page 23.

©2011, Attendance on Demand®, Inc. Information in this document is subject to change without notice.
12
Working with the Biometric Reader
Employees can use a finger to punch In/Out on the time clock. This section describes biometric
technology, how to enroll a finger correctly, and how to punch In/Out.
Understanding Biometric Technology and Enrollment
All fingers contain a number of unique physical characteristics called minutiae which include certain
visible aspects of fingerprints such as ridges, ridge endings, and bifurcation (forking) of ridges. Most of
the minutiae are found in the core point of fingerprints. A core point is the topmost point on the innermost
upward ridge line. The quality of finger image is relative to the number of minutiae points captured.
Please note: The IDpunch 7 Finger Reader does not store or read finger prints. It uses the physical
characteristics of the finger to create a unique template to store and compare when an employee punches.
To ensure a smooth finger enrollment process, consider the factors influencing finger enrollment and
follow the rules listed here.
Finger selection. Use index, middle or ring fingers with good core points. Avoid using thumb and
little fingers since they are awkward to consistently position on the sensor. Good core points are
found near the center of the finger on the fleshy pad.
Good core point Bad core point
Finger position. Always place the finger in the center of the sensor reader to ensure consistent finger
positioning. If the scanned minutiae remain consistent whenever an individual punches, the finger
image is successfully matched to the pre-existing template. Placing the finger far from the center of
the sensor reader increases the rejection rate.
Finger area. Maximize the surface area of the finger to capture the most minutiae.
Correct placement

©2011, Attendance on Demand®, Inc. Information in this document is subject to change without notice.
13
Avoid the following most common mistakes made during the initial phase of enrollment.
Incorrect placement
Finger rotation. Avoid or minimize finger rotation during enrollment and verification.
Finger condition. Avoid using a finger that is too wet or dry. Excessive or lacking moisture can
result in poor-quality finger images, characterized by smudged, faded or distorted areas on the finger.
Poor quality finger images
Finger Pressure. Apply moderate pressure when making contact with the sensor reader. If too much
pressure is applied, the ridges adhere to each other, which is similar to the wet finger image. On the
other hand, if too little pressure is applied, the resulting image is similar to the dry finger. A little
practice is needed for employees to get the feel of it.
Enrolling Employees
Before employees can be enrolled at a time recorder, those employees must have badge numbers and
belong to a clock group that is assigned to the time clock. Then employee finger enrollment can be
performed at the time clock. To enroll an employee, you can use the time clock configuration menu or set
up a function key for enrolling employees.
To enroll an employee using the time clock configuration menu:
1. Press MENU on the time clock.
2. Enter the administrator’s PIN to access the IDpunch 7 Finger Reader menu if the menu is locked. The
Enrollment Menu is highlighted.
3. Press OK. Employee Enrollment is highlighted.
4. Present the employee badge or enter the employee’s badge number.
5. Press OK. Follow the following instructions on the display to place or remove the finger on or from
the platen.
First, a notification message, such as “Preparing to enroll 1 of 1 finger(s)” is displayed.
Place the finger on the platen after the message “Place Your Finger Firmly” is displayed.
Remove the finger from the platen after the message “Remove your Finger” is displayed.
Place the finger on the platen again when the message “Place Your Finger” is displayed.

©2011, Attendance on Demand®, Inc. Information in this document is subject to change without notice.
14
It is important that the finger is placed on the platen in the same manner every time. See
Understanding Biometric Technology and Enrollment on page 12 to ensure enrollment is successful.
During the enrollment process, if the finger is not placed on the platen within 10-15 seconds after the
message “Place Your Finger Firmly” or “Place Your Finger” is displayed, the message “Operation
was Not Successful. Please Try Again Later” followed by “Enrollment Failed” is displayed.
6. Once the enrollment is successful, the message “Completed. Thank you!” is displayed. Otherwise, the
message “About to Try Again.” is displayed.
7. Depending on the configuration, enroll other fingers or other employees or press ESC to exit the
menu.
8. The finger can be tested immediately after the enrollment. Place enrolled finger on the platen. If the
finger is read successfully, the employee’s badge number and the message “Transaction Accepted” is
displayed on the screen. If the finger read is not successful, error message “Unable to Identify” is
displayed with the score number.
9. Once the enrollment is successful, the employee badge number is displayed with the score number on
the screen. The score reflects how accurately your hand is placed on the platen and should average
above 80.
To enroll employee use the designated function key:
1. Press the function key to access the Enrollment Menu. Enroll Employee is highlighted.
2. Press OK.
3. Follow the instructions on how to enroll an employee using the time clock configuration menu in
Enrolling Employees on page 13.
Punching In or Out
After employee fingers are enrolled in the system, they can punch.
1. (For Verify mode) Enter the employee badge number in this step or in step 3.
2. (For Verify mode or Identify mode) Place enrolled finger on the platen. It is important that the finger
is placed on the platen in the same manner every time.
3. (For Verify mode) Enter the employee badge number in this step or in step.
4. If the finger is read successfully, Employee name and “Transaction Accepted” are displayed on the
screen.
If the finger read is not successful, error messages are displayed, such as “Access Denied”.
Customized messages can be displayed for different situations, such as “Double Punch”, or “Not a
member of this unit”. Make sure the employee is enrolled using the correct badge.

©2011, Attendance on Demand®, Inc. Information in this document is subject to change without notice.
15
Working with Proximity Badges
The IDpunch 7 Finger Reader reads proximity badges to punch employees In and Out and perform
transactions. This section describes how to prepare and use badges with the IDpunch 7 Finger Reader.
Understanding Proximity Technology
The proximity technology used in IDpunch 7 Finger Readers is simple and effective. Proximity badges
store a small amount of information, a series of digits, using an encoding that the proximity reader can
scan and process. Instead of having to remember a PIN, employees simply wave their badges in front of
the proximity reader to punch.
Punching In or Out
After badges are assigned to employees, they can punch In/Out.
1. Wave a proximity badge 3¼ inches away from the reader (or closer) or type the employee’s badge
number at the clock.
2. If the badge is read successfully, no messages are displayed on the IDpunch 7 Finger Reader screen.
If the badge read is not successful, error messages are displayed, such as “Access Denied”.
Customized messages can be displayed for different situations, such as “Double Punch”, or “Not a
member of this unit”. Make sure the employee is enrolled using the correct badge.
Preparing Badges for Use
Before proximity badges are ready to use, some preparation is required.
Scan the badges at the clock to register them with the system. See Registering Badges in the System
on page 15.
Issue badge numbers to employees, print badge labels, and give badges to employees. See Issuing
Badges to Employees on page 16.
Registering Badges in the System
Badges must be registered in the system so employees can easily be assigned an appropriate badge
number. This operation is performed at the IDpunch 7 Finger Reader.
1. Press MENU on the IDpunch 7 Finger Reader. If needed, identify an administrator at the clock with a
PIN.
2. Use the arrow keys to navigate to Settings and press OK.
3. Use the arrow keys to navigate to Allocate Badges and press OK. The IDpunch 7 Finger Reader
displays Register RFID’s.
4. Pass each proximity badge over the sensor, one after the other, to register the badges.

©2011, Attendance on Demand®, Inc. Information in this document is subject to change without notice.
16
5. Press ESC to exit the menu. The clock performs a synchronization automatically to upload badges to
the system.
Issuing Badges to Employees
Before badges can be used they must be issued to employees (with or without labels). This procedure is
different depending on whether you are issuing badges to all employees (typical when a clock is first
being installed) or to just one employee (typical when a new employee is hired).
Issuing Badges to All Employees
Use the Comprehensive Employee Import or the Simple Employee Import to import employees with their
badge numbers in Attendance on Demand.
Issuing Badges to One Employee
Use Add New Employee Wizard to issue a badge to a new employee when he/she is added in Attendance
on Demand.
Printing Badge Labels
To print labels from Attendance on Demand, see Appendix E: Printing Badge Labels on page 36.
Changing Badge Assignments
Badge assignments must occasionally be changed when an employee leaves the company, no longer
punches, or loses or damages a badge.
When an Employee Leaves Work
If an employee leaves the company or no longer punches, ask the employee to return his or her badge. If
the badge is returned, a label can be reprinted and the badge number reused.

©2011, Attendance on Demand®, Inc. Information in this document is subject to change without notice.
17
When an employee leaves, it is a best practice to release the employee’s badge number in the employee
Personal Information page of the software by clicking Release next to the Badge field on the Basic tab.
When an Employee Loses a Badge
When an employee loses a badge, a new badge number must be assigned in the employee Personal
Information in Attendance on Demand. See Appendix F: Issuing a Badge to an Employee on page 39.
When a Badge Label Becomes Damaged
If a badge label becomes damaged, see Appendix E: Printing Badge Labels on page 36 on how to print a
badge label.

©2011, Attendance on Demand®, Inc. Information in this document is subject to change without notice.
18
Appendix A: IDpunch 7 Finger Reader Menu
Structure
This appendix describes the IDpunch 7 Finger Reader menu structure, menu items and operations.
Note: The Enrollment Menu is available only if the biometric reader is installed and Suprema is selected in the
Biometric Type menu.
Menu Key
o Audio
o Restrictions
o Polling
o Device
o Volume
o Hourly Chime
o Minute Tick
o Restrict Employees
o Restrict Transactions
o DHCP
o IP Address
o IP Network
o IP Gateway
o IP DNS Address
o Telnet Server
o Terminal ID
o Menu Timeout
o Message Timeout
o Editor Timeout
o Communication Timeout
o HTTP Timeout
o Firmware
o Application
o By Badge
o By Name
o Number of Employees
o Number of Transactions
o AOD Locator
o Query Round Trip
o Full Sync
o Communications
o Timeouts
o Biometric Type
o Software Update
o Revert to Factory Defaults
o Device Info
o View Employees
o
o
o View Statistics
o
o
o
o Operations
o Firmware Version
o Application Version
Settings
Database
Version
o Polling Type
o Polling Server
o Device Type
o IP Configuration
o MCU Version
o Firmware Version
o Serial Number
o Clear Transactions
o Clear Employees
o Revert to Defaults
o Allocate Badges
o Communications
o Restart Application
o Restart Terminal
Operations
Enrollment
o Enroll
o View Templates
o Template Usage
o Remove Templates
o Remove All Templates
o Calibrate Reader

©2011, Attendance on Demand®, Inc. Information in this document is subject to change without notice.
19
Operation
Description
Enrollment menu
Enroll
Enroll employee finger into the device. Employees must present badge
numbers before enrolling their fingers.
View Templates
Displays how many finger templates are available in the clock for a
specific employee.
Template Usage
Displays the finger templates usage information in the clock.
Remove Templates
Remove a specific employee’s finger templates in the clock.
Remove All
Templates
Remove all employees’ finger templates in the clock.
Recalibrate Reader
Under development.
Settings menu
Volume
Enter the volume of voice prompts, from 0 –99: 99 is loud, 0 is silent.
Press OK to confirm. Press ESC to cancel.
Hourly Chime
Specify whether or not play the sound of an hourly chime upon the hour.
Press OK to confirm. Press ESC to cancel.
Minute Tick
Specify whether or not play the sound of a clock ticking every minute.
Press OK to confirm. Press ESC to cancel.
Restrict Employees
Displays the message “Restrict employees not assigned to this clock”.
Press the Up or Down arrows to choose from the following options:
Yes. Employees not assigned to this clock cannot punch using this
clock.
No. Employees not assigned to this clock can punch using this clock.
Press OK to confirm. Press ESC to cancel.
Restrict
Transactions
Displays the message “Restrict transactions based on the employee’s
restriction class”. Press the Up or Down arrows to choose from the
following options:
Yes. Employee transactions are restricted based on the restriction class
configured in the software.
No. Employee transactions are not restricted.
Press OK to confirm. Press ESC to cancel.
Polling Type
Press the Up or Down arrows to choose from the following type of polling
used by this clock:
Polled. Not used.
Push (AoD). The push technology is used for Attendance on Demand
and the clock.
Push (Local). Not used.
Press OK to confirm. Press ESC to cancel.

©2011, Attendance on Demand®, Inc. Information in this document is subject to change without notice.
20
Operation
Description
Polling Server
If Polled is selected, specify the IP address of performing the poll
operation. For example, the IP address of the computer running
Attendance Enterprise. Each of four numbers separated by periods must be
entered as 3-digit format. For example, the number 010 is entered to
represent 10.
Press OK to confirm. Press ESC to cancel.
DHCP
Configures whether DHCP is used or not. Press the Up or Down arrows to
choose from the following options:
Yes. If DHCP is used, select Yes.
No. If a static IP is used, select No.
Press OK to confirm. Press ESC to cancel.
IP Address
Enter the IP address of the clock if static IP is used. Each of four numbers
separated by periods must be entered as 3-digit format. For example, the
number 010 is entered to represent 10. Press OK to confirm. Press ESC to
cancel.
IP Network
Enter the IP Mask of the clock if static IP is used. Each of four numbers
separated by periods must be entered as 3-digit format. For example, the
number 010 is entered to represent 10. Press OK to confirm. Press ESC to
cancel.
IP Gateway
Enter the IP Gateway of the clock if static IP is used. Each of four numbers
separated by periods must be entered as 3-digit format. For example, the
number 010 is entered to represent 10. Press OK to confirm. Press ESC to
cancel.
IP DNS Address
Enter the DNS IP address of the clock if static IP is used. Each of four
numbers separated by periods must be entered as 3-digit format. For
example, the number 010 is entered to represent 10. Press OK to confirm.
Press ESC to cancel.
Telnet Server
Configures whether you allow the clock to be accessed remotely. Through
Telnet, specific application and data can be loaded on the clock for
maintenance and troubleshooting. Press the Up or Down arrows to select
Yes or No. Press OK to confirm. Press ESC to cancel.
Terminal ID
Enter a number with a range of 1 to 999. This number combined with host
name (idpunch7) is used to differentiate multiple terminals on the same
network. For example, an IDpunch 7 with a terminal id of "86" has a host
name of "idpunch7-86".
Menu Timeout
Enter the number of seconds after which the menu display times out. Press
OK to confirm. Press ESC to cancel.
Message Timeout
Enter the number of seconds after which the displayed message times out.
Press OK to confirm. Press ESC to cancel.
Editor Timeout
Enter the number of seconds after which the display for entering
information times out. Press OK to confirm. Press ESC to cancel.
Other manuals for IDpunch 7
1
Table of contents
Other InfoTronics Clock manuals
