Infrasonic Amon SE User manual

IAM140317001
OWNER'S MANUAL
AMON SE OWNER’S Manual – 1
ENGLISH
ENGLISH
Table of Contents 1. Introduction
Thank you for choosing the INFRASONIC AMON SE!
AMON SE is the ideal mobile recording interface for both laptop and desktop computers. It offers 2 input
and 2 output channels in a solid, portable and stylish unit that provides means for connecting microphones
or musical instruments to any computer running Mac OS X or Windows. AMON SE is built and designed with
remarkable mic-preamp and Hi-Z input quality. It is the perfect solution for playback and high quality vocal
recording of condenser or dynamic microphones on the road. It is also designed for recording electronic
instruments such as guitars and bass guitars as well. Enjoy all the fine-tuned features and high quality
multitask recording process without bulky external DC adapters with an easy to use USB bus powered
interface. All in one solution in an aluminium body gives impressive portability to carry it anywhere you go.
You will find further convenient features in AMON SE including Stereo Mix, 48V phantom power and coaxial
digital output.
1.1 Main features
• 2 in / 2 out - all in one audio interface
• USB bus powered
• 24 bit / 48kHz
• Microphone preamplifier / Hi-Z input
• +48V phantom power
• Analog line (TS) output (2 in / 2 out)
• Digital coaxial output
• Zero latency monitoring
• ASIO 2.0, WDM and Core Audio
1.2 system requirements
PC Mac
Intel Core 2 Duo or AMD Athlon 64 X2
2 GB RAM (4 GB recommended)
One available USB port
Microsoft Windows® XP (SP2, 32-bit), Windows® 7
or Windows® 8(last Service Pack, 32/64-bit)
Intel Core 2 Duo
2 GB RAM (4 GB recommended)
One available USB port
Mac OS® X 10.7 or 10.8 (latest update)
You can find the minimum system requirements on our website www.infra-sonic.com or outside of the box.
1.3 contents
• AMON SE x 1
• USB cable x 1
• Installation CD x 1
• User’s manual
1. Introduction……………………………………………………………………………………………………1
1-1. Main features……………………………………………………………………………………………1
1-2. system requirements………………………………………………………………………………1
1-3. contents………………………………………………………………………………………………… 1
2. Overview…………………………………………………………………………………………………………2
2-1. Front panel………………………………………………………………………………………………2
2-2. Back panel…………………………………………………………………………………………………3
2-3. Top panel…………………………………………………………………………………………………3
3. Hardware Setup………………………………………………………………………………………………4
3-1. Connection AMON SE to your PC………………………………………………………………4
3-2. Microphone connection……………………………………………………………………………4
3-3. Hi-Z connection…………………………………………………………………………………………5
3-4. Headphone connection……………………………………………………………………………5
3-5. Line Out Connection (Line / Coaxial)…………………………………………………………5
4. Driver Installation……………………………………………………………………………………………6
4-1. Windows® Driver Installation……………………………………………………………………6
4-2. OS X Driver Installation……………………………………………………………………………6
4-3. Control panel……………………………………………………………………………………………7
5. FAQ…………………………………………………………………………………………………………………8
6. Specifications………………………………………………………………………………………………10
7. WARRANTY……………………………………………………………………………………………………11

AMON SE OWNER’S Manual – 32
ENGLISH
ENGLISH
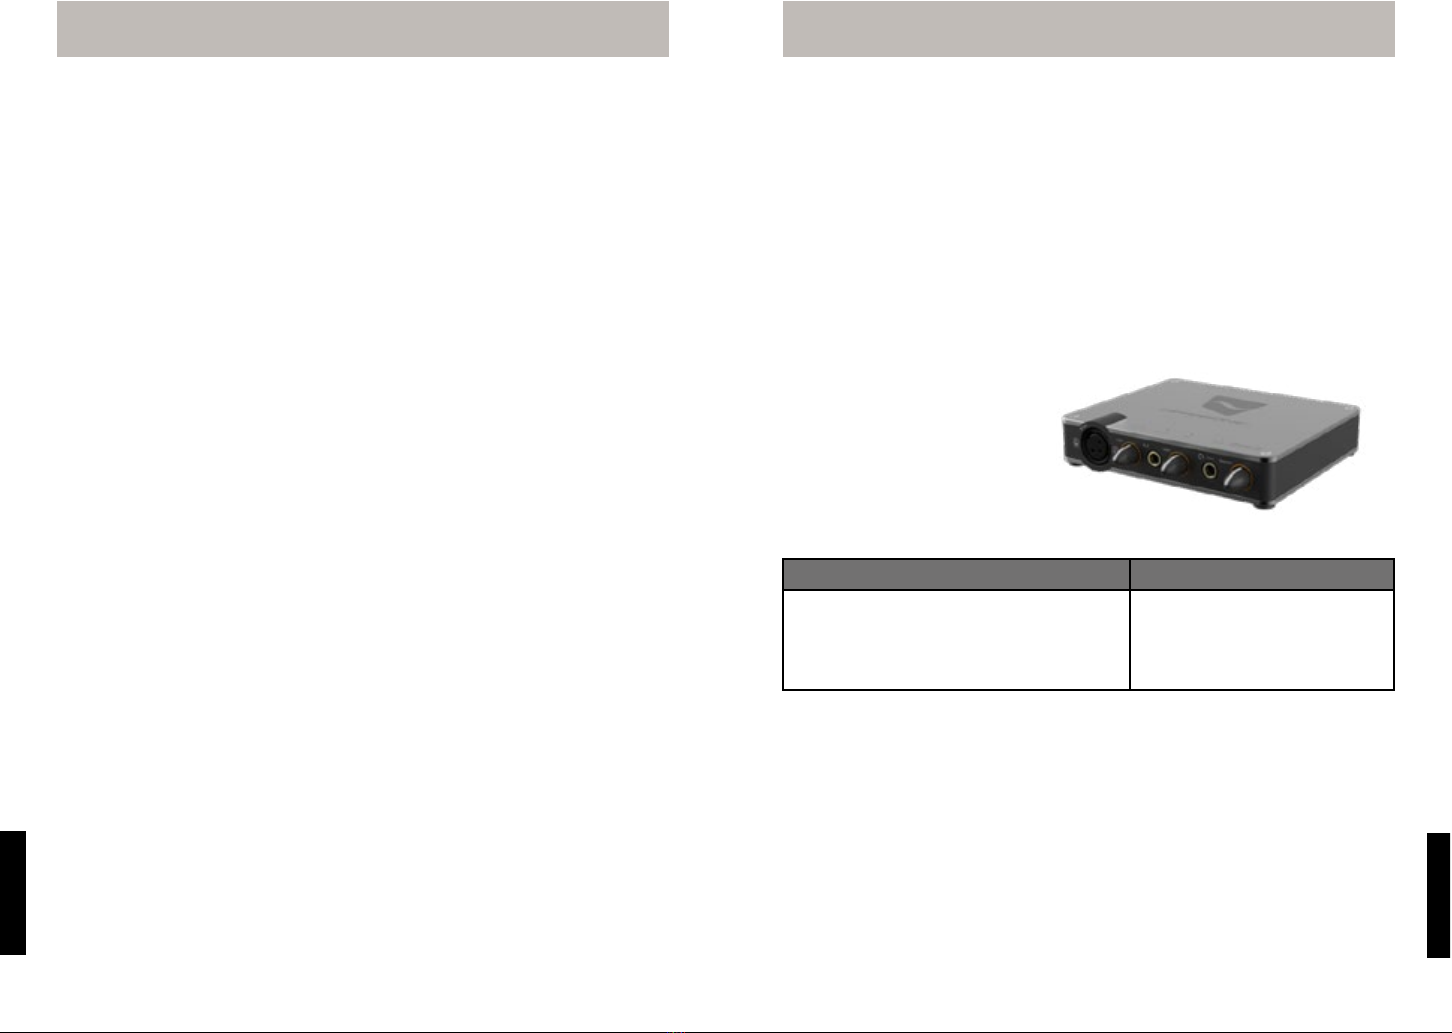
2. Overview 2. Overview
2.2 back panel
❶ USB
Type B connector is compatible with all types of USB ports (1.1, 2.0, and 3.0).
AMON SE is designed to work perfectly on USB bus power and it doesn’t require external power supply.
❷ +48V Phantom power switch
Turn the switch on when you need phantom power supply for your condenser microphone.
❸ COAX OUT
You can connect digital monitor speakers, recorders, AV amplifiers with this coaxial digital output.
❹ LINE OUT
These output connectors are balanced 1/4” TRS type sockets, which can be connected to any mixing
board, power amplifier, powered studio monitor, recorder or any other stereo unbalanced line-
level inputs.
2.3 Top panel
1) MIC / Hi-Z Peak LED
The Peak LEDs illuminate red, if the input signal is over
the clipping point. If the red peak LED lights up
frequently or stays lit for any period of time, lower the
input gain level with the input gain control knob to
avoid unwanted distortion.
2) +48V Phantom power LED
This red LED provides visual feedback about the status
of phantom power.
3) Power LED
The power LED illuminates red if AMON SE and your
computer are connected properly
2.1 Front panel
❶ XLR microphone connector
The XLR input on channel 1 is equipped with a custom high quality microphone preamplifier.
The preamp works great with all types of microphones including dynamic, ribbon and condenser
microphones. The +48V phantom power switch is located at the back panel of AMON SE .
❷ MIC / Hi-Z Gain Control Knobs
Adjust the input gain of inputs 1 & 2 preamplifiers respectively.
❸ Hi-Z Input
Connect an electric guitar or bass guitar instrument to this unbalanced 1/4” TS connector.
Only unbalanced 1/4” phone jack cable is suitable for this Hi-Z input
❹ Headphone connector
This is where you connect stereo headphones with a 1/4” stereo TRS jack plug.
❺ Headphone volume control knob
The volume knob controls the headphone output amplifier. The headphone amplifier is quite powerful,
so use the maximum setting with extreme caution
Caution: Always remember to turn off the +48V phantom power supply before connecting some
dynamic or ribbon microphones.
Caution: Always remember to turn off the +48V phantom power supply before connecting some
dynamic or ribbon microphones.

AMON SE OWNER’S Manual – 54
ENGLISH
ENGLISH
3. Hardware Setup
1. Plug in the bundled USB cable to AMON SE and your PC or MAC.
2. Connect your choice of audio devices (mixer, monitoring speaker, microphone, etc.) to AMON SE.
3. Hardware Setup
3.1 Connection AMON SE to your PC
3.3 Hi-Z connection
3.2 Microphone connection
3.4 Headphone connection
3.5 Line Out Connection (Line / Coaxial)
1) Plug USB 2.0 cable into USB port on the rear
panel of AMON SE & your PC or MAC.
1) Plug in the 1/4” TS jack to the Hi-Z
socket on the front panel.
2) You can control the input gain with
the rotating knob right next to the Hi-Z
socket.
1) Plug in the XLR jack to the MIC socket on the front
panel.
2) If you intend to use condenser microphone, turn
on the +48V hantom power switch on the rear
panel after connecting the microphone with the
XLR jack cable
Note: Make sure to check both the XLR cable
and condenser microphone are connected
properly, before turning on the phantom power
switch.
1) AMON SE supports 1/4” TRS stereo headphones
and you can control the headphone output level
with the Volume control knob right next to the
headphone socket. The headphone amplifier is
quite powerful, so use the maximum setting with
extremeaution.
1) Line Out (Unbalanced) > Output for mixer, recording gear or monitoring speaker.
2) The digital coaxial connector provides standard SPDIF output at 44.1 or 48kHz sampling rate at
16 or 24 bit resolution.
<USB cable connection>
<Hi-Z connection>
<XLR cable connection>
<Headphone connection>
<Line out><Coaxial out>

AMON SE OWNER’S Manual – 76
ENGLISH
ENGLISH
4. Driver Installation 4. Driver Installation
In this chapter, we are going to explain how to install the driver and control panel for AMON SE on your PC.
If you encounter any problem or difficulty during the software installation, please feel free to contact
our support team at [email protected] Also please visit our website for the latest driver for your
convenience. www.infra-sonic.com
4.1 Windows® Driver Installation
1) Please insert the enclosed driver disc into your optical drive. Open ‘Driver\AMON SE_DRIVER_WIN’
folder and double click the ‘Setup’ file for installation. Simply follow the displayed instructions to
complete the rest of installation process.
NOTE: Please select the proper driver version according
to your Windows® version
2) Please select ‘Next’ for starting the installation
3) Please select the destination folder location.
(Default folder is recommended)
4) Installation will be complete after clicking ‘Finish’
4.2 OS X Driver Installation
1) Please insert enclosed driver disc into your optical drive. Navigate to the ‘Driver\AMON SE_DRIVER_
MAC’ folder and double click ‘Infrasonic_AMON SE_Driver_*.*.*.dmg ‘ file, which creates a new AMONE
SE control panel icon.
2) The new folder and icon of AMON SE will be created automatically and the control panel can be started
after clicking the AMON SE icon.
4.3 Control panel
1) AMON SE Logo
AMON SE logo changes if AMON
SE is connected to the computer
properly.
2) Monitoring
Enables analog zero latency
monitoring of the Microphone
and/or Hi-Z inputs.
3) Volume faders
Control the volume level of Inputs
& Outputs.
4) Indicator
Indicates the volume level
settings.
5) Mute
Mutes the selected channel.
6) Link
If you enable the link button,
volume faders are connected
and can be move together.
7) Latency bar
Adjust the latency of AMON SE. The lower the latency, the more real-time the audio output appears to
be, but the audio performance is strongly related to the PC’s processing power. As a rule of thumb, make
sure, that the latency of AMON SE is set higher than the average DPC latency of your computer to avoid
digital noise in the audio signal flow.
8) Stereo Mix
This feature enables AMON SE to mix down all outputs from different audio applications and record it at
once just as you hear it on the outputs of AMON SE, hence the Stereo Mix feature is also called “What
you hear”. It is especially useful in podcasting.
Table of contents
Other Infrasonic Accessories manuals


