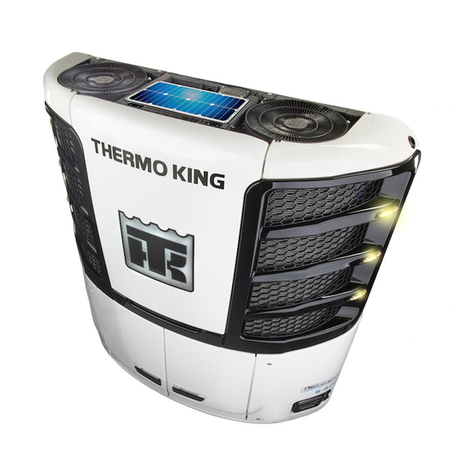
Ingersoll-Rand THERMO KING E-200 Series User manual

Revision A
July 2019 TTKK 6611669944--1188--IIMM--EENN
Vehicle Powered Truck Edition
E-200 Series
Single and Multi Temperature Systems
Installation Manual

©2019 Ingers ll Rand TK 61694-18-IM-EN
Introduction
This manual was written t assist with the basic installati n f a Therm King c mp nents nt trucks designed and
built f r refrigerated applicati ns. The TThheerrmm KKiinngg IInnssttaallllaattii nn SSttaannddaarrddss aanndd PPrr cceedduurreess GGuuiiddee pr vides m re
detailed inf rmati n that must be f ll wed t safely and pr perly c mplete the entire installati n.
Due t its c mplexity, y u sh uld n t attempt this installati n unless y u:
• Are an experienced mechanic.
• Can safely lift 34 kil s (75 lbs.).
• In the U.S., EPA 608 certified and trained in the repair and maintenance f transp rt refrigerati n systems.
• Have a basic understanding f electricity and electrical wiring.
• Have the necessary t ls and equipment t c mplete the installati n.
• Have a truck b dy designed and built t meet the requirements f this installati n.
• F ll w all safety precauti ns utlined in the Therm King Installati n Standards and Pr cedures Guide.
This manual is published f r inf rmati nal purp ses nly. Therm King makes n representati ns warranties express
r implied, with respect t the inf rmati n rec mmendati ns and descripti ns c ntained herein. Inf rmati n pr vided
sh uld n t be regarded as all-inclusive r c vering all c ntingencies. If further inf rmati n is required, Therm King
C rp rati n Service Department sh uld be c nsulted.
TThheerrmm KKiinngg’’ss wwaarrrraannttyy sshhaallll nn tt aappppllyy tt aannyy eeqquuiippmmeenntt wwhhiicchh hhaass bbeeeenn ““ss iinnssttaalllleedd,, mmaaiinnttaaiinneedd,, rreeppaaiirreedd
rr aalltteerreedd aass,, iinn tthhee mmaannuuffaaccttuurreerr’’ss jjuuddggmmeenntt,, tt aaffffeecctt iittss iinntteeggrriittyy..””
MMaannuuffaaccttuurreerr sshhaallll hhaavvee nnoo lliiaabbiilliittyy ttoo aannyy ppeerrssoonn oorr eennttiittyy ffoorr aannyy ppeerrssoonnaall iinnjjuurryy,, pprrooppeerrttyy ddaammaaggee oorr aannyy
ootthheerr ddiirreecctt,, iinnddiirreecctt,, ssppeecciiaall,, oorr ccoonnsseeqquueennttiiaall ddaammaaggeess wwhhaattssooeevveerr,, aarriissiinngg oouutt ooff tthhee uussee ooff tthhiiss mmaannuuaall oorr
aannyy iinnffoorrmmaattiioonn,, rreeccoommmmeennddaattiioonnss oorr ddeessccrriippttiioonnss ccoonnttaaiinneedd hheerreeiinn.. TThhee pprroocceedduurreess ddeessccrriibbeedd hheerreeiinn sshhoouulldd
oonnllyy bbee uunnddeerrttaakkeenn bbyy ssuuiittaabbllyy qquuaalliiffiieedd ppeerrssoonnnneell.. FFaaiilluurree ttoo iimmpplleemmeenntt tthheessee pprroocceedduurreess ccoorrrreeccttllyy mmaayy ccaauussee
ddaammaaggee ttoo tthhee TThheerrmmoo KKiinngg uunniitt oorr ootthheerr pprrooppeerrttyy oorr ppeerrssoonnaall iinnjjuurryy..
Revision History
Revision A (07/19) New manual format.
Custo er Satisfaction Survey
Let y ur v ice be heard!
Y ur feedback will help impr ve ur manuals. The survey is accessible thr ugh any internet-c nnected device with a
web br wser.
Scan the Quick Resp nse (QR) c de r click r type the web address http://irc .az1.qualtrics.c m/SE/?SID=SV_
2 ctfSH UJxsk6x t c mplete the survey.

TK 61694-18-IM-EN 3
SSaaffeettyy PPrreeccaauuttii nnss ............................................................................................................................................................ 55
Danger, Warning, Cauti n, and N tice . . . . . . . . . . . . . . . . . . . . . . . . . . . . . . . . . . . . . . . . . . . . . . . . . . . . . . . . . . . . 5
Safety Precauti ns . . . . . . . . . . . . . . . . . . . . . . . . . . . . . . . . . . . . . . . . . . . . . . . . . . . . . . . . . . . . . . . . . . . . . . . . . . . . . . 5
Rec ver Refrigerant . . . . . . . . . . . . . . . . . . . . . . . . . . . . . . . . . . . . . . . . . . . . . . . . . . . . . . . . . . . . . . . . . . . . . . . . . . . . . 5
RReeqquuiirreedd TT llss .................................................................................................................................................................... 66
RReeqquuiirreedd SSuupppp rrtt MMaatteerriiaallss ........................................................................................................................................ 88
AAuutt SSttaarrtt HHaarrdd SStt pp // DDiissaabbllee CC nnnneecctt rr............................................................................................................ 99
PPrreeppaarriinngg CC nnddeennsseerr ff rr IInnssttaallllaattii nn........ .. .......... .. .......... .. ............ .. .......... .. .......... .. .............. .............. .............. .. 1100
C ver and Fan H using Rem val (All M dels) . . . . . . . . . . . . . . . . . . . . . . . . . . . . . . . . . . . . . . . . . . . . . . . . . . . . 10
CC nnddeennsseerr IInnssttaallllaattii nn .. .. ........ .. ............ .. ............ .............. .............. .............. .............. .............. .. .......... .. .......... .. .......... 1111
EEvvaapp rraatt rr IInnssttaallllaattii nn .... .............. .. .......... .. .......... .. .......... .. .. .......... .. .......... .. ............ .............. .............. .............. ........ 1122
HH ssee CC nnnneeccttii nnss ........ .. ............ .............. .............. .. .......... .. .......... .. .......... .. ............ .. .......... .. ............ .. ............ .............. .. 1133
IInnssttaalllliinngg tthhee FFiilltteerr DDrriieerr aanndd SSiigghhtt GGllaassss .......................................................................................................... 1199
WWiirriinngg CC nnnneeccttii nnss MM ddeell 2200 && 5500.... .. .......... .. ............ .. ............ .............. .............. .. .......... .. .......... .. .......... .. .. ........ 2200
IInn--CCaabb CC nnttrr lllleerr IInnssttaallllaattii nn.... .. .......... .. .......... .. ............ .. ............ .. .......... .. .......... .. ............ .............. .. .......... .. .......... 2222
OOppttii nnaall DDIINN AAddaapptt rr ((bbyy rrddeerr nnllyy)) ........ .............. .............. .. .......... .. .......... .. .......... .. .. ........ .. ............ .. ............ .. 2255
BBaatttteerryy CC nnnneeccttii nn.............. .. .......... .. .......... .. .......... .. .. .......... .. .......... .. ............ .............. .............. .............. .............. ........ 2266
HH lldd vveerr BBaatttteerryy OOppttii nn ........ .. ............ .. .......... .. ............ .............. .............. .............. .............. .. .......... .. .......... .. ............ 2277
H ld- ver Opti n Installati n Guidelines. . . . . . . . . . . . . . . . . . . . . . . . . . . . . . . . . . . . . . . . . . . . . . . . . . . . . . . . . 28
C ntr ller Set-up . . . . . . . . . . . . . . . . . . . . . . . . . . . . . . . . . . . . . . . . . . . . . . . . . . . . . . . . . . . . . . . . . . . . . . . . . . . 28
Installati n Guidelines . . . . . . . . . . . . . . . . . . . . . . . . . . . . . . . . . . . . . . . . . . . . . . . . . . . . . . . . . . . . . . . . . . . . . . 28
SSttaarrtt//SStt pp FFuunnccttii nnaalliittyy .... .. .......... .. .......... .. .......... .. .. ........ .. ............ .. ............ .............. .............. .............. .............. ...... 3300
C ncept....................................................................................... 30
Parts Required bef re Starting Installati n . . . . . . . . . . . . . . . . . . . . . . . . . . . . . . . . . . . . . . . . . . . . . . . . . . . . . . . 31
Installati n Guidelines . . . . . . . . . . . . . . . . . . . . . . . . . . . . . . . . . . . . . . . . . . . . . . . . . . . . . . . . . . . . . . . . . . . . . . . . . 32
IInnccrreeaasseedd IIddllee SSppeeeedd SSeettuupp.. .. ............ .. ............ .............. .............. .............. .............. .. .......... .. .......... .. ............ .. .......... 3344
C ncept....................................................................................... 34
Parts Required bef re Starting Installati n . . . . . . . . . . . . . . . . . . . . . . . . . . . . . . . . . . . . . . . . . . . . . . . . . . . . . . . 35
Installati n Guidelines . . . . . . . . . . . . . . . . . . . . . . . . . . . . . . . . . . . . . . . . . . . . . . . . . . . . . . . . . . . . . . . . . . . . . . . . . 36
SSttaannddbbyy RReecceeppttaaccllee BB xx IInnssttaallllaattii nn ((MM ddeellss 2200 aanndd 5500 OOnnllyy)).............................................................. 3388
EEvvaapp rraatt rr DDrraaiinn HH ssee IInnssttaallllaattii nn.......... .. ............ .............. .............. .............. .. .......... .. .......... .. ............ .. ............ .. 3399
ES-100N/ES150 . . . . . . . . . . . . . . . . . . . . . . . . . . . . . . . . . . . . . . . . . . . . . . . . . . . . . . . . . . . . . . . . . . . . . . . . . . . . . . . . 39
Table of Contents
4TK 61694-18-IM-EN
ES-200........................................................................................ 41
CC mmpplleettiinngg tthhee IInnssttaallllaattii nn............ .............. .............. .............. .............. .............. .. .......... .. .......... .. ............ .. ............ .. 4422
SSuuccttii nn PPrreessssuurree RReegguullaatt rr ((SSPPRR)) AAddjjuussttmmeenntt PPrr cceedduurreess -- MMAAXX .... .............. .. .......... .. .......... .. ........ 4433
DDiisscchhaarrggee PPrreessssuurree RReegguullaatt rr ((DDPPRR)) AAddjjuussttmmeenntt PPrr cceedduurreess -- MMAAXX................................................ 4444
CC mmpprreessss rr OOiill AAmm uunnttss aanndd TTyyppee ............ .. .......... .. .......... .. ............ .............. .. .......... .. .......... .. ............ .. ............ .. 4455
RReecc mmmmeennddeedd RReeffrriiggeerraanntt CChhaarrggee bbyy MM ddeell.................................................................................................. 4466
CC nnddeennsseerr aanndd EEvvaapp rraatt rr DDiimmeennssii nnss ............................................................................................................ 4477
TTaabbllee ff CC nntteennttss

TK 61694-18-IM-EN 5
Safety Precautions
Danger, Warning, Caution, and Notice
Therm King®rec mmends that all service be perf rmed by a Therm King dealer and t be aware f several general
safety practices.
Safety advis ries appear thr ugh ut this manual as required. Y ur pers nal safety and the pr per perati n f this unit
depend up n the strict bservance f these precauti ns.
Indicates an imminently hazardous situation which, if not avoided, will result in death or serious injury.
Indicates a potentially hazardous situation which, if not avoided, could result in death or serious injury.
Indicates a potentially hazardous situation which, if not avoided, could result in minor or moderate injury and unsafe
practices.
Indicates a situation that could result in equipment or property-damage only accidents.
Safety Precautions
IImmppoorrttaanntt Additional Safety Precautions must be followed when installing this unit. See “Section 2 - Safety
Precautions” in the Thermo King Vehicle Powered Truck Installation Standards and Procedures Guide (TK
56430).
CCAAUUTTIIOONN
RRiisskk ff IInnjjuurryy!!
TThheerrmm KKiinngg cc nnddeennsseerr uunniittss aanndd rreemm ttee eevvaapp rraatt rrss aarree sshhiippppeedd wwiitthh aa 3355 kkPPaa ((55 ppssii)) hh llddiinngg cchhaarrggee ff
HHeelliiuumm.. BBee ccaarreeffuull wwhheenn rreemm vviinngg ccaapp.. TThhiiss hh llddiinngg cchhaarrggee mmaayy bbee ssaaffeellyy vveenntteedd iinntt tthhee aattmm sspphheerree..
Recover Refrigerant
NNoottee In the USA, EPA Section 608 Certification is required to work on refrigeration systems. In the EU, local F-gas
Regulations must be observed when working on refrigeration systems.
At Therm King®, we rec gnize the need t preserve the envir nment and limit the p tential harm t the z ne layer
that can result fr m all wing refrigerant t escape int the atm sphere.
We strictly adhere t a p licy that pr m tes the rec very and limits the l ss f refrigerant int the atm sphere.
When w rking n transp rt temperature c ntr l systems, a rec very pr cess that prevents r minimizes refrigerant
l ss t the atm sphere is required by law. In additi n, service pers nnel must be aware f the appr priate Eur pean
Uni n, Nati nal, Federal, State, and/ r L cal regulati ns g verning the use f refrigerants and certificati n f
technicians. F r additi nal inf rmati n n regulati ns and technician pr grams, c ntact y ur l cal THERMO KING
dealer.
SSeerrvviiccee TT llss - Use the pr per service t ls. Gauge manif ld sets sh uld include appr priate shut ff valves r
disc nnects near the end f each service line.
RReecc vveerryy EEqquuiippmmeenntt - Rec very equipment must be used. Pr per rec vering, st ring and recycling f refrigerants is
an imp rtant part f all service w rk.
SSeerrvviiccee PPrr cceedduurreess - Rec mmended pr cedures must be used t minimize refrigerant l ss.
CC mmpp nneennttss mmaayy bbee iiss llaatteedd by cl sing service valves and perf rming system pump-d wns.
CC mmpp nneennttss uunnaabbllee tt bbee iiss llaatteedd f r service must be repaired nly after refrigerant is pr perly rec vered.

6TK 61694-18-IM-EN
Required Tools
NNoottee Equipment such as scales, gauges, refrigerant leak detectors, and torque wrenches should be in good working
condition and routinely calibrated to assure accurate readings.
Figure 1.
BED760
1. Electric drill 13. Protective gloves 25. Electrical terminal press
2. Set of drill bits 14. File 26. Pincers for hose clips
3. Set of glass-shaped cutters 15. Plastic flanges 27. Gauge manifold
4. Protective goggles 16. Riveter 28. Vacuum pump

TK 61694-18-IM-EN 7
5. Adhesive tape 17. Electric connectors 29. Leak detector
6. Measuring tape 18. Electrical wire 30. Nitrogen cylinder
7 Drilling template 19. Voltmeter 31. Refrigerant cylinders
8. Pencil 20. Set of screwdrivers 32. Table-mounted vice
9. Socket wrenches 21. Hose cutters 33. Crane or hoist
10. Fixed wrenches 22. Wire strippers 34. TK refrigerant oil
11. Monkey wrench 23. Wire cutters 35. Open Y wrench
12. Silicone 24. Electric and hand saws 36. Torx Tube Wrench
37. Torque Wrench
RReeqquuiirreedd TT llss

8TK 61694-18-IM-EN
Required Support Materials
Please have the f ll wing supp rt materials t hand pri r t starting y ur installati n - as they are listed as reference
thr ugh ut this manual:
1. Vehicle P wered Truck Installati n Standards and Pr cedures Guide EMEA - l cated in Inf central: Technical
Publicati ns
2. C mmercial Br chure f r y ur unit - includes weight specificati ns and applicable unit pti ns: C mmercial
Br chures
3. FF rr MMuullttii--TTeemmppeerraattuurree UUnniittss nnllyy -Multi-Temperature C nfigurati n Guides

TK 61694-18-IM-EN 9
Auto Start Hard Stop / Disable Connector
DDAANNGGEERR
HHaazzaarrdd uuss VV llttaaggee!!
TTaakkee ccaarree tthhaatt tthhiiss cc nnnneecctt rr dd eess nn tt ddiisscc nnnneecctt tthhee AACC vv llttaaggee iinnppuutt.. IIff sseerrvviiccee ff tthhee eelleeccttrriiccaall bb xx iiss
rreeqquuiirreedd,, yy uu MMUUSSTT uunnpplluugg tthhee AACC SShh rree PP wweerr bbeeff rree pprr cceeeeddiinngg..
This c nnect r has the f ll wing tw main functi nalities:
1. HHaarrdd SStt pp - this c nnect r is wired directly t the p wer relays. When y u disc nnect (unplug this c nnect r), the
relays and the circuit pens immediately st pping the unit.
2. DDiissaabbllee AAuutt ssttaarrtt - during unit c mmissi ning r while any maintenance is being carried ut n the unit, and a
p wer ff Is needed, is rec mmended t unplug this c nnect r. In this case, the p wer relays remain pen and the
machine cann t start.

10 TK 61694-18-IM-EN
Preparing Condenser for Installation
Cover and Fan Housing Re oval (All Models)
T access the unit m unting h les:
1. Rem ve plastic c ndenser c ver.
2. Rem ve the fan h using assembly. (Rem ve the fan c nnect r)
3. Rem ve “P wer Off Device” C nnect r and Electric B x C ver
4. M unting h les are n w accessible

TK 61694-18-IM-EN 11
Condenser Installation
IImmppoorrttaanntt See Section 4 - Unit Installation Standards and Procedures in the Thermo King Vehicle Powered Truck
Installation Standards and Procedures Guide. THESE PROCEDURES MUST BE FOLLOWED!
NNoottee Nose mount and roof top condenser mounting and access hole dimensions can be found at the back of this
manual.
WWAARRNNIINNGG
EEqquuiippmmeenntt DDaammaaggee!!
SSeeaall aallll tthhee hh lleess iinnssiiddee tthhee eelleeccttrriicc bb xx wwhhiicchh aarree nn tt uusseedd ff rr iinnssttaallllaattii nn ((ddeeppeennddiinngg nn ssee mm uunntt//rr ff tt pp))..
OOtthheerrwwiissee wwaatteerr wwiillll ggeett iinntt tthhee eelleeccttrriicc bb xx aanndd ddaammaaggee tthhee cc mmpp nneennttss..
Figure 2. Condenser Mounting Bolts
1. Mounting holes when unit is mounted on the Front of the Truck (6)
2. Mounting holes when unit is mounted on the Roof of the Truck (6)
T=10
min.
BED760
=12 3 4 5 678
9 10 13

12 TK 61694-18-IM-EN
Evaporator Installation
IImmppoorrttaanntt See Section 4 - Unit Installation Standards and Procedures in the Thermo King Vehicle Powered Truck
Installation Standards and Procedures Guide (TK 61588). THESE PROCEDURES MUST BE FOLLOWED!
NNoottee Evaporator mounting hole locations can be found at the back of this manual.
Figure 3. Standard Evaporator (10 and 20 Models) Mini u distance fro cargo wall to rear of evaporator shown.
1. Return Air
2. Discharge Air

TK 61694-18-IM-EN 13
Hose Connections
IImmppoorrttaanntt See Section 6 - Refrigerant Hose and Fittings Standards in the Thermo King Vehicle Powered Truck
Installation Standards and Procedures Guide (TK 61588). THESE PROCEDURES MUST BE FOLLOWED!
CCAAUUTTIIOONN
SSeerrvviiccee PPrr cceedduurree!!
TThhiiss uunniitt iiss ssuupppplliieedd wwiitthh sseerrvviiccee vvaallvveess ccll sseedd.. TThhee IInnssttaalllleerr hhaass tt mm uunntt tthhee ffiilltteerr ddrryyeerr aanndd ssiigghhtt ggllaassss
bbeeff rree cchhaarrggiinngg tthhee uunniitt wwiitthh rreeffrriiggeerraanntt .. AAfftteerr rreeffrriiggeerraanntt cchhaarrggee,, tthhee sseerrvviiccee vvaallvveess sshhaallll bbee lleefftt ppeenn aanndd aa
ttaammppeerr pprr ff sseeaall ffiitttteedd ((aass rreecc mmmmeennddeedd bbyy EENN 337788--22)) ((aavv iidd rriisskk tthhaatt nn tt--eedduuccaatteedd uusseerr ccll sseess vvaallvveess
ttrraappppiinngg lliiqquuiidd iinn tthhee ddrryyeerr))..

TK 61694-18-IM-EN 15
Legend
1. O-RING (#4, o-ring seal) 7. 90 degree Fitting (straight, #6 fitting, #4 hose)
2. Straight Fitting (female o-ring seal, #4 fitting, #4 hose) 8. O-RING (#10, o-ring seal)
3. O-RING (#6, o-ring seal) 9. 90 degree Fitting (female o-ring seal, #10 fitting, #10 hose)
4. 90 degree Fitting (female o-ring seal, #6 fitting, #6 hose) 10. Hose (Liquid Line) (#4, 50 ft)
5. O-RING (#8, o-ring seal) 11. Hose (Defrost Line) (#6, 50 ft)
6. 90 degree Fitting (female o-ring seal, #8 fitting, #10 hose) 12. Hose (Suction Line) (#10, 50 ft)
HH ssee CC nnnneeccttii nnss

16 TK 61694-18-IM-EN
Figure 5. Hose Connection Single Te perature Model 50
Legend
1. O-RING (#4, o-ring seal) 8. Straight Fitting (female o-ring seal, #6 fitting, #8 hose)
2. Straight Fitting (female o-ring seal, #4 fitting, #4 hose) 9. O-RING (#10, o-ring seal)
3. O-RING (#6, o-ring seal) 10. 90 degree Fitting (female o-ring seal, #10 fitting, #10 hose)
4. 90 degree Fitting (female o-ring seal, #6 fitting, #6 hose) 11. Hose (Liquid Line) (#4, 50 ft)
5. O-RING (#8, o-ring seal) 12. Hose (Defrost Line) (#6, 50 ft)
6. 90 degree Fitting (female o-ring seal, #8 fitting, #10 hose) 13. Hose (Suction Line) (#10, 50 ft)
7. 90 degree Fitting (straight, #6 fitting, #4 hose)
HH ssee CC nnnneeccttii nnss

TK 61694-18-IM-EN 17
Figure 6. Hose Connection Multi Te perature (2 Zone)
Legend
1. O-RING (#4, o-ring seal) 9. O-RING (#10, o-ring seal)
2. Straight Fitting (female o-ring seal, #4 fitting, #4 hose) 10. EE - splicer (#4)
3. O-RING (#6, o-ring seal) 11. TEE - splicer (#10)
4. 90 degree Fitting (female o-ring seal, #6 fitting, #6 hose) 12. Hose Fitting (straight, #6 hose #8 fitting)
5. O-RING (#8, o-ring seal) 13. Hose (Liquid Line) (#4, 50 ft)
6. 90 degree Fitting (female o-ring seal, #6 fitting, #10 hose) 14. Hose (Defrost Line) (#6, 50 ft)
HH ssee CC nnnneeccttii nnss

TK 61694-18-IM-EN 19
Installing the Filter Drier and Sight Glass
CCAAUUTTIIOONN
SSeerrvviiccee PPrr cceedduurree!!
TThhiiss uunniitt iiss ssuupppplliieedd wwiitthh sseerrvviiccee vvaallvveess ccll sseedd.. TThhee IInnssttaalllleerr hhaass tt mm uunntt tthhee ffiilltteerr ddrryyeerr aanndd ssiigghhtt ggllaassss
bbeeff rree cchhaarrggiinngg tthhee uunniitt wwiitthh rreeffrriiggeerraanntt .. AAfftteerr rreeffrriiggeerraanntt cchhaarrggee,, tthhee sseerrvviiccee vvaallvveess sshhaallll bbee lleefftt ppeenn aanndd aa
ttaammppeerr pprr ff sseeaall ffiitttteedd ((aass rreecc mmmmeennddeedd bbyy EENN 337788--22)) ((aavv iidd rriisskk tthhaatt nn tt--eedduuccaatteedd uusseerr ccll sseess vvaallvveess
ttrraappppiinngg lliiqquuiidd iinn tthhee ddrryyeerr))..
1. L cate the Filter Drier/Sight Glass assembly in y ur installati n kit.
2. Grease the -rings pri r t installing them nt each end f the assembly.
3. Install the assembly with appr priate wrench (hand tighten).
4. Perf rm vacuum pr cedure f air fr m the Filter Drier and Sight Glass via the service valves n either side f this
assembly.
IImmppoorrttaanntt See Section 10 - System Evacuation Procedures and Section 12 - System Charging Procedures in the
Thermo King Vehicle Powered Truck Installation Standards and Procedures Guide (TK 61588). THESE
PROCEDURES MUST BE FOLLOWED!
Figure 7. Installing the Filter Drier and Sight Glass

20 TK 61694-18-IM-EN
Wiring Connections Model 20 & 50
IImmppoorrttaanntt See Section 7 - Electrical Standards in the Thermo King Vehicle Powered Truck Installation Standards and
Procedures Guide .THESE PROCEDURES MUST BE FOLLOWED!
Table of contents
Other Ingersoll-Rand Refrigerator manuals

Ingersoll-Rand
Ingersoll-Rand THERMO KING Precedent C-600 User manual

Ingersoll-Rand
Ingersoll-Rand THERMO KING Precedent S-600 User manual

Ingersoll-Rand
Ingersoll-Rand Thermo King Cold Cube User manual

Ingersoll-Rand
Ingersoll-Rand Thermo King V-520 10 User manual

Ingersoll-Rand
Ingersoll-Rand 4TVC0009B100ND Installation and operating instructions

Ingersoll-Rand
Ingersoll-Rand THERMO KING T-680R Series User manual

Ingersoll-Rand
Ingersoll-Rand THERMO KING Precedent C-600 User manual

Ingersoll-Rand
Ingersoll-Rand Thermo King Precedent C-600M User manual

Ingersoll-Rand
Ingersoll-Rand THERMO KING Trailer B-130 User manual

Ingersoll-Rand
Ingersoll-Rand Thermo King CRR DF MPC2000ID User manual