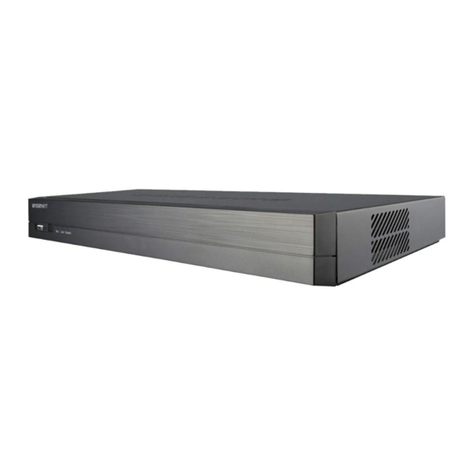
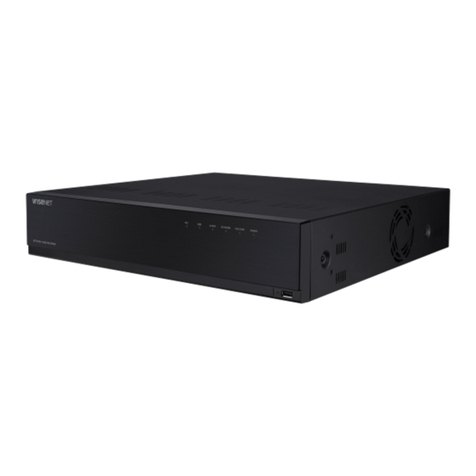
Ingrasys iSC-NVR2316-T User manual

SmartVIEW NVRs
User Manual
Copyright © Ingrasys Technology Inc. All rights reserved.
iSC-NVR2316-T / iSC-NVR2532-T
iSC-NVR2532-U / iSC-NVR2532-R
iSC-NVR2532-A / iSC-NVR2532-D
Version 1.5

About This Document
This manual is intended for administrators and users of iSC-NVR2532-U/R/A/D/T and
iSC-NVR2316-T. It covers configuration of storage and SmartVIEW configuration, as well as
instructions for using and managing SmartVIEW NVRs on your mobile devices. Later versions
of this document will be posted on the official website, as required.
The use of video surveillance devices can be prohibited by laws that vary from country to
country. It is the user’s responsibility to ensure that the operation of such devices is legal
before installing this unit for surveillance purposes.
Version history
Version
Description
Date
1.5
First release
2014-06-10

Legal Notices
Ingrasys Technology Inc. reserves the right to modify product specifications without
notification. The contents of this document may be modified without notification.
The trademark of SmartVIEW is the property of Ingrasys Technology Inc. All other trademarks,
registered trademarks, and product names mentioned in this document are the properties of
their respective owners. In addition, the “TM” symbols are omitted in this document.
The iPhone and iPad trademarks are the property of Apple Inc. All other trademarks,
registered trademarks, and product names mentioned in this document are the properties of
their respective owners. In addition, the “TM” symbols are omitted in this document.
Liability
Every care has been taken in the preparation of this manual. Ingrasys cannot be held
responsible for any technical or typographical errors and reserves the right to make changes
to the product and manuals without prior notice. Ingrasys makes no warranty of any kind
with regard to the material contained within this document, including, but not limited to, the
implied warranties of merchantability and fitness for a particular purpose. Ingrasys shall not
be liable or responsible for incidental or consequential damages in connection with the
furnishing, performance or use of this material.
Support
Should you require any technical assistance, please contact your reseller or SI. If your
questions cannot be answered immediately, please forward your queries through the
appropriate channels to ensure a rapid response.

Introduction
SmartVIEW is a series of user-friendly Windows-based NVRs which can manage up to 32
channels with just one server. It provides powerful local display functionality with up to 32
channels live view and 16 channel playbacks. The whole series of SmartVIEW NVR provides
completed hardware solutions for user to choose what’s the best for their application is,
include both rack mount and tower desktop types.
For remote monitoring, user can log-in NVR built-in remote web client interface or iOS
mobile APP Eye2GO, to access to their monitoring system anytime and anywhere.
Furthermore, with our “Internet Service”and “UPnP”functions, user can easily access NVR
data from internet. For Eey2GO, user can monitor multiple NVRs on Eye2GO APP at a time, or
monitor single NVR from web client.

Table of Contents
1System Overview............................................................................. 6
1.1 How to start? ............................................................................................................. 6
1.2 Hardware interface.................................................................................................... 7
2System Setting............................................................................... 12
2.1 SysGuard.................................................................................................................. 12
2.2 RAID Setting............................................................................................................. 15
2.3 Add Storage ............................................................................................................. 19
2.4 Change System Language ........................................................................................ 21
3SmartVIEW initialization................................................................ 23
3.1 Installation Wizard................................................................................................... 23
3.2 Exit the system......................................................................................................... 28
3.3 Log Off and Switch Login User................................................................................. 29
4Live view ....................................................................................... 30
4.1 The Live view page................................................................................................... 30
4.2 About the SmartVIEW System Version .................................................................... 36
4.3 System Information ................................................................................................. 37
4.4 Two-way audio chat and broadcast control............................................................. 38
4.5 Digital PTZ ................................................................................................................ 39
4.6 Snapshot Browsing .................................................................................................. 40
4.7 Speed Dome Camera Control .................................................................................. 41
4.8 Screen Layout .......................................................................................................... 46
4.9 Event Display............................................................................................................ 47
5System Settings ............................................................................. 49
5.1 System Configurations ............................................................................................. 49

5.2 Storage Settings ....................................................................................................... 51
5.3 User Account Management..................................................................................... 53
5.4 Hardware Monitoring .............................................................................................. 59
5.5 IP Camera Management .......................................................................................... 60
5.6 Group Settings ......................................................................................................... 70
5.7 Sequence Settings ................................................................................................... 72
5.8 SMS / Email Settings / FTP Settings ......................................................................... 75
5.9 DO (Digital Output) Settings .................................................................................... 77
5.10 Sensor Settings ........................................................................................................ 79
5.11 Event Action Settings............................................................................................... 81
6Playback & Log search ................................................................... 84
6.1 Playback................................................................................................................... 84
6.2 Event Log Query....................................................................................................... 99
7Network Service Configuration.................................................... 101
8Internet Service Configuration..................................................... 104
9Remote web client ...................................................................... 105
9.1 Log-in and Live View page ..................................................................................... 105
9.2 Remote event search............................................................................................. 108
9.3 Remote video playback.......................................................................................... 109
10 Backup Player.............................................................................. 111
11 Eye2GO ....................................................................................... 113
12 . Abbreviation and definition....................................................... 113

6
1System Overview
1.1 How to start?
Following steps are for bringing on this system from storage setting to starting recording and
live viewing. Details will be described in following contents.
Hardware preinstall & power on
RAID setting
(for iSC-NVR2532-R/A/D)
Windows partition setting
Enable SysGuard
NVR quick setting by Installation wizard
Enjoy your surveillance system

7
1.2 Hardware interface
(1) NVR2316-T
A
Power switch
B
Power LED
C
Reset button
D
System read/write LED
E
Front cover for 4 x 3.5”lockable HDD trays
F
2 x USB 2.0
G
Power socket
H
LAN
I
LAN
J
VGA
K
4 x USB 2.0
L
COM
M
E-SATA

8
(2) NVR2532-T
A
Power switch
B
Power LED
C
Reset button
D
System read/write LED
E
Front cover for 4 x 3.5”lockable HDD trays
F
2 x USB 2.0
G
Power socket
H
Audio Jack
I
COM1
J
COM2
K
VGA
L
DVI-D
M
HDMI
N
LAN
O
LAN
P
4 x USB 2.0

9
(3) NVR2532-U
A
Power switch
B
Alarm mute button
C
Fan failed LED
D
Power LED
E
4 x 3.5”HDD tray
F
Power socket
G
Audio Jack
H
COM1
I
COM2
J
VGA
K
DVI-D
L
HDMI
M
LAN
N
LAN
O
4 x USB 2.0

10
(4) NVR2532-R / NVR2532-A (Redundant PSU)
A
Power switch
B
System reset button
C
Alarm mute button
D
System R/W LED
E
Power LED
F
System Alarm LED
G
LAN1 LED
H
LAN2 LED
I
2 x USB 2.0
J
16 x 3.5”HDD tray
K
Power socket
L
Audio Jack
M
COM1
N
COM2
O
VGA
P
DVI-D
Q
HDMI
R
LAN
S
LAN
T
4 x USB 2.0
NVR2532-R
NVR2532-A (Redundant PSU)

11
(5) NVR2532-D
A
Power button
B
System reset button
C
Alarm mute button
D
Power LED
E
System Alarm LED
F
LAN1 LED
G
LAN2 LED
H
2 x USB 2.0
I
24 x 3.5”HDD tray
J
Power socket
K
Audio Jack
L
COM1
M
COM2
N
VGA
O
DVI-D
P
HDMI
Q
LAN
R
LAN
S
4 x USB 2.0

12
2System Setting
2.1 SysGuard
To prevent from any exception and keep high performance for the SmartVIEW NVR, the
operation system is built with Microsoft Window Embedded 7 and the system drive (Drive C)
is protected with FBWF (File Base Write Filter). If you want to change any settings of
Windows operating system (i.e. storage, network IP address, system time zone, system
date/time, computer name … etc.), you MUST follow the steps to apply changes.
Please do the 4 steps below before using SmartVIEW NVR.
Notice : For the system safety, you have to enable the SysGuard for running SmartVIEW
NVR after changing settings on Windows operation system.
○
1Choose not to enable SysGuard
when warning message pops up.
○
4System auto reboot
○
2Change settings
○
3Enable SysGuard

13
(1) You should disable the SysGuard before changing the system settings.
After system start up, system will pop out a warning message automatically, please click
No to disable the SysGuard.
(2) Close Install action Wizard and SmartVIEW for changing Windows operation system
settings.
Notice
:
Default user name is admin, default password is 1234
You can change the system settings after disabling SysGuard. In this session, all the
changes of the system settings would be applied and the system is not under protection
until the SysGuard is enabled.
Notice
:
The most important setting is to create RAID and format disks, SmartVIEW
Installation Wizard will apply 1st available drive letter (e:) automatically as default
Recording Media

14
(3) Double click on the shortcut of system desktop and click Yes to enable the
SysGuard. System will be restarted automatically.
(4) If your SmartVIEW is already running and SysGuard is enabled, you may open the
SysGuard program and select Disable the SysGuard function and click OK. Then, click
Yes. The system will be restarted to disable the SysGuard. After system reboot, please
refer to above steps to change settings.

15
2.2 RAID Setting
Notice : For NVR2532-R / NVR2532-A / NVR2532-D Only.
If you are using NVR2316-T, NVR2316-K, or NVR2532-T, please Skip to Chapter 2.3 directly.
(1) Login MegaRAID Storage Manager
A. Insert all hard drives to the trays.
B. Power on the system.
C. Please disable the SysGuard (Refer to Chapter 2.1) before changing the RAID
settings.
D. Double click on the icon on the Windows desktop to open the MegaRAID
Storage Manager.
E. Click on IP Address link ( ) under Remote servers list to type User Name “NVR”
() and password (There’s no password in the default setting) then click Login ( )
button to login MegaRAID Storage Manager.

16
(2) RAID configuration
You will enter the main console of MegaRAID Storage Manager.
A. Select to Physical tab and make sure every hard disks you installed in your
SmartVIEW NVR’s front slots are all “Unconfigured Good”(like )
B. Right click on LSI MegaRAID SAS 9260-4i ( ) and choose Create Virtual Drive.
C. Create Virtual Drive –Choose mode will pop up, please select on Simple and click
Next button.

17
D. Create Drive Group –Drive group and Virtual drive settings will pop up, please
select RAID 5 ( ), then click Next ( ) button to create RAID.
E. Create Virtual Drive - Summary window will pop up to confirm all settings are
correct, and then click Finish and OK to complete settings.

18
F. Please make sure all HDD you configured are online ( ).
G. These hard drives will be regarded as one single disk in Windows7 operation
system.
Now you may go to initialize the disk and create new volumes through right click
mouse at WindowsComputer and select on ManageDisk Management.
Please be aware of the recommended maximum volume size is less than 2TB for
the best performance of database.
(3) Enable SysGuard
Please execute SmartVIEW and enable the SysGuard. The system will be under
protection after system is restarted.

19
2.3 Add Storage
SmartVIEW NVR is capable to install up to 24 hard drives as recording storages. To keep the
system working normally, you should operate steps as the following for adding recording
storages:
Notice
:
If you are using NVR2532-R/A/D and your RAID setting has been just done, please
jump to step (5) directly.
(1) Insert all hard drives to the trays.
(2) Power on the system.
(3) Please disable the SysGuard (Refer to Chapter 2.1) before add storage of SmartVIEW.
(4) For storage volume setting in Windows, you may go to initialize the disks and create
new volumes through right click mouse at WindowsComputer and select on
Manage Disk Management. Please be aware of the recommended maximum
volume size is less than 2TB for the best performance of database.
(5) After disk volumes were created properly, system will pop-up window as following
picture. Please close the AutoPlay window.
This manual suits for next models
5
Table of contents
Other Ingrasys Network Hardware manuals
Popular Network Hardware manuals by other brands

MICROBEE
MICROBEE PCFW-104-ETH user manual

Patton electronics
Patton electronics 2500RC user manual

D-Link
D-Link DIR-615 - Wireless N Router Installation
Moxa Technologies
Moxa Technologies ThinkCore DA-660-8-CE Quick installation guide

Arlotto
Arlotto ANVR832 user manual
Ubiquiti
Ubiquiti ER-4 quick start guide
Clare Controls
Clare Controls 4-Channel NVR with PoE user manual

Honeywell
Honeywell MIWI350 quick start guide
IBM
IBM 16/4 Token Ring PCI Special NIC Quickspecs
Cabletron Systems
Cabletron Systems CyberSWITCH HSIM-W6 user guide
Symantec
Symantec SG-S200 quick start guide

Fidelis
Fidelis Network Collector SA quick start guide
