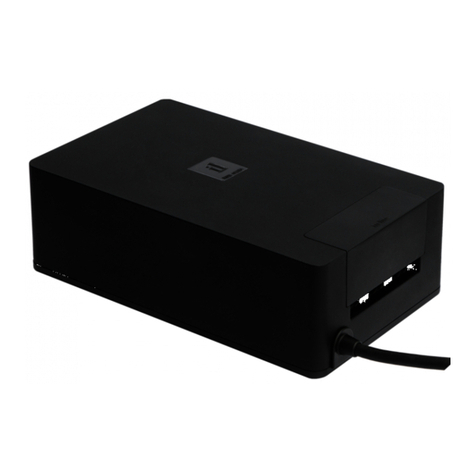
Inlite SMART HUB-150 User manual

SMART HUB-150
MANUAL
OUTDOOR LIGHTING

OUTDOOR LIGHTING
2
START SCREEN
THE START SCREEN OPENS WHEN YOU START UP THE IN-LITE APP.
Select “I’m new here:” if you don’t yet have an account and if the
transformer has not yet been installed.
Select “I already have an account” if the transformer has already been
installed and an account has already been created. Enter your email
address to ask for your personal settings code. Enter this code to load
settings saved earlier.
Choose; ”Use shared code:” if you want to load the transformer settings
shared by others. This code is available in the app settings. In settings
choose the required yard for which a share code must be created with
the “Share yard” button. This code can then be shared with another in-lite
app user.
I AM NEW HERE.
Under “I am new here” open the “Set your yard” screen. Give the yard a
name e.g. “Front yard” and press Next.
PRESS “NEXT”.
The app searches for a connection with the transformer. As soon as the
transformer has been found, the identification code appears. Check that
this is the correct transformer by pressing the “flash light switch” button.
This activates the blue reset button indicator light (the button on the
right-hand side of the transformer).
Press the transformer (number) button when the correct transformer has
been found to continue.

OUTDOOR LIGHTING
3
STARTSCHERM
GIVE THE TRANSFORMER A NAME (SEE POINTER ON THE
SCREEN) AND PRESS NEXT.
THEN THE SCREEN OPENS WITH THE LIGHT ZONES TO BE
SET. PRESS THE “NOT DESIGNATED” BUTTON TO SET THE
FIRST LIGHT ZONE.
Then the screen shown on the right opens and the
lighting connected for this light zone flashes a few
times.
Pressing the “Flash again ” button makes the lighting
connected for the light zone flash again. Then give the
light zone a recognizable name and choose a suitable
symbol for the light zone. Repeat these steps for the
two other light zones.
PRESS “DONE” IN THE NEXT SCREEN WHEN ALL ZONES
HAVE BEEN GIVEN A NAME. THESE THEN TURN GREEN.

OUTDOOR LIGHTING
4
STARTSCHERM
IF THERE ARE NO OTHER TRANSFORMERS TO SET, CONTINUE BY
PRESSING THE “NEXT” BUTTON.
If there are other transformers to be set. Repeat these steps.
AS THE LAST STEP FOR INSTALLING THE TRANSFORMER CREATE
AN ACCOUNT TO SAVE THE SETTINGS.
Enter an email address and press “Save”
THEN THE SCREEN WITH AN EXPLANATION OF THE APP OPENS.
PRESS THE “SKIP” BUTTON IF REQUIRED.
The various options are explained aer pressing the “Continue”
button.
The extra explanation is canceled by pressing “Skip”.

OUTDOOR LIGHTING
5
ROUTINES
AFTER THE INTRODUCTIONS THE APP SHOWS WHICH ZONES ARE SET
AND THE LIGHTING CAN BE SWITCHED ON AND/OR OFF USING THE APP.
The app switches all zones o at the same time with the slide button
above the word settings. You switch each light zone with the slide
buttons.
PRESS “ROUTINES” TO OPEN THE ROUTINES SCREEN.
In the routines screen routines can be added with which light zones can
be automatically switched on or o at certain times. It is also possible
to switch light zones on and o using a motion sensor. This can also be
added as a routine here.
Press “Set your first routine”.
ADD ROUTINE
Here you can set the following routines:
• Sunset automatic: The set zones automatically switch on at sunset
and go out at a set time.
• Sunrise automatic: Here the set zones automatically come on at a
set time and go out again at sunrise.
• Motion sensor: Connect a wireless SMART MOVE motion sensor to
one or more light zones.
• Sunset to be set: Switch the set zones on and o in a period
between 16:00 hours and 4:00 hours.
• Sunrise to be set: Switch the set zones on and o between 04:00
hours and 10:00 hours.
• Sunrise-sunset: Switch the set zones on at sunset and o at sunrise.

OUTDOOR LIGHTING
6
ROUTINE: SUNSET AUTOMATIC AND SUNRISE AUTOMATIC
Give the routine a name and set a start time or end time
with the slide button. Then select the light zones for which
this routine must apply and press the “Add” button.
ROUTINE MOTION SENSOR
Press the pair button for 10 seconds on the back of the
wireless SMART MOVE motion sensor. Release the button
to make the connection with the transformer.
When the SMART MOVE motion sensor has been found,
the following screen opens.
GIVE THE MOTION SENSOR A NAME AND SET THE TIME
AFTER WHICH THE LIGHTING MUST COME ON AFTER
MOTION DETECTION.
The minimum time is 1 minute and the maximum time is 60
minutes.
Select the zones that must light up when motion is
detected and press Ready.
Repeat these steps if a number of wireless SMART MOVE
motion sensors are installed.
ROUTINES

OUTDOOR LIGHTING
7
ROUTINE: SUNSET ADJUSTABLE AND SUNRISE
ADJUSTABLE
Give the routine a name and set a start time and end
time with the slide button. Then select the lines for which
this routine must apply and press the “Add” button.
ROUTINE: SUNRISE-SUNSET
Give the routine a name. Select the lines for which this
routine must apply and press the “Add” button.
ROUTINES

OUTDOOR LIGHTING
8
SETTINGS
This screen is used to manage the various in-lite app settings.
MY YARDS
Select a set yard to change the names of the yard,
transformer or light zone. Here a transformer or
motion sensor can also be added and/or a share
code generated for the parts of the yard with another
smartphone/tablet. If a number of yards are installed,
the app also shows the names of the other yards.
ADD NEW YARD
A new yard can be added with “Add new yard”. Under
Account, settings such as the linked email address can
be changed.
LOG OUT
Note: The settings are not lost when just logging out.
When you log in again (without resetting the SMART
HUB-150) your settings are loaded again. If the app is
started up aer a transformer reset, the start screen
opens and the app can be set again.
WARRANTY
This is where you can read the general warranty
conditions for the in-lite products.
CHANGE TRANSFORMER
The names of the light zones and the name of the
transformer can be changed in this screen.
Select “Transformer (name)” to change the names of the
set light zones. The name of the transformer can also be
changed.
Choose “New transformer” to add a new transformer.
Choose “Motion sensors” to add a new motion sensor.
Choose “Change name” to change the name of the
yard
Select “Share yard” to generate a share code and share
the yard with another user

OUTDOOR LIGHTING
9
SETTINGS
ADD TRANSFORMER
This screen shows the set transformer and allows you to
add a new transformer and/or motion sensor. The name
of the yard can also be changed and a share code can
be generated here.
Press “Find transformers”.
IF THE TRANSFORMER IS FOUND THE FOLLOWING
SCREEN OPENS.
Follow the instructions and give the light zones a name
to add them.
ADD SMART MOVE MOTION SENSOR
Press the “Add motion sensor” button to add a new
SMART MOVE motion sensor.

OUTDOOR LIGHTING
10
SHARE A YARD
The share code is used to share all settings with
another user. The other user must enter this code under
“Use share code” in the app’s start screen.
This share code is easy to send with various apps by
pressing “Share”.
The share code can also be used if a user adds a new
yard if he already has an account.
SETTINGS
ADD YARD
Manually set a new yard giving the new yard a name
and continuing with Next.
Or use a share code of a yard already installed earlier.
With use share code the new yard is automatically
added.
I ALREADY HAVE AN ACCOUNT
Enter the email address already used and press Next.
Aer entering the email address an email is sent with
an access code. Use the “open mail-app” button to
read the email.
Should the code not be accepted, ask for a new code
then press “Send again”.
If the right code is entered, the yard is automatically
installed on the app and a connection will be made
with the transformer(s).

OUTDOOR LIGHTING
11
SETTINGS
USE SHARE CODE
Enter the share code here that has been received from
another app user. Aer entering the code the yard is
automatically installed on the app and the app will
connect to the transformer(s).
WARRANTY
This is where you can read the general warranty
conditions for the in-lite products.
Other manuals for SMART HUB-150
4
Table of contents
Other Inlite Switch manuals
