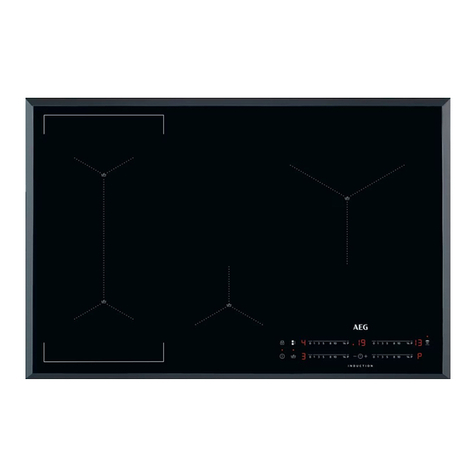
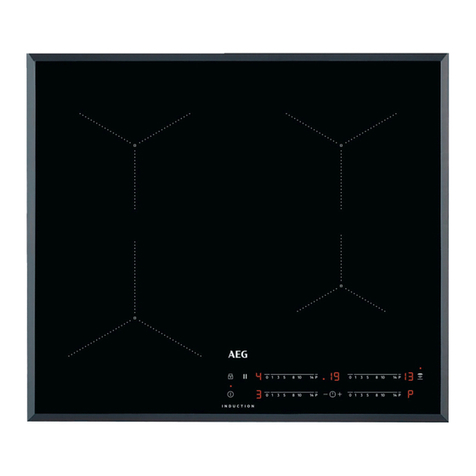
Innocenti ICONFLEXL90 User manual

User Manual
Instruction Manual
Induction Hob MODEL:
ICONFLEXL90

Safety
These instructions are for your safety. Please
read the following instructions carefully before
proceeding with the installation and use of this
appliance.
WARNING: Before connecting the hob, check that
the supplied voltage and frequency match with that
indicated on the appliance rating plate.
Failure to install the appliance in accordance with
these instructions may result in a safety hazard.
If in doubt, ask for advice in store or from a qualified
installer.
WARNING: Consult local regulations regarding
extraction outlets and ensure these are complied
with.
WARNING: This appliance can be used by children
aged from 8 years and above and persons with
reduced physical, sensory or mental capabilities or
lack of experience and knowledge if they have been
given supervision or instruction concerning use of
the appliance in a safe way and understand the
hazards involved. Children shall not play with the
appliance. Cleaning and user maintenance shall not
be made by children without supervision. Keep the
appliance and its supply cord out of the reach of
children less than 8 years old.
2

Do not use inappropriate child safety shields or hob
guards. These can cause accidents.
Do not use covers. These can cause accidents or
overheating and damage to the electric hob.
We recommend that great care be taken during use
and cleaning. Read the cleaning and maintenance
sections of this appliance carefully.
Risk of electric shock! Do not use any high
pressure cleaners or steam cleaners, which can
result in an electric shock.
Danger of burns! The hotplates and surrounding
area become very hot. Never touch the hot
surfaces. When a cooking zone has been in use,
the surface remains hot for some time
afterwards.Be careful not to touch the hot surface
and not to place any objects on it.
After use, switch off the hob element by its control.
Metallic objects such as knives, forks, spoons and
lids should not be placed on the hob surface since
they can get hot.
Never use water to put out burning oil or fat. Switch
off the hotplate.Extinguish flames carefully using a
fire blanket.
3

Risk of fire! The hotplates become very hot.
Never place combustible items on the hob.
Never store objects on the hob.
Risk of fire! Do not use flammable sprays in
close vicinity to the appliance.
Risk of fire! Do not store detergents or
flammable materrials beneath the hob.
This appliance is intended for domestic use
only. The appliance must only be used for the
preparation of food and drink.
The appliance must be supervised during
operation. Only use this appliance indoors.
The manufacturer declines all liability for
personal or material damage as a result of
misuse or incorrect installation of this appliance.
Please dispose of the packing material carefully.
Risk of injury! Saucepans may suddenly move
due to liquid between the pan base and the
hotplate. Always keep the hotplate and
saucepan bases dry.
4

WARNING:There is a risk of electric shock and
fire if cleaning is not carried out in accordance
with these instructions.
WARNING:Use only the same size of fittings and
mounting screws as recommended in this
instruction manual. Failure to follow these
instructions may result in electrical hazards.
WARNING: Switch off the appliance at the mains
supply before carrying out any maintenance
work.
WARNING: Accessible parts may become hot
when used with cooking appliances. Young
children should be kept away. Care should be
taken to avoid touching the appliance.
WARNING: Means for full disconnection must be
incorporated in the fixed wiring in accordance
with the local wiring installation rules for your
country. An all-pole disconnection switch having
a contact separation of at least 3mm in all poles
should be connected during installation.
WARNING: Only clean the hob when it has
cooled down sufficiently. When the power to the
cooktop is switched off, there will be no residual
heat indication but the cooking zone may still be
hot. Take extreme care!
5

WARNING: Unattended cooking on a hob with fat
or oil can be dangerous and may result in fire.
NEVER try to extinguish a fire with water, but
switch off the appliance and then cover flame e.g.
with a lid or a fire blanket.
CAUTION: The cooking process has to be
supervised. A short term cooking process has to be
supervised continuously.
WARNING: Danger of fire: do not store items on
the cooking surfaces.
WARNING: Use only hob guards designed by the
manufacturer of the cooking appliance or indicated
by the manufacturer of the appliance in the
instructions for use as suitable or hob guards
incorporated in the appliance. The use of
inappropriate guards can cause accidents.
WARNING: If the surface is cracked, switch off the
appliance to avoid the possibility of electric shock.
The appliance is not intended to be operated by
means of an external timer or separate remote-
control system.
If the supply cord is damaged, it must be replaced
by the manufacturer, its service agent or similarly
qualified persons in order to avoid a safety hazard.
6

IMPORTANT:
•Heavy-duty scourers, some nylon scourers and
harsh/abrasive cleaning agents may scratch the
glass. Always read the label to check if your
cleaner or scourer is suitable.
•Never leave cleaning residue on the cooktop: the
glass may become stained.
•The appliance is for domestic use as a cooking
device; do not use as a source of heat.
Congratulations on the purchase of your new Induction Hob.
We recommend that you spend some time to read this Instruction / Installation Manual in
order to fully understand how to install correctly and operate it.
For installation, please read the installation section.
Read all the safety instructions carefully before use and keep this Instruction /Installation
Manual for future reference.
7

Product Overview
Top View
User interface
8

9
Reference Description
AON/OFF key
BChild lock key
CPause key
D
Timer control keys &Timer setting
indicator
E Power slider regulating key
FBoost control key
GCooking functions key
HFlexible area key
ITimer setting indicator
JPower level indicator
KTimer Indicator
L
Cooking functions indicator

10
Heating zone Power
Heating Zone ICONFLEXL90
Front left zone 2000/2800W(Booster)
Rear left zone 1500/2000W(Booster)
Rear Right zone 1500/2000W(Booster)
Front Right zone 2000/2800W(Booster)
Right Central zone 2300W/3000W(Booster)
Total Rating Power 9000W

iron pot
magnetic circuit
ceramic glass plate
induction coil
induced currents
A Word on Induction Cooking
Induction cooking is a safe, advanced, efficient, and economical cooking
technology. It works by electromagnetic vibrations generating heat directly in
the pan, rather than indirectly through heating the glass surface. The glass
becomes hot only because the pan eventually warms it up.
Before using your New Induction Hob
Read this guide, taking special note of the ‘Safety Warnings’ section.
Remove any protective film that may still be on your Induction hob.
Using the Touch Controls
The controls respond to touch, so you don’t need to apply any pressure.
Use the ball of your finger, not its tip.
You will hear a beep each time a touch is registered.
Make sure the controls are always clean, dry, and that there is no object (e.g.
a utensil or a cloth)covering them. Even a thin film of water may make the
controls difficult to operate.
11

Choosing the right Cookware
•Only use cookware with a base suitable for induction
cooking. Look for the induction symbol on the
packaging or on the bottom of the pan.
•You can check whether your cookware is suitable by carrying out
a magnet test. Move a magnet towards the base of the pan. If it
is attracted, the pan is suitable for induction.
•If you do not have a magnet:
1. Put some water in the pan you want to check.
2. If does not flash in the display and the water is heating, the pan is suitable.
•Cookware made from the following materials is not suitable: pure stainless steel, aluminum or
copper without a magnetic base, glass, wood, porcelain, ceramic and earthenware.
Do not use cookware with jagged edges or a curved base.
Make sure that the base of your pan is smooth, sits flat against the glass, and is
the same size as the cooking zone. Use pans whose diameter is as large as the
graphic of the zone selected. Using a pot a slightly wider energy will be used at
its maximum efficiency. If you use smaller pot efficiency could be less than
expected. Pot less than 140 mm could be undetected by the hob. Always
centre your pan on the cooking zone.
Always lift pans off the Induction hob – do not slide, or they may scratch the
glass.
12

Using your Induction
•You have not placed a pan on the correct cooking zone or,
•The pan you’re using is not suitable for induction cooking or,
•The pan is too small or not properly centred on the cooking zone.
No heating takes place unless there is a suitable pan on the cooking zone.
The display will automatically turn off after 1 minutes if no suitable pan is
placed on it.
alternately with the heat
If the display flashes
setting
This means that:
Hob
To start cooking
1. Touch the ON/OFF key(A).
After power on, the buzzer beeps once, all displays
show “ – “, indicating that the induction
hob has entered the state of standby mode.
2. Place a suitable pan on the cooking zone that you
wish to use.
• Make sure the bottom of the pan and
Of the cooking zone are clean and dry.
the surface
3. Adjust heat setting by touching the slider regulating key(E) control.
• If you don’t choose a heat setting within 1 minute, the induction hob will
automatically switch off. You will need to start again at step 1.
• You can modify the heat setting at any time during cooking.
13

When you have finished cooking
Usin g th e Kee p war m Function
You can choose 3 handy cooking functions by pressing the cooking functions key
Using the Boost function
Actived the boost function
1. Touching the slider regulating key to decrease the power to “0” level.
2. Beware of hot surfaces“H” will show which cooking zone is hot to touch. It will
disappear when the surface has cooled down to a safe temperature. It can also be
used as an energy saving function if you want to heat further pans, use the
hotplate that is still hot.
Touching the relevant zone boost control key ,the zone indicator show “P.”
and the power reach Max.
Cancel the Boost function
Touching the slider regulating key to cancel the Boost function, then the cooking
zone will revert to the power level you wish.
• The function can work in any cooking zone.
• The cooking zone returns to level 9 after 5 minutes.
each time moves from one function to the other.
-Melt or defrost(about 50℃)
-Heating or keeping warm (about 70℃)
-Simmering , temperature close to boiling ,useful for slow cooking
14

Using the Pause function
The hob have a handy restart function to pause and restart the cooking process
if you’re interrupted.
When the hob is in the lock mode, all the controls are disable except OFF,
you can always turn the hob off with the OFF control in an emergency, but
you shall unlock the hob first in the next operation.
Using Child Lock Function
You can lockthecontrols to prevent unintended use (for example children
accidentally turning the cooking zones on).
When thecontrols are locked, all the controls except OFF control control
are disabled.
To lock the controls
1.Make sure the Induction hob is turned on.
2.Touch thekeylock control for 3 seconds.The timer indicator will show “Lo“
To unlock the controls
1. Touch and hold thekeylock control for 3 seconds.
2. You can now start using your Induction hob.
Using the Timer
You can use the timer in two different ways:
• You can use it as a minute minder. In this case, the timer will not turn any
cooking zone off when the set time has expired.
• You can set it to turn one cooking zone off after the set time has expired.
• You can set the timer for up to 99 minutes.
1.
2.
When the hob is on and working, press the pause key , all burner will
stop working,and all LED indicator will show the symbol “=” .
press the pause key again, all setting will restart at the previous
setting.
15

Using the Timer as an alarm
1. After selecting the cooking zone and the power level required,the dot next to
power level indicator will flash for 5 seconds.
or ,you can2. When the dot stops flashing, touch the timer control key
realize the setting of timing from 1 to 99 minutes.
Hint: Touch the “-“ or ”+” control of the timer once to decrease or increase by 1 minute.
Touch and hold the “-“or ”+” control of the timer to decrease or increase by 10
minutes.
3. When the time is set, it will begin to count down immediately. The display will
show the remaining time,and the dot next to timer indicator will keep on flashing.
4. Buzzer will beeps and the timer indicator will turn off when the setting time
finished.
Setting the timer to switch off zones
1. Selecting the relevant cooking zone by touching the power slider regulating
key to set the power lever you required,the dot next to power level indicator
will flash for 5 seconds.
or ,you
2. Before the dot stops flashing, touch the timer control key
can realize the setting of timing from 1 to 99 minutes.
Hint: Touch the “-“ or “+” control of the timer once will decrease or increase by 1 minute.
Touch and hold the ”-“ or “+”control of the timer will decrease or increase by 10
minutes.
3. When the time is set, it will begin to count down immediately. The timer
willsetting indicator will show the remaining time and the timer indicator
flash for 5 seconds.
16

4. After that, if the indicator will keep on flashing meaning that the timer
setting indicator shows the relevant zone remaining time until the timer
expires; or else the indicator will keep on lighting until the timer
expires.
5. When cooking timer expires, the corresponding cooking zone will be switch
off automatically. Other cooking zone will keep operating if they are turned on
previously.
6. When using “the timer as an alarm” and “the timer to switch off the zones ”
together ,the timer setting indicator will show the remaining time of alarm
as first priority. Press power slider regulating key of relevant cooking zone
to show the remaining time of switch off timer.
17

FLEXIBLE AREA
• Thi s are a can b e use d as a singl e zone , according t o th e cookin g need s
anytime.
• Flexibl e are a i s mad e of tw o independen t inductors th at can b e controlle d
separately . Whe n workin g as a singl e zone , a cookware i s move d fro m on e
zon e to th e othe r on e withi n th e flexibl e are a keepin g th e same powe r level
of th e zon e where th e cookware originall y w as placed , an d th e part th at i s no
t covere d b y cookware i s automaticall y switche d off.
•Important :Mak e sure t o pl ace th e cookware s centere d o n th e singl e
cookin g zone . To use the whole flexible zone use a rectangular or oval
cooking pot. Examples of good pot placement and bad pot placement are
shown below.
1. To activate the flexible area as a single big zone, simply press the dedicated
key .
18

Over-Temperature Protection
An internal temperature sensor will monitor the temperature inside the Induction
hob. When an excessive temperature is detected, the Induction hob will stop
operation automatically.
Detection of Small Articles
When an unsuitable size or non-magnetic pan (e.g. aluminium), or some other
small item (e.g. knife, fork, key) has been left on the hob, the hob automatically
go on to standby in 1 minute. The fan will keep cooling down the induction hob
for a further 1 minute.
2. The flexible zone indicator next to the power lever indicator will be light up.
3. According to the heating zone where the pan is placed, adjust heat setting by
touching the front left zone slider regulating key control.
4. If the pot is moved from the front to the rear part (or viceversa),the flexible
area detects automatically the new position, keeping the same power.
19

Auto Shutdown Protection
Auto shut down is a safety protection function for your induction hob. It shut
down automatically if ever you forget to turn off your cooking. The default
working times for various power levels are shown in the below table:
Power level 1~3 4~6 7~8 9
Default working timer (min) 360 180 120 90
When the pot is removed, the induction hob can stop heating immediately and the
hob automatically switches off after 2 minutes.
People with a heart pace maker should consult with their doctor before
using any induction hob.
20
This manual suits for next models
1
Table of contents
Other Innocenti Hob manuals
Popular Hob manuals by other brands
Electrolux
Electrolux 61 B3A 02 AA user manual
Indesit
Indesit PR 642 operating instructions

Hotpoint Ariston
Hotpoint Ariston PCN 752 T/IX/HA operating instructions

Siemens
Siemens CA 343 Series instruction manual
BALAY
BALAY 3EF920F Instructions for use
Baumatic
Baumatic BMEH93G2I Instructions for use and installation
