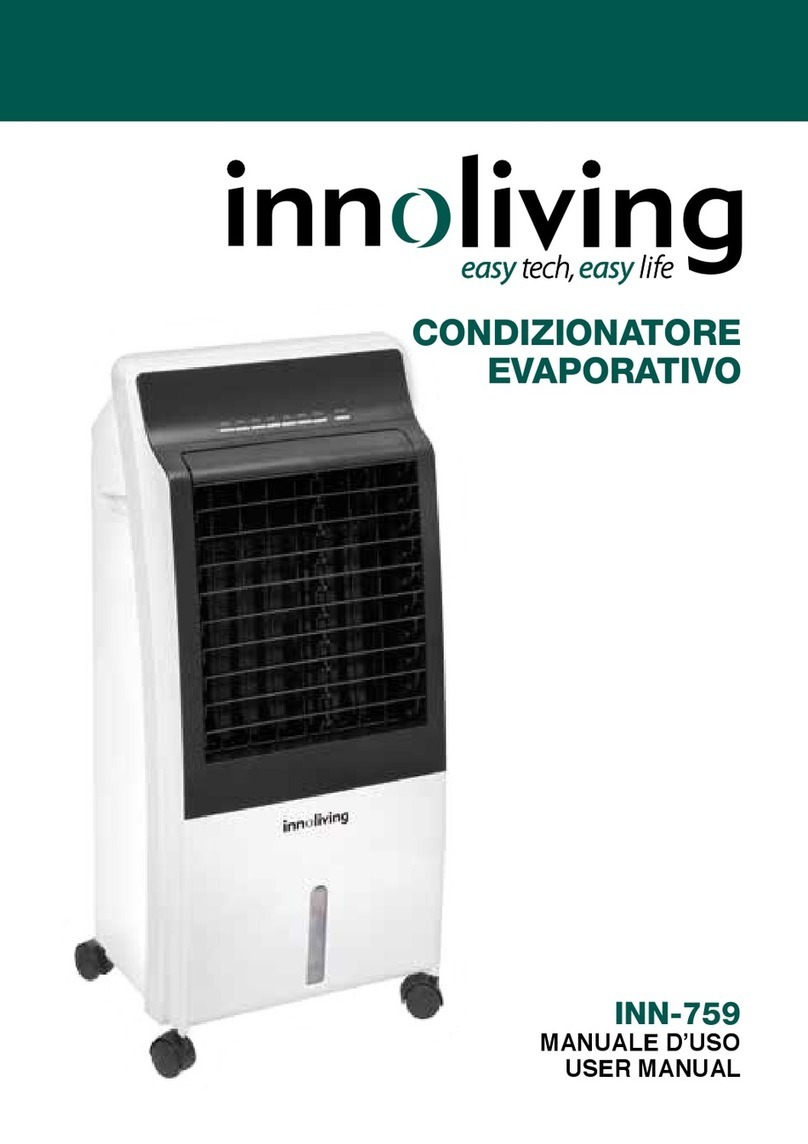
INNOLIVING INN-508 User manual

RAFFRESCATORE
D’ARIA
INN-508
MANUALE D’USO
USER MANUAL
Il presente prodotto è adatto
solo a ambienti correttamente isolati
o ad un uso occasionale.
This product is only suitable for well
insulated spaces or occasional use.

2
RAFFRESCATORE D’ARIA
MANUALE DI ISTRUZIONI
Grazie per aver acquistato il raffrescatore d’aria Innoliving INN-508.
PRIMA DELL’USO LEGGERE ATTENTAMENTE IL SEGUENTE MANUALE DI ISTRUZIONI E
CONSERVARLO PER FUTURE CONSULTAZIONI.
Prima di utilizzare l’apparecchio, leggere attentamente le istruzioni per l’uso e in
particolare le avvertenze sulla sicurezza, attenendosi ad esse. Conservare il presente
manuale, per l’intera vita utile dell’apparecchio, a scopo di consultazione. La mancata
osservanza delle istruzioni potrebbe essere causa di incidenti e rendere nulla la garanzia,
sollevando il fabbricante da ogni responsabilità.
Il presente apparecchio deve essere utilizzato unicamente per lo scopo per cui è stato
progettato, ovvero come raffrescatore evaporativo per uso domestico. Qualsiasi altro
utilizzo è considerato non conforme e pertanto pericoloso.
IMPORTANTI NORME DI SICUREZZA
• Gli elementi di imballaggio (sacchetti di plastica, cartone, polistirolo ecc.) non devono essere
lasciati alla portata dei bambini in quanto potenziali fonti di pericolo e devono essere
smaltiti secondo quanto previsto dalle normative vigenti.
• Prima di inserire la spina nella presa di corrente vericare attentamente che il voltaggio
della vostra rete domestica corrisponda a quello indicato sull’apparecchio e che la presa di
corrente e la linea di alimentazione siano dimensionate al carico richiesto.
• Prima dell’uso, vericare che il cavo di alimentazione e la spina non presentino danni visibili.
Se il cavo o la spina risultano danneggiati, essi devono essere sostituiti dal produttore o dal
servizio di assistenza tecnica autorizzato.
• Questo apparecchio è stato concepito per il solo uso domestico.
• Questo apparecchio può essere utilizzato da bambini di età superiore a 8 anni e da persone
con ridotte capacità siche sensoriali o mentali o con mancanza di esperienza e di conoscenza
se sotto sorveglianza oppure se hanno ricevuto delle istruzioni riguardanti l’utilizzo
dell’apparecchio in sicurezza e se capiscono i pericoli implicati. Le operazioni di pulizia e
manutenzione effettuata da parte dall’utilizzatore non devono essere eseguite dai bambini,
a meno che non abbiano un’età superiore agli 8 anni e operino sotto sorveglianza. Tenere
l’apparecchio ed il suo cavo fuori dalla portata dei bambini con età inferiore agli 8 anni.
• Assicurarsi che i bambini non giochino con l’apparecchio.
• Per staccare la spina dalla presa di corrente, è necessario tirare sempre per la spina e mai
per il cavo.
• Non toccare la spina e il dispositivo con mani bagnate.
• Rimuovere la spina dalla rete elettrica quando l’apparecchio non è in uso.
• Assicurarsi sempre che la spina sia completamente inserita nella presa elettrica prima di
accendere il prodotto.
• Posizionare il cavo in modo tale che non vi si inciampi e che non possa staccarsi.
• Utilizzare il prodotto posizionandolo solo su superci piane e stabili.
• Non utilizzare il dispositivo all’aperto o in prossimità di vasche, piscine, docce ecc.
• Il livello dell’acqua all’interno del serbatoio non deve mai superare il livello MAX indicato
nell’apposito serbatoio.
• Non inserire corpi estranei all’interno del dispositivo.
• Non ostruire l’entrata e la fuoriuscita d’aria in qualunque modo.
• Non aggiungere prodotti chimici o metallici all’interno del serbatoio dell’acqua. Questi
I

3
I
componenti possono infatti arrecare danni al prodotto e comprometterne il corretto
funzionamento.
• Evitare l’esposizione prolungata di bambini e anziani al usso diretto del ventilatore.
• Non lasciare l’apparecchio esposto alla luce diretta del sole per un lungo periodo di tempo.
• Non utilizzare detergenti aggressivi per pulire il prodotto.
• Non lasciare che l’apparecchio e/o il cavo entri a contatto con superci incandescenti.
• Non usare il prodotto se è caduto a terra, se ci sono visibili segni di danneggiamento o
perdite. Evitare urti e cadute.
• In caso di guasto o di cattivo funzionamento dell’apparecchio, spegnerlo e non
manometterlo. Per l’eventuale riparazione rivolgersi esclusivamente ad un centro di
assistenza tecnica autorizzato.
• Utilizzare l’apparecchio in una zona ben ventilata. Durante l’utilizzo, l’apparecchio deve essere
tenuto ad una distanza di almeno 20 cm dalle pareti per garantire il corretto funzionamento
delle prese d’aria. L’apparecchio non deve essere posto immediatamente sotto o dietro una
tenda o simili. Non coprire l’apparecchio con coperte o simili, durante l’uso.
• Tenere le tavolette di ghiaccio lontano dalla portata di bambini.
• Non ingerire il liquido contenuto all’interno delle tavolette di ghiaccio.
• Assicurarsi che il prodotto sia spento e scollegato dalla presa prima di rimuovere le griglie,
di eseguire operazioni di pulizia o di riempire il serbatoio.
• Prestare attenzione durante l’utilizzo del prodotto a causa della possibile emissione di
vapore caldo.
• L’apparecchio non deve essere posto immediatamente sotto a una presa di rete.
• Il prodotto deve essere assemblato prima di essere collegato alla tensione di rete.
• Per evitare surriscaldamenti, non coprire il dispositivo.
DESCRIZIONE DEL PRODOTTO
1 - PANNELLO DI CONTROLLO
2 - ALETTE
3 - FINESTRA DI ISPEZIONE DEL SERBATOIO DELL’ACQUA
4 - RUOTE
5 - INTERRUTTORE COMMUTATORE
6 - INTERRUTTORE ON/OFF
7 - CAVO

4
8 - LEVA DI BLOCCO DEL SERBATOIO
9 - SUPPORTO PER CAVO
10 - VITE
11 - FILTRO
12 - PAD DI RAFFREDDAMENTO
13 - SERBATOIO D’ACQUA
ASSEMBLAGGIO
1. Rimuovere accuratamente il materiale di imballaggio facendo attenzione a non rovinare
il corpo in plastica.
2. Installazione delle ruote. Posizionare le ruote negli appositi fori posti alla base del
dispositivo.
3. Posizionare il dispositivo su una supercie piana e stabile. Tenere il prodotto lontano da
fonti di calore o amme libere.
4. Riempimento del serbatoio d’acqua. Ruotare le leve di blocco serbatoio in posizione
orizzontale e tirare verso di sé il serbatoio per estrarlo parzialmente. Inserire le tavolette di
ghiaccio e riempire il serbatoio con l’acqua per ottenere un getto d’aria ancora più fresco.
Assicurarsi che il livello dell’acqua nel serbatoio non superi il livello MAX indicato.
5. Riposizionare il serbatoio nella sua posizione originale e ruotare le leve di blocco in
posizione verticale.
6. Per il telecomando è necessaria una batteria CR2025. Prima dell’uso, estrarre la scheda
inserita nel pulsante del telecomando. Una batteria di tipo CR2025 è fornita in dotazione.
TELECOMANDO
Inserire la spina nella presa elettrica. Accendere l’unità con l’apposito interruttore ON/OFF.
Quindi si sentirà un breve segnale acustico e il display mostrerà la temperatura corrente e
il condizionatore d’aria passerà alla posizione di stand by. Le funzioni dell’unità possono
essere controllate tramite pannello di controllo posto sul prodotto stesso oppure tramite
telecomando.
FUNZIONE RAFFREDDAMENTO:
Posizionare l’interruttore commutatore (5) nella posizione Cooling.
1. ON / OFF: Premere il tasto “ON / OFF” sul pannello di controllo o premere il tasto ON / OFF
sul telecomando per accendere l’unità. L’unità inizierà a bassa velocità e con una velocità di
ventilazione normale. Per tornare alla posizione di standby, basta premere di nuovo il pulsante
I

5
ON / OFF sul pannello di controllo o premere il pulsante ON / OFF sul telecomando.
2. Speed: la velocità di ventilazione può essere regolata su 3 livelli (LOW – MID – HIGH)
premendo il pulsante ‘Speed’. Ogni volta che viene premuto il pulsante “Speed”, sullo schermo
viene visualizzata un’icona che indica il livello di velocità corrente.
3. Wind: premere il pulsante “Wind” per scegliere la modalità di ventilazione desiderata.
Ogni volta che si preme questo pulsante, un indicatore si accenderà sullo schermo per indicare
la modalità di ventilazione impostata. Ci sono 3 tipi di ventilazione selezionabili: Normale-
Naturale-Sonno.
Modalità Normale (Normal): la velocità di ventilazione rimane costante al livello selezionato
con “Speed”.
Modalità Naturale (Natural): la ventilazione alterna le diverse velocità di ventilazione: una fase
alta, una bassa e una pausa, come ad imitare la ventilazione naturale. L’alternarsi delle velocità
di ventilazione dipende dalla velocità impostata in precedenza con il tasto “Speed”:
1. Se la velocità di ventilazione è impostata su HIGH, la modalità Naturale alternerà la velocità
massima, la velocità media e quella bassa ad una pausa ci circa 6 secondi.
2. Se la velocità di ventilazione è impostata su MID, la modalità Naturale alternerà la velocità
media, la velocità bassa e una pausa di circa 6 secondi.
3. Se la velocità di ventilazione è impostata su LOW, la modalità Naturale alternerà solamente
la velocità bassa ad una pausa di circa 6 secondi.
Modalità Sonno (Sleep): la ventilazione alterna le diverse velocità di ventilazione, poi si riduce
no a rimanere costante. La diminuizione della velocità di ventilazione dipende dalla velocità
impostata in precedenza con il tasto “Speed”:
1. Se la velocità di ventilazione è impostata su HIGH, la modalità Sonno alternerà la velocità
massima, la velocità media e quella bassa ad una pausa ci circa 6 secondi. Dopo 30 minuti, la
velocità rimarrà costante al livello medio di ventilazione.
2. Se la velocità di ventilazione è impostata su MID, la modalità Sonno alternerà la velocità
media, la velocità bassa e una pausa di circa 6 secondi. Dopo 30 minuti, la velocità rimarrà
costante al livello basso di ventilazione.
3. Se la velocità di ventilazione è impostata su LOW, la modalità Naturale alternerà solamente
la velocità bassa ad una pausa di circa 6 secondi. Dopo 30 minuti, la velocità rimarrà costante al
livello basso di ventilazione.
4. Timer: premere il tasto “Timer” per impostare il tempo di funzionamento della ventola (da 0
a 12 ore). Questa impostazione consente all’unità di entrare nella modalità stand-by dopo l’ora
impostata. Premere il pulsante “Timer”, per incrementare il tempo di funzionamento di una
unità alla volta. Per disattivare questa funzione, basta premere il tasto “Timer” no a quando
il display non mostrerà “00”.
5. Swing: premere il tasto “Swing” per attivare la funzione oscillazione delle alette. Una volta
premuto il tasto “swing” l’apposita icona apparirà sul pannello di controllo. Per disattivare la
funzione oscillazione, premere nuovamente il tasto “Swing”. La direzione del usso d’aria può
essere regolata manualmente sistemando le apposite alette.
6. Cooler: per attivare la funzione di raffreddamento dell’aria, premere il tasto ‘Cooler’.
Attenzione: non attivare la funzione di raffreddamento se il livello dell’acqua nel serbatoio è
al di sotto del livello minimo indicato o non c’è acqua nel serbatoio. Prima di attivare questa
I
6
funzione, controllare il livello dell’acqua e riempire il serbatoio se necessario. Sostituire l’acqua
stantia con acqua fresca. È consigliabile sostituire l’acqua nel serbatoio almeno una volta alla
settimana. Una volta attivata la funzione “raffreddamento”, la pompa dell’acqua inizierà
a prelevare l’acqua dal serbatoio facendola passare attraverso il pad di raffreddamento; in
questo modo l’aria evaporata viene espulsa con l’aiuto della ventola.
7. Ionizzatore: premere il pulsante “Ion” per attivare la funzione ionizzatore. L’apposita
icona della funzione si illuminerà sullo schermo e inizierà il rilascio di ioni negativi.
FUNZIONE CALORE:
Posizionare l’interruttore commutatore (5) nella posizione Heating.
1. ON / OFF: Premere il tasto “ON / OFF” sul pannello di controllo o premere il tasto ON /
OFF sul telecomando per accendere l’unità. L’unità partirà con una velocità di ventilazione
normale e un livello di riscaldamento basso (1000 W).
Dopo aver premuto per la seconda volta il pulsante ON/OFF, il dispositivo smetterà di emettere
calore ma la ventola resterà in funzione per altri 30 secondi, dopodiché il dispositivo tornerà
in modalità stand-by.
2. Speed: la funzione di selezione della velocità non è disponibile quando il prodotto è in
modalità “Heating”.
3. Wind/heat: Premere il tasto “Wind/Heat” per scegliere l’intensità di calore desiderata.
Ogni volta che questo pulsante viene premuto, un indicatore si accenderà sullo schermo per
indicare il tipo di intensità selezionato. Ci sono 2 livelli di intensità di riscaldamento: basso
(1000W) oppure alto (2000W).
4. Timer: premere il tasto “Timer” per impostare il tempo di funzionamento della ventola (da
0 a 12 ore). Questa impostazione consente all’unità di entrare nella modalità stand-by dopo
l’ora impostata. Premere il pulsante “Timer”, per incrementare il tempo di funzionamento
di una unità alla volta Per disattivare questa funzione, basta premere il tasto “Timer” no a
quando il display non mostrerà “00”.
5. Swing: premere il tasto “Swing” per attivare la funzione oscillazione delle alette. Una volta
premuto il tasto “swing” l’apposita icona apparirà sul pannello di controllo. Per disattivare
la funzione oscillazione, premere nuovamente il tasto “Swing”. La direzione del usso d’aria
può essere regolata manualmente sistemando le apposite alette.
6. Cooler: la funzione di raffreddamento non è disponibile quando il prodotto è in modalità
“Heating”.
7. Ionizzatore: premere il pulsante “Ion” per attivare la funzione ionizzatore. L’apposita
icona della funzione si illuminerà sullo schermo e inizierà il rilascio di ioni negativi.
Come riempire il serbatoio
Controllare frequentemente il livello dell’acqua nel serbatoio assicurandosi che non vada
mai al di sotto del livello “MIN” indicato nel serbatoio stesso. L’attivazione della funzione
“Raffreddamento” con una quantità di acqua insufciente può causare il malfunzionamento
della pompa dell’acqua rendendo nulla la garanzia. ATTENZIONE: Prima di procedere con il
riempimento del serbatoio, assicurarsi di aver prima disattivato il dispositivo e scollegato la
spina dalla rete elettrica.
Come utilizzare le tavolette di ghiaccio
Inserendo le tavolette di ghiaccio nel serbatoio, è possibile ottenere un getto d’aria più fresco.
I

7
• Riporle per un paio d’ore nel congelatore.
• Una volta congelata l’acqua al loro interno, le tavolette di ghiaccio sono pronte per essere
riposte nel serbatoio. Procedere versando l’acqua nel serbatoio no a raggiungere il livello
MAX indicato.
PULIZIA E MANUTENZIONE
La polvere accumulata nel ltro polvere può ostacolare il corretto afusso di aria. Pertanto
si consiglia di pulire il prodotto regolarmente, seguendo le indicazioni riportate di seguito.
Prima di qualsiasi operazione di manutenzione o pulizia, spegnere l’apparecchio, disinserire la
spina dalla presa di corrente o scollegare l’alimentazione elettrica. Non usare mai detergenti
o abrasivi. Non pulire mai i componenti dell’apparecchio con liquidi inammabili. I vapori
potrebbero causare incendi o esplosioni. Pulire l’esterno dell’apparecchio con un panno
umido e asciugare con un panno morbido.
Filtro antipolvere
Per rimuovere il ltro antipolvere, è sufciente rimuovere la vite, premere verso il basso le
due leve di rilascio che si trovano nella parte superiore del ltro ed estrarlo. Utilizzare un
detergente neutro e una spazzola morbida per pulire e rimuovere la polvere e lo sporco
sul ltro. Riapplicare il ltro pulito inserendo prima la parte inferiore e spingendo la parte
superiore per bloccarla.
Pad di raffreddamento
Dopo aver rimosso il ltro per la polvere, è visibile il pad di raffreddamento. Estrarre il
pad con l’apposita protezione e rimuoverlo delicatamente. Utilizzare un pennello pulito e
morbido per rimuovere la polvere e lo sporco dal pad. Risciacquare con acqua se necessario
e lasciare asciugare all’aria aperta. Non utilizzare soluzioni e detergenti chimici che possono
danneggiare il pad.
Serbatoio d’acqua
Ruotare la leva di blocco serbatoio in posizione orizzontale e tirare verso di sé il serbatoio per
estrarlo parzialmente. Prima di procedere con la pulizia eliminare eventuali residui di acqua.
Utilizzare detergenti delicati per la pulizia del serbatoio. Risciacquare con abbondante acqua
e asciugare con cura prima di riposizionare il serbatoio nella posizione originale. Si consiglia
di effettuare regolarmente le operazioni di pulizia del serbatoio dell’acqua poiché impurità e
depositi di calcare possono danneggiare la pompa pregiudicando il normale funzionamento
del dispositivo.
Pulizia della parte esterna del prodotto.
Pulire l’esterno dell’apparecchio con un panno umido ad eccezione del pannello di controllo.
Non utilizzare detergenti aggressivi che potrebbero danneggiare la parte esterna del
prodotto. Asciugare accuratamente il prodotto utilizzando un panno morbido prima di
procedere nuovamente con il normale utilizzo.
ATTENZIONE: Evitare che l’acqua entri in contatto con il pannello di controllo. Pulire
la parte superiore dell’apparecchio con un panno morbido e asciutto.
I

8
ETICHETTA DATI: Questo prodotto
è conforme a tutte
le direttive europee
applicabili.
Leggere
attentamente le
istruzioni per l’uso
INN-508 RAFFRESCATORE D’ARIA - AIR COOLER
220-240V~50Hz Potenza: 80W (raffrescatore)
2000W (funzione calore)
Innoliving Spa
Via Merloni 9 - 60131 Ancona - Italy
Lot n.
MADE IN CHINA
INFORMAZIONI AGLI UTENTI ai sensi del Decreto Legislativo N° 49 del 14
Marzo 2014 “Attuazione della Direttiva 2012/19/UE sui riuti di apparecchiature
elettriche ed elettroniche (RAEE)”. Il simbolo del cassonetto barrato riportato
sull’apparecchiatura indica che il prodotto alla ne della propria vita utile deve
essere raccolto separatamente dagli altri riuti.
L’utente dovrà, pertanto, conferire l’apparecchiatura integra dei componenti essenziali giunta
a ne vita agli idonei centri di raccolta differenziata dei riuti elettronici ed elettrotecnici,
oppure riconsegnarla al rivenditore al momento dell’acquisto di nuova apparecchiatura di
tipo equivalente, in ragione di uno a uno, oppure 1 a zero per le apparecchiature aventi
lato maggiore inferiore a 25 CM. L’adeguata raccolta differenziata per l’avvio successivo
dell’apparecchiatura dimessa al riciclaggio, al trattamento e allo smaltimento ambientale
compatibile contribuisce ad evitare possibili effetti negativi sull’ambiente e sulla salute e
favorisce il riciclo dei materiali di cui è composta l’apparecchiatura. Lo smaltimento abusivo
del prodotto da parte dell’utente comporta l’applicazione delle sanzioni amministrative di cui
al D.Lgs n. Decreto Legislativo N° 49 del 14 Marzo 2014.
Apparecchio con
isolamento elettrico
di classe II
I
Specifiche tecniche
Descrizione Simbolo Valore Unità
Portata massima aria F5,5 m3/min
Potenza assorbita del ventilatore P80 W
Valori di esercizio SV 0,09 (m3/min)/W
Consumo elettrico in modo “attesa” PSB - W
Livello di potenza sonora del ventilatore LWA 65 dB(A)
Velocità massima dell’aria C10 metri/secondo
Norma di misura per il valore di esercizio IEC 60879:1986 (corr.1992)
Referente per ulteriori informazioni Innolving Spa Via Merloni, 9 60131 Ancona
ATTENZIONE:
tensioni pericolose

9
AIR COOLER GB
INSTRUCTION MANUAL
Thank you for purchasing Innoliving air cooler INN-508.
BEFORE USE READ CAREFULLY THIS MANUAL AND KEEP IT SAFE FOR FUTURE REFERENCES.
Before using the appliance, carefully read the instructions for use and in particular
the safety warnings and follow them. Keep this manual safe for the entire life of the
appliance for future references. Failure to follow the instructions could cause accidents
and void the warranty, relieving the manufacturer of all responsibility.
This appliance must only be used for the purpose for which it was designed, that is as
an evaporative cooler for household use only. Any other use is considered improper and
therefore dangerous.
IMPORTANT SAFETY NORMS
• Keep all packing material (plastic bags, cardboard, polystyrene, etc.) out of reach of the
children, since they are potential sources of danger and must be disposed of as provided
by law.
• Make sure that the voltage indicated on the rating label matches the mains voltage before
plugging in the appliance.
• Before use, check that the power cord and plug are not visibly damaged. If the cord or
plug is damaged, it must be replaced by the manufacturer or by an authorized technical
assistance service.
• This appliance can be used by children over 8 years old and by persons with reduced
physical, sensory or mental capabilities or lack of experience and knowledge, only under
proper supervision, or if they received the instructions regarding the safe use of the device
and if they understand the dangers involved. Keep the product out of reach of children
younger than 8 years old.
• Make sure children do not play with the appliance.
• To unplug the power cord, always pull the plug and never the cord.
• Do not touch the plug or the power cord with wet hands.
• Disconnect the plug from the mains when the product is not in use.
• Make sure the plug has been inserted fully into the electrical socket before turning on the
appliance.
• Always place the product on a at and stable surface.
• DO not use the product outdoors or near bath tub, swimming pools, showers etc.
• The water level inside the tank must never exceed the MAX level indicated in the tank itself.
• Do not insert foreign objects into the device.
• Do not obstruct the entry and exit of air in any way.
• Do not add chemicals or metals inside the water tank. These components can cause damage
to the product and compromise its correct functioning
• Avoid prolonged exposure of children and elderly to the direct ow of the ventilator.
• Do not leave the unit exposed to direct sunlight for a long period of time.
• Do not use aggressive detergents to clean the product.
• Do not allow the appliance and / or the cord to come into contact with hot surfaces.
• Do not use the product if it has fallen to the ground, if there are visible signs of damage or
loss. Avoid bumps and falls.
• In case of failure or malfunction of the appliance, switch it off and do not try to tamper with
it. For repairs, contact only the authorized after sales service.

10
GB
• Use the appliance in a well-ventilated area. During use, the appliance must be kept at a
distance of at least 20 cm from the walls to guarantee correct operation of the air intakes.
The appliance must not be placed immediately under or behind a curtain or similar. Do not
cover the appliance with blankets or similar, during use.
• Keep ice tablets out of reach of children.
• Do not swallow the liquid contained inside the ice tablets.
• Make sure the product is switched off and unplugged before removing the grids or
proceeding with any cleaning and maintenance operations.
• Be careful when using the product because of the possible emission of hot steam.
• Do not place the unit directly under an electrical outlet.
• Before connecting the product with the power source, make sure to assemble it properly.
• Do not cover, risk of overheating.
PRODUCT DESCRIPTION
1 - CONTROL PANEL
2 - AIR WINGS
3 - WATER TANK INSPECTION WINDOW
4 - WHEELS
5 - CHANGE-OVER SWITCH
6 - ON/OFF SWITCH
7 -CABLE
8 - WATER TANK LOCK
9 - CABLE HOLDER
10 - SCREW
11- FILTER
12 - COOLING PAD
13 - WATER TANK
ASSEMBLY
1. Remove the packing material carefully, taking care not to damage the plastic body of the
appliance.
2. Wheel installation. Place the wheels in the appropriate holes at the base of the device.
3. Place the device on a at and stable surface. Keep the product away from sources of heat

11
GB
or open ames.
4. Filling the water tank. Turn the tank lock lever to a horizontal position and pull the tank
towards you to partially pull it out. Insert the ice boards and ll the tank with water to obtain
an even fresher air stream. Make sure that the water level in the tank does not exceed the
MAX level indicated.
5. Replace the tank in its original position and turn the locking lever to the upright position.
6. A CR2025 battery is required for the remote control and it is supplied with the unit. Before
use, remove the card inserted in the remote control button.
REMOTE CONTROL
Insert the plug into the electrical socket. Turn on the unit with the ON / OFF switch. Then
you will hear a short beep and the display will show the current temperature and the air
conditioner will switch to the standby position. The unit functions can be controlled via the
control panel located on the product itself or by remote control.
COOLING FUNCTION:
Turn the Change-over switch on cooling position.
1. ON / OFF: Press the “ON / OFF” button on the control panel or press the ON / OFF button
on the remote control to turn the unit on. The unit will start at low speed and with a normal
ventilation speed. To return to standby mode, simply press the ON / OFF button on the control
panel again or press the ON / OFF button on the remote control.
2. Speed: the ventilation speed can be adjusted on 3 levels (LOW - MID - HIGH) by pressing
the ‘Speed’ button. Each time the “Speed” button is pressed, an icon indicating the current
speed level is displayed on the screen.
3. Wind: press the “Wind” button to select the desired ventilation mode. Each time you press
this button, an indicator will light up on the screen to indicate the set ventilation mode. There
are 3 types of selectable ventilation: Normal-Natural-Sleep.
Normal Mode (Normal): the ventilation speed remains constant at the level selected with
“Speed”.
Natural mode (Natural): ventilation alternates between different ventilation speeds: a high
phase, a low phase and a pause, as if to imitate natural ventilation. The alternating fan speeds
depend on the speed previously set with the “Speed” button:
1. If the fan speed is set to HIGH, the Natural mode will alternate the maximum speed, the

12
GB
medium speed and the low speed and a pause of 6 seconds.
2. If the fan speed is set to MID, the Natural mode will alternate the medium speed, the low
speed and a pause of about 6 seconds.
3. If the fan speed is set to LOW, the Natural mode will alternate only the low speed with a
pause of approximately 6 seconds.
Sleep Mode (Sleep): ventilation alternates between different ventilation speeds, then reduces
to remain constant. The lowering of the fan speed depends on the previously set speed with
the “Speed” button:
1. If the ventilation speed is set to HIGH, the Sleep mode will alternate the maximum speed,
the medium speed, the low speed and a pause of around 6 seconds. After 30 minutes, the
speed will remain constant at the medium speed of ventilation.
2. If the ventilation speed is set to MID, the Sleep mode will alternate the medium speed, the
low speed and a pause of about 6 seconds. After 30 minutes, the speed will remain constant
at the low speed of ventilation.
3. If the fan speed is set to LOW, the Natural mode will alternate only the low speed with a
pause of approximately 6 seconds. After 30 minutes, the speed will remain constant at the
low speed of ventilation.
4. Timer: press the “Timer” key to set the operating time of the fan (from 0 to 12 hours). This
setting allows the unit to enter standby mode after the set time. Press the “Timer” button to
increase the operating time of one unit at a time. To deactivate this function, simply press the
“Timer” button until the display shows “00”.
5. Swing: press the “Swing” key to activate the swinging function of the aps Once the
“swing” button has been pressed, the appropriate icon will appear on the control panel.To
deactivate the swing function, press the “Swing” button again. The airow direction can be
adjusted manually by arranging air wings.
6. Cooler: press the “Cooler” button to activate the cooling function.
Attention: do not activate the cooling function if the water level in the tank is below the
minimum level indicated or there is no water in the tank.
Before activating this function, check the water level and ll the tank if necessary. Replace
stale water with fresh water. It is advisable to replace the water in the tank at least once a
week.
Once the “cooling” function has been activated, the water pump will start to draw water
from the tank, making it pass through the cooling pad; in this way the evaporated air is
expelled with the help of the fan.
7. Ionizer: press the “Ion” button to activate the ionizer function. The appropriate function
icon will light up on the display and the release of negative ions will start.
HEATING FUNCTION:
Set the switch (5) in the Heating position.
1. ON / OFF: Press the “ON / OFF” button on the control panel or press the ON / OFF button
on the remote control to turn the unit on. The unit will start with a normal ventilation speed
and a low heating level (1000 W).

13
GB
After pressing the ON / OFF button for the second time, the device will stop emitting heat but
the fan will remain in operation for another 30 seconds, after which the device will return to
stand-by mode.
2. Speed: the speed selection function is not available when the product is in “Heating” mode.
3. Wind/heat: Press the “Wind / Heat” button to select the desired heat intensity. Each time
this button is pressed, an indicator will light up on the screen to indicate the type of intensity
selected. There are 2 levels of heating intensity: low (1000W) or high (2000W).
4. Timer: press the “Timer” key to set the operating time of the fan (from 0 to 12 hours). This
setting allows the unit to enter standby mode after the set time. Press the “Timer” button to
increase the operating time of one unit at a time. To deactivate this function, simply press the
“Timer” button until the display shows “00”.
5. Swing: press the “Swing” key to activate the swing function of the wings. Once the “swing”
button is pressed, the appropriate icon will appear on the control panel. To deactivate the
swing function, press the “Swing” key again. The airow direction can be adjusted manually
by arranging the appropriate air wings.
6. Cooler: the cooling function is not available when the product is in “Heating” mode.
7. Ionizer: press the “Ion” button to activate the ionizer function. The appropriate function
icon will light up on the display and the release of negative ions will start.
How to fill the tank
Check the water level in the tank frequently, making sure that it never goes below the “MIN”
level indicated in the tank itself. The activation of the “cooling” function with an insufcient
amount of water may cause the malfunction of the water pump making void the warranty.
ATTENTION: Before proceeding with the filling of the tank, make sure to first
disconnect the device to the mains.
How to use ice tablets
By inserting the ice tablets into the tank, a fresher jet of air can be obtained.
• Store them for a couple of hours in the freezer.
• Once the water is frozen inside them, the ice boards are ready to be stored in the tank.
Proceed by pouring the water into the tank until reaching the indicated MAX level.
CLEANING AND MAINTENANCE
Dust accumulating on the dust lter may prevent proper air ow. Therefore we recommend to
clean the lter and all its parts regularly, following the instructions below. Before proceeding
with any maintenance or cleaning operation, switch off the appliance and remove the plug
form the main socket. Never clean the product components with ammable liquids. The
vapours may cause re or explosion.
Dust Filter
To remove the dust lter, simply press the two release levels located at the top of the lter
down to remove it. Use a mild detergent and a soft brush to clean and remove dust and dirt
from the lter. Put the lter on again inserting the bottom rstly and pushing the upper part
to lock it.

14
Cooling Pad
After removing the dust lter, the cooling pad is visible. Take out the pad with the appropriate
protection and gently remove the pad. Use a clean, soft brush to remove dust and dirt from
the pad. Rinse with water if necessary, and leave to air dry. Do not use chemical cleaning
solutions that can damage the pad
Water tank
Turn the tank lock lever to a horizontal position and pull the tank towards you to partially
pull it out. Before proceeding with the cleaning, remove any residual water, removing the
plastic stopper on the bottom of the tank. It is advisable to place a container under the tank
to collect the water, which will naturally start to come out of the product.
It is advisable to operate regular cleaning of the water tank as impurities and scale deposits
can damage the pump, damaging the normal operation of the device.
Cleaning the external part of the product
Clean the external part of the device with a damp cloth with the exception of the control
panel and dry with a soft cloth. Do not use abrasive cleaners. Make sure the unit has been
thoroughly dried before proceeding again with normal use.
WARNING: DO NOT LET WATER COME INTO CONTACT WITH THE CONTROL PANEL.
CLEAN THE TOP OF THE APPLIANCE WITH A SOFT, DRY CLOTH.
TECHNICAL SPECIFICATIONS:
Description Symbol Value Unit
Max air ow F5,5 m3/min
Fan power consumption P80 W
Operating values SV 0,09 (m3/min)/W
Electric consumption in stand by mode PSB - W
Sound power level LWA 65 dB(A)
Max air speed C10 m/sec
Measurement Norm IEC 60879:1986 (corr.1992)
Manufacturer Innolving Spa Via Merloni, 9 60131 Ancona
GB

15
RATING LABEL:
This product complies with all the applicable EU directives.
Read carefully the instruction manual.
Class II insulated electrical appliance.
INFORMATION TO USERS according to Legislative Decree No. 49 of March 14, 2014
“ 2012/19/UE Implementation of the Directive on Waste Electrical and Electronic
Equipment (WEEE)“ The crossed-out dustbin symbol indicates that the product at
the end of its life must be collected separately from other waste.
The user should, therefore, take the equipment with the essential components at the end
of its useful life to the separate collection center of electronic and electrical waste, or return
it to the retailer when purchasing new equipment of equivalent type, in ratio of one to
one, or one to zero for devices with larger side less than 25 CM. The separate collection for
the decommissioned equipment for recycling, treatment and environmentally compatible
disposal contributes to avoid possible negative effects on the environment and human health
and promotes recycling of the materials. Improper disposal of the product by the user entails
the application of administrative sanctions according to Legislative Decree No. 49 of 14 March
2014.
INN-508 RAFFRESCATORE D’ARIA - AIR COOLER
220-240V~50Hz Potenza: 80W (raffrescatore)
2000W (funzione calore)
Innoliving Spa
Via Merloni 9 - 60131 Ancona - Italy
Lot n.
MADE IN CHINA
GB
HIGH VOLTAGE PARTS

Innoliving Spa
Via Merloni, 9
60131 Ancona Italy
Tel 199.188.335
www.innoliving.it
MADE IN CHINA
Rev.00_12.2017
Table of contents
Languages:
Other INNOLIVING Air Conditioner manuals

INNOLIVING
INNOLIVING INN-520 User manual

INNOLIVING
INNOLIVING INN-516 User manual

INNOLIVING
INNOLIVING INN-758 User manual

INNOLIVING
INNOLIVING INN-521 User manual

INNOLIVING
INNOLIVING INN-517 User manual

INNOLIVING
INNOLIVING INN-757 User manual

INNOLIVING
INNOLIVING INN-759 User manual

INNOLIVING
INNOLIVING INN-507 User manual

INNOLIVING
INNOLIVING INN-515 User manual

INNOLIVING
INNOLIVING INN-519 User manual