Press to select
menu options
Press to conrm
a selection or to enter
a sub-menu
Press to close the menu
Press to move the cursor
on the screen or
to adjust a selected item
42”/50” PLASMA HDTV IQUICK SETUP GUIDE I NS-42P650A11/NS-50P650A11
TV
AV
----
Component1
----
Component2
----
HDMI1
----
HDMI2/DVI
-
Source List
▲
▼
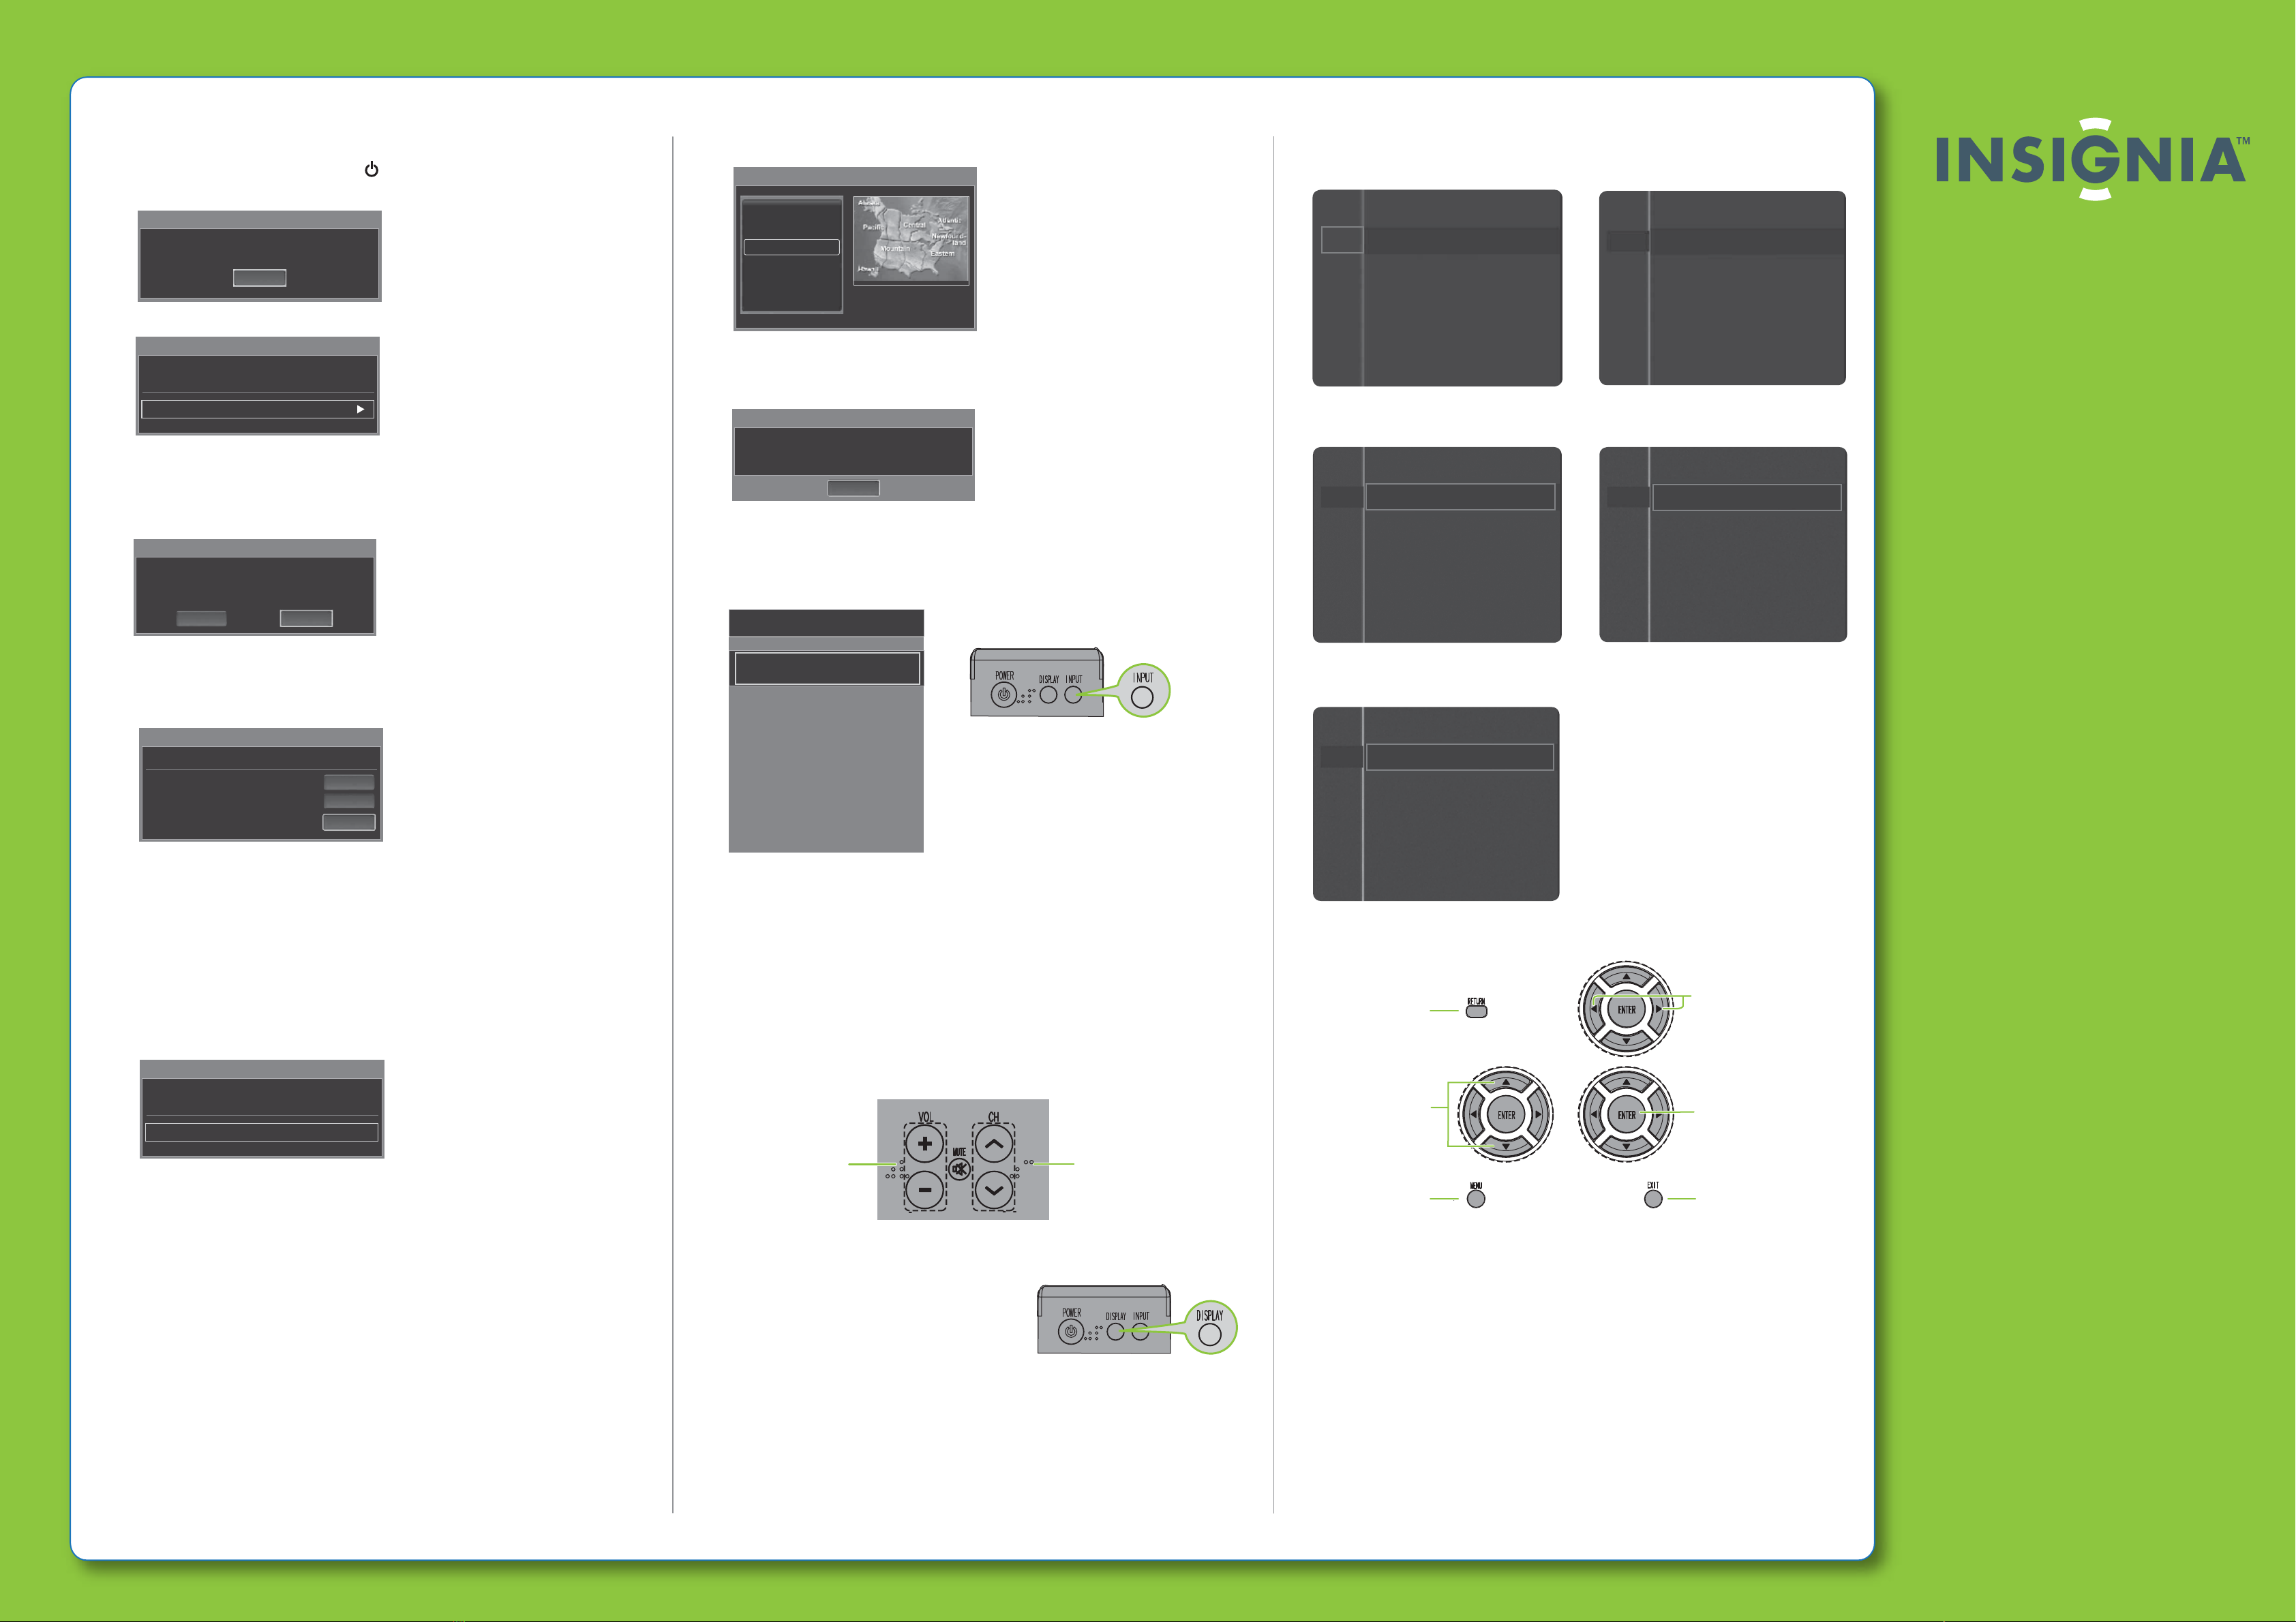
Press to open the
on-screen menu
Press to return to the
previous menu
Press to
change the
volume
Press to
change the
channel
Turning on your TV for the rst time
1Connect the power cord, then press (power) to turn on yourTV. The Plug &
Play introduction screen opens.
2Press ENTER. The Select Language of the OSD screen opens.
3Press ENTER to access the menu, then press to highlight a language. You can
select English, French, or Spanish.
4Press ENTER. The Select ‘Home Use’ when installing this TV in your home screen
opens.Press ▲or ▼to highlight Home Use, then press ENTER.
5The Select the Antenna source to memorize screen opens.
Press ▲or ▼to highlight your TV signal source, then press ENTER.You can
select Air (antenna), Cable (cable TV), or Auto both antenna and cable TV). If
you have cable, select Auto.
6If you select Cable, press ▲or ▼, ◄or ►to highlight the cableTV signal
type, then press ENTER.You can select STD, HRC, or IRC for analog (antenna
or without a cable box) or digital signals. HRC (harmonically related carriers) and
IRC (incrementally related carriers) are schemes that were developed to solve
cable distortion problems. STD (standard) will be satisfactory in most cases. Fiber
optic cable networks have almost eliminated the need for HRC and IRC.
STD is the most common setting. If you do not know which type of cableTV
signal you have, contact your cable TV provider.
YourTV starts searching for available channels in your area and stores them in
the channel list. Scrambled channels are not stored in the list.
7When the search is complete, the Set the Clock Mode screen opens.
Press ENTER, then press ▲or ▼ to highlight Auto (to automatically set the
time using time information from a digital channel) or Manual (to manually
set the time), then press ENTER. If you select Auto, the Set to daylight saving
time screen opens. If you select Manual, the Set current date and time screen
opens.
8 If you selected Auto, press ▲or ▼to highlight:
• O—Turns o the daylight saving time feature.
• On—Turns on the daylight saving time feature.
• Auto—Sets the daylight saving time feature based on the time information
from a digital channel.
9Press ENTER. The Set the time zone screen opens.
10 Press or to highlight a time zone, then press ENTER. If you receive a digital
channel signal, the time zone is selected automatically.
11 Press ENTER. The Enjoy your TV screen opens.
12 Press ENTER.Your TV is ready to use.
Selecting the video input source
• Press INPUT, press ▲or ▼to highlight a source , then press ENTER.
Adjusting the volume
• Press VOL+ or VOL- to change the volume.
• Press MUTE to turn o the sound.
Selecting a channel
• To move to a different channel in the channel list, press CH
▲
or CH
▼
.
OR
• Enter the channel number directly using the number buttons.
Viewing program information
•
Press DISPLAY to view an information
banner. The information banner displays
status information, such as the channel
number, type of sound, and picture and
sound settings.
On-screen menu overview
Picture menu Sound menu
Channel menu Setup menu
Input menu
Navigating menus with your remote control
ENGLISH 09-11571
Sound
Channel
Setup
Input
Antenna : Air
Auto Program
Clear Scrambled Channel
Channel List
Fine Tune
Signal Strength
Channel
Setup
Input
Plug & Play
Language : English
Time
Game Mode : Off
V-Chip
Caption
Energy Saving : Off
Setup
Input
Source List
Edit Name
Plug & Play
Menu Language, Store Demo, Channels, and Time will be set.
Start
Plug & Play
Select Language of the OSD.
Language : English
Select ‘Home Use’ when installing this TV in your home.
Plug & Play
Home Use
Store Demo
Plug & Play
Select the Antenna source to memorize.
Air
Cable
Auto
Start
Start
Start
Plug & Play
Sets the Clock Mode.
Clock Mode : Auto
Plug & Play
Newfoundland
Atlantic
Eastern
Central
Mountain
Pacific
▼
OK
Plug & Play
Enjoy your TV.
Two-year limited warranty
See your User Guide or visit
www.insigniaproducts.com for details.
Need additional help?
See your User Guide! This comprehensive
guide includes everything from basic
how-to steps to more advanced features.
Check out our online community forum at
www.insigniaproducts.com for helpful
information from other Insignia TV owners.
We’re here for you
www.insigniaproducts.com
For customer service, call:
877-467-4289 (U.S./Canada markets)
01 800-926-3000 (Mexico market)
Distributed by Best Buy Purchasing, LLC
7601 Penn Avenue South, Richeld, MN USA
55423-3645
Best Buy Imports, S. de R.L. de C.V. Av. Santa Fe 485,
Segundo Piso, Colonia Cruz Manca, Programa Parcial de
Desarrollo Santa Fe, Delegación Cuajimalpa, Distrito
Federal, México 05349
RFC#BBI0802114Q2
© 2010 BBY Solutions, Inc.
All rights reserved. INSIGNIA is a trademark of BBY
Solutions, Inc. Registered in some countries. All other
products and brand names are trademarks of their
respective owners.
Picture
Sound
Channel
Setup
Input
Mode : Custom
Equalizer
SRS TruSurround HD : Off
Preferred Language : English
Multi-Track Sound : Stereo
Auto Volume : Off
Speaker Select : TV Speaker
Mode : Standard
Contrast : 95
Brightness : 45
Sharpness : 50
Color : 50
Tint (G/R)
Picture Options
: G50/R50
Picture
Sound
Channel
Setup
Input


