Integy i8MT-2016W User manual

v1.0.0 Copyright © 2014 Integy, Inc. All Rights Reserved.
Part#: i8MT-2016W
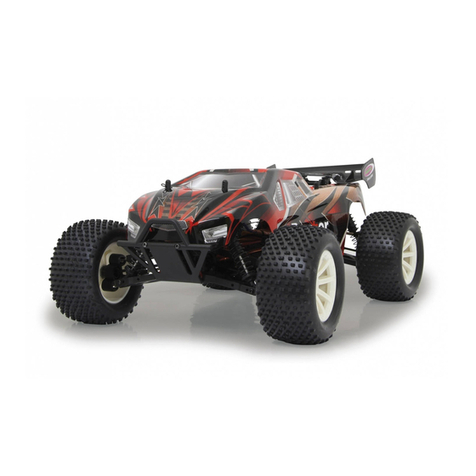
i8MT 4X4 1/8 RC Monster Truck
(RTR)

12.A2021 Exploded
32906
32906
32828
30860
30083
32898
33201
33201
32906
33201 33204
30860
32870
30083
32898
33201
30837
32903
32903
30083
32903
33166
33166
30835 32910
33203
33208
33103
32726
32911
32911
32726
33201 32906
32906
33201
33204
33201
33208
30083
33201
33166
32903
30837
33166
32903
30837
33202
32903
32903 33201
32726
32911
32911
32726
32908
30838
32853
30860
30083 32898
30083
32898
30860
32870
30835 32909
32826
32826
32827
32827
32612
32612
32801
32909
32854
32835
32907
32907
32906
32906
32827
30083
32900
32827
32832
32901
30240
32877
30103
32832
32906
32906
30028
32881
32905
32820
32839
30103
32832
32832
32840
32916
32847
32845
30083
32821
32899
32849
32850
32822
30103
32850
30103
32844
32919
32848
32843
33205
33205
32843
32844
32919
32848
32849
32822
32899
32857
32856
30860
32847 32832
32840
32832
32846
32905
32838
32820
32855
30103
32827
33156
30083
33210
33210 30834
32912
32913
30834
32912
33093
33093
33118
32832
32876
32832
32900
30095
32977
B1090
B1097
Or
B1091
B1120
Or
B1109
B1081
32785
32871
B1115
1.B1091 can only ues one piece
Notes:
2.The electronic equipment please refer to parts list

BEFORE YOU RUN YOUR CAR
Required equipement for operation
1.Tools required for building and maintenance:
Hobby knife Precision ruler or caliper
Needle nose pliers
Hobby scissors Philips screwdriver
Hex wrench
Wire cutters
Thread locking compound Cross wrench
CA glue & rubber cement
IMPORTANT!!!
Check all the screws are tight before using the car!
Check all the screws are still tight after every battery
pack used in the car!
RECOMMENDED:
Use thread lock on all scews that work loose.
PLEASE READ BEFORE STARTING!
Thank you for selecting our racing product ! This vehicle is designed to be fun to drive and uses
good quality parts for durability and performance. The instruction manual you are reading was
designed to be easy to follow yet thorough in its explanations. We want you to enjoy driving your
new R/C car. Well, before you throw down this manual and unleash your new vehicle, please
continue reading for just a few short minutes.
SAFETY GUIDELINES
The vehicle is not intended for use by children without direct supervision of a responsible, know-
ledgeable adult. We shall not be liable for any loss or damages, whether direct or indirect
1

special, incidental, or consequential, arising from the use, misuse, or abuse of this product and/or
any product or accessory required to operate this product.
special, incidental, or consequential, arising from the use, misuse, or abuse of this product and/or
any product or accessory required to operate this product.
IMPORTANT POINTS TO REMEMBER:
Always, turn on your transmitter first before turning on your vehicle receiver switch. When turning an
R/C vehicle off, the order is just the opposite: Turn the receiver switch off first and then turn the trans-
mitter off. Just remember that when your vehicle is turned ON, your transmitter should always be turned
ON. If not, your vehicle will no longer be under the control of your transmitter, and could unexpectedly
take off on its own, causing damage to itself and other people.
Never use old, worn out batteries in your transmitter or vehicle. Use only fresh batteries or fully charged
rechargeable batteries to ensure that you will not exceed the range of your radio system while driving
your vehicle. It is also very important to stop your vehicle immediately when you begin to see that it is
slowing down. This means the batteries in your vehicle are close to being fully discharged, and if you
continue to run your vehicle after it has slowed, it may run "out of control" since it does not have suffi-
cient voltage left to receive the signals from your transmitter.
Only run your vehicle in safe, open areas that will not put anything or anyone in danger of a collision.
Use common sense when driving your vehicle to ensure that you are not causing a potential hazard
to anyone(crowds of people and confined areas should be avoided). Although the model is small
and light weight, it can still hurt when it runs into your ankle height. It can also startle someone who
is not expecting it, so it is extremely important to ALWAYS keep a safe distance between any people
and the path of your vehicle(don't forget this includes yourself)!
Never run your vehicle through puddles, wet grass, snow or any other type of moisture. Also never
use any liquid cleaners around the electronic components on your vehicle. Any small amount of
moisture can cause severe damage to your electronics.
If you be running your vehicle with other R/C vehicles, always confirm before turning your transmitter
on, that no one else is using your same frequency channel. If neccessary, you may change fre-
quencies.
Always let your motor and battery cool down completely between
runs. The motor needs to cool completely at the end of a charge
before using again. Heat is a big enemy of electric motors.
Overheating the motor will shorten its life and can cause it to fail.
Prolonged running on high drag surfaces like grass, carpet etc.
can heat the motor up and cause possible failure.
WHAT ELSE IS NEEDED
8 "AA" alkaline batteries(for the radio transmitter)
GETTING STARTED
1. INSTALLING TRANSMITTER BATTERIES
Install 8 new "AA" batteries into your vehicle transmitter.
Check the life and proper installation of your batteries by switching the transmitter to ON. On vehicle
transmitters, you should see all three LED'S light up(Red, yellow, and green). If you do not, your
batteries may be low on voltage or you may not have installed them all correctly.
As the life of your transmitter batteries begins to decline, the green LED will no longer light. When you
notice that you are down to only the yellow and red lights, this is a caution sign that it is time to install
new batteries. If you continue operating your vehicle, and see that the yellow light goes out(and only
the red light is lit), STOP IMMEDIATELY! Your vehicle may easily travel out of range causing you to
lose all control, which could result in a collision causing damage to the vehicle or other property.
-2-

3. ASSEMBLING THE ANTENNA
Locate the plastic antenna tube(found inside the manual bag).
Run the antenna wire up through the rear antenna mount hole in the
upper chassis plate and begin feeding it into the plastic antenna tube
until it comes out the other side. Pull the remaining wire through the
tube, and then press the tube into the antenna mount in the upper
chassis plate. Bend the antenna wire down around the tube and
install the black rubber antenna cap on the top of the tube. You
may then wrap the remaining wire arount the tube.
DO NOT cut the antenna wire off! This could shorten the range of
your radio system.
4. LEARNING THE TRANSMITTER - FM
Before turning on your vehicle, please familiarize yourself with the controls and adjustments of the radio
transmitter.
You may use the following diagram to confirm the location and function of each of these features.
A. ON/OFF Switch: Controls power to the transmitter.
B. Steering Wheel: Steering the vehicle left and right.
C. Throttle Trigger: Contols the speed and the Forward/Reverse
direction of the vehicle.
D. Throttle Trim: Ajusts the neutral position of the throttle so
your vehicle responds correctly to the trigger.
E. Steering Trim: Adjusts the neutral position of the throttle so
your vehicle travels straight.
F. Throttle Reverse Switch: Reverses the forward/reverse direction
of the steering wheel.
G. Steering Reverse Switch: Reverse the left/right direction of
steering wheel.
H. Antenna: Transmits radio signals to your receiver.
I. Recharging Jack: you can charge the battery with your charger
if you are using rechargeable batteries in your transmitter.
Caution: You can not recharge Non-rechargeable batteries.
J. Battery Power Indicators: Signal when it is time to replace your
transmitter batteries when the red indicator lit.
K. Steering Knob: Adjusts the steering angle
L. Frequency Crystal: Controls the operating freqency(channel) of your transmitter.
H
G
F
A
B
D
C
E
I
J
K
-3-
2. CHARGING YOUR VEHICLE
Charge your vehicle's battery pack. Connect the charger to your battery pack(it will only plug in one
direction) and then plug the charger into a standard wall outlet. Charging takes approximately 30
minutes. When the battery is charged unplug the charger and connect the battery to your speed control
battery's connect plug.
Your vehicle charger will safely charge your battery pack and not over charge it. Be careful when using
after market chargers that you do not overcharge the battery pack and ruin it.

-4-
6. LET THE FUN BEGIN!
After reading all of the above information, you are likely ready to
start racing!
Just proceed as follows:
A. Fully extend the antenna on your transmitter.
B. Turn your transmitter on.
C. Turn your vehicle on.
D. Adjust the “ThrottleTrim” knob on your transmitter if necessary(if the wheels are moving forward
without touching the trigger, turn the throttle trim counter clockwise untill the wheels stop.)
L
5. To change frequency crystals simply remove the black plastic crystal
holder from the back of your transmitter by carefully pulling it straight
out. Slide the crystal out of the holder and install the new crystal labeled
“ Tx”in its place. Then carefully align the two pins that extend from
the transmitter, and gently press it into place.
Do not force the crystal! The pins can easily be broken! Remove the
crystal from your receiver in the same careful manner using a pair of
needle-nose pliers and install the new “Rx”crystal in its place.
PLEASE NOTE:
It is very important that the crystal labeled “ Tx” is installed in the
transmitter and the crystal marked “ Rx”is installed in the receiver.
PLEASE NOTE:
If you do not have any “reverse” when pusing the trigger forward twice , adjust the throttle trim further in
the counter clockwise direction. If you pull the trigger all the way back to forward full speed and your car
stops, then adjust the throttle trim in the clockwise direction. But becareful not to go too far or your
vehicle may not be able to reach full speed when pulling the trigger all the way back.
E. Adjust the “Steering Trim” knob on your transmitter if necessary (so your car will travel in a straigth
line without turning the steering wheel)
F. By now you are likely kicking up dust or burning up the asphalt. We highly recommend that you
continue readding the reminder of this manual to find out how you can get even more enjoyment
out of your vehicle.
RUNNING MULTIPLE VEHICLE
If you have some vehicles that would like to get a vehicle of their own or already have friends with
other vehicles that you will be racing, it is very important that you first check what frequency channe
your vehicle is on and confirm that none of your friends have the same frequency as yours. If you do
find that someone else is using the same frequency channel that you are, you must wait for them to
turn their transmitter and vehicle OFF or you may choose to change the frequency crystals in your
transmitter and receiver (so that you can run together at the same time without causing any radio
interference). Additional frequency cystal sets can be purchased separately and installed in a few
quick seconds.

While if you have our optional radio control system- 2.4G at hand, please read as following:
LEARNING THE OPTIONAL TRANSMITTER - 2.4G
You may use the following diagram to confirm the location and function of each of these features.
A. ON/OFF Switch: Controls power to the transmitter.
B. Steering Wheel: Steering the vehicle left and right.
C. Throttle Trigger: Contols the speed and the Forward/Reverse
direction of the vehicle.
D. Throttle Trim: Ajusts the neutral position of the throttle so
your vehicle responds correctly to the trigger.
E. Steering Trim: Adjusts the neutral position of the throttle so
your vehicle travels straight.
F. Throttle Reverse Switch: Reverses the forward/reverse direction
of the steering wheel.
G. Steering Reverse Switch: Reverse the left/right direction of
steering wheel.
H. Antenna: Transmits radio signals to your receiver.
I. Recharging Jack: you can charge the battery with your charger
if you are using rechargeable batteries in your transmitter.
Caution: You can not recharge Non-rechargeable batteries.
J. Battery Power Indicators: Signal when it is time to replace your
transmitter batteries when the red indicator lit.
K. Steering Knob: Adjusts the steering angle
L. Start button: Channel 3.
2.4GHZ Frequency Pin Setup
1. Switch on the transmitter.
2. Turn on the receiver power(you can choose any channel), plug the jumper into”BIND/BATT” stop of
receiver. When the indicator starts flashing, that means the receiver comes into the set code mode.
At this point, pull out the jumper immediately.
3. The receiver can automatically find the nearest transmitter to match with. Once they match successfully,
the indicator would keep lighting(at this moment, please plug the jumper into” BIND/BATT” again.)
And if the indicator flashes continuously, that means they haven’t matched successfully, please re-try.
-5-

An Instrction of Car Modeling Electric Speed Controler
Functions and Features:
1. Specially designed for RC car, with excellent start-up, acceleration and linearity features.
2. Compatible with sensorless brushless motor.
3. Use top quality electronic components to enhance the current endurance ability of the ESC.
4. 2 running modes(Racing mode and Forward/Backward mode)
5. 4 steps of maximum reverse force adjustment
6. Proportional ABS brake function with 4 steps of maximum brake force adjustment, 8 steps of
drag-brake force adjustment and 4 steps of initial brake force adjustment.
7. 4 start modes(also called “Punch”) from “soft” to “very aggressive”.
8. Multiple protection features: Low voltage cut-off protection for lithium or nickel battery / Over-heat
protection / Throttle signal loss protection / Motor blocked protection.
9. 8 steps of timing adjustment
10. Waterproof and dustproof.
11. Easily program with only one button and compatible with pocket-size program card.
Specifications
Constant Current: 80A
Burst Current: 270A
Resistance: 0.185ohm
Suitable Car: 1/8 Buggy/Truggy
BEC Output: 5.75V/3A
Motor Type: Sensorless Brushless Motor
Dimension: 58x46x35(the height of fan is not included)
Weight: 144(without wires)
The LED Status in Normal Running
1. In normal use, if the throttle stick is in the neutral range, neither the red LED nor the green LED will
light.
2. The red LED lights when the car is run forward or backward and it will flash quickly when the car is
braking.
3. The green LED lights when the throttle stick is moved to the top point(end point) of the forward zone
or backward zone.
Alert Tones
1. Input voltage abnormal alert tone: The ESC begins to check the input voltage when power on, if it is
out of the normal range, such alert tone will be emitted: “beep-beep, beep-beep”(There is 1 second
time interval between every “beep-beep” tone.)
2. Throttle signal abnormal alert tone: When the ESC can’t detect the normal throttle signal, such and
alert tone will be emitted: “beep, bee, beep” (There is 2 seconds time interval between every “beep”
tone).
Protection Function:
1. Low voltage cut-off protection: If the voltage of a lithium pack is lower than the threshold for 2 seconds,
the ESC will cut of the output power. Please note that the ESC can not be restarted if the voltage of
each lithium cell is lower than 3.5V.
2. Over-heat protection: When the temperature of the ESC is over 95 Celsius degree for 5 seconds, the
ESC will cut off the output power. You can disable the over-heat protection function for competition race
3. Throttle signal loss protection: The ESC will cut off the output power if the throttle signal is lost for 0.2
second.
-6-

A Special Instructions About Batteries
Contents:
1. Keep batteries/storage batteries out of reach of children.
2. Do not let batteries lie around openly. There is a risk of batteries being swallowed by children or pets.
In such case, seek instant medical care!
3. Batteries/rechargeable batteries must never be short-circuited, taken apart or thown into fire.
They might explode!
4. Leaking or damage batteries/rechargeable batteries might cause acid burns when getting into contact
with skin. Therefore, use suitable protective gloves.
5. Conventional batteries must not be recharged. Danger of fire and explosion! Only charge rechargeable
batteries which are intended for this purpose, use suitable rechargeable battery chargers.
6. Pls observe correct polarity of batteries/rechargeable batteries and the connection of a re-chargeable
battery pack(note plus/+ and minus/-) when inserting the batteries.
7. If the device is not used for a longer period of time (eg storage), take out the inserted batteries/
rechargeable batteries of the remote control to avoid damage from leaking batteries/rechargeable
batteries.
Recharge the rechargeable battery about every 3 months, because otherwise there may a so called
deep discharge because of the self discharge, which makes the rechargeable batteries useless.
8. Always exchange the entire set of batteries or rechargeable batteries.
Do not mix full batteries/rechargeable batteries with half-full ones.
Always use batteries or rechargeable batteries of the same type and manufacturer.
9. Never mix batteries and storage batteries. Either use eight batteries or eight rechargeable batteries
for the remote control/transmitter.
Please Note:
Before the rechargeable battery pack delivery its maximum power, several complete dis-charge and
charge cycles are necessary.
Always drive the rechargeable battery pack empty, since recharging a “half - full” rechargeable battery
pack can cause a so called memory effect. That means that the rechargeable battery pack loses its
capacity, it no longer releases all of its saved energy, drive time is decreased.
If you are using several rechargeable battery packs or rechargeable batteries, purchasing a high quality
charger maybe worthwhile.
They are normally also suitable for fast charging of rechargeable batteries.
For this purpose, proceed as follows:
If the rechargealbe battery pack was taken directly from the vehicle and is still hot, wait untill the
rechargeable battery pack has cooled down before you recharge. (min. of 5-10 minutes)
Connect the plug-in charger with a proper mains socket.
Connect the rechargeable battery pack with correct polarity with the plug-in charger.
Normally the special design of the two plugs avoids the incorrect connection of the rechargeable battery.
- 7 -

Attention:
Do not use any force when plugging in it!
For reason of safety place the rechargeable battery pack on a non-flammable surface,eg. a tiled floor.
Keep the rechargeable battery pack away from flammable objects.
Never leave the rechargeable battery pack unattended.
The rechargeable battery pack gets warm during charging, this is normal.
Separate the rechargeable battery pack from the plug-in charger after charging, pull the plug-in charger
from the mains socket.
Before using the rechargeable battery pack in the vehicle, wait until it has completely cooled down.
After your playing, please do not forget to cut the connections of battery and ESC!
Disposal:
The user is legally obliged(battery regulation) to return used batteries and storage batteries.
Do not dispose of used batteries via the household rubbish!
Batteries/storage batteries containning harmful substances which been disposed via the household
rubbish is prohibited.
You can return used batteries/accumulators free of charge to any collecting point in your local
authority, so that you comply with your legal obligations and make your contribution to enviromental
protection.
Declaration for Using of Our Products
Even if the vehicle is quite small at the first glance, there is risk of injuries in the case of crash with
people(or animals), because of the high acceleration capacity and the high achievable speed.
Sharp edges and rotating parts also present a high danger!
This is why you should drive very responsibly and carefully, this is especially the case for inexperienced
drivers.
So, here we declaration as below:
1. Please do note this manual carefully, especially the attentions parts and if you are a new player
without enough experience, we will not take any responsibility for the car damages or injuries caused
by incorrect operation!
2. Please do not change the matches of the brushless ESC, motor and the Li-Po battery casually, if you
want to make a change, please do ask for ideas of professional people, incorrect and unsuitable
matches will effect the functions and the car’s high performance, even it will cause the damages of
the electronic parts and the crash of the car!
We do not take the responsibility of car damages and injuries of unsuitable matches or equipment
changes!
3. We have right to change the specification and parameter of the model and without notice in advance,
pls take the material object as the standard!
- 8-

1.Diff.Gearbox Completed 1.Diff.Gearbox Completed
32829
2.Gear Box Completed2.Gear Box Completed
32829
32830
32848
3 2 8 4 8
32848
32858
32858
32859
32859
32860
32861
32863
32865
32862
32868
32868
3 2 8 9 5
32864
32864
32897
3289 7
32632
32632
30095
30095
30103
32902
- 9 -

32833
3.Aluminum Shock Components 3.Aluminum Shock Components
4.Aluminum Shock Assembly4.Aluminum Shock Assembly
32833
32833
32833
32833
32870
3 2 8 9 0
32891
3289 1
3289 1
3289 1
32892
32894
32896
32877
10
3 2 928

5.Plastic Shock Absorber Components
5.Plastic Shock Absorber Components
6.Plastic Shock Assembly6.Plastic Shock Assembly
32833
32833
3289 0
3289 1
32894
32896
32877
32833
32891
32833
32892
3289 1
3297 9
32928
11

7.Middle Diff.Gearbox Completed7.Middle Diff.Gearbox Completed
8.Tyre Assembly8.Tyre Assembly
32826
32826
3 2 8 6 7
32867
32868
32827
32866
32848
32848
32785
3 2 9 1 4
32897
32858
32895
32865
32632
32868
30095
12
33 2 0 5
33207
33206
33107

9.Servo Saver Complete9.Servo Saver Complete
32 8 2 3
32 8 2 3
32823
32823
32823
32824
32824
32824
32825
32825
32878
32879
3 2 8 7 9
32880
3 2 8 8 0
32823
32 8 2 3
10.Brushless Motor10.Brushless Motor
13
11.Steering Servo Mount11.Steering Servo Mount
33117
32872
32872
32920
32834
32827
32906
32726
B1109
B1081
Table of contents
