Intelbras Micro PABX Conecta User manual

CONECTA
MODULARE i
Version handbook: 02/07
Compatible Software: 6.8

Dear user
The Micro PABX Conecta and Modulare i were developed for clients needing up
to four external 4 lines and 12 extensions. These models are very flexible as you
can buy them with a basic configuration, two lines and four extensions, and
upgrade the features whenever necessary.
These PABX come with a large number of features to suit your commercial and
residential needs.
This manual will guide you through the installation and configuration process of
your equipment that will make your daily working environment very pleasant and
profitable. We recommend that you read this manual carefully to have full control
over the features and operations of your PABX.
Should you have any comments about this manual, please feel free to contact
us. After all your satisfaction is our primary goal.
Documentation Department
Intelbras S/A

○○○○○○○○○○○○○○○○○○○○
TABLE OF CONTENTS
INSTALLING AND CONFIGURING YOUR PABX........................ 1
1. GENERAL INSTRUCTIONS .......................................................................... 1
1.1 Where to install your PABX ................................................................................. 1
1.2 Mounting your PABX on the wall ......................................................................... 2
1.3 Identifying the external connectors for the Modulare i and the Conecta ............ 3
1. Identifying the internal connectors of the Modulare i and Conecta ...................
1.5 Installing the extensions ..................................................................................... 8
1.6 Linking your extensions to the PABX .................................................................. 9
1.7 Installing the extension boards .......................................................................... 9
1.8 Installing the external lines ............................................................................... 10
1.9 Installing the external music ............................................................................. 12
1.10 Installing the power supply ............................................................................ 13
1.11 Connecting the ground protection ................................................................. 13
1.12 Technical Specifications ................................................................................. 15
2. GENERAL CONFIGURATION OF THE PABX ............................................. 16
2.1 Changing the main password .......................................................................... 16
2.2 Command to enter PABX program mode ......................................................... 16
2.3 Resetting your PABX ........................................................................................ 17
2. Configuring the lines as route 0 ........................................................................ 17
2.5 Automatic Line Selection (Only in Modulare i) ................................................. 18
2.6 Extension Number Setting ............................................................................... 19
2.7 Prefix Table ....................................................................................................... 20
2.8 Analyzing local numbers digits ........................................................................ 21
2.9 Blocking collect call ......................................................................................... 22
2.10 Auto-answer ................................................................................................... 22
2.11 Identifying incoming calls .............................................................................. 25
2.12 Dial tone timing .............................................................................................. 26
USING THE PABX (IN ALPHABETICAL ORDER) .................... 27
3. FAST ACCESS TO INTERNET ................................................................... 27
3.1 Category for fast internet access ...................................................................... 27
3.2 Using fast internet access ................................................................................ 27

4. COLLECTIVE PHONE DIRECTORY ........................................................... 28
.1 Category for collective phone directory restricted use access and data
protection for extensions. .............................................................................. 28
.2 Storing telephone numbers ............................................................................. 29
.3 Using both phone directories ........................................................................... 29
. INDIVIDUAL PHONE DIRECTORY ............................................................. 29
5.1 Storing telephone numbers ............................................................................. 29
5.2 Using the individual phone directory ............................................................... 30
6. TOLL RESTRICTION .................................................................................. 30
6.1 Set Toll Restriction from extension .................................................................... 30
6.2 Toll Restriction from main PABX extension ........................................................ 31
6.3 Cancelling any TOLL RESTRICTION ................................................................ 31
7. CALL CAPTURE ......................................................................................... 31
7.1 Standard Call Capture ( any extension ) .......................................................... 31
7.2 Call Capture at a specific extension ................................................................. 32
7.3 Extension Group Capture ................................................................................. 32
7. Call Capture from operator queue .................................................................... 32
8. CANCELLING PASSWORDS (EXTENSION, FOLLOW ME, DND & TOLL
FREE RESTRICTION), AT ONCE ................................................................... 32
9. INTERCOM EMERGENCY ......................................................................... 32
9.1 Setting extension to make an emergency call ................................................. 32
9.2 Setting extension to receive emergency call ................................................... 32
9.3 Resetting extension emergency activation ...................................................... 32
9. Making an emergency intercom ...................................................................... 33
10. BOSS-SECRETARY.................................................................................. 33
10.1 Setting the group and the position of each extension .................................... 33
10.2 Calling a group boss-secretary ...................................................................... 3
10.3 Transferring a call to an extension belonging to a boss-secretary group ....... 3
10. Group Boss-secretary extension inquiry ........................................................ 3
10.5 Capturing a call ringing on an extension from a boss-secretary group .......... 35
11. INQUIRIES ............................................................................................... 3
11.1 Changing the flash time of the extension ....................................................... 35
11.2 Extension inquiry ............................................................................................ 35
11.3 Call inquiry to PABX operator ......................................................................... 35
11. Call inquiry to an extension group .................................................................. 36
11.5 Terminating a call inquiry ............................................................................... 36

12.CALL CONFERENCE ................................................................................ 36
12.1 Conference between three extensions ........................................................... 36
12.2 Conference between 2 extensions and one external call ............................... 37
12.3 Conference between 1 extension and 2 external calls ................................... 37
13.CALL DIVERT ............................................................................................ 37
13.1 Always divert .................................................................................................. 37
13.2 Divert if busy ................................................................................................... 37
13.3 Divert if no answer .......................................................................................... 38
14. CALL PARKING ........................................................................................ 38
1 . EXTENSION GROUP ................................................................................ 39
15.1 Types of groups to be set ............................................................................... 39
15.2 Programming the groups ............................................................................... 0
15.3 Calling a group .............................................................................................. 0
16. HOTLINE .................................................................................................. 41
16.1 Hotline without delay (external line) ............................................................... 1
16.2 Hotline with delay (external line) .................................................................... 1
16.3 Hotline without delay (intercom) .................................................................... 1
16. Hotline with delay (intercom) ......................................................................... 2
17. CALL INTRUSION .................................................................................... 42
17.1 Categories ...................................................................................................... 2
17.2 Extension telemarketing................................................................................. 3
18. INTERCOM .............................................................................................. 43
18.2 Chained call ...................................................................................................
19. EXTERNAL CALLS ................................................................................... 44
19.1External call category .....................................................................................
19.2 External calls .................................................................................................. 5
19.3 Calling a number using your extension password .......................................... 5
19. External call through special route ................................................................. 5
19.5 External call category (0 & Special route) using 0 .......................................... 7
19.6 External calls using private code ................................................................... 9
19.7 Calling teleservices ........................................................................................ 50
20. LAST NUMBER DIALED MEMORY .......................................................... 0
21. ROOM MONITORING (BABYPHONE) ...................................................... 0

22. DND (DO NOT DISTURB) ........................................................................ 1
22.1 Cancelling DND using the main extension ..................................................... 51
23. BROKER CALL ......................................................................................... 1
24. CALLS ON HOLD ..................................................................................... 2
2 .1 Capturing a held call ...................................................................................... 53
2 . RECALLS ................................................................................................. 3
25.1 Recalling a busy line ...................................................................................... 53
25.2 Recalling a busy or unavailable extension ..................................................... 53
25.3 Automatic line or extension recall .................................................................. 53
25. Number of rings to wait before programming the recall ................................. 5
25.5 Call back (call last incoming number ) ........................................................... 5
26. EXTENSION PASSWORD ......................................................................... 4
26.1 Digits number for your password.................................................................... 55
26.2 Cancelling the password from the main extension ......................................... 55
27. FOLLOW ME ............................................................................................
27.1 Cancelling follow me from the main extension ............................................... 55
28. TRANSFERRING CALLS .......................................................................... 6
28.1 Return of Transfered calls ............................................................................... 56
28.2 Transferring a call ........................................................................................... 56
28.3 Transferring a call to the PABX operator ......................................................... 56
28. Transferring a call to an extension group ........................................................ 56
28.5 Transferring a call using the private code....................................................... 56
28.6 Transferring a call to another PABX ................................................................ 57
29. INSTALLING THE ACCESSORIES ........................................................... 8
29.1 Communication board ................................................................................... 58
29.2 DISA board ..................................................................................................... 60
29.3 Caller ID board ............................................................................................... 60
29. Interface for doorphone IP 700 ....................................................................... 61
29.6 Tone detection board (Only for Modulare i) .................................................... 62
29.5 Electronic doorphone PI100 .......................................................................... 62
29.7 External activation interface ITA 700 .............................................................. 63
29.8 Emergency call device ................................................................................... 63

PROGRAMMING AND OPERATING THE ACCESSORIES ...... 64
30. COMMUNICATION BOARD...................................................................... 64
30.1 Calendar ........................................................................................................ 6
30.2 Reminder ....................................................................................................... 6
30.3 Setting holidays ............................................................................................. 66
30. Setting the working hours for Saturday .......................................................... 66
30.5 Call me ........................................................................................................... 66
30.6 Cancelling a TI ............................................................................................... 66
30.7 Automatic night mode service ....................................................................... 67
30.8 Message signal for unanswered calls ............................................................ 68
30.9 Extension call timer ........................................................................................ 68
30.10 DISA - Auto-Answer ..................................................................................... 68
30.11 Remote programming using a MF phone .................................................... 70
30.12 Emergency call to an external number......................................................... 71
30.13 External number call back ........................................................................... 72
30.1 Station Call report ........................................................................................ 73
31. DISA BOARD - AUTO ANSWER ............................................................... 76
31.1 Description ..................................................................................................... 76
31.2 DISA Configuration ......................................................................................... 77
32. CALLER ID BOARD.................................................................................. 79
32.1 PABX caller ID ................................................................................................ 79
32.2 Extension caller ID .......................................................................................... 80
32.3 Remove caller ID category ............................................................................. 81
32. Received call classification for the Ti (KTS) .................................................... 81
32.5 Prefix DDD/Area code for Ti ............................................................................ 82
33. ELECTRONIC DOORPHONE ................................................................... 82
33.1 Physical position for PI 100 ............................................................................ 83
33.2 Physical postion for third party doorphones ................................................... 83
33.3 Desactivating an installed doorphone ........................................................... 83
33. Access category to the doorphone ............................................................... 83
33.5 Doorphone attendant ..................................................................................... 8
33.6 External number as doorphone attendant ..................................................... 8
33.7 Activating the doorphone attendant .............................................................. 85
33.8 Calling the doorphone ................................................................................... 85
34. INTERFACE FOR EXTERNAL ACTIVATION ITA 700 ................................ 86
3 .1 Access category to external activation programming in day mode ............... 86
3 .2 Enabling external activation ........................................................................... 87

3 .3 Enabling external activation during a call ...................................................... 87
3 . Programming the command time .................................................................. 87
3 .5 Automatic external activation ........................................................................ 87
3 .6 Emergency call through an external device ................................................... 88
3 .7 Cancelling the emergency call ...................................................................... 89
3 TONE DETECTION BOARD (LEAST COST ROUTING) ............................. 89
35.1 Programming the time table for one carrier ................................................... 89
35.2 Programming the time table for various carriers ............................................ 90
35.3 Desactivating the time tables 1 and 2 ............................................................ 90
DISA BOARD PRIVATE MESSAGES ........................................ 90

1
Installing and Configuring your PABX
1. GENERAL INSTR CTIONS
1.1 Where to install your PABX
Chocse a place next to the telephone line and electrical socket, where the distribution of the extensions is
easy. If there is a point where all the extensions are connected to the external line, this will be the ideal place
for installing your PABX.
Before installing the PABX, you shoud carefully read the following instructions:
- Do not install the equipment in places without ventilation, with humidity, next to sources of heat or
vibrations.
- Avoid installing the PABX in places with intense sun light, behind doors, under windows or in busy places.
- Do not install the PABX next to electronic or radio equipment to avoid interference.
- Do not run the wires of the telephone line and/or the extensions next to electrical wiring or antenas.
To mount your PABX on
the wall, you have to
follow the drilling points
marked on the base, and
to follow the described
steps in the next page.

2
Step 1
Leaving a
minimum distance
of 1, 5 mtr from
the floor; mark the
point to drill. When
done, insert
the anchor plug
and the screw
(leaving 1/2 cm of
the head off the
wall).
Step 5
Remove the
PABX base, drill
the hole and
then insert the
anchor plug.
Step 2
Hook the
PABX base
onto the
screw head.
Step 3
Push the PABX
base downwards
until the screw
head fits into the
base mount.
Step
Aline the
PABX base
and mark
the spot for
the second
drill.
Step 6
Hook the
PABX base
again onto the
upper screw
head, aline
with the lower
hole, and
fasten the
second screw.
1.2 Mounting your PABX on the wall

3
1.3 Identifying the external connectors for the Modulare i and the Conecta
CN36 - Extensions ( Extension 20 to Extension 31);
CN22 - External Activation Board ITA 700;
CN23 - Doorphone IP 700;
J9 - Jumper for External or Internal Music;
CN37 - External Music input;
CN38 - External Lines 1 and 2;
CN39 - Groud Protection;
CN 0 - External Lines 3 and ;
CN 1 - Telephone Systems TI630i/530/TI730i (TXTI, GNDTI); Serial Interface (TXDB, RXDB, DCDB e
GND);
CN 2 - External Power Supply.

MOD LARE I
1.4 Identifying the internal connectors of the Modulare i and Conecta
Opening the PABX
Press the lateral clips to remove the PABX cover. To place the cover again, just insert it on top of the base
and press.

5
Extension Board Slot:
Slot 1 : Extensions 20 to 23 (CN8, CN13, CN17, CN2 , CN27);
Slot 2 : Extensions 2 to 27 (CN9, CN1 , CN18, CN25, CN28);
Slot 3 : Extensions 28 to 31 (CN10, CN15, CN19, CN26, CN29);
Communication Board: CN1, CN , CN5, CN7, CN11 e CN12;
DISA: CN2, CN3, CN6 e CN16;
J1 - Watch-Dog Jumper ( always closed ); J2 - Reset Jumper;
J3 - Jumper for +5V;
Trunk Board (juntor) 3: CN20, CN30, CN32 e CN33;
Trunk Board (juntor) : CN21, CN31, CN3 e CN35;
J - Battery Jumper;
J5 - Jumper for +12V;
J6A and J6B: activate lines 1 and 2; J7A and J7B: Polarity inversion for Line 1 and 2; J8A and J8B:
adjuste ring sensor for line 1 and 2;
LD2: When flashing, PABX program is functioning properly; LD3: indicates current of +12V;
Caller ID Board : CN 3, CN , CN 5, CN 6;
J11A e J11B: Data reception for Caller ID Board;
J12: Selection jumper for interface IP 700 for Doorphone, or extension 31;
Tone Detection Board, CN 7, CN 8 e CN 9.

6
CONECTA

7
Board 1: Extensions 20 to 23 (CN8, CN13, CN17, CN2 , CN27);
Board 2: Extensions 2 to 27 (CN9, CN1 , CN18, CN25, CN28);
Communication board socket: CN1, CN , CN5, CN7, CN11 and CN12;
DISA board socket: CN2, CN3, CN6 and CN16.
J1 - Jumper Watch-Dog (should remain closed) 2 - Reset Jumper;
J3 - Jumper +5V;
J - Jumper for battery;
J5 - Jumper +12V;
J6A and J6B: enable lines 1 and 2; J7A and J7B: polarity inversion for line 1 and 2; J8A and J8B:
Adjust ring sensor for line 1 and 2;
LD2: when flashing indicates proper function of the PABX; LD3: indicates voltage +12V;
Caller ID board socket : CN 3, CN , CN 5, CN 6;
J11A and J11B: Allow for data reception in the Caller ID board;
Trunk board socket (juntor) 3: CN20, CN30, CN32, CN33;

8
1.5 Installing the extensions
Before connection your extension wires to your PABX, you should prepare the distribution of these wires
from the telephone until the place of the PABX. Following are two forms for distributing the extensions.
PRECA TION !
- Do not use multi pair wires, do not run various extensions in the same conduit, keep the wires far from the
electrical network or electronic devices.
1.5.1 Existing pre-installed extensions sockets
1.5.2 No preexisting installation
You will need to
connect each
extension wire to a
phone socket, and
then push the wiring
to the point of
installtion of your
PABX.
You will need to
connect each
extension wire to a
phone socket, and
then push the wiring
to the point of
installtion of your
PABX using PVC
conduits (use PVC
conduits 2200x10x20)

9
1.6 Linking your extensions to the PABX
1.7 Installing the extension boards
Each board supports extensions. To have 8 extensions, you need to install 2 extension boards, and for 12
extensions, 3 extensions boards are required. Note: The conecta is supplied with 2 extension boards.
Remove the wire
insulation and press the
connector clip (CN 36)
downwards.
Insert the wires into the
connector and release
the clip.
Slot for Extension 28, 29, 30 e 31.
Slot for Extension 20, 21, 22, e 23.
Slot for Extension 2 , 25, 26, e 27.

10
NOTE !
- If after installing your PABX you notice interference or low quality transmission through the extensions,
verify that all the installation instructions have been followed, and that the equipment is not near a source
of interference.
1.8 Installing the external lines
If the PABX is installed close to the external line termination, just run the wire to the PABX and follow the
instructions below. In the event that your external line termination is far from your PABX, you would need to
run the wire through a PVC conduit (utilize PVC 2200x10x20), to avoid having loose wires hanging in your
premise.
NOTE !
- Before connecting your external line to the PABX make sure to identify the line signaling mode (Pulse or
Tone). To do so, establish a call using a regular telephone connected to the telephone line in mode Tone.
- If the call is established, your line has a multifrequencial signal (Tone), in such case, you can use your
PABX without any configuration programmimg of the line as route 0 since the PABX comes programmed
to operate in multifrequencial mode (Tone).
- If the call is not established, this means that your line has a decadic (Pulse) signal; in such case inquire with
your carrier about the possibility to alter your line signal to multifrequencial. If not, you will need to configure
your lines as route 0 to program your PABX for a decadic line signal.
1.8.1 Installing line 1 and 2
NOTE !
- If you don´t use line 1 or 2, you should free the jumper J6 A or J6 B of the PABX;
- To locate the jumper, see identifying the PABX connectors.
Remove the insulation of the wires for line 1 e 2
and press the connector clip CN 38 downwards.
Insert the wire into the
connector and release
the clip.

11
1.8.2 Installing line 3 and 4
To install line 3 and , you need 2 trunk boards. The following instructions will guide you through the process
of installation:
1.8.2.1 Installing the trunk boards for line 3 (Conecta) and 3 and 4 (Modulare i).
Unsheath the wire end (line 3 & ) and
press down the conector´s crank (CN 0)
Insert the wires
and release the
crank.
Line 3:
Remove jumper CN 32 and install the trunk
board in the slots CN20; CN30; CN 32 e
CN33. If after installing the board, line 3 is not
used, you should open the jumper J1 of the
board.
Line :
Remove jumper CN 3 and install the trunk
board in the slots CN21, CN31, CN 3 and
CN35. If after installing the board, line 3 is not
used, you should open the jumper J1 of the
board.

12
NOTE !
- If after connecting the external lines, you notice that the PABX is not receiving calls, it could be that your
equipment is not identifying the ring signal; you need to adjust the PABX sensibility for line 1 and 2 using
the jumpers :
For line 1 (J8 A) and Line 2 (J8 B). For lines 3 and you need to adjuste the jumper J3 of the board
corresponding to the external line:
- Remove the jumper if the ring signal is too weak.
- Plug the jumper in position 1 and 2 if the ring signal is medium.
- Plug the jumper in position 2 and 3 if the ring signal is high.
- If you want your PABX to use polarity inversion, you need to close the jumper J7 A for line 1 and J7 B for
line 2. For line 3 and close jumper J2 of the trunk board corresponding to the line. See Using Polarity
Inversion on how to program this feature.
1.9 Installing the external music
The Modulare offers on hold music for incoming calls, call inquiries, call transfering, call waiting or after auto-
answer; if you have more than one line and other incoming calls are being held, only the first line will use on
hold music. The remaining lines will not use this feature.
Remove the wire insulation of
the radio or CD player, press the
clip of conector CN 37
downwards.
Insert the wires and release
the clip.
Remove the
Jumper J9 to allow
the e ternal music
in.
This manual suits for next models
1
Table of contents
Other Intelbras Telephone System manuals
Popular Telephone System manuals by other brands
Bell System Practices
Bell System Practices 630 Series manual
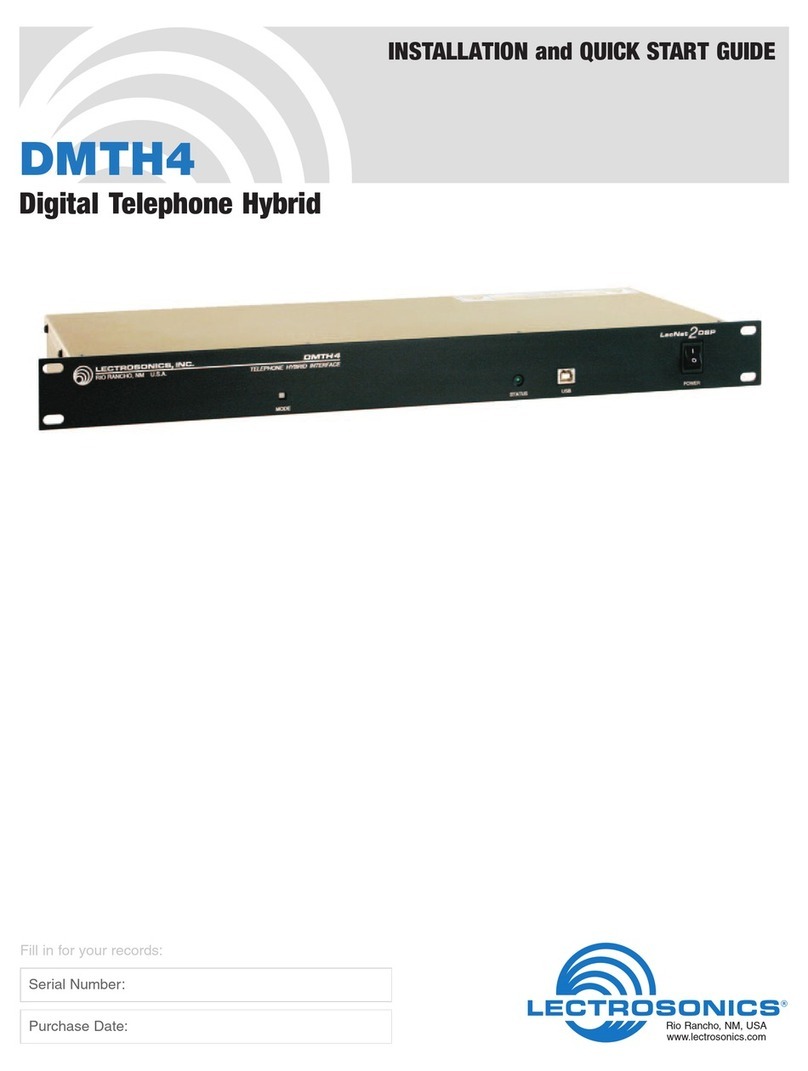
Lectrosonics
Lectrosonics DMTH4 Installation and quick start guide
LG
LG LDK24 ADSL Router Programming manual

Init7
Init7 MikroTik Fiber7-X Instruction
SAN/BAR
SAN/BAR SB6620B Circuit description
Toshiba
Toshiba Strata AirLink DK40 Programming manual
Siemens
Siemens Gigaset 2415 owner's manual
General Telephone & Electronics
General Telephone & Electronics Leich 40 Technical bulletin

Fujitsu
Fujitsu F9600 Interface Interface guide
Avaya
Avaya IP Office 3.0 installation manual

Lucent Technologies
Lucent Technologies PacketStar AC 60 user guide
3Com
3Com NBX V3000 Analog datasheet

