Intelbras TX 8000 User manual

User manual
TX 8000

TX 8000
Universal transmitter
Congratulations, you have just purchased a product with Intelbras quality and safety.
The TX 8000 universal transmitter was developed to facilitate the installation of wired sensors in your daily life, as it allows a
wired sensor to communicate wirelessly with the AMT 8000 alarm center. , providing longer battery life. It also has a tamper
key to protect against tampering, making your environment even more secure, a key for registration and a status indicator
LED. Compatible with all Intelbras wired sensors and most wired sensors available on the market. Carefully read the intro-
ductory product information for the correct use of the TX 8000 Universal Transmitter.

Care and safety
» LGPD – Data processing by Intelbras: Intelbras does not access, transfer, capture or perform any type of processing of
personal data from this product.
» This product is intended for indoor environments.
» Avoid installing the transmitter directly under metallic surfaces so that there is no change in its operating characteristics.
» Conrm the installation location is stable and appropriate.
» The universal transmitter TX 8000 is exclusively for use in sensors with normally closing contact (NC).
» Wireless communication technology, when exposed to environments with high power radiation, may suffer interference
and have its performance impaired, for example: places close to TV towers,AM/FM radio station, amateur radio station, etc.
» Do not expose the TX 8000 magnetic sensor to direct sunlight, rain and moisture.
» For your safety, test the product and systems at least once a week. This is necessary due to changing environmental
conditions, electrical or electronic outages and violations. Take all necessary precautions for the safety and protection
of your property.

Summary
1. Technical specications 5
2. Features 5
3. Product 6
4. Sensor opening 6
5. Enrolling the TX 8000 Transmitter 7
5.1. Deleting sensor registration ...................................................................7
6. Identied the best location for installation 7
7. Installation 8
7.1. Connection between the TX 8000 and the wired sensor ..............................................8
8. Conguring the TX 8000 transmitter 9
8.1. Conguring the TX800 through the keyboard ......................................................9
8.2. Information about LED operation ..............................................................10
9. Battery 12
10. Test 12
11. Homologation 12
Warranty term 13

5
1. Technical specications
Operating voltage 3V Lithium battery, model CR2450
Operating current 3uA
RF range 600 meters without barrier
Transmission frequency 915MHz – 928MHz
Power 11 dBm
Modulation DSSSS BPSK 40 Kbps
Compatibility AMT 8000 alarm panel
Anti jamming Against invasive signs
Anti-violation rear tamper
Installation environment Internal
Operating Temperature -10°C to 50°C
Transmitter Dimensions (L × H × D) 34,4 × 18,6 × 69,2 mm
2. Features
» Anti-tampering (tamper key);
» Low battery indication;
» Easy installation;
» Key for registration;
» Drive status indication LED;
» Protection against malicious signals;
» Encryption in data transmission between devices;
» Transmission frequency 915 MHz – 928 MHz.

6
3. Product
1. Transmitter base
2. Screw hole for xing
3. Button for registration
4. Light conductor (LED)
5. Transmitter cover
6. Battery contact
7. Zone input terminal
8. Sync key
9. Tamper key
4. Sensor opening
To access the TX 8000 board for registration, battery replacement or to unregister it from the control unit, simply open
the lock with the help of a screwdriver and remove its base. This way the board will be exposed and ready for handling.
Remove the plate, then insert the battery (model CR2450), respecting the polarity.

7
5. Enrolling the TX 8000 Transmitter
To register the TX 8000 transmitter code on the AMT 8000 control panel, follow one of the options below:
First registration option
Insert the LITHIUM 3 Vdc battery - CR 2450. The sensor will be ashing the red LED, register the sensor code XAS 8000 in
the AMT 8000 control panel as follows:
Press the AMT 8000 control panel’s synchronization key (the blue indicative LED will be lit) then press the sensor’s syn-
chronization button, observing if the LED will ash green, indicating the correct registration. If the LED ashes red, the
registration was not performed and the procedure must be repeated.
Second registration option
Press the AMT 8000 control panel’s synchronism key (the blue LED indicator will be on) then insert the CR 2450 battery in
the sensor, observing if the LED will ash green, indicating the correct registration. If the LED ashes red, the registration
was not performed and the procedure must be repeated.
Note: after pressing the control panel’s synchronization button, the blue LED indicative of the control panel will remain
on for approximately 3 minutes after the last registration performed, after that time it will automatically turn off and it will
not be possible to perform new registrations until the sync is pressed again. If no device is registered, the control panel’s
LED will automatically turn off after 3 minutes.
The sensors will be addressed according to the sequence performed, Example: First sensor will be registered in zone 1, the
second sensor in zone 2, the third sensor in zone 3 and so on.
To perform the registration of other sensors through keyboard commands and more information, please consult the com-
plete manual of the AMT 8000 control unit.
5.1. Deleting sensor registration
If you want to delete the sensor registration, just press and hold the sensor’s synchronization key for approximately 10
seconds, watching the LED indicator until it ashes red twice.
Note: when physically erasing sensors, they must be erased from the control unit’s memory via programming.
01 to 64
Enter71Enter Zone N° +++
6. Identied the best location for installation
The TX 8000 transmitter has signal level indications for communication with theAMT 8000 control panel, this will help you
choose the best installation location. follow the procedure:
1. After duly registered, take the sensor to the environment you want to protect;
2. Once chosen, position the sensor in the exact location where it will be installed and carry out a transmission through an
opening and a closing, if the sensor is in a door or window for example, just open and close it.
Note: it is very important to check the LED status when opening and closing.
3. Observe the color that the LED will light up and check in the following table if the sensor can be installed in that location;
LED status communication level
Green Excellent signal level (recommended installation location)
Orange Regular signal level Not recommended location for installation (communication failure may occur)
Red No communication (Do not install on site)
4. If the signal level is not excellent, reposition the TX 8000 and perform the procedure again.
8
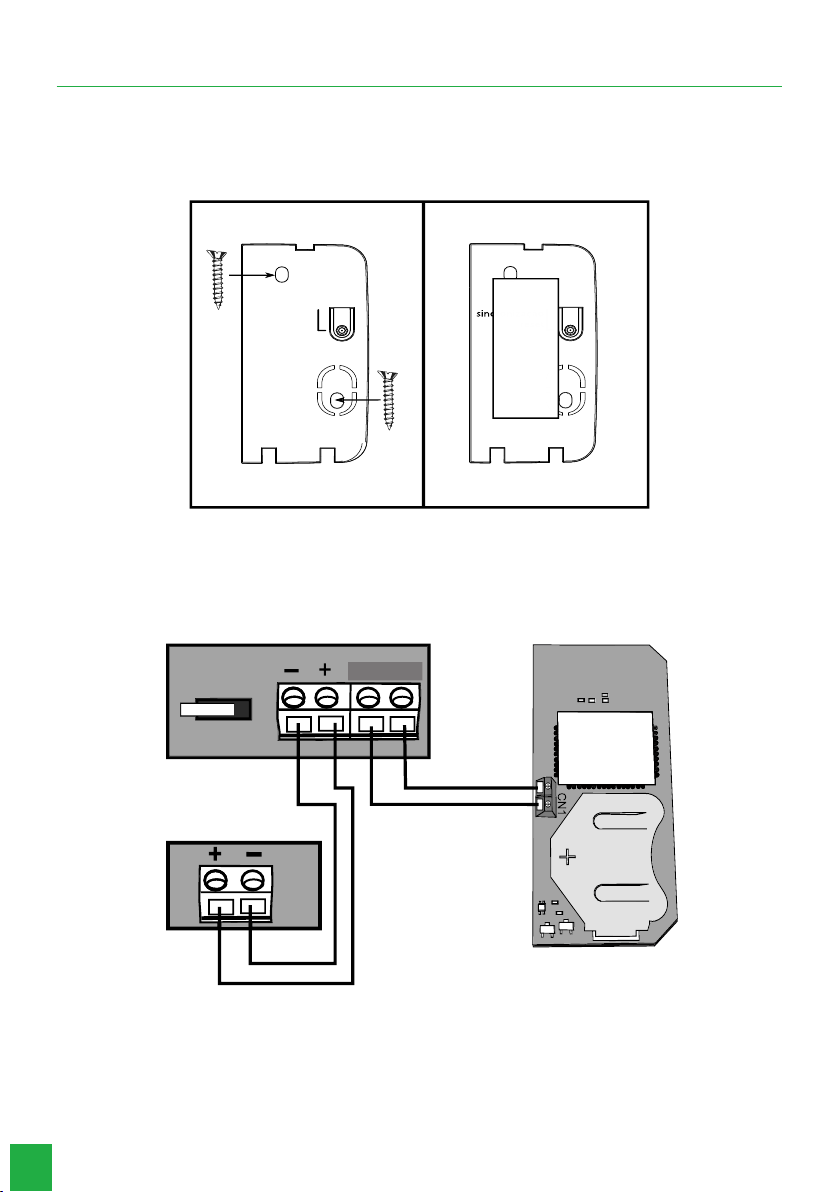
7. Installation
The TX 8000 can be secured using double-sided tape or screw. If the option with double-sided tape is chosen, clean the
surface that will be in direct contact with the tape and then glue it to the base of the product. If using screws, just open
the transmitter and use the holes to pass the screw located on the base of the product, as shown in the following gure.
The recommended screw for xing the product is 18×3 mm.
Screw installation
Base TX 8000 Base TX 8000
Tape
Synchronization
reset
Installation with double-sided tape
7.1. Connection between the TX 8000 and the wired sensor
Use an external source to power the wired sensor, then connect the cable from the alarm output (normally closed (NC)) of
the wired sensor to terminal CN1 of the TX 8000 universal transmitter, as shown in the following gure:
Wired sensor TX 8000
External source Maximum distance
1m
ALARM
The maximum recommended wiring distance for installation between the TX 8000 and the sensor connected to it is 1 meter.
Note: the ohmic resistance of the cable is very low for this distance, and a cable of your choice can be used. Once this is
done, install the TX 8000 transmitter in a location where it is fully protected from sunlight, rain and moisture.
9
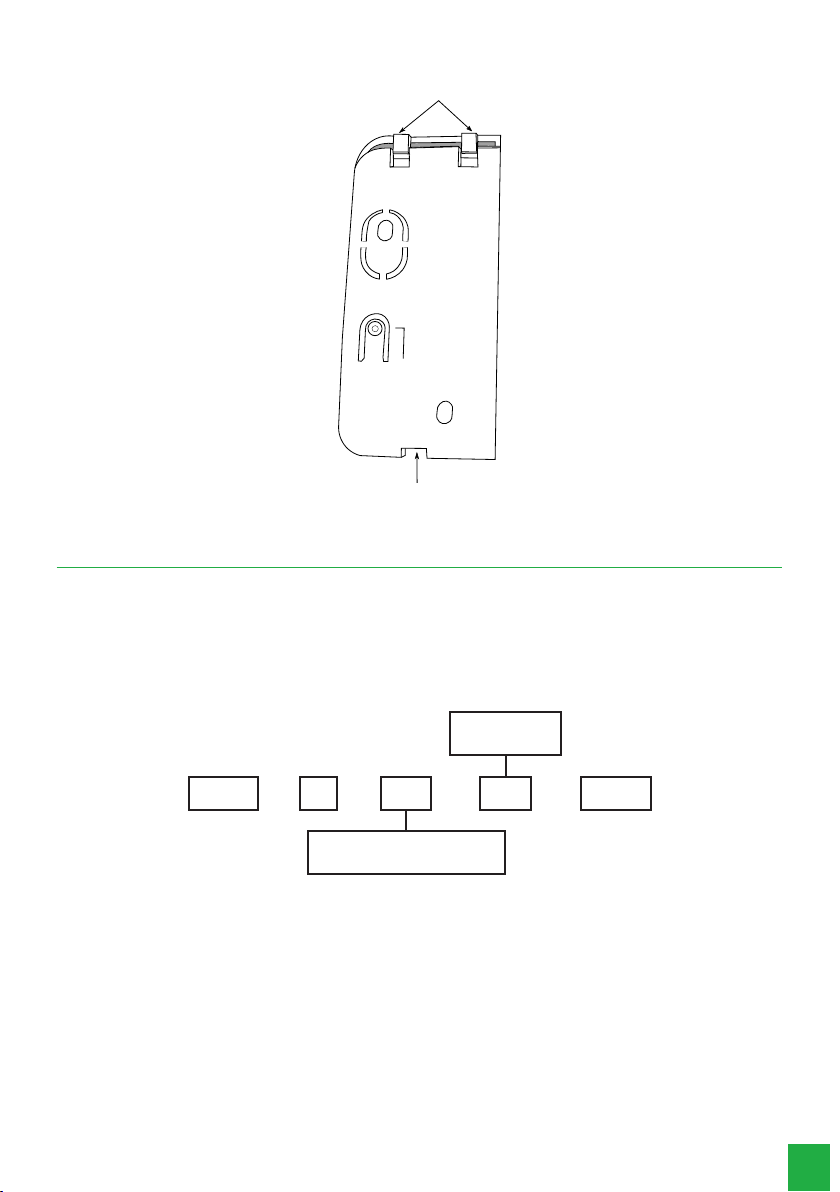
To close the TX 8000, simply t the latches and then press the other side for complete closure.
Mount the latches
Press to lock
Sincronización reset
8. Conguring the TX 8000 transmitter
The adjustment of congurations of the transmitter can be done in two ways, to follow we present or step by step of each
one.
8.1. Conguring the TX800 through the keyboard
Using the keyboard of the AMT 8000 alarm center, enter the programming mode as an installer, then type the following
command:
000 = Off
010 = On
Zone in which the sensor is
registered, from 01 to 64
Enter66Enter Zone LED ++ ++

10
8.2. Information about LED operation
» LED Off: with the LED off option, the TX 8000 will only turn the LED on for the rst 15 minutes after battery insertion.
Factory standard.
» LED On: with the LED on option, the TX 8000 will light the LED on every motion detection of the wired sensor connected to it.
Conguring the LED through the app
After the app is properly connected to the alarm center, select Congure center on the main screen of the app.
Menu
Congure central >
Online >
Events >
Then select sensors:
Conguration
General >
Zones >
Passwords >
Communication >
Event codes >
IP monitoring >
Ethernet/Wi-Fi >
GPRS >
Scheduled activation/deactivation >
Sensors >
Once this is done, select the sensor you want to congure. Example: sensor 1.
Sensors
Sensor 1 >
Sensor 2 >
Sensor 3 >
Sensor 4 >
Sensor 5 >
Sensor 6 >
Sensor 7 >
Sensor 8 >
Sensor 9 >
... Sensor 64 >
11
After selecting the sensor, the following adjustment screen will open. For the XAS 8000 the sensitivity and operating mode
settings do not apply. LED conguration only.
LED
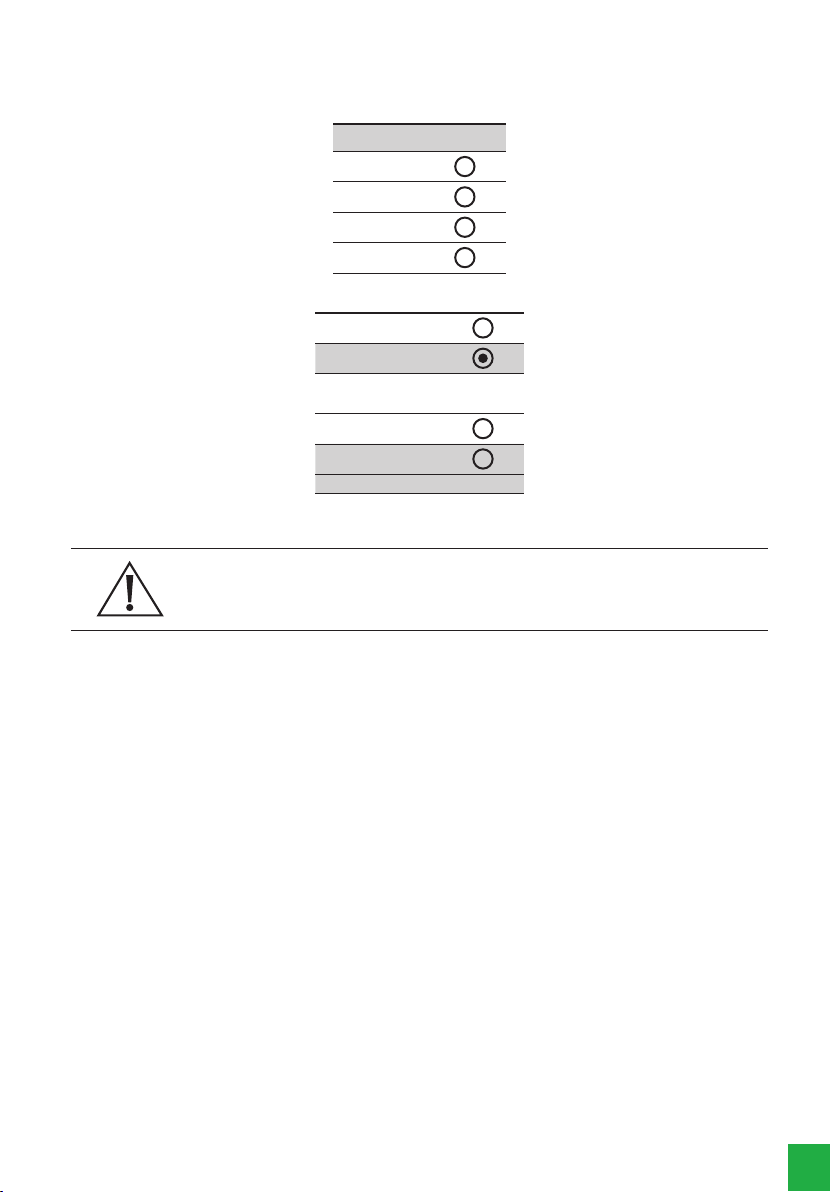
Sensitivity (not applicable)
Level 0
Level 1
Level 2
Level 3
Sensor 1
Always off
On when shooting
Operating mode (not applicable)
Economy mode
Continuous mode
Discard changes Save
After adjusting the LED operation, press
Save
Attention!
The sensor’s operating mode will not change its operation.
Note: for the conguration of the LED adjustment, check the explanations in item 8.2. Information about LED operation.

12
9. Battery
Only use quality batteries, with the correct sizing for the device, and with the typical use of the same, the battery life
forecast is 3 to 5 years, which can be inuenced by the number of activations, weather conditions and mode of operation.
settings.
Battery model must be CR2450, using one (1) battery per transmitter.
This product has an internal battery. After their useful life, the batteries must be delivered to an authorized technical assistance
service provided by Intelbras or directly disposed of in an environmentally appropriate manner, avoiding environmental and health
impacts. If you prefer, the battery as well as other unused Intelbras brand electronics can be disposed of at any Green Eletron
collection point (electronic waste manager to which we are associated). In case of doubt about the reverse logistics process, please
contact us at (48) 2106-0006 or 0800 704 2767 (from Monday to Friday from 8 am to 8 pm and on Saturdays from 8 am to 6 pm)
10. Test
Once installed and in operation, check if the control panel is receiving the triggering information from the wired sensor
installed in the TX 8000, if any failure occurs, it is necessary to reposition the transmitter or the control panel, check
through the LED if the signal between the transmitter and the control unit is in accordance with item 6 of this manual. Be
sure to take all precautions and follow the installation recommendations to obtain the best operating performance from
the product.
11. Homologation
This equipment is not entitled to protection against harmful interference and may not cause interference to duly authorized
systems. This is a product approved by Anatel, the approval number can be found on the product label, for queries, visit the
website:
sistemas.anatel.gov.br/sch.

13
Warranty term
It is established that this warranty is granted upon the following conditions:
Client’s name:
Client’s signature:
Invoice number:
Date of purchase:
Model: Serial number:
Retailer:
1. All the parts, pieces and components of the product are guaranteed against possible manufacturing defects, which may
arise, for the term of 1 (one) year - this being 90 (ninety) days of legal guarantee and 9 (nine) months contractual war-
ranty –, counting from the date of purchase of the product by the Consumer, as appears in the product purchase bill of
sale, which is an integral part of this Term throughout the domestic territory. This contractual warranty includes the free
exchange of parts, pieces and components which have a manufacturing defect, including the expenses with labor used in
this repair. If there is no manufacturing defect, but defect(s) arising from misuse, the Consumer shall bear these expenses.
2. The installation of the product shall be executed in accordance with the Product Manual and/or Installation Guide. If your
product requires the installation and conguration by a qualied technician, seek a suitable specialized professional, the
costs of these services not being included in the product amount.
3. Having perceived the defect, the Consumer shall immediately contact the nearest Authorized Service which appears in
the report offered by the manufacturer – they are the only ones authorized to examine and remedy the defect during the
warranty term foreseen herein. If this is not respected, this warranty shall lose its validity, as it shall be characterized as
product infringement.
4. If the Consumer requests home service, it shall contact the nearest Authorized Service to inquire about the technical visit
rate. If it is necessary to remove the product, the ensuing expenses, such as those of transportation and insurance of the
taking and return of the product, shall be the Consumer’s responsibility.
5. The warranty shall lose its validity totally in the occurrence of any of the following cases: a) if the defect is not one of manu-
facture, but is caused by the Consumer or by third parties foreign to the manufacturer; b) if the damage to the product arises
from accidents, disasters, agents of nature (lightning, oods, landslides, etc.), humidity, voltage in the electrical network
(excess voltage caused by accidents or excessive uctuations in the network), installation/use in disagreement with the
user’s manual or arising from natural wear of the parts, pieces and components; c) if the product has undergone effects of a
chemical, electromagnetic, electrical or animal (insects, etc.) nature; d) if the serial number of the product has been falsied
or erased; e) if the appliance has been infringed.
6. This warranty does not cover loss of data; therefore, it is advisable that if it is the case of the product, the Consumer makes
a backup regularly of the data which appears in the product.
7. Intelbras is not responsible for the installation of this product, or for possible attempts at fraud and/or sabotage in its
products. Maintain the updates of the software and applications used up-to-date, if it is the case, as well as the network
protection required for defense against hackers.The equipment is guaranteed against defects in its usual conditions of use,
it being important to bear in mind that, as it is electronic equipment, it Is not free of fraud and scams which may interfere
with its correct functioning.
8. After its useful life, the product must be delivered to an authorized Intelbras service center or directly disposed of in an
environmentally appropriate manner to avoid environmental and health impacts. If you prefer, the battery, as well as other
unused Intelbras brand electronics, can be disposed of at any Green Eletron collection point (waste management facility
to which we are associated). If you have any questions about the reverse logistics process, please contact us at (48) 2106-
0006 or 0800 704 2767 (Monday to Friday 8am to 8pm and Saturdays 8am to 6pm) or via -mail support@intelbras.com.br.
These being the conditions of this complementary Warranty Term, Intelbras S/A reserves the right to alter the general,
technical and esthetic features of its products without prior notice.
All the images of this manual are illustrative.

01.22
Made in Brazil
Customer Support: (48) 2106 0006
Forum: forum.intelbras.com.br
Support via chat: chat.intelbras.com.br
Support via e-mail: suporte@intelbras.com.br
Customer Service: 0800 7042767
Where to buy? Who installs it? 0800 7245115
Produced by: Intelbras S/A – Indústria de Telecomunicação Eletrônica Brasileira
Rodovia BR 459, km 124, 1325 – Distrito Industrial – Santa Rita do Sapucaí/MG – 37540-000
CNPJ 82.901.000/0016-03 – www.intelbras.com.br | www.intelbras.com
This manual suits for next models
1
Table of contents
Other Intelbras Transmitter manuals


Popular Transmitter manuals by other brands

TELERAD
TELERAD VHF EM9000-2G Technical manual

Vega
Vega VEGAWELL S 51 operating instructions

Nokia
Nokia NWSP Assembly instructions

SenseAir
SenseAir aSENSE installation manual

NOSHOK
NOSHOK KING-GAGE ES2 5501 Installation and operation manual

Audio Technica
Audio Technica ATW-T1006 Installation and operation


Varec
Varec 7532 Installation and operation manual

Speaka Professional
Speaka Professional SP-WTR-300 operating instructions

Listen
Listen LT-82 user manual

Siemens
Siemens SITRANS LR260 Quick start manual

Greystone
Greystone RH200A installation instructions

CAMDEN
CAMDEN Lazerpoint CM-TX-99 installation instructions