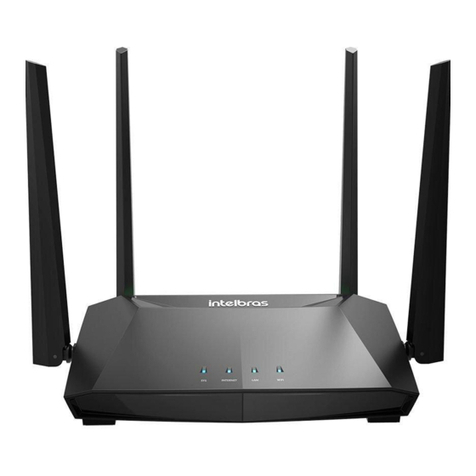
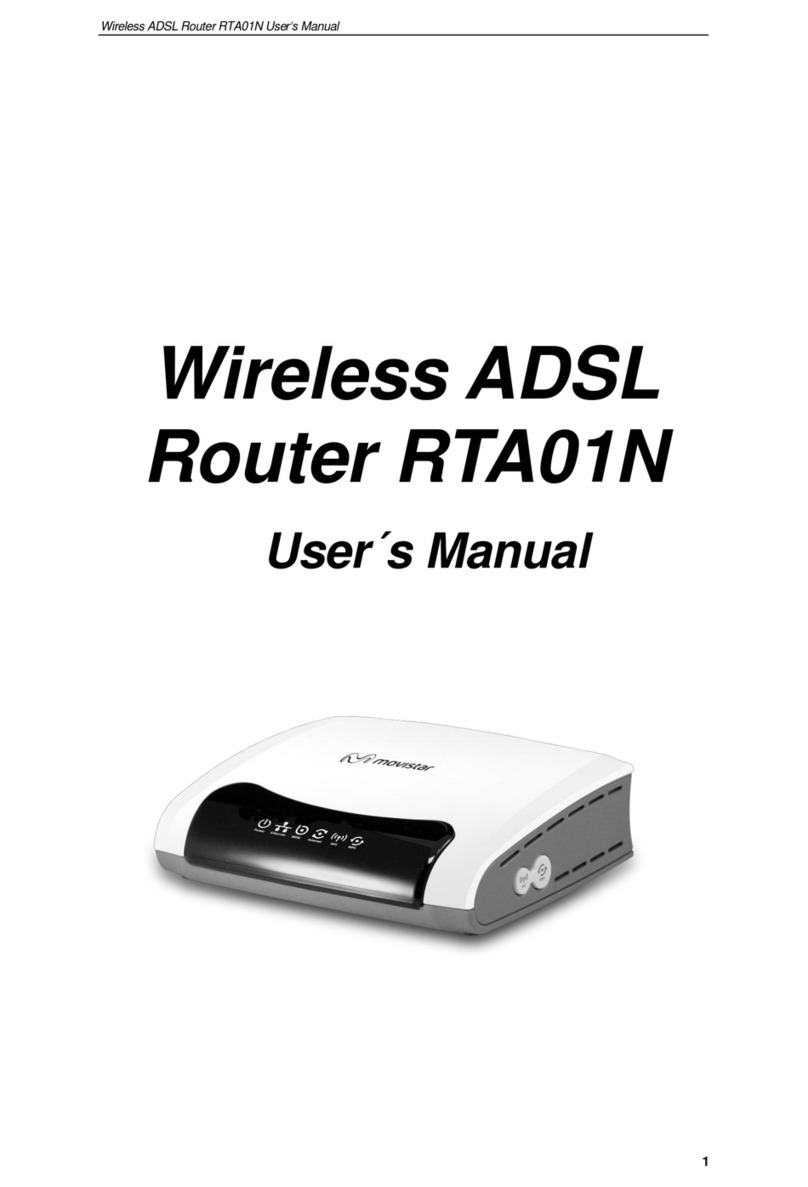
Intelbras ACtion RF 1200 User manual

User guide
ACtion RF 1200

ACtion RF 1200
Wireless router
Congratulations, you have just purchased a product with Intelbras quality and
security.
The Wi-Fi router ACtion RF 1200 provides a complete solution for home networks.
With it you can share Internet access with multiple devices in a high-speed
wireless network. It can be installed and managed via the web interface or via
Android® or iOS® application quickly and easily.

Care and safety
Adjust the position of the an-
tennas; normally the vertical
position is the most indicated.
Prefer to install your router in
the central part of the environ-
ment and preferably in a higher
location, for example on top of
a furniture.
Avoid an excessive number
of physical barriers between
the transmitting and receiving
devices on the Wi-Fi network.
Do not leave your router exposed to sunlight or heat sources
Do not place the router in closed or tight places
Do not leave your router near the microwave
Do not leave your router near the wireless phone (analog)

Summary
Care and safety 3
1. Technical specications 5
2. Accessories 6
3. Installation 6
4. Conguration 7
4.1. Conguration via installation wizard. . . . . . . . . . . . . . . . . . . . . . . . . . . . . . . . . . . . . . . . . . . . . . . . . . . . . . . . . . . . .7
4.2. Conguration in other scenarios for product use....................................................9
4.3. Internet status ............................................................................12
4.4. Internet settings...........................................................................13
4.5. Wi-Fi Network Settings......................................................................13
4.6. Network for visitors ........................................................................18
4.7. Parental control ...........................................................................19
4.8. IPv6....................................................................................20
4.9. Advanced settings .........................................................................22
4.10. System settings ..........................................................................28
5. Frequently Asked Questions (FAQ) 34
Warranty term 35

5
1. Technical specications
Hardware
4 xed antennas of 5 dBi
3
LAN
ports (100 Mbps each)
1
Internet
port (100 Mbps)
Realtek® RTL8197FN + RTL8812BRH Chipset
Flash
Memory 8 MB
RAM
memory 64 MB
Wireless parameters
Standards IEEE 802.11a/b/g/n/ac
Radio mode MU-MiMo
Mode of operation AP Router / Wireless Repeater / Wireless Client / Access Point
Frequency of operation 2.4 GHz
5 GHz
Bandwidth 2.4 GHz: 20, 40 MHz
5 GHz: 20, 40, 80 MHz
Transmission rate 2.4 GHz: up to 300 Mbps
5 GHz: up to 867 Mbps
Channels of operation 2.4 GHz: 1-13 (Brazil)
5 GHz: 36, 40, 44, 48, 149, 153, 157, 161
Maximum power (E.I.R.P.) 2.4 GHz: 63 mW (18 dBm)
5 GHz: 126 mW (21 dBm)
Receiver sensitivity at 2.4 GHz
802.11b 1 Mbps: -92 dBm
802.11g 54 Mbps: -74 dBm
802.11n 20 MHz MCS7: -71 dBm
802.11n 40 MHz MCS7: -70 dBm
Receiver sensitivity at 5 GHz 802.11a 6 Mbps: -86 dBm
802.11ac 80 MHz MCS9: -61 dBm
Security WPA-WPA2/PSK with TKIP and/or AES encryption
Description of LEDs
SYS On: router initializing
Flashing: normal operation
Wi-Fi
On: Wi-Fi 2.4 and 5 GHz network(s) is/are active, but no data trafc
Off: Wi-Fi 2.4 and 5 GHz are disabled
Flashing: the 2.4 and 5 GHz network(s) is (are) active and there is data trafc
Flashing slowly: WPS is running and waiting for a device to connect
Internet
On: there is a device connected to the corresponding port, without data trafc
Off: no device connected to the corresponding port
Flashing: there is a device connected to the corresponding port, with data trafc
LAN 1/2/3
On: there is a device connected to the corresponding port, without data trafc
Off: no device connected to the corresponding port
Flashing: there is a device connected to the corresponding port, with data trafc
Power supply
Input 100-240 V to 50/60 Hz
Output 9 Vdc/1 A
Maximum power consumption 9 W
Attention: this equipment has no right to be protected against harmful interference and may not cause interference to duly autho-
rized systems.

6
2. Accessories
» Network cable
» Power supply
» Installation guide
3. Installation
The following scenario describes the product installation for use in
Router
mode. For
Repeater
,
Wireless Client
and
Access Point
modes refer to the topic
4.2. Conguration in other product usage scenarios below.
Step 3
Step 2
Step 1
Example of Installation in Router mode
1. Connect the power supply to the router and then plug it into the electrical outlet. The LEDs will light up;
2. Connect the network cable from the Internet (for example, from your modem or other device) to the
Internet
port of
the router;
3. Connect the computer to one of the
LAN
(1/2/3/) ports on the router using a network cable;
Note:
»
If you wish to access your router via Wi-Fi instead of via network cable, connect to the Wi-Fi network
under the name
INTELBRAS
or
INTELBRAS_5G
, after performing steps
2
and
3
.
» To access the 5GHz Wi-Fi network, your devices must support this technology. If in doubt, please refer to the
manufacturer’s manual and check for compatibility with the same technologies as ACtion RF 1200.

7
4. Conguration
On your computer, open your web browser (we recommend using the most current versions of Google Chrome®, Mozil-
la Firefox®or Microsoft Edge®) and go to
http://10.0.0.1
or
http://meuintelbras.local/
as shown in the following image.
This procedure should be performed whenever you need to change any conguration of your router.
Accessing the router conguration page
4.1. Conguration via installation wizard
When accessing the router’s web page address, you will be directed to the installation wizard, as the following image.
It will help you congure Internet access, and quickly and easily create your own Wi-Fi network.
To congure your router, click
Start
and follow the instructions in the installation wizard.
Installation wizard home screen
Note:
in case your connection requires user and password
, the router will request this information after clicking on
Start
. If you do not have this information, please contact your operator or internet provider.

8
After starting the installation wizard, your internet connection will be recognized automatically. Please wait and follow
the guidelines described in the installation wizard.To create your Wi-Fi network, the Wi-Fi password, and the password
to access your router’s conguration page, please ll out the elds shown on the next screen:
Conguration screen of the setup wizard
1. Fill in the
Wi-Fi Network Name
eld with the name you want for your Wi-Fi network, for example,
My Network
.This eld
by default is lled in with the name
INTELBRAS
, but can be changed to any name up to 29 characters long;
Note: the Wi-Fi network name at 5GHz will be set to
_5G
at the end of the network name, e.g.,
My Network_5G
.
2. Now, ll in the
Wi-Fi Network Password
eld with the password you want for your Wi-Fi network. This is the password
you will use when connecting your wireless devices to your network (e.g. mobile phones, tablets, laptops, etc.). This
password will be for both 2.4 GHz and 5 GHz Wi-Fi networks, and can be up to 63 characters long;
Note: To put a different password for each network, see the item
4.5. Wi-Fi network settings.
3. Fill in the
Router Password
eld with a password that will be used to access your router settings.
Note: the
Wi-Fi Network Name
and
Wi-Fi Network Password
elds allow the following characters:
Space ! “ # $ % & ‘ ( ) * + , - . / 0 1 2 3 4 5 6 7 8 9
: ; < = > ? @ A B C D E F G H I J K L M N O P Q R S
T U V W X Y Z [ \ ] ^ _ ` a b c d e f g h i j k l m
n o p q r s t u v w x y z { | } ~
4. Click on the button
Next
to apply the settings made.

9
Final screen of the installation wizard
Congratulations! Your router is already congured and ready to access the Internet.
Important: if you are accessing your router via Wi-Fi, wait until it applies the settings and then connect to your new
network, which was created in the previous steps.
4.2. Conguration in other scenarios for product use
The following describes other router use scenarios with their respective settings.
Wireless repeater
If you already have a Wi-Fi network in your home, but want to extend your coverage, you can use your router as a
signal repeater.
Internet Modem / Roteador Repetidor
Example of
Repeater
mode scenario

10
See the following sample image:
Router Repeater
Residence with Wi-Fi signal repeater
Note that the router’s coverage area does not cover the entire residence, so an ACtion RF 1200 is used as a Wi-Fi
repeater to solve this problem. It is important to note that in this scenario, depending on the room you are in, when
connecting a device (a laptop or smartphone, for example) to the Wi-Fi network it may connect either to the router or
the repeater. Examples:
» If you are in the living room (C) and connect to Wi-Fi, you are connecting to your main router’s Wi-Fi network.
» If you are in the kitchen (D) and connect to the Wi-Fi network, you are connecting to the ACtion RF 1200 (repeater)
Wi-Fi network.
» If you connect to the Wi-Fi network while in the dining room (A) and then you move to the bedroom (B), and the main
signal network still reaches it, even if weak, your device will still be connected to the main router, not automatically
switching to Wi-Fi on the ACtion RF 1200 (repeater). If you want your device to connect to the repeater and thus get
a stronger signal, disable and enable your device’s Wi-Fi network again (if you don’t know how to do this, you can try
restarting it so that the Wi-Fi connection with the stronger signal network occurs). The same goes for the move in the
direction area covered by the repeater > area covered by the router (from the bedroom to the dining room, for example).
In short: when moving between the rooms, disconnect and reconnect your device to the Wi-Fi network so that it con-
nects to the network with the best signal. This process may be waived if your device automatically switches between
networks.
To congure the product as a wireless repeater for an existing Wi-Fi network, do the following:
1. Enable the function
Wi-Fi Repeater
by changing the option
Wi-Fi Repeater
to enabled (the button will turn green);
2. Choose the connection mode
Wi-Fi Repeater
in the option
Wi-Fi Connection Mode
;
3. Select the Wi-Fi network you wish to repeat in the eld
Main Wi-Fi Network Name
;
4. After choosing the Wi-Fi network, if it requires a password, you must enter it in the eld
Main Wi-Fi Network Password
;
5. Click on
Save
;
6. In the conrmation message, click on
Ok
and ACtion RF 1200 will reboot applying the settings.
7. ACtion RF 1200 will now connect to your main network and repeat it with the SSID and password set in the installation
wizard or on the page
Wi-Fi Network Settings>Wi-Fi Network Name and Password
;
8. If you want the ACtion RF 1200 to repeat the same SSID and password as your main network, go to the web page at
http://meuintelbras.local
(item
4.5. Wi-Fi network settings
) and congure the Wi-Fi network with the same SSID and
password as your main network.

11
Wireless conguration repeater screen
Wireless client
If you have a Wi-Fi network and wish to create another separate network connected to your main network via a wire-
less connection, you can use the function
Wireless client
.
In this mode of operation, you will not need to connect the network cable to the port
WAN
of ACtion RF 1200. The
product will connect via Wi-Fi to an existing network.
Internet Modem / Roteador Cliente wireless
Rede principal Rede cliente
Example of
Wireless client
mode scenario
Attention:in this scenario, the main network and the client network will be on different IP addresses. If the main network has the
same address range as the ACtion RF 1200 LAN, conict will occur. ACtion RF 1200 is prepared to recognize this conict and change
its LAN address if necessary. To do so, follow the web interface guidelines if this occurs.
To congure this mode, in the router’s conguration web interface navigate to the menu
Wi-Fi Network Settings
and
click on
Wi-Fi Repeater
.
To congure the product as a
Wireless client
on an existing Wi-Fi network, do the following:
1. Enable the function
Wi-Fi Repeater
by changing the option
Wi-Fi Repeater
to enabled (button will turn green);
2. Choose the
Wireless client
connection mode from the option Wi-Fi Connection Mode;
3. Select the Wi-Fi network you wish to connect to in the eld
Main Wi-Fi Network Name
;
4. After choosing the Wi-Fi network, if it requires a password, you must enter it in the eld
Main Wi-Fi Network Password
;
5. Click on
Save
;
6. In the conrmation message, click
Ok
.
Note: If you wish to connect only via network cable to ACtion RF 1200, using the
LAN
ports, and do not want the
product to generate a Wi-Fi network, you can turn off the options
Wi-Fi 2.4 GHz Network
and
Wi-Fi 5 GHz Network
within the menu
Wi-Fi Network Settings > Wi-Fi Network Name and Password.

12
Wireless client conguration screen
Access point
With this mode, the product will not perform routing, but will only serve to provideWi-Fi and cable access to an existing
network. In this use scenario, the port
WAN
will work as a
LAN
port.
To use the mode
Access Point
, you will need to access the product's web conguration interface (through the IP address
10.0.0.1
or the link
http://meuintelbras.local
) and navigate to the menu
Wi-Fi Network Settings>Access Point.
On this
screen, enable the option
Activate
Access Point
and click
Save.
Access point conguration screen
4.3. Internet status
Internet status screen

13
The
Internet Status
screen displays the main information about your router. In addition, you can access the main settings
via icons.
In this area, the names of your 2.4 GHz and 5 GHz wireless networks are displayed. By clicking the
icon you can congure the names and passwords of these networks.
In this area, the status of your internet connection is displayed. If there is any connection problem,
the phrase
Connection failure
will appear between the internet (globe) and router icons. By clicking
the Internet icon (globe) you can congure your connection. Clicking on the router icon, it is
displayed the screen
System Status
with more detailed information about the device.
This area displays the number of devices connected to the router. Clicking on the icon displays the
list of devices and the information: download and upload speed, access type, and block device.
Internet consumption Shows the current download and upload consumption of all devices connected to the router.
WAN IP Address Shows the IP address of the WAN (
Internet
port) of the router.
Firmware version Shows the current version of the router software. ACtion RF 1200 periodically checks for new
rmware versions; if a new version is available, a warning is displayed on the screen
Internet Status.
4.4. Internet settings
Internet conguration screen
The menu
Internet Settings
groups the settings related to your Internet connection.
Below we will explain each available option.
»Internet port: shows the status of the port
Internet
, informing if the cable is connected or not.
»Connection type: there are 3 possible connection modes:
»Dynamic IP address: use this mode if your connection details are provided automatically through a DHCP server.
»PPPoE: use this mode if your Internet access requires authentication via PPPoE. In this mode, a user and password
(provided by your operator or ISP) is required to authenticate with the Internet. You must enter the user in the eld
Provider User
and your password in the eld
Provider Password
.
»Address Static IP: use this mode if your Internet access is provided via a static IP address. All information for the
conguration in this mode must be provided by your Internet operator.
»Conguring DNS: if you want to congure DNS servers manually, you can choose the option
Manual
and enter the
servers in the elds
Primary DNS Server
and
Secondary DNS
.
When you nish the settings click the
Connect
button to apply the settings.
4.5. Wi-Fi Network Settings

14
The menu
Wi-Fi Network Settings
groups the settings related to your Wi-Fi network.
Wi-Fi network name and password
Wi-Fi network name and password conguration screen
From the menu
Wi-Fi Network Name and Password
you can change the main settings of your Wi-Fi network. Since
ACtion RF 1200 operates in two frequency ranges, 2.4 GHz and 5 GHz, you can congure each separately.
If you don't want to have a Wi-Fi network in one of these two frequencies, you can disable the 2.4 GHz network using
the button
Wi-Fi 2.4 GHz network
and disable the 5 GHz network using the button
Wi-Fi 5 GHz network
.
For both Wi-Fi network frequencies you can congure:
»Wi-Fi network name: name you want for your Wi-Fi network, e.g.,
My Home
. This eld allows you to create a name
with up to 32 characters.
Note: we recommend that you congure different names for the 2.4 GHz and 5 GHz networks, e.g.,
My Home
and
My 5G Home
. This will prevent possible network identication problems for Wi-Fi devices.
»Encryption mode: this option allows you to select the security mode for your Wi-Fi network. These are:
None
,
WPA
-PSK, WPA2-PSK
and
WPA-PSK/WPA2-PSK
. To leave your network without password choose the option
None
.
Note: if you want to set a password, we recommend using the option
WPA-PSK/WPA2-PSK
.
»Wi-Fi network password: password you want for your Wi-Fi network. This is the password you will use when connec-
ting your wireless devices to your network (e.g. mobile phones, tablets, laptops, etc.).
Note: the elds
Wi-Fi Network Name
and
Wi-Fi Network Password
allow the following characters:
Space ! “ # $ % & ‘ ( ) * + , - . / 0 1 2 3 4 5 6 7 8 9
: ; < = > ? @ A B C D E F G H I J K L M N O P Q R S
T U V W X Y Z [ \ ] ^ _ ` a b c d e f g h i j k l m
n o p q r s t u v w x y z { | } ~
» Hide: select this option if you want the name of your Wi-Fi network to be hidden. In this case, in a common Wi-Fi search
your network will not be listed with its name and you will have to manually congure the SSID on the devices to be
connected to it.

15
Wi-Fi Network Scheduling
Wi-Fi scheduling conguration screen
In the menu
Wi-Fi Network Scheduling
you can schedule a time to turn off your Wi-Fi network. Schedu-
ling will only work if the system time is synchronized with the Internet. You can check the system time in
System settings>Time settings
.
To disable your Wi-Fi network at a scheduled time simply enable the option
Wi-Fi Network Scheduling
, choose the
interval at which you wish to disable the Wi-Fi network, and the days on which the scheduling should take effect.
Note: if you wish to turn Wi-Fi on when it is off because it is within a scheduled time, press the
Wi-Fi
button located
on the back of your router.
Channel and bandwidth

16
Channel and bandwidth conguration screen
In the menu
Channel and Bandwidth
you can congure the network mode, the channel and the bandwidth of the Wi-Fi
network for the two operating frequencies:
»Network mode: network mode allows you to choose which technologies your router will operate on.
Note: limiting to some technology may cause some device not to be able to connect to your Wi-Fi network, so
we recommend using the router’s default values.
»Wi-Fi network channel: operation channel of the router’s Wi-Fi network. You can check, through specic applications
for this purpose, which channel is less busy and then use it on your router to improve product performance.
»Wi-Fi network bandwidth:
» For Wi-Fi 2.4 GHz it is possible to:
» Set to 20 MHz or 40 MHz. With this option, all wireless devices will connect to your router using 20 MHz or 40
MHz as selected.
» Select 20/40 MHz. This way the router will set the best bandwidth to be used and x its operation automatically
in this mode.
» For Wi-Fi 5 GHz it is possible to:
» Set to 20 MHz, 40 MHz or 80 MHz.
» Select 20/40/80 MHz.This way the router will set the best bandwidth to be used and x its operation automatically
in this mode.
Transmission power
Transmission power conguration screen
In the menu
Transmission Power
you can congure the signal strength of the ACtion RF 1200 for the frequencies of
2.4 GHz and 5 GHz. Use
High
Power if you want the router to operate at its maximum range. If you are still having
problems with the signal range, we recommend checking your router’s installation location as described in the item
Cui-
dados e segurança,
or using a Wi-Fi signal repeater.
WPS

17
WPS conguration screen
The function
WPS
allows you to connect devices to your Wi-Fi network quickly and securely. If you have a WPS compa-
tible device you can allow it to access your router’s Wi-Fi network through one of the available WPS modes: physical
button (PBC) or PIN.
»Physical Button (PBC): if the device you wish to connect to your Wi-Fi network has a
WPS
, follow the procedure:
1. Press the button
RST/WPS
(one click only) located on the back of your ACtion RF 1200. Verify that the product’s Wi-Fi
LED will ash slowly, indicating that the network is available for WPS connection, for about 2 minutes. You can also
activate WPS through the button
Click here
, available in the web conguration interface;
2. Within 1 minute after pressing the button
RST/WPS
on your router, press the button
WPS
on your wireless device and
wait while the connection is established.
Tip: Some devices, for example smartphones with Android® operating system, have a
virtual WPS
button, i.e.,
option to activate WPS through the advanced Wi-Fi network settings. Please refer to the instructions for use or the manufac-
turer of your device if you need more information.
»PIN Mode: you can get the current PIN of your router in WPS settings. Simply enter the number on your wireless device
and then proceed with the connection.
Beamforming+
Beamforming+ conguration screen

18
In the menu
Beamforming+
you can enable the function
Beamforming+,
which detects the positions of devices in the
5 GHz Wi-Fi network, such as mobile phones and tablets, and strengthens the signal transmission to these positions for
better web browsing, gaming performance and video playback experience.
Note:
for the
Beamforming+
function to work correctly, the wireless devices that will connect to the Wi-Fi network
5 GHz of ACtion RF 1200 must support
Beamforming+
function. Please refer to the instructions for use or the manu-
facturer of your devices if you need more information.
Anti-interference
In the menu
Anti-interference
you can activate, deactivate or leave the operation automatically.
» Automatic: in
automatic
mode the router limits the accepted signal level in Rx from the ambient noise level.
» Activated: in
activated
mode the router limits the accepted signal level at Rx from the modulation sensitivity level at
which it operates.
» Deactivated: disables the function.
4.6. Network for visitors
Network conguration screen for visitors
In the menu
Network for visitors
you can congure a separate network for visitors. With this you do not need to give
your main Wi-Fi network password to other people.
»2.4 GHz Wi-Fi network name: the name you want for your 2.4 GHz Wi-Fi network, for example,
Visitors
. This eld
allows you to create a name with up to 32 characters.
»5GHz Wi-Fi network name: the name you want for your 5GHz Wi-Fi network, e.g.,
Visitors_5G
. This eld allows you
to create a name with up to 32 characters.
»Network password for visitors: password you want for your 2.4GHz Wi-Fi network and 5GHz visitors. This is the
password you will enter for visitors. Leave this eld blank if you want to congure an open network, you do not need a

19
password to connect to the visitors network. Up to 63 characters are allowed in this eld.
»Validity: inform for how many hours you want the visitors network to be available, after that time the visitors network
will be disabled. If you want the visitors network to be always available, select the option
Always
.
»Shared bandwidth among guests: if you wish to limit the bandwidth available to your visitors you can choose how
many Mbps they can use.
Note: the elds
2.4 GHz Wi-Fi Network Name
,
5 GHz Wi-Fi Network Name
and
Wi-Fi Network Password
allow the
following characters:
Space ! “ # $ % & ‘ ( ) * + , - . / 0 1 2 3 4 5 6 7 8 9
: ; < = > ? @ A B C D E F G H I J K L M N O P Q R S
T U V W X Y Z [ \ ] ^ _ ` a b c d e f g h i j k l m
n o p q r s t u v w x y z { | } ~
4.7. Parental control
Parental control conguration screen
In the menu
Parental control
,
it is possible to congure the time of access to the internet and the websites that each device
will be able to access.
When accessing the menu
Parental Control
, a list of connected devices will be displayed, informing the name, MAC
address, active time and options for each device.The available options are:
Edit the time and sites that the device will be able to access.
Disables parental control for the device, allowing full internet access (icon displayed only when there is a rule
congured for the device).
Enables parental control for the device, allowing access to only the specied sites and at the congured time (icon
displayed only when parental control is disabled for the device).
The following options are available when clicking :
»Device name: you can change the default device name for easy identication.

20
»Internet accessible at: choose the time when the device will be able to access the internet.
»From: choose the days on which the device can access the internet at the time congured in the option
Internet acces-
sible at
.
»Control access to websites: enable/disable control of the websites that the device will be able to access.
»Control type: if you want to block only some sites, select
Block listed
, so the sites entered in
Blocked websites
will not
be accessible to the device. If you want to allow only some sites, select
Allow listed
, so the device will only access the
sites listed under
Allowed websites
, blocking access to any other websites.
»Blocked websites: enter sites separated by commas. For example: google, facebook indicates that only Google and
Facebook websites will be blocked.
»Allowed websites: enter sites separated by a comma. For example:
Google
,
Facebook
indicates that only Google and
Facebook websites will be accessible.
Note: the site lter is done by word, i.e., any site containing the keyword will be blocked or allowed.
Edit screen of a device in parental control
When click on
Save
the device will already be controlled as congured above.
Note: if any device is not appearing in the list you can add it manually by clicking
Add,
the MAC address of the device
is required.
4.8. IPv6
In the menu
IPv6
you can congure IPv6 addressing options.
Conguring IPv6 WAN
Table of contents
Other Intelbras Wireless Router manuals
