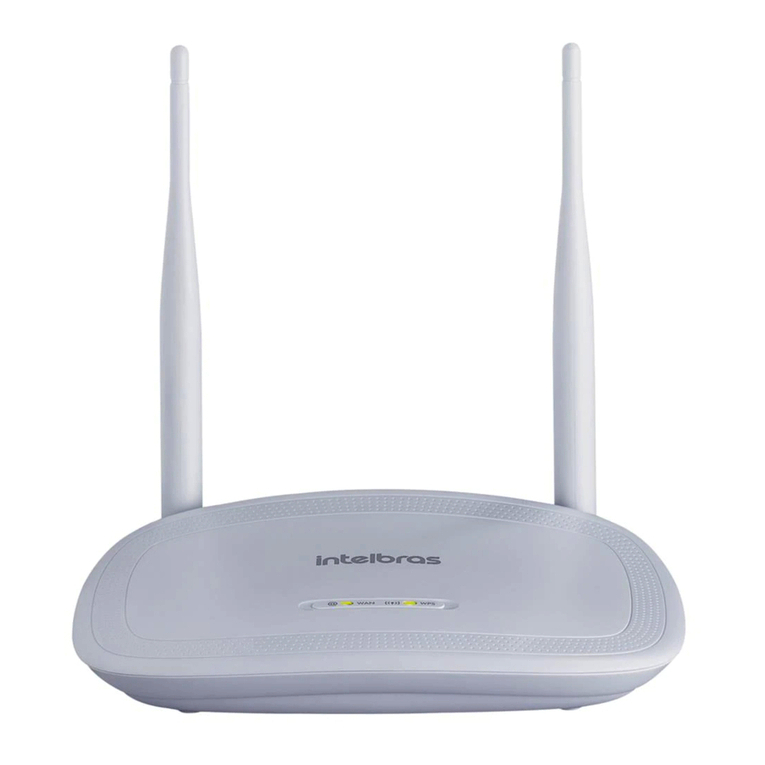
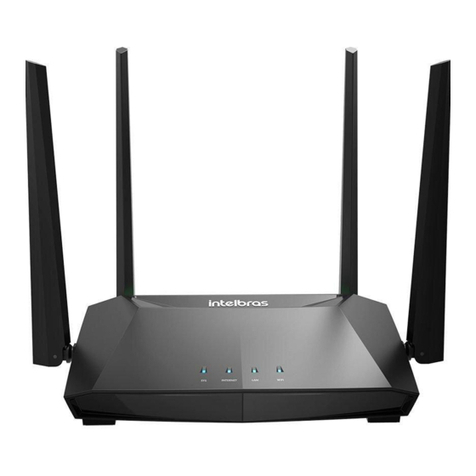
Intelbras RF 301K User manual

User guide
RF 301K

RF 301K
300 Mbps wireless router
Congratulations, you have just purchased a product with Intelbras quality and security.
The RF 301K router is designed for those who need Wi-Fi for simple day-to-day tasks such as
accessing websites and social networks. Its installation and management can be done through
the web interface, quickly and easily.

Care and safety
SYS WLAN WAN1 2 3
Avoid an excessive number
of physical barriers between
the transmitting and receiving
devices on the
Wi-Fi
network.
Adjust the position of the
antennas; normally the vertical
position is the most indicated.
Prefer to install your router in the
central part of the environment and
preferably in a higher location, for
example on top of a furniture.
Do not leave your router exposed to sunlight or heat sources.
Do not place the router in closed or tight places.
Do not leave your router near the microwave.
Do not leave your router near the wireless phone (analog).

Summary
1. Technical specications 5
1.1. Description of LEDs .........................................................................5
2. Package contents 5
3. Installation 6
4. Conguration 6
4.1. Conguration via installation wizard. . . . . . . . . . . . . . . . . . . . . . . . . . . . . . . . . . . . . . . . . . . . . . . . . . . . . . . . . . . . .7
4.2. Conguration in other scenarios for product use....................................................8
4.3. Status menu .............................................................................11
4.4. Internet settings menu ......................................................................12
4.5. Wi-Fi
Network Settings menu.................................................................12
4.6. Band control menu ........................................................................14
4.7. Parental control menu ......................................................................15
4.8. Advanced settings menu ....................................................................15
4.9. IPv6 Menu ...............................................................................17
4.10. System settings menu .....................................................................19
5. Frequently Asked Questions 22
Warranty term 23

5
1. Technical specications
Hardware
Chipset RTL8196E + RTL8192ER
Flash
memory 2 MB
SDRAM
memory 16 MB
2 xed antennas 5 dBi
3
LAN
ports 100 Mbps (each)
1
WAN
port 100 Mbps
Wireless parameters
Standards IEEE 802.11b/g/n
Radio mode MiMo
Mode of operation
AP Router
Wireless repeater
Wireless client
Access point
Frequency of operation 2.4 GHz
Bandwidth 20 and 40 MHz
Transmission rate Up to 300 Mbps
Channels of operation 1-13 (Brazil)
Maximum power (EIRP) 20 dBm (100 mW)
Security WPA-WPA2/PSK
Supply
Input 100-240 V to 50/60 Hz
Maximum power
consumption
5.4 W
1.1. Description of LEDs
Description of LEDs
SYS On: router initializing
Flashing: normal operation
WLAN
On: The
Wi-Fi
network is activated, but no data trafc
Off: The
Wi-Fi
is deactivated
Flashing: The
Wi-Fi
network is activated and there is data trafc
LAN 1/2/3
On: there is a device connected to the corresponding port, without data trafc
Off: no device connected to the corresponding port
Flashing: there is a device connected to the corresponding port, with data trafc
WAN
On: there is a device connected to the corresponding port, without data trafc
Off: no device connected to the corresponding port
Flashing: there is a device connected to the corresponding port, with data trafc
2. Package contents
» 1 RF 301K wireless router
» 1 network cable
» 1 power supply
» 1 installation guide

6
3. Installation
The following scenario describes the product installation for use in
Router
mode. In order to know other scenarios for
use in other modes, such as
Repeater
,
Wireless client
, among others, please refer to the topic
4.2. Conguration in
other product usage scenarios.
Example of Installation in
Router
mode
1. Connect the power supply to the router and then plug it into the electrical outlet.The LEDs will light up;
2. Connect the network cable from the Internet (for example, from your modem or other device) the
WAN
port of the router;
3. Connect the computer to one of the
LAN
(1/2/3/) ports on the router using a network cable;
Note: If you wish to access your router via Wi-Fi instead of via network cable, connect to the
Wi-Fi
network under
the name INTELBRAS after performing steps
1
and
2
.
4. Conguration
On your computer, open your web browser (we recommend using the most current versions of Google Chrome®, Mo-
zilla Firefox®or Microsoft Edge®) and go to
http://10.0.0.1
as shown in the following image. This procedure should be
performed whenever you need to change any conguration of your router.
Example of a web browser with the address lled in

7
4.1. Conguration via installation wizard
When accessing the RF 301K web page address, you will be directed to the installation wizard, as the following image.
It will help you congure Internet access, and quickly and easily create your own
Wi-Fi
network.
To congure your router, follow the instructions in the installation wizard.
Installation wizard home screen
After this procedure, your internet connection will be recognized automatically. Please wait and follow the guidelines
described in the installation wizard.
You can also choose, manually, the type of internet connection:
1. Select the option
PPPoE
if you need to perform authentication (PPPoE) with the operator to surf the Internet. Then enter
your user name and password (if you do not have this information, please contact your internet service provider). This
way, the router will automatically make this connection for you;
2. Select the option
dynamic IP,
if to have access to the Internet, simply connect to your network and open the browser
(Google Chrome®, Mozilla Firefox®, Microsoft Edge®, etc.). In this case, the router will not need to perform any authenti-
cation with the operator (this usually occurs when there is a modem or other device that already performs the connection
with the operator);
3. Select the option
static IP
if your Internet access is provided via a static
IP
address.All information for the conguration
in this mode must be provided by your Internet operator.
Choose your Internet connection type and your
Wi-Fi
network settings and click on
Ok
.
Final screen of the installation wizard

8
The router will apply the settings and then you will be directed to the main page of the router (status page).
Important: if you are accessing RF 301K via Wi-Fi, wait until it applies the settings and then connect to your new
network, which was created in the previous steps.
At this point, your router will already be congured. Test your connection to the
Wi-Fi
network and the internet. If
there are any problems, follow the step-by-step conguration again. If the problem persists, please contact our support.
When entering the conguration page for the rst time, RF 301K will prompt you for a password to access the product
conguration web interface. For further security, we recommend entering a password in the eld
Password
and click on
Save password
.
Warning screen for registering router password
4.2. Conguration in other scenarios for product use
Next, we will describe other RF 301K use scenarios, with its respective settings.
For these other modes, you will always use the advanced router settings, accessible only after performing the congu-
ration via the installation wizard described in item
4.1. Conguração via assistente de instalação
.
Wireless repeater
If you already have a
Wi-Fi
network in your home, but want to extend your coverage, you can use your RF 301K as a
signal repeater.
ModemInternet Roteador
Example of Repeater mode scenario

9
See the following sample image:
SYSWLAN WAN1 2 3
Example of residence with Wi-Fi signal repeater
Note that the router’s coverage area does not cover the entire residence, so a RF 301K is used as a
Wi-Fi
repeater to
solve this problem. It is important to note that in this scenario, depending on the room you are in, when connecting a
device (a laptop or smartphone, for example) to the
Wi-Fi
network it may connect either to the router or the repeater.
Examples:
» If you are in the living room (C) and connect to Wi-Fi, you are connecting to your main router’s
Wi-Fi
network.
» If you are in the kitchen (D) and connect to the
Wi-Fi
network, you are connecting to the repeater
Wi-Fi
network.
» If you connect to the
Wi-Fi
network while in the dining room (A) and then you move to the bedroom (B), and the main
signal network still reaches it, even if weak, your device will still be connected to the main router, not automatically
switching to Wi-Fi on the repeater. If you want your device to connect to the repeater and thus get a stronger signal,
disable and enable your device’s
Wi-Fi
network again (if you don’t know how to do this, you can try restarting it so that
the
Wi-Fi
connection with the stronger signal network occurs).The same goes for the displacement in the direction of
the area covered by the repeater, larger area covered by the router (from the bedroom to the dining room, for example).
In short: when moving between the rooms, disconnect and reconnect your device to the
Wi-Fi
network so that it
connects to the network with the best signal.
To perform the conguration this way, in the
Advanced settings
of the web interface of conguration of the router go
to the menu
Operation ode
.
Operation mode conguration screen

10
To congure the product as a wireless repeater for an existing
Wi-Fi
network, do the following:
1. Enable the function
Repeater
selecting the option
Wireless repeater
;
2. Wait until the available networks are displayed on the screen;
3. Select the
Wi-Fi
network you wish to repeat;
4. If the selected network requires a password, enter it in the eld
Password of the Wi-Fi selected
;
5. Click on
Save
and then
Save again
in the warning message.
Attention: after nishing the conguration of the
Repeater
mode, RF 301K will not repeat exactly the same
Wi-Fi
network name
and password that you have congured, i.e., it will be the same values that were already congured via the installation wizard or
menu
Wi-Fi Network Conguration
.You can change these values if you wish, by accessing the RF 301K web interface again and setting
the desired values in the menu
Wi-Fi Network Conguration
.
Wireless client
If you have a
Wi-Fi
network and wish to create another separate network connected to your main network via a wire-
less connection, you can use the function
Wireless client
.
In this mode of operation, you will not need to connect the network cable to the port
WAN
of RF 301K. The product
will connect via Wi-Fi to an existing network.
ModemInternet Roteador
Example of Wireless client mode scenario
See the following sample image:
Attention: in this scenario, the
Main
network and the
Client
network will be on different
IP
addresses. If the
Main
network has the
same address range as RF 301K LAN, conict will occur. RF 301K is prepared to recognize this conict and change its LAN address if
necessary. To do so, follow the web interface guidelines if this occurs. The conguration of this operation mode is available in the menu
Operation Mode
of the RF 301K web interface.
Operation mode conguration screen
To congure the product as a
wireless Client
of an existing
Wi-Fi
network , follow the procedure:
1. Enable the function by selecting the option
Wireless Client
;
2. Wait until the available networks are displayed on the screen;
3. Select the
Wi-Fi
network you wish to connect to;
4. If the selected network requires a password, enter it in the eld
Password of the Wi-Fi selected
;
5. Click on
Save
and then
Save again
in the warning message.

11
Attention:
after nishing conguring the
Repeater
mode
, RF 301K will not repeat exactly the same
Wi-Fi
network name and
password that you have congured in the repeater, that is, the access to the
Wi-Fi
network
will be done with a name and password
previously congured via the installation wizard or the menu
Wi-Fi Network Conguration
of the RF 301K.You can change these values
if you wish, by accessing the RF 301K web interface again and setting the desired values in the menu
Wi-Fi Network Conguration
.
Access point
If used in operation mode
Access point
, the product will not perform routing, but will only serve to provide Wi-Fi and
cable access to an existing network. In this usage scenario, the
WAN
port of the product will start functioning as LAN
port.
To congure the product in
Access Point
mode , follow the procedure below:
1. Access the product's conguration web interface and navigate to the menu
Operation Mode
;
2. Select the option
Access Point
;
3. Click on
Save
and then
Save again
in the warning message.
4.3. Status menu
RF 301K Status Screen

12
In the
Status screen
you can check the information of the Internet connection; the number of connected devices, the
real time download/upload consumption and the system information.
4.4. Internet settings menu
Internet settings screen
The menu
Internet Settings
groups the settings related to the
WAN
connection of your router.Below we will explain
each available option.
There are 3 possible connection modes, selectable through the eld
Connection type
:
»PPPoE: use this mode if your Internet access requires authentication via PPPoE. The elds available for lling in this
mode are:
»User name: the user used for authentication. Normally, this information must be provided by your Internet operator.
»Password: the password used for authentication. Normally, this information must be provided by your Internet
operator.
»Dynamic IP: use this mode if your connection details are provided automatically through a
DHCP
server.
»Static IP: use this mode if your Internet access is provided via a static
IP
address . All information for the conguration
in this mode must be provided by your Internet operator.
4.5.
Wi-Fi
Network Settings menu
The menu
Wi-Fi Network Settings menu
groups the settings related to the
Wi-Fi
network of the router, which are as
follows:
»Disable/enable Wi-Fi: allows you to disable or enable your
Wi-Fi
network, you can disable your
Wi-Fi
network if you
want to use only equipment connected to the RF 301K.
»
Wi-Fi
Network name: through this eld you can change the name of your
Wi-Fi
network. After changing it you will
need to recongure all wireless devices to reconnect to your
Wi-Fi
network. Up to 32 characters are allowed in this eld.
Note: the eld
SSID
allows only the following characters:
Space ! “ # $ % & ‘ ( ) * + , - . / 0 1 2 3 4 5 6 7 8 9
: ; < = > ? @ A B C D E F G H I J K L M N O P Q R S
T U V W X Y Z [ \ ] ^ _ ` a b c d e f g h i j k l m
n o p q r s t u v w x y z { | } ~
»Hide Wi-Fi: mark this option you want to hide your
Wi-Fi
network’s name. By hiding your
Wi-Fi
network, it will no longer
appear in your device's network list, it will be necessary to manually add it to each device, informing the
Wi-Fi
network’s
name and security settings inserted in the following elds.
»Safety Mode: this option allows you to select the safety mode for your
Wi-Fi
network. These are:
None,
WPA-PSK, WPA2-PSK
and
WPA/WPA2-PSK
. To leave your network without password, choose the option
None
. If you
want to set a password, we recommend using the option
WPA-PSK/WPA2-PSK
.
»
Wi-Fi
network password: in this eld you can enter the password you want for your
Wi-Fi
network. It is this password
that you will enter on your wireless devices (smartphones, tablets, computers, etc.) when you connect them to your
Wi-Fi
network. You can create a password containing between 8 and 63 characters.

13
Note:
the Wi-Fi Network Password eld
allows only the following characters:
Space ! “ # $ % & ‘ ( ) * + , - . / 0 1 2 3 4 5 6 7 8 9
: ; < = > ? @ A B C D E F G H I J K L M N O P Q R S
T U V W X Y Z [ \ ] ^ _ ` a b c d e f g h i j k l m
n o p q r s t u v w x y z { | } ~
»Wi-Fi signal strength: allows you to congure the power of your 301K RF. Use the
high
Power
if you want the router
to operate at its maximum range. If you are still having problems with the signal range, we recommend checking your
router’s installation location as described in the item
Cuidados e segurança
,or using a Wi-Fi signal repeater.
»
Wi-Fi
Network Scheduling: allows you to schedule a time to turn off your
Wi-Fi
network. Scheduling will only work
if the system time is synchronized with the Internet.You can check the system time in
System settings>Time and Date
. To
disable your
Wi-Fi
network at a scheduled time, simply enable the option
Scheduling
, choose the interval at which you
wish to disable the
Wi-Fi
network, and the days on which the scheduling should take effect.
»WPS: the function
WPS
allows you to connect devices to your
Wi-Fi
network quickly and securely. If you have any device
compatible with the technology
WPS
you can allow it to access your router’s
Wi-Fi
network via one of the available
WPS
modes:
Physical button
(PBC) or
PIN
.
»Physical Button (PBC): if the device you wish to connect to your
Wi-Fi
network has a
WPS
button:
1. Press the button
WPS/RST
, located on the back of your RF 301K, for approximately 1 second.
The product will be available for
WPS
connection for about 2 minutes. You can also activate WPS through the
PBC
button available in the web conguration interface
2. Within 1 minute after pressing the
WPS/RST
button on your router, press the
WPS
button on your wireless device
and wait while the connection is established.
Tip: Some devices, for example smartphones with Android®operating system, have a
virtual
WPS
button,
i.e., they allow WPS activation through the advanced
Wi-Fi
network settings.
»PIN
mode
:If your wireless device (smartphone, tablet or other) requests a number to establish the
WPS
connection,
you can get the current PIN from your router in the WPS settings. Simply enter the number on your wireless device
and then proceed with the connection.
»Operationmode: allows you to choose which technologies your router will operate on.
Note: limiting to some technology may cause some device not to be able to connect to your
Wi-Fi
network, so we
recommend using the router’s default values.
»Channel: operation channel of the router’s Wi-Fi network. You can check, through specic applications for this purpose,
which channel is less busy and then use it on your router to improve product performance.
»Bandwidth: you can set the bandwidth to 20 MHz, 40 MHz or let the router choose the best option by selecting the
option
Automatic
.

14
4.6. Band control menu
Band control conguration screen
Band control allows you to set your Internet speed use priorities.
»Device name: displays the device name and its
IP
address. The device name can be changed by clicking .
»Download Speed: informs the current download consumption of the device.
»Upload speed: informs the current upload consumption of the device.
»Download limit: informs the maximum download speed, in kilobytes per second, for the selected device. Select
Unlimi-
ted
if you want the device to be able to use the download band of your internet without limitation.
»Upload limit: informs the maximum upload speed. in kilobytes per second, for the selected device. Select
Unlimited
if
you want the device to be able to use the upload band of your internet without limitation.
»Internet access: allows you to block the device from accessing the Internet.
»Blocked devices: displays the blocked devices. To unblock a device click
Remove
, after lling in the information, click
Save
to apply the changes made.

15
4.7. Parental control menu
Parental control conguration screen
Parental control
allows you to manage when connected devices can use the Internet; block or release certain content.
»Connected devices: displays the connected devices. You can change the device name by clicking and choosing
whether to manage the device by clicking .
»Access Restrictions: you can choose when managed devices can access the Internet and what content they can access:
»Internet accessible at: choose the time when the device will be able to access the internet.
»Type of restriction: you can choose between:
»Disable: causing managed devices to access the internet at the specied time without any restrictions.
»Allow only: allowing access only to sites entered in the eld
Name or website URL
at the specied time.
»Prohibit only: blocks access only to sites entered in the eld
Name or website URL
at the specied time.
»Name or website URL: allows you to add words or websites that will be blocked or allowed depending on the type of
constraint selected in the
Type of constraint
.
After lling in the information, click
Save
to apply the changes made.
4.8. Advanced settings menu
Static DHCP
Static DHCP conguration

16
You can control which address should always be delivered, via DHCP, to a specic device on the local network.
The devices are always identied by their respective
MAC
addresses. The available elds are:
»
IP
address: enter the address that should be assigned to the device each time it connects to the router network.
»MAC
address
:enter the
MAC
address of the device that should receive the reserved IP.
»Comment: enter a comment to help identify the device.
After lling in, click the button to add the reservation and the button
Save
to save the settings.
The reserved addresses on the
DHCP
server can be viewed on this same page, in the list below the elds used to add
the records. To delete a rule just click .
Port forwarding
Port forwarding conguration
Port forwarding is used to release Internet access to specic ports of your local area network (LAN) devices.
To add a new rule, ll in the elds according to the following guidelines.
»IP Address:
this must be the IP address of the device on your internal network that will receive the forwarded trafc.
»Internal Port: these elds must indicate the port or range of ports used by the device application reported in the eld
IP
Address
.
»External Port: these elds must indicate the port or range of ports that will concentrate the Internet trafc that will be
directed to the ports reported in the eld
Internal Port
of the device reported in the eld
IP Address
.
»Protocol: indicates the transport protocol to be used.You need to conrm this information for the forwarding to be succes-
sful.The options are
TCP
,
UDP
and
TCP&UDP
. If you want to forward both protocols (
TCP
and
UDP
) to the same destination,
you must select
Both
.
After completing the elds, click on .
The list of rules created will appear right below.To delete a rule just click .
DDNS
DDNS conguration

17
Through the DDNS feature you can add a dynamic
No-IP
and
DynDNS
service host to your router.
You must register your information directly on the website of one of the services, and then inform in the router the
parameters for authentication.
Tip: to access the page of each of the servers (
DynDNS
and
No-IP
), you can click on the link
Register now
of the web
interface, after selecting the service in the eld
Service Provider
.
Fill in the information according to the host registration at your preferred provider and click
Save
.
DMZ
DMZ conguration
This feature allows you to set up a device on your network to receive all connection requests received via the Internet
(
WAN
interface) and that do not have any specic forwarding rules.
To set a device as
DMZ
, enable the function through the option
Enable
, ll in the eld
IP Address
with the address of
the device you want to turn into a DMZ and click
Save
.
UPnP
UPnP conguration
UPnP allows applications to request port forwarding to the router automatically.This option is enabled by
default
. If you
want to disable it, check the option
Disable
and click
Save
.
4.9. IPv6 Menu
In the menu
IPv6
you can congure IPv6 addressing options. To enable the use of IPv6, select the option
IPv6
.
Option to enable IPv6
WAN IPv6 Settings
WAN IPv6 Settings

18
WAN IPv6 Settings groups the settings related to your
IPv6
Internet connection. Below we will explain each available
option.
»Connection type: there are 3 possible connection modes:
»DHCPv6: use this mode if your connection details are provided automatically through a
DHCPv6
server.
»PPPoE: use this mode if your Internet access requires authentication via PPPoE. In this mode you need a user and
password to authenticate with your operator or ISP.
»Static IPv6: use this mode if your Internet access is provided via a static
IPv6
address.
All information for the conguration in this mode must be provided by your Internet operator.
»Obtain a Stateful address: if your operator or ISP delivers the address via DHCPv6 Stateful, check this option.
»Obtain Prex Delegation: if your operator or ISP delivers the LAN prex via Prex Delegation, check this option.
Note: the options
Obtain Stateful Address
and
Obtain Prex Delegation
are only displayed for the modes
PPPoEv6
and
DHCPv6
.
When you nish the settings, click on the button
Save
to apply the changes.
LAN IPv6 Settings
LAN IPv6 Settings
The LAN IPv6 settings menu groups the settings related to your
IPv6
connection on the router LAN. Below we will
explain each available option.
»LAN IPv6
address
: allows you to congure the LAN
IPv6
address of the router. Select
Manual
if you want to congure
a specic
IPv6
address.
»LAN IPv6
address
: allows you to congure the LAN prex
IPv6
of your router. Select
Manual
if you want to congure
a specic prex. Depending on the type of connection used on the WAN, you may need to congure a prex reported
by your operator or ISP.
»
DHCPv6
server: allows you to enable or disable the
DHCPv6
server on the router LAN.
»Type of DHCPv6: allows you to choose how the
DHCPv6
server will deliver the
IPv6
addresses to the devices on the
router’s LAN. Choose
Manual
if you want to congure a specic address range.
»DNS IPv6: allows you to congure the
DNS
servers that will be sent to the devices on the router’s LAN. Choose
Manual
if you want to use specic
DNS
servers.
When you nish the settings, click on the button
Save
to apply the changes.

19
4.10. System settings menu
Login password
Conguring the router administration password
To change your router's web conguration interface password, you must enter the old password (password you cur-
rently use) in the eld
Old Password
e, then ll in the new password in the eld
New Password
, and conrm the pass-
word in the eld
Conrm Password
. Finally, click
Save
to apply the changes.
When you do this, you will be directed to the screen where you should log into your router’s web conguration interface,
using the user
admin
and entering the registered password.
WAN
Advanced WAN settings
It groups some more advanced
WAN
port of the RF 301K:
»MTU: only modify this eld if your operator indicates a value different from the default.
»Clone MAC: allows you to associate a non-default
MAC
address with the
WAN
interface of the RF 301K. You can
manually enter the
MAC
address selecting
Manual
or clone the
MAC
address of the device you are using to access the
conguration web interface by selecting
Clone MAC of this device
. If you wish to return to the router’s default MAC,
select
default MAC
.
»MTU: only modify this eld if your operator indicates a value different from the default.

20
LAN
Advanced LAN settings
You can change the following settings:
»LAN IP
address
:Router’s LAN IP
address
.When changing this information, you should use the new
IP
address to access
the router interface or perform access using the address
http://meuintelbras.local/
»Subnet mask: LAN subnet mask of the router.
»DHCP
server
:allows you to enable or disable the
DHCP
server in the router’s LAN. When disabling the
DHCP
server, you
must congure an
IP
address in each device connected to the router.
»Start IP and End IP: the
DHCP
server will deliver to the devices connected to the router an
IP
address within the
specied range.
»Primary DNS and Secondary DNS: if you want to use specic
DNS
servers, you can enable this option and enter the
servers in the elds
primary DNS
and
secondary DNS
.
Remote management
Remote management settings
Remote management settings allow access to the RF 301K conguration web page via the Internet (WAN).
»Activate: allows you to enable the function, so that the router releases access to the conguration page via incoming
connections via the
WAN
interface. Once the function is enabled, you can specify a port for the connection through the
eld
Port
.
»Remote IP Address: If you want to limit access to the conguration page to only one
IP
address, select
Manual
. If you
prefer any
IP
address to access the product web conguration page, select
Any IP Address
.
»Port: port through which you want to allow access, via internet, to the router’s web conguration interface. By default
the congured port is
8080
.
To make any change, click
Save
and wait for the conguration to complete.
Table of contents
Other Intelbras Wireless Router manuals
