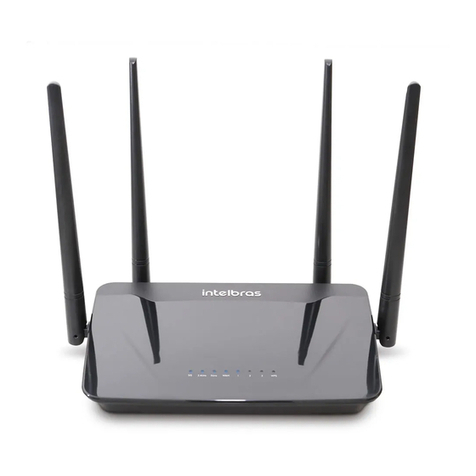
Intelbras GF 1200 User manual

User guide
GF 1200

GF 1200
Wi-Fi router 5 (dual band AC 1200)
Congratulations, you have just purchased a product with Intelbras quality and security.
The GF 1200 router is designed for ISPs that want to deliver much higher performance
Wi-Fi to their subscribers. With it you can share Internet access with multiple devices in a
high-speed wireless network. Its installation and management can be done through the
web interface, quickly and easily. In addition, it is compatible with the Remotize platform
(
https://remotize.intelbras.com.br
), which allows providers to manage their router park
with convenience and security in a centralized way.

Care and safety
Avoid an excessive number
of physical barriers be-
tween the transmitting and
receiving devices on the
Wi-Fi network.
Adjust the position of the
antennas. Usually, the
vertical position is the most
indicated.
Prefer to install your router in
the central part of the environ-
ment and preferably in a higher
location, for example on top of
a furniture.
Do not leave your router exposed to sunlight or heat sources.
Do not place the router in closed or tight places.
Do not leave your router near the microwave or other equipment that might generate
interference.
Do not leave your router near other radio frequency transmitters, for example,
wireless (analog) phones.
Use only products that are approved according to current legislation. This will
prevent, for example, such products from causing serious interference problems in
your network.

Summary
1. Technical specications 5
2. Accessories 6
3. Installation 7
4. Conguration 7
4.1. Conguration via web interface ................................................................7
4.2. Dashboard................................................................................8
4.3. Network settings ...........................................................................9
4.4. System settings ...........................................................................15
5. Frequently Asked Questions 18
Warranty term 19

5
1. Technical specications
Hardware
4 xed antennas of 5 dBi
3 LAN Fast Ethernet ports (10/100 Mbps each)
1 WAN Gigabit Ethernet port (10/100/1000 Mbps)
Chipset Realtek® RTL8197F + RTL8211F + RTL8812BRH
Flash Memory 8 MB
RAM memory 64 MB
OS Linux + Bifrost Intelbras
Button
Reset/WPS
(Attention: this button does not have the function
WPS
enabled)
Compatible with the Remotize platform (
https://remotize.intelbras.com.br
)
Wireless
parameters
IEEE standards 802.11a/b/g/n/ac
Radio mode Mu-MiMo, Beamforming
Mode of operation Router
Frequency of operation 2.4 GHz
5 GHz
Bandwidth 2.4 GHz: 20, 40 MHz with coexistence enabled by default
5 GHz: 20, 40, 80 MHz with coexistence enabled by default
Transmission rate 2.4 GHz: up to 300 Mbps
5 GHz: up to 867 Mbps
Channels of operation
2.4 GHz: 1-13 (Brazil)
5 GHz: 36, 40, 44, 48, 149, 153, 157, 161 (considering 20 MHz. When
changing the bandwidth, the system automatically adjusts the available
channels on the product interface)
Maximum power
(E.I.R.P.)
2.4 GHz: 316 mW (25 dBm)
5 GHz: 158 mW (22 dBm)
Receiver sensitivity at
2.4 GHz
Receiver sensitivity at
5 GHz
Security WPA-WPA2/PSK with AES encryption

6
Description of LEDs
Power On: power-connected router
Off: power-disconnected router
Internet
On: router with internet access
Flashing: Internet port connected, but no Internet access
Off: no network cable connected to the Internet port
LAN
On: there is(are) device(s) are connected on LAN ports
Flashing: there is(are) device(s) traveling data on LAN ports
Off: no device connected to the LAN ports
Wi-Fi
On: Wi-Fi on, no devices trafcking data
Flashing: Wi-Fi on and devices are trafcking data
Off: Wi-Fi off (5 GHz and 2.4 GHz)
Power supply
Input 100V-240 V to 50/60 Hz
Output 12 Vdc / 1 A
Maximum power
consumption 5.68 W
Attention: this equipment is not entitled to be protected against harmful interference and may not
cause interference to duly authorized systems.
2. Accessories
» Network cable;
» Power supply;
» Installation guide.

7
3. Installation
The following scenario describes the product installation for use in
Router
mode.
Step 1
Step 2
Step 3
Installation in
Router
mode
1. Connect the power supply to the router and then plug it into the electrical outlet. The LEDs will light up.
2. Connect the Internet network cable (for example, from your modem or other device) to the router’s Internet port;
3. Connect the computer to one of the LAN ports on the router using a network cable;
Note:
if you wish to access your router via Wi-Fi, access the wireless network named INTELBRAS or INTELBRAS_5G.
If you wish to perform this conguration using a smartphone, disable the mobile data network before proceeding with
the router settings.
4. Conguration
4.1. Conguration via web interface
On your computer, open your web browser (we recommend using the most current versions of Google Chrome®, Mozil-
la Firefox®or Microsoft Edge®) and go to
http://10.0.0.1
or
http://meuintelbras.local/
as shown in the following image.
This procedure should be performed whenever you need to change any conguration of your router.
Accessing the router conguration page

8
Your router’s login page will open.As factory default, the user is
admin
and the password is
admin
. Enter these creden-
tials in the corresponding elds and click on
Enter.
Login page
Note:
if access is not possible with these credentials:
1.
If your router is managed by your ISP or internet operator, please contact the service provider support.
2.
If your router is managed by yourself, please refer to the item
5. Dúvidas frequentes
or contact our support.
4.2. Dashboard
After logging in, you will see the
dashboard
screen (following gure), which contains the main router information: In-
ternet connection status, current band consumption,WAN settings, LAN settings, rmware version details, and number
of connected devices.
Dashboard
In the animation of the Internet circle, you can see the status of the Internet connection: if the connection is working,
you will see
Internet
Active
written; if there is any failure, you will see
Internet Inactive
written with a red sign.

9
Internet (WAN)
On the car titled
Internet (WAN)
, you can view the following Internet settings obtained: mode of operation, IP address,
subnet mask, gateway, WAN MAC address, DNS1, DNS2 and DNS3.
Local Area Network (LAN)
On the card titled
Local Area Network (LAN)
, you can view the following LAN settings obtained: IP address, subnet
mask, and LAN MAC address.
Details
On the card titled
Details
, you can view the following details: current rmware version of the router, product model, and
active time (without restarting) the router.
4.3. Network settings
In the main menu, available through the icon in the top left corner, you will have access to all the functions of
your product. Click the on menu and select the option
Network
.
Main menu

10
You will be directed to the network settings screen that contains 3 tabs:
WI-FI, INTERNET and LAN
, as shown in the
following image. By default, the
WI-FI
tab will be shown rst.
Wi-Fi settings editing screen
Wi-Fi network name and password
By default, the 2.4 GHz and 5 GHz networks will be named
INTELBRAS and INTELBRAS_5G
, respectively. You can
change the name and password of each separately by clicking on the icon and then on
Edit
to access the edit
screen, as shown in the following image.
Network name and password editing
» Network password: password you want for your Wi-Fi network. For example,
MyHome
. This eld allows you to create
a name with up to 32 characters.
Note:
we recommend that you congure different names for the 2.4 GHz and 5 GHz networks, e.g., MyHome and
MyHome5G. This will prevent possible network identication problems for Wi-Fi devices.
» Leave network open: if this option is active (gure above), your Wi-Fi network will be unprotected (no password) and
any device within range can connect to the network.

11
» Network password: if you disable the previous option (Leave network open), you can set the password you want
for your Wi-Fi network. This is the password you will use when connecting your wireless devices to the network (smart-
phones, notebooks, tablets etc). The encryption used will be
WPA/WPA2-PSK
.
Note:
the elds Wi-Fi Network Name and Wi-Fi Network Password allow the following characters:
Space ! “ # $ % & ‘ ( ) * + , - . / 0 1 2 3 4 5 6 7 8 9
: ; < = > ? @ A B C D E F G H I J K L M N O P Q R S
T U V W X Y Z [ \ ] ^ _ ` a b c d e f g h i j k l m
n o p q r s t u v w x y z { | } ~
Deactivate
If you want any of your Wi-Fi networks to be deactivated, you can do so by using the signaled icons in the image below.
Thus, in a common search for Wi-Fi networks on a wireless device, the disabled network will not be listed, nor will it
be possible to connect to it.
Deactivation function for your network

12
Radio
You can change the radio settings of each frequency separately by clicking on
Radio settings
and accessing the edit
screen as shown below.
2.4 GHz and 5 GHz radio settings
» Enabled: if activated (gure above), the radio of a certain frequency will be on and can provide Wi-Fi connection. If it is
deactivated, the radio of a certain frequency will be turned off and will not be able to provide Wi-Fi connection.
» Bandwidth: in this eld, you can select the bandwidth options you wish for each of the radios.
» For Wi-Fi 2.4 GHz network
» 20/40 MHz: In this option, the router will make available both the 20 MHz option and the 40 MHz option for
wireless devices to connect.
In environments with a lot of interference, your router will automatically use 20 MHz bandwidth.

13
» 20 MHz: In this option, all wireless devices will be forced to connect to the router using the 20 MHz band.
» For Wi-Fi 5 GHz network
» 20/40/80 MHz: in this option, the router will make available the 20 MHz option, the 40 MHz option and the 80
MHz option for wireless devices to connect.
» 20/40 MHz: in this option, the router will set the best bandwidth to be used (between 20 and 40 MHz, discarding
option 80 MHz) and will automatically set its operation in this mode.
» 20 MHz: in this option, all wireless devices will be forced to connect to the router using the 20 MHz band.
» Channel: in this eld, you can select the channel options you wish for each of the radios. If you use the
Automatic
option, the router will automatically choose the channel.This choice will be based on a scan to check which channel has
the least noise or amount of transmissions.
The scan is performed every time the router is restarted or when some radio setting is saved.
Internet
You can change the Internet settings via the
Internet
tab, available within the
Network
menu.
DHCP mode Internet settings edit screen
» Operation mode: you can select three connection modes, described below:
» Automatic (DHCP): use this mode if your connection settings are provided automatically via a DHCP server (image
above).

14
» PPPoE: use this mode if your Internet access requires authentication via PPPoE. If selected, you will need at least
one user and password (provided by your operator or internet provider) to authenticate with the Internet. It may be
necessary to ll in the other elds.
PPPoE mode Internet settings edit screen
» Static: use this mode if your Internet access is provided via a static IP address. All information for conguring this
mode must be provided by your operator or internet provider.
Static mode Internet settings edit screen

15
LAN
You can change the local area network (LAN) settings via the
LAN
tab, available from the
Network
menu (gure below).
LAN settings editing screen
» IP Address: is the IP address to access the router’s web interface (10.0.0.1 by default).When changing this information,
you should use the new address you have chosen to access the router interface or perform access using the address
http://meuintelbras.local
.
» Subnet mask: LAN subnet mask of the router.
Note: The DHCP server of the LAN is enabled by default with IP range set by the congured subnet mask.
4.4. System settings
You have access to the system settings functions available within the
System Settings
menu, as shown below.
System settings edit screen

16
» Update: in this tab, in addition to viewing the current rmware version of the product, you can update your router
manually by selecting a rmware le using the
Select File
button and then clicking
Update
. The gure below shows this
tab with details.
Update Screen
» User and Password: in this tab, you can change your router’s web interface access credentials through the
User and
Password
elds. Enter the credentials you want in the corresponding elds, ll in the
Password Conrmation
eld with
the same password chosen and click on
Save
.
User Screen and Password
» Restart: in this tab, you can restart your router by clicking the
Restart
button, as below. If you do not want to access the
web interface, you have two other alternatives:
1. You can remove the power cable from the back of your router and then replug it.
2. You can remove the power supply from the outlet and replug it.
Restart Screen

17
» Restore: in this tab, you can perform two actions (as shown below):
1. Change the time the
Reset
button should be pressed to restore your router settings to factory default. To do this,
change the value of the pressed
Time
eld (seconds) to the desired one and click on the
Save
button.
2. Reset your router settings to factory defaults by clicking the
Restore to Factory Default
button.
Note: as described in action 1, you can also restore your router settings to factory default by holding down the
RESET WPS button (which is on the back of your router) for the time that was set (the default is 20 seconds).
Restore Screen
» Remote Management: in this tab, you can change the remote management settings of your routerTwo functions are available:
» WAN access: by enabling this function, you can access your router’s web interface via an external connection that enters
through your Internet port. If you enable this function, you must specify a port for connection through the
Connection Port
eld (image below).
WAN access conguration screen

18
» Enable WAN ping: by enabling this function (image below), you can ping your router’s WAN and get a response. If
you disable the function, the WAN ping will not get a response.
WAN ping conguration screen
5. Frequently Asked Questions
Problem Solution
What to do when I can't access the Internet?
You can try the following options:
Option 1: make sure all the cables are connected correctly, according to the item
3. Installation
and that all the equipment
in the network is active.
Option 2: turn the router and the other equipment that provide your Internet connection off and on again.
Option 3: make sure there is no problem with your broadband service (ADSL/cable).
What to do when I cannot access the
conguration
web page?
Check all physical connections as per item
3. Installation
.
The device you will use to perform the conguration (computer, laptop or other) must be connected to the router via cable
(LAN) or via Wi-Fi.
Check that your device (computer, laptop or other) is congured to obtain an IP address automatically in your network settings.
If you are trying to access through a smartphone, disable the mobile data and try again.
Clear your browser cache before attempting to access the web page to make the settings.
What can I do if I forget the wireless
password?
Option 1: connect a device via the network cable to one of the LAN ports on the router. Then, using a web browser, access the
product’s conguration interface, go to
Network > Wi-Fi
menu and set your password again.
Option 2: restore the router to factory settings by pressing the
RESET/WPS
button for 20 seconds.Then, recongure the router
as explained in this manual in the item
4. settings.
What can I do if I forget the
password to access the web interface?
Restore the router to factory default settings by pressing the
RESET/WPS
button for 20 seconds. After this time, the product
will restart.
Then, recongure the router as explained in this manual in the item
4. settings.
Note: if your product settings are managed by your internet provider, please consult them before doing this.
What to do when the 5 GHz network does not
appear on my device?
Check the technical specications of your device to see if it supports 5 GHz Wi-Fi networks, since not all devices support this
frequency.
If you have congured 2.4 GHz and 5GHz networks with the same name, e.g.,
MY HOME
, when you go looking for the network
on your devices to connect, you will only see theWi-Fi network with the name
MY HOME
, so there is no differentiation between
frequencies.
What to do when I cannot get a good
Wi-Fi connection?
For a good connection to the router, your device must be within the signal range of the router, i.e., receivingWi-Fi signal properly,
and with little interference from other Wi-Fi routers or devices at the same operating frequency (2.4 or 5 GHz).
To improve your connection you can try:
» Refer to the item Care and safety to check the best place to install your router.
» Manually change the router’s operating channel, or restart the product if it has automatic channel setting, so it will
choose a new operating channel, with less interference.
» Some devices do not support higher speeds. Check the technical specications of your device to see if it supports the
same technologies as your router.
The Wi-Fi network of my device (mobile,
computer or other)
sometimes disconnects and reconnects to the
router network.
What to do?
Option 1: are you using different names for the 2.4 GHz and 5 GHz networks and have you saved both on your device, letting it
automatically choose between them? If so, remove one of the networks on your device (for example, forgetting the network on
the smartphone). Make sure the behavior stops happening. Some devices may be switching between saved networks, so you'll
notice disconnections.We recommend keeping saved only one of the networks on the device that has this problem.
Option 2: did you give equal names to the Wi-Fi 2.4 GHz and 5 GHz networks? If so, change the names to make them different.
For example, if your 2.4 GHz network has been set up with the name My Network, change the name of the 5GHz network to
My 5G network.
If no option solves your problem, please contact our support.
How do I restore my router to the factory
default settings?
With the product on and in normal operation, press the
RESET/WPS
button for about 20 seconds When the reset time is
reached, with the exception of LED Power, the other LEDs on the product will turn off. When this occurs, you can stop pressing
the button. After releasing the button, wait a few seconds while the conguration is restored.You can also restore through the
web interface, as per item
Restore
within
4.4. System settings.
Note: if your product settings are managed by your internet provider, please consult them before doing this.

19
Warranty term
It is expressly stated that this contractual warranty is given subject to the following conditions:
Name of customer:
Signature of the customer:
No. of the invoice:
Date of purchase:
Model: Serial No:
Reseller:
1. All parts and components of the product are under warranty against possible manufacturing defects, which
may present, for a period of 5 (ve) years – comprising 90 (three) months of legal warranty and 57 (fty seven)
months of contractual warranty –, counted from the date of purchase of the product by the Consumer, as stated in the
invoice of purchase of the product, which is part of this Term throughout the national territory. This contractual warranty
includes the express exchange of products that are defective in manufacture. If there is no manufacturing defect, but
aw(s) from improper use, the Consumer will bear these expenses.
2. The product installation must be done in accordance with the Product Manual and/or Installation Guide. If your product
needs to be installed and congured by a qualied technician, look for a suitable and specialized professional, and the
costs of these services are not included in the value of the product.
3. If you notice a defect, you should immediately contact the nearest Authorized Service listed by the manufacturer – only
they are authorized to examine and remedy the defect during the warranty period provided herein. If this is not adhered
to, this warranty will lose its validity, as it will be characterized as the violation of the product.
4. In the event that the Customer requests home care, the Customer should refer to the nearest Authorized Service for the
technical visit fee. If the need for withdrawal of the product is found, the expenses arising, such as transportation and
safety to and from the product, are under the responsibility of the Consumer.
5. The warranty will totally lose its validity in the event of any of the following: a) if the defect is not of manufacture, but
caused by the Consumer or by third parties alien to the manufacturer; b) if the damage to the product comes from
accidents, claims, agents of nature (lightning, oods, landslides, etc.. ), humidity, mains voltage (overvoltage caused by
accidents or excessive mains uctuations), installation/use in disagreement with the user manual or due to natural wear
of parts, pieces and components; c) if the product has been inuenced by chemical, electromagnetic, electrical or animal
(insects, etc.); d) if the product’s serial number has been tampered with or erased; e) if the device has been violated.
6. This warranty does not cover loss of data, so it is recommended, if the product is concerned, that the Consumer make a
regular backup copy of the data contained in the product.
7. Intelbras is not responsible for the installation of this product and also for any attempts of fraud and/or sabotage on its
products. Keep software and application updates, if any, up to date, as well as network protections necessary to protect
against hackers. The equipment is under warranty against aws within its normal conditions of use, and it is important
to be aware that, since it is an electronic equipment, it is not free from frauds and scams that may interfere with its
correct functioning.
8. After its useful life, the product must be delivered to an Intelbras authorized technical assistance or directly to its nal
destination in an environmentally adequate way, avoiding environmental and health impacts. If you prefer, the battery
as well as other Intelbras brand electronics without use, can be disposed of at any Green Eletron collection point
(electro-electronic waste manager with which we are associated). If you have any questions about the reverse logistics
process, please contact us at (48) 2106-0006 or 0800 704 2767 (Monday to Friday from 8 am to 8 pm and Saturdays
from 8 am to 6 pm) or via e-mail suporte@intelbras.com.br.
As these are the conditions of this Term of Additional Guarantee, Intelbras S/A reserves the right to change the general,
technical and aesthetic characteristics of its products without prior notice.
The manufacturing process of this product is not covered by ISO 14001 requirements.
All images in this manual are illustrative.

Customer Support: (48) 2106 0006
Forum: forum.intelbras.com.br
Support via chat: intelbras.com.br/suporte-tecnico
Support via e-mail: suporte@intelbras.com.br
Customer Service: 0800 7042767
Where to buy? Who installs it? 0800 7245115
Imported in Brazil by: Intelbras S/A – Indústria de Telecomunicação Eletrônica Brasileira
Rodovia SC 281, km 4,5 – Sertão do Maruim – São José/SC – 88122-001
CNPJ 82.901.000/0014-41 – www.intelbras.com.br
01.20
Made in China
Table of contents
Other Intelbras Wireless Router manuals
