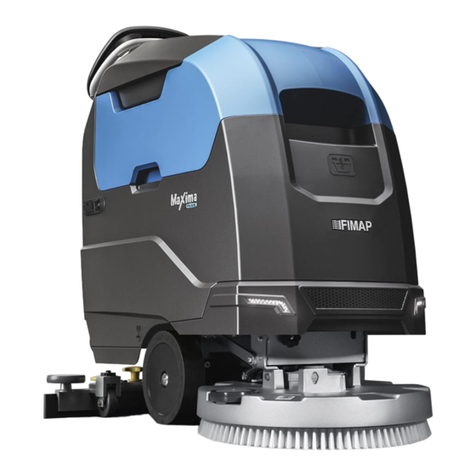
Intellibot Robotics HydroBot Series User manual

User Manual
HydroBot Series Robotic Floor Scrubber
Intellibot Robotics, LLC
The Future of Floor Care
5410 SW Macadam Ave
Suite 100
Portland, Oregon 97239

Congratulations on the purchase of a new HydroBot Robotic Floor Scrubber. The selection of this product represents a
desire to incorporate a robotic floor cleaning robot that is easily operated and will provide years of functionality.
This HydroBot Robotic Floor Scrubber is the culmination of a combined effort of many skilled engineers and craftsmen.
We developed this manual to ensure your pleasure of ownership, and for your safety.
✓Please read the manual carefully before operating your HydroBot Robotic Floor Scrubber.
✓Abide by recommendations within the manual.
✓Regard all warnings and cautions.
✓Store this manual in a safe place for future reference.
Best wishes for many hours of sustainable and cost effective robotic floor cleaning.
Intellibot Robotics, LLC
© Intellibot Robotics, LLC 2012. All Rights Reserved. No part of this publication may be reproduced or distributed in any
form without the expressed written consent of Intellibot Robotics, LLC.
Information contained within this document is subject to change without notice. Any error or misinformation found within
this document should be reported to Intellibot immediately.

Table of Contents Page
Introduction ..........................................................................................................................................................1!
Product Information............................................................................................................................................1!
User Manual ..........................................................................................................................................................1!
Malfunctions.......................................................................................................................................................1!
Service and Warranty Information .......................................................................................................................1!
Customer Assistance ...........................................................................................................................................1!
Where to find it ..................................................................................................................................................1!
Operator Controls ..................................................................................................................................................2!
Control Panel......................................................................................................................................................2!
Power On Screen................................................................................................................................................2!
Login Screen ......................................................................................................................................................3!
Operation ..............................................................................................................................................................3!
Operator Pager...................................................................................................................................................3!
Parking Brake.....................................................................................................................................................3!
Tank..................................................................................................................................................................3!
Brush Head Assembly .........................................................................................................................................4!
Squeegee Assembly ............................................................................................................................................4!
Battery Charging ................................................................................................................................................4!
Robotic Floor Cleaning............................................................................................................................................5!
Best Time to Clean .............................................................................................................................................5!
Clearing Obstacles ..............................................................................................................................................5!
Floor Preparation ................................................................................................................................................5!
Manual Clean .....................................................................................................................................................5!
Spot Clean .........................................................................................................................................................6!
Area Clean .........................................................................................................................................................7!
Selecting a Route................................................................................................................................................7!
Pausing and Restarting .......................................................................................................................................8!
Changing Pads or Brushes...................................................................................................................................8!
Exchanging Battery Packs....................................................................................................................................8!
Configuration Settings ............................................................................................................................................9!

Table of Contents Page
Wi-Fi Configuration ................................................................................................................................................9!
Operator Administration ....................................................................................................................................... 10!
Operator Setup................................................................................................................................................. 10!
Acquiring a Site.................................................................................................................................................... 10!
Acquiring Area(s).............................................................................................................................................. 11!
Acquisition .............................................................................................................................................................. 11!
Creating a Route .............................................................................................................................................. 14!
Editing Area(s) ................................................................................................................................................. 15!
Diagnostics.......................................................................................................................................................... 17!
Wi-Fi................................................................................................................................................................ 17!
Sonar............................................................................................................................................................... 18!
Gyro ................................................................................................................................................................ 19!
Output(s)......................................................................................................................................................... 20!
Memory ........................................................................................................................................................... 23!
Touch Shield Zones........................................................................................................................................... 24!
Infrared Sensors............................................................................................................................................... 25!
Water Flow ...................................................................................................................................................... 26!
Troubleshooting................................................................................................................................................... 27!
Displayed Messages .......................................................................................................................................... 27!
No Power On.................................................................................................................................................... 27!
Leaving Water .................................................................................................................................................. 27!
Not Cleaning Floor Surface ................................................................................................................................ 27!
Robot Pulling to One Side in Manual Mode.......................................................................................................... 27!
Navigation Issues ............................................................................................................................................. 27!
Troubleshooting Problem Routes........................................................................................................................... 28!
Bumping Walls (Left or Right)............................................................................................................................ 28!
Running Short from Back Wall ........................................................................................................................... 28!
Bumping Far Wall ............................................................................................................................................. 29!
HydroBot Robotic Floor Scrubber Care ................................................................................................................... 30!
Daily Operator Tasks......................................................................................................................................... 30!
Startup Tasks.......................................................................................................................................................... 30!

Table of Contents Page
Shutdown Tasks...................................................................................................................................................... 30!
Preventive Maintenance Checklist ...................................................................................................................... 31!
Fuse Box & Circuit Breaker Location................................................................................................................... 31!
Technical Data..................................................................................................................................................... 32!
Name(s) .......................................................................................................................................................... 32!
Model(s) .......................................................................................................................................................... 32!
Construction..................................................................................................................................................... 32!
Electrical Requirements ..................................................................................................................................... 32!
Robotic Features............................................................................................................................................... 32!
Solution/Recovery Recycling System .................................................................................................................. 33!
Brushes, Squeegee and Vacuum ........................................................................................................................ 33!
Motors ............................................................................................................................................................. 33!
Production ....................................................................................................................................................... 33!
Operating Environment ..................................................................................................................................... 33!
Storage Environment ........................................................................................................................................ 33!
Environmental Effects ....................................................................................................................................... 34!
Consumable Parts Kit ........................................................................................................................................... 34!
Individual Part(s) .............................................................................................................................................. 34!
Ordering Parts ..................................................................................................................................................... 34!


User Manual - HydroBot Robotic Floor Scrubber
© 2012 Intellibot Robotics, LLC All Rights Reserved v2.5 Page 1
Introduction
Product Information
Always use Intellibot Robotics original parts and accessories, explicitly approved for the HydroBot Robotic Floor Scrubber.
These parts have been tested to determine their reliability, safety and suitability. Intellibot Robotics approved parts and
accessories are available through the service department: (1-888-837-0002).
User Manual
This manual contains a lot of practical information. Read it carefully and become familiar with the HydroBot Robotic Floor
Scrubber before operating.
For longer service life of the robot, follow the instructions and any warnings contained within this manual. Damage caused
by failure to follow these instructions may not be covered by the limited warranty.
Malfunctions
If a malfunction occurs with the HydroBot Robotic Floor Scrubber, especially one that may affect its safe operation,
immediately contact Intellibot Robotics (1-888-837-0002) to have the malfunction diagnosed and corrected. If any service
matter is not handled satisfactorily, please contact Intellibot Robotics management at the following address:
5410 SW Macadam Ave., Ste. 100, Portland, OR 97239.
Service and Warranty Information
The installation packet contains detailed information concerning any warranties that cover the robot including:
✓
One year limited warranty
✓
Software license agreement
Customer Assistance
Intellibot Robotics’ support program provides factory-trained and certified technical help in the event of a malfunction. An
Intellibot Customer Service Representative will answer calls to the toll-free support program 24 hours per day, 365 days
per year.
1-888-837-0002
Where to find it
This manual is divided into several sections:
Operator Controls: Overview of operator controls
Operation: Information on Robotic Floor Scrubber equipment and operation.
Robotic Floor Cleaning: Instruction on how to operate the robot.
Settings: Instruction on how to set parameters such language, metric (or imperial), and default water flow.
Administration: Instruction on how to add operators and operator privileges.
Reports: Instruction on how to view reports from the User Interface (UI) display panel.
Site Acquisition: Instruction on how to acquire a site (areas, zones, and routes).
Diagnostics: Instruction on how to run diagnostics.
Troubleshooting: Assisting in the event of a malfunction.
HydroBot Robotic Floor Scrubber Care: Caring for the robot.
Technical Data: Technical data for the robot, including parts list for ordering parts.
WARNING NOTICES APPEAR IN CAPITAL BOLD TYPE FACE.

User Manual - HydroBot Robotic Floor Scrubber
© 2012 Intellibot Robotics, LLC All Rights Reserved v2.5 Page 2
Operator Controls
An overview of operator controls.
Control Panel
1. On/Off button: Powers robot on or off.
2. Handle bar: Initiates movement of the robot.
3. User Interface (UI) display: Used to input commands and receive
messages.
4. Emergency stop switch: Depressing the emergency stop switch will
immediately stop the robot.
5. Amber warning light: Provides a visual indicator that the robot is operating.
6. Parking Brake: To the left is locked, to the right is released.
Important
The emergency stop switch should only be used if the robot must be stopped
immediately, such as for a building evacuation.
Power On Screen

User Manual - HydroBot Robotic Floor Scrubber
© 2012 Intellibot Robotics, LLC All Rights Reserved v2.5 Page 3
Login Screen
At the login screen, enter an assigned passcode using the keypad. Press to
complete log in.
Note: If the passcode is unknown, contact your robot administrator.
Operation
This section provides basic information on the HydroBot Robotic Floor Scrubber.
Caution
To prevent condensation of critical components, before operating, allow the robot to sit (1) hour for every 7.2°F
(4°C) difference between storage temperature and 70°F (21°C).
Operator Pager
The operator will be paged when the robot finishes a cleaning routine, runs low
on battery charge, or encounters an obstacle that it is unable to navigate around.
Parking Brake
The HydroBot Robotic Floor Scrubber has a parking brake that can be engaged
from the rear of the robot (see red handle). Pivoting the red handle to the left
locks the parking brake, moving it to the right releases the parking brake.
Note: The robot will not move when the parking brake is engaged.
Tank
The HydroBot Robotic Floor Scrubber has a 3-stage filtering system, providing
filtering to 10, 5, or 1 micron(s), utilizing a 25-gallon, high-density, roto-molded,
seamless, linear, polyethylene tank. The robot can run for 8 consecutive hours
without changing solution. The tank should be drained, rinsed and cleaned at the
end of every work shift. This will ensure the robot remains clean and free of
bacteria.

User Manual - HydroBot Robotic Floor Scrubber
© 2012 Intellibot Robotics, LLC All Rights Reserved v2.5 Page 4
Brush Head Assembly
The brush head assembly is a powder-coated stainless steel weldment. The
assembly utilizes dual 24 VDC, 0.75 HP, 200 RPM, direct-drive, permanent,
magnet motors. The two counter-rotating brushes or pads yield a 29” scrubbing
width. Depending on the floor surface, the unit can accommodate various
abrasive grades of pads.
Squeegee Assembly
The HydroBot Robotic Floor Scrubber utilizes a 36-inch, parabolic, self-centering,
swing-style squeegee with plastic rollers on the ends and quick-change, four-
edge, reversible, gum-rubber blades coupled with a powerful vacuum system
that provides outstanding water pickup. The squeegee coverage width is 34.5”.
Squeegee blades are removable so they can be cleaned or reversed to get more
service time. It is recommended that squeegee blades be replaced at least every
12 weeks to avoid excessive noise and avoid the potential of leaving water (due
to worn squeegee blades).
Battery Charging
The HydroBot Robotic Floor Scrubbers are installed with gel cell batteries. These
batteries are reliable and do not require a vented room (they do not emit fumes
while recharging). The robot will operate for approximately four hours per battery
pack charge, provided the batteries are in good working order. Intellibot Robotics
offers, as an accessory, a battery exchange system. This system is designed to
allow the operator to exchange the battery pack when low on charge.
Important!
Only 24-volt chargers with a gel cell setting should be used as these chargers
ensure the batteries do not overheat. Using any other charger may cause
damage to the batteries. Charge each battery pack for a continuous eighteen
hours. The robot automatically powers off when the battery-charging plug is
inserted.

User Manual - HydroBot Robotic Floor Scrubber
© 2012 Intellibot Robotics, LLC All Rights Reserved v2.5 Page 5
Robotic Floor Cleaning
This section provides important information on operating a HydroBot Robotic Floor Scrubber, detailing floor preparation
and outlining a cleaning process that optimizes and maximizes productivity. The robot cleans approximately 10,250
square feet per hour and has four modes of operation: ‘spot’, ‘manual’, ‘area’, and ‘route’ mode cleaning routines. Each
mode has a specific application, which will be detailed in this section.
Best Time to Clean
Clean at times of the day when there are few people around. The robot tends to attract people and their curiosity often
leads to moments of interaction. People may "tease" the robot to see what it will do when blocked. These episodes may
cause the robot to leave small amount of water on the floor.
Clearing Obstacles
Ensure the area to be cleaned is as clutter-free as possible. Remove all items from the area such as garbage bags, trash
cans and cleaning carts. Keeping the halls clear reduces the likelihood of water being left on the floor and ensures that
the entire floor surface is cleaned.
Floor Preparation
Important!
Walk the area to be cleaned prior to starting the robot, picking up large pieces of debris and moving items that may
interfere with smooth, effective floor cleaning.
Manual Clean
1. To select manual clean, begin by pressing the manual icon (shown by
the red arrow).
2. To move the robot forward, press . Note that pressing the arrow
multiple times increases speed as shown by the green progress bar
located directly to the left of the arrows.
3. To move the robot in reverse, press . Note that pressing the arrow
multiple times increases speed as shown by the green progress bar
located directly to the left of the arrows.
4. To stop the robot (and reset the speed progress bar), press .
5. To set the amount of water being distributed on the floor, press .
Note that by pressing the water valve icon multiple times, the green
progress bar indicates the increased water flow.
6. To turn on (or off) the vacuum motor, press .

User Manual - HydroBot Robotic Floor Scrubber
© 2012 Intellibot Robotics, LLC All Rights Reserved v2.5 Page 6
7. To turn on (or off) the brushes, press .
8. At a stop, to have the robot turn 180 degrees, press .
9. For the help menu, press .
10. To return to the home menu, press .
Spot Clean
1. To select spot clean, begin by pressing the icon (shown by the red
arrow).
2. From the next menu, select spot clean from the list (shown by the red
arrow).
Note: The robot will clean approximately a 20 ft. rectangle. The robot will
automatically detect the width of the area and set the correct number of looping
passes to cover the floor surface.

User Manual - HydroBot Robotic Floor Scrubber
© 2012 Intellibot Robotics, LLC All Rights Reserved v2.5 Page 7
Area Clean
1. To select area clean, begin by pressing the icon (shown by the red
arrow).
2. From the next menu, select area clean from the list (shown by the red
arrow), then press the right arrow.
Note: The robot may prompt you to move to the starting location of the area.
Follow the instructions on the screen.
Note: The robot will clean the full length of the area until it encounters an end
wall. During the centering pass, the robot will automatically detect the length
and the width of the area, setting the correct number of looping passes to cover
the entire floor surface.
Selecting a Route
1. To select a route, begin by pressing the icon (shown by the red arrow).
2. From the next menu, select the desired route from the list. To scroll to the
next page of listed routes, press the down arrow. To scroll back to the
previous list, press the up arrow.
Note: The robot may prompt you to move to the starting location of the route.
Follow the instructions on the screen.

User Manual - HydroBot Robotic Floor Scrubber
© 2012 Intellibot Robotics, LLC All Rights Reserved v2.5 Page 8
Pausing and Restarting
In the event of an emergency (e.g. building evacuation, etc.), it may become
necessary to pause or stop the robot during an autonomous cleaning routine (e.g.
area clean, route, etc.).
1. To pause the robot during autonomous cleaning, press ; to resume,
press from the next screen.
2. To stop the robot and abort the run, press .
Changing Pads or Brushes
1. Power off robot.
2. Open front door.
3. Grasp the pad drivers (or brushes) as shown by the red arrows. Deliver a
quick turn in the direction of the arrows to release the pad driver (or
brush).
4. Flip pad driver. Squeeze together the locking clip (shown be red arrow) to
release the locking cap.
5. Remove pad from driver.
6. Install new pad onto driver then lock cap in place.
7. Mount pad drivers on spindles using a quick turn in the opposite direction,
as shown by the arrows.
Note: Dirty or worn pads can cause excessive drag, shortening battery run time.
Flip and/or change pads often.
Exchanging Battery Packs
1. Set parking brake on (to left).
2. Power robot off.
3. Position battery cart to engage latching gate (use level to drop gate in
place).
4. Press down on battery pack locking latch. Lock casters.
5. Pull battery pack onto battery cart.
6. Release locking latch and casters.
7. Spin battery cart 180 degrees to align new battery pack.
8. Engage latching gate and lock casters.
9. Push battery pack into place until handle latch locks.

User Manual - HydroBot Robotic Floor Scrubber
© 2012 Intellibot Robotics, LLC All Rights Reserved v2.5 Page 9
Configuration Settings
1. To access the system menu, press the right arrow (as shown by the red
arrow).
2. From the system menu, select system settings by pressing (shown by
red arrow).
3. From the configuration menu, to set the sound (on/off), press ; to
set language (English, Spanish, or German), press ; to configure
Wi-Fi press ; to set the water flow default (if applicable), press
; and to set the measurement system, (metric or imperial) press
.
Wi-Fi Configuration
This screen allows for configuring a Wi-Fi device to work on a managed network
with a static IP address or one provided by a DHCP server. It also allows for
configuring a variety of security and authentication protocols. This screen does
not configure a cellular modem device.

User Manual - HydroBot Robotic Floor Scrubber
© 2012 Intellibot Robotics, LLC All Rights Reserved v2.5 Page 10
Operator Administration
Operator Setup
1. To access the system menu, press the right arrow (as shown by the red
arrow).
2. To set up operator privileges, press (shown by red arrow).
3. To add an operator, from the operator setup menu, press ; to edit
an existing operator, press the name to highlight, then press . To
inactivate an operator, press the name to highlight, then press .
4. To enter the new operator name, press . To enter the operator’s
passcode, press . To enter the operator’s phone number, press .
To enter the operator email address, press . To turn (on/off)
manual use privileges, press (note the green check mark indicating
privilege). To turn (on/off) robotic mode privilege, press . To turn
(on/off) learning privilege, press . To turn (on/off) access to
reporting, press . To turn (on/off) admin privileges, press . To
allow access to diagnostics, press .
Acquiring a Site
During learning (acquisition mode), the robot has the capability of capturing and recording physical floor dimensions
known as a “Site.” Routes define which areas are to be cleaned; areas can be grouped into zone(s). Each hallway or aisle
can be captured and recorded as an area.

User Manual - HydroBot Robotic Floor Scrubber
© 2012 Intellibot Robotics, LLC All Rights Reserved v2.5 Page 11
Acquiring Area(s)
Acquisition
1. Position the robot at starting location (home base).
2. Select the acquisition icon (shown by red arrow).
3. The robot will prompt ‘Do you want the machine to learn a new Zone
of Areas to clean?’ Select the green check mark (shown by red
arrow).
4. The robot will prompt ‘Is the machine at the correct staring position of
the Area to learn?’ If yes, select the green arrow (shown by red
arrow); if no, select the red X.
5. Enter the name of the Zone (e.g. West Wing, etc.) using the keyboard.
Press the green check mark to complete the zone naming. Use the
red backspace to correct any errors in the zone name. Note: Do not
duplicate zone names.
6. The next screen will prompt you to enter the name of the area (e.g.
Hallway1, etc.) to be acquired. Enter the area name, then press the
green check mark to complete the area naming. Use the red back-
space to correct any errors in the area name. Note: Do not duplicate
area names.
7. The robot will prompt ‘Please step aside so that the machine can
detect the wall behind it. It will beep when finished’. Step aside and
press the green check mark so that the robot can detect the near wall,
then wait for the beep.

User Manual - HydroBot Robotic Floor Scrubber
© 2012 Intellibot Robotics, LLC All Rights Reserved v2.5 Page 12
8. Choose or Ignore left and/or right walls. It is best practice to use
parallel walls and ignore walls that aren’t parallel to the cleaning area.
To ignore the wall, press the associated . Press to start
acquiring the area.
9. Step aside from the rear of the robot to allow it to learn the near wall
distance. The robot will then drive itself down the center of the area
until it encounters an end wall. To pause acquisition, press ; to
stop acquisition of the area, press .
10. When the robot has detected an end wall it will stop and display
“Learning Done.” To complete the area acquisition, press .
11. At the end of each area acquisition there will be an opportunity to edit
the area wall hugs. To edit the left wall hug position, press left wall
(see red arrow).
12. Use the large up and down arrows to change the wall hug position.
Note: To increase in larger increments, press the small yellow up
arrow; to return to smaller increments, press the up arrow again.

User Manual - HydroBot Robotic Floor Scrubber
© 2012 Intellibot Robotics, LLC All Rights Reserved v2.5 Page 13
13. Next screen presents the near wall position and near offset edit(s) (the
wall directly behind the robot). Note: It is recommended to edit both
parameters simultaneously, then edit the near offset. Note: The near
offset cannot be larger than the near wall position. Edit values as
appropriate; when finished, press the right arrow.
14. Next screen presents the far wall position and far offset edit(s) (the
wall at the far end of the area). Note: It is recommended to edit both
parameters simultaneously, and then edit the far offset. Note: The far
offset cannot be larger than the far wall position. Edit values as
appropriate; when finished, press the right arrow.
15. Next Summary Edit screen displays the old and new values. Review
the values for accuracy. If changes are required, press the left arrow
key and return to a previous screen to make changes. To finish
editing, press the green check mark.
16. The robot will prompt ‘Is there another Area to learn in this zone?’ If
yes, press the green check mark; if no, press the red X (proceed to
step 22 of this procedure).
17. The robot will prompt ‘Is the machine at the correct starting position
of the Area to learn?’ If yes, press the green check mark (repeat steps
5 thru 18 of this procedure); if no, press the red X (proceed to step 20
of this procedure).

User Manual - HydroBot Robotic Floor Scrubber
© 2012 Intellibot Robotics, LLC All Rights Reserved v2.5 Page 14
18. Maneuver the robot to the starting location of the next area, staying
within the boundary of any previous area. Note: It is important to stay
within the boundary of any previous area so that proper intersections
(junctures) are created. To perform a 90-degree right turn, press ,
a 90-degree left turn, press , or a 180-degree turn, press .
Note: To perform a turn other than 90 or 180 degrees, begin by
holding the handlebar and pressing either left or right turn icon. The
robot will rotate slowly; release the handlebar once the robot is
aligned.
19. Press and engage the handlebar to move the robot into position.
Note: Stay in the boundary of the previous area when positioning the
robot at the starting point of the next area. Press once the robot is
positioned at starting point of the next area. Repeat steps 5 thru 18
for the next area.
20. The final screen displays the Learned Zone Name, number for areas
created for the zone and the route created. To continue, press the
green check mark.
Creating a Route
A Route is a collection of one or more Areas in the order that they are to be cleaned. Once areas of a zone have been
acquired (learned), it is possible to create a route.
1. To create a route, begin by pressing the icon (shown by the red arrow).
2. To create the new route, press .
Table of contents
Other Intellibot Robotics Scrubber manuals
