2
Before you install the additional disk drives in one of the storage arrays:
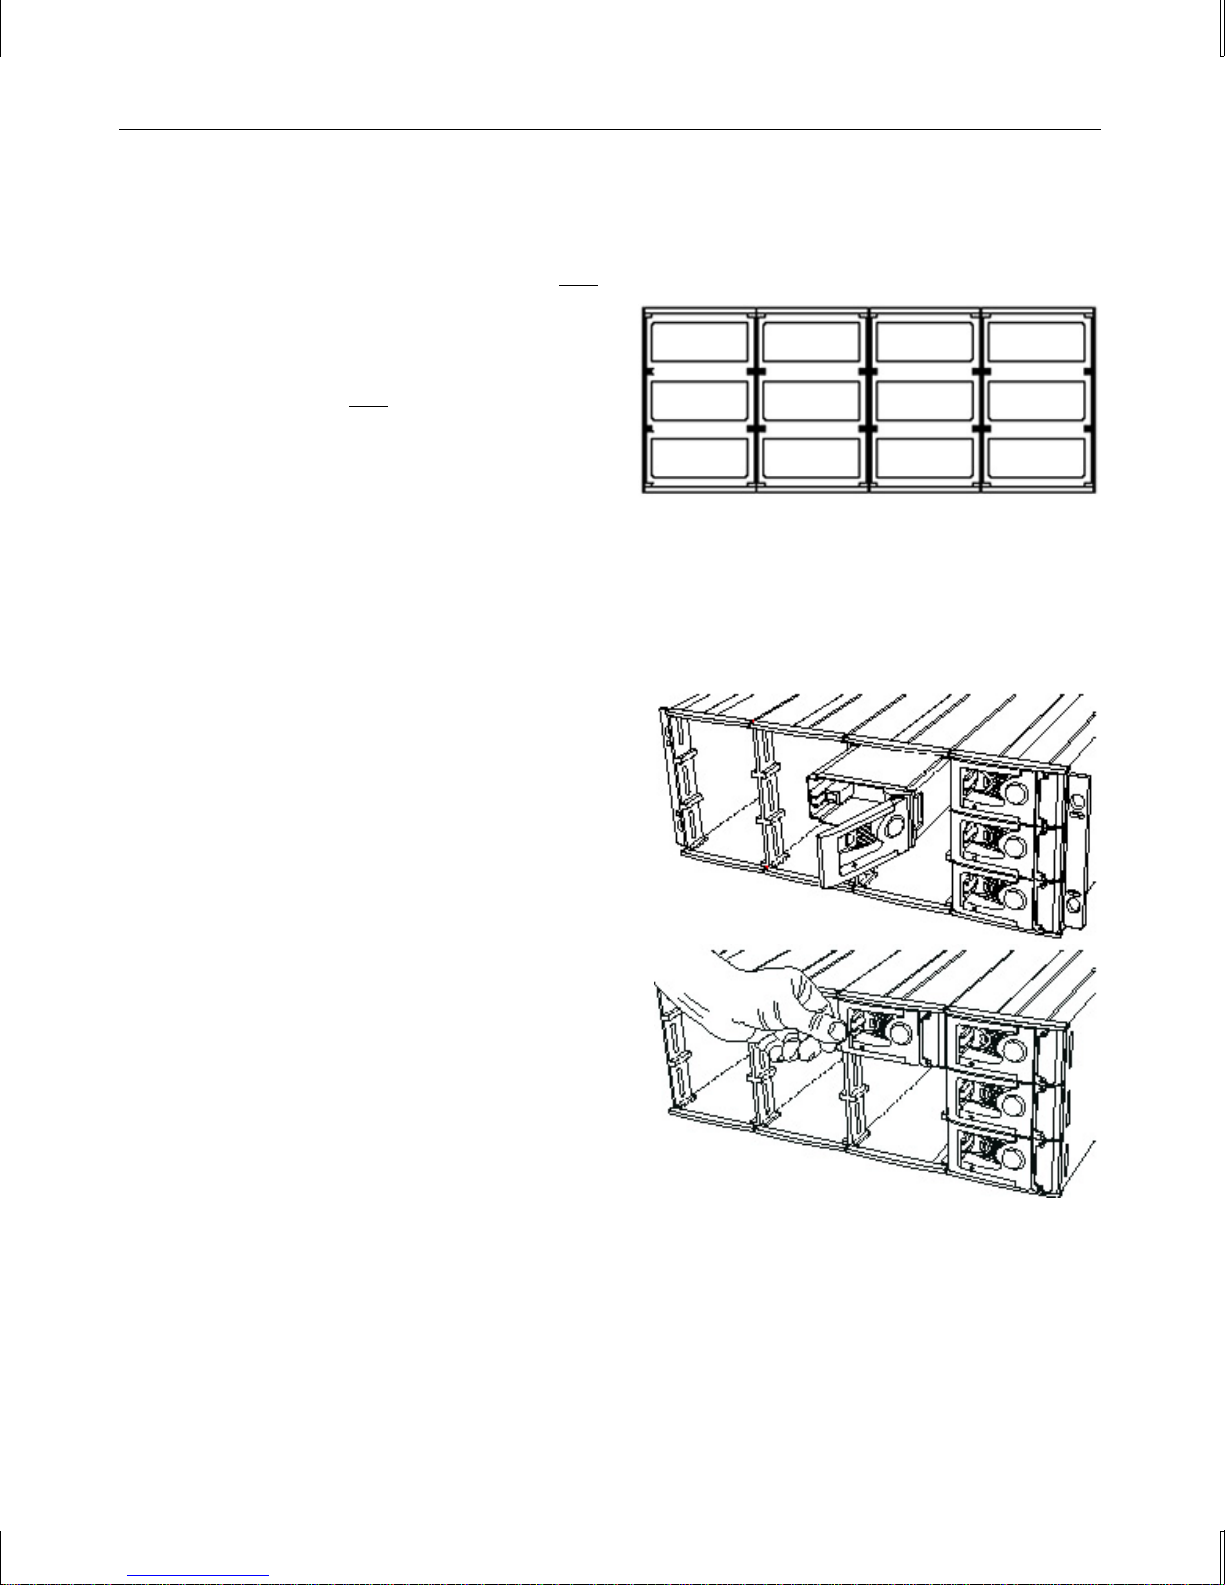
♦Match the letter on the disk drive label with the letter on the storage array label. For example,
install a disk drive with an A label only in the chassis with an A label.
♦Match the number on the disk drive label
with the bay in the storage array. For
example, install the disk drive with a 9
on its label only in bay 9.
♦The additional disk drives for a storage
array must be installed in bays 9 through
12 of that storage array.
WARNING If you do not install the disk drives as labeled, the RAID configuration and disk
striping will not work, and the storage arrays will not function correctly. You
must install each disk drive in the correct bay in the correct storage array, as
described in these instructions and on the installation labels.
To install a disk drive in a storage array:
1. Press the left side of the carrier faceplate to
release the carrier handle.
2. Insert the disk drive carrier into the chassis.
3. Push the carrier gently into the chassis until
it stops.
4. Press the left side of the carrier handle to
draw the carrier into the chassis until the
handle clicks closed.
5. For added security, use the supplied carrier
lock key to lock each carrier handle and
prevent removal of the disk drives. Insert
the key in the socket on the handle and turn
it counter-clockwise until the indicator in
the handle shows green. To unlock the
carrier handle, turn the key clockwise until
the indicator in the handle shows black.
2000 Intergraph Computer Systems. Intergraphand the Intergraph logo are registered trademarks of Intergraph Corporation.
9
5
1
12
8
4
10
6
2
11
7
3


