International MX Composites mxNext User manual
OWNERS MANUAL
MX
T
NE
mxNEXT - OWNERS MANUAL
2

MX
T
NE
1. Notice
2. Introduction
3. Safety First
4. Design Features
5. Rigging Your mxNext
6. Handling Your mxNext
7. Care and Maintenance
8. Warranty
CONTENTS
mxNEXT - OWNERS MANUAL 3

MX
T
NE
NOTICE
mxNEXT - OWNERS MANUAL
4
International MX Composites has developed this manual with the intent
to produce a useful guide to using your mxNext sailboat. All statements,
technical information and recommendations in this manual are believed
to be reliable, but the accuracy and completeness are not guaranteed
nor warranted.
The mxNext sailboat sold to you is subject to limited warranties set out
in the warranty section of this manual.
International MX Composites reserves the right to make changes to the
mxNext design and specications at any time without notice. Therefore
some features of your boat may differ slightly from the ones described
in this manual.
COPYRIGHT © 2014 International MX Composites
All rights reserved.
mxNext is a registered trademark of International MX Composites

MX
T
NE
INTRODUCTION
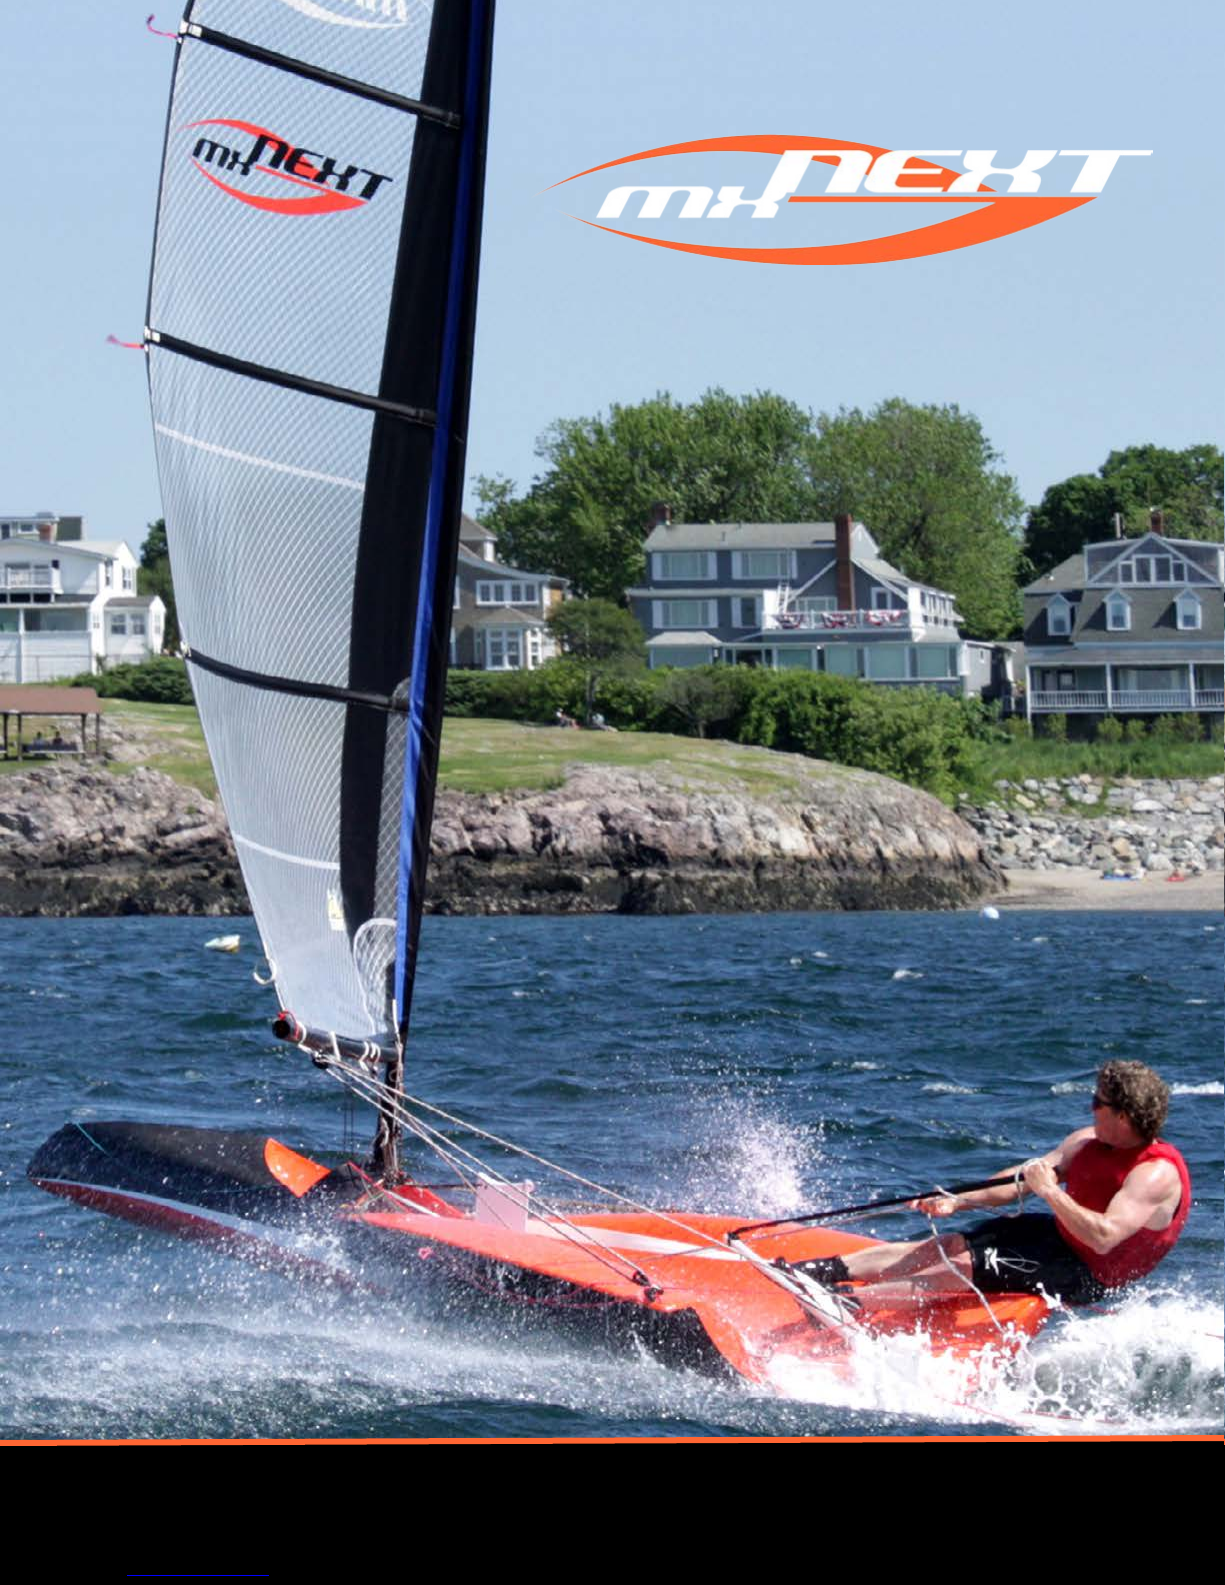
Congratulations on your purchase of the mxNext.
The mxNext is the latest generation of high-performance single-handed
skiffs aimed at those sailors who are seeking a fun, fast sailing experience
With the mxNext you have chosen to join a totally new concept that brings
high-speed “skiff” sailing to the individual sailor. The boats innovative
features make it possible for a single person to handle both the main and
asymmetrical spinnaker while sailing at speeds of up to 25 knots. The
mxNext was designed not just as a fast boat - she is also relatively simple
to sail and approachable for people of most levels of sailing ability.
This manual explains the mxNext’s design features and provides you with
the basic knowledge of how to rig, handle and care for your boat. If after
reading this manual you have further questions, please contact your local
dealer or International MX Composites directly. Dealers are listed on the
mxNext website where you will also nd the latest mxNext news. You can
contact us at:
MARK LE BLANC
International MX Composites
www.mx-Next.com
1 (978) 320 9435
Welcome and enjoy sailing your mxNext.
5
mxNEXT - OWNERS MANUAL

MX
T
NE
SAFETY FIRST
6
• Every time you sail, be alert to the power of nature and the elements.
Any body of water, even a small pond, may be dangerous if you do not
treat it with respect.
• Know your own limits. The mxNext is a high performance boat and
requires a certain level of knowledge and skill to handle. Carefully read
this manual and get acquainted with all of the boat’s systems on shore
before taking her out on the water.
• Plan for emergency conditions. The weather can change very rapidly
and even if it’s a nice sunny day when you start out, take appropriate
precautions. Carefully read the section “Emergency Procedures” of this
manual and nd time to practice these procedures so you’ll know what
to do and stay cool in case of a real emergency.
• Always wear your life jacket while sailing.
• Always carry a small paddle on the boat.
• The safest way to learn how to sail the mxNext is by going out on
the water with sailors from your local Yacht Club who can provide
assistance if necessary. If you go sailing alone, always inform someone
else where you will be sailing and what time you plan to come back to
shore.
• Get familiar with your mxNext gradually. Start in a light wind in a well-
protected area and go through all the routine maneuvers: tacking,
jibing, spinnaker hoisting and dousing, etc. Try to capsize the boat few
times to develop the skill of righting her.
• Secure yourself properly to the boat. During hiking or rapid acceleration
keep your feet under the hiking strap. Wear non-slip dinghy boots. It
is also a good idea to wear kneepads.
mxNEXT - OWNERS MANUAL
SAFETY TIPS

MX
T
NE
• If you fall overboard, hold on to the mainsheet or other lines. Try to
avoid holding on to the tiller, especially if the boat is moving at a high
speed, as this may break the tiller or rudder or both.
• Make sure that the boat and all the systems are in working order and
do not show signs of excessive wear and tear. Periodically check all
hardware and running rigging and replace parts if necessary.
• Periodically open the inspection port and check for large amounts of
water that might indicate a leak. It is normal for a small amount of
water to accumulate inside the hull - just be sure you drain the boat
completely through the transom drain plug every time you go sailing.
If a serious hull leak develops, immediately stop using the boat and
contact your local dealer or International MX Composites.
• Check that the inspection port and drain plug are always closed tight
before leaving the shore.
• The hull is constructed with closed cell foam that provides 1,000lbs
(453kg) of buoyancy so there is no danger of your boat sinking.
• The mxNext hull, mast and boom are made of carbon ber, which is
an excellent conductor of electricity. Rigging or sailing your boat near
electrical lines or during a storm with lightening could be extremely
dangerous.
• Contact your local dealer or mxNext representative if you have any
questions about safe mxNext sailing. By putting safety rst, and always
knowing your limits, you will ensure that you have a great and trouble-
free time sailing your mxNext
7
SAFETY FIRST
mxNEXT - OWNERS MANUAL
SAFETY TIPS
MX
T
NE
8mxNEXT - OWNERS MANUAL

mxNEXT - OWNERS MANUAL
MX
T
NE
DESIGN FEATURES
9
mxNEXT - OWNERS MANUAL
4

MX
T
NE
DESIGN FEATURES
CONCEPT
The mxNext was developed as the latest generation of high-performance
single-handed skiffs sailed with a combination of mainsail and spinnaker,
an idea that was started two decades ago with the highly successful
mxRay. Both the mxRay and the mxNext were designed and developed by
Vlad Murnikov whose innovative approach to sailboat design continues to
change the way we view fast sailboats.
The design goal was to create a boat that would be challenging and
exhilarating for the most experienced sailors, yet relatively simple and safe
enough for less experienced sailors. The result is a boat that is approachable
for most levels of experience. As long as you know the basics of sailing and
never overestimate your abilities, the mxNext can provide you with one of
the most invigorating sailing experiences you will nd anywhere.
mxNEXT - OWNERS MANUAL
SAIL PLAN
While sailing upwind, the mxNext uses an efcient square-top mainsail
with full length that can be adjusted to a wide range of shapes by using
the vang, cunningham/downhaul and outhaul. The primary mainsail bers
are Technora and the sail is made of a clear membrane which you can see
through to see other boats and obstacles that might be in your way.
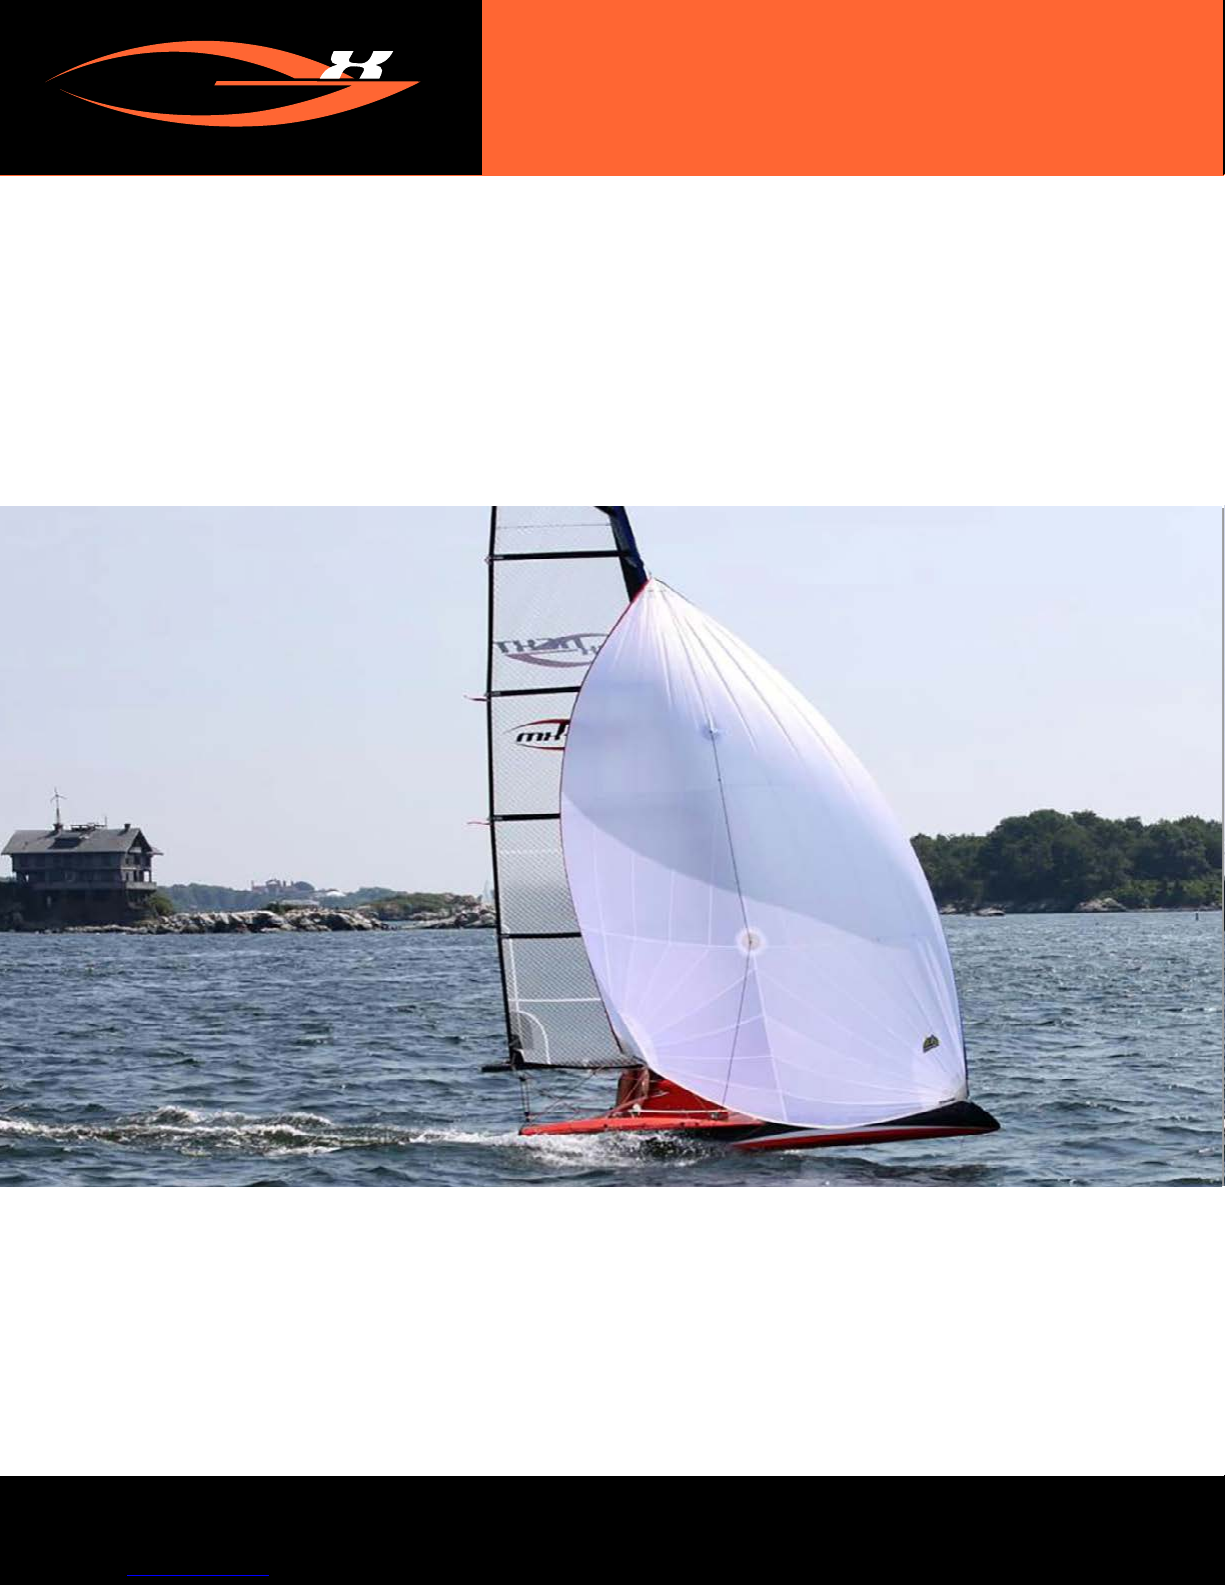
The asymmetrical spinnaker has a long luff for more power and a large
10
TECHNICAL CHARACTERISTICS
LOA - 4.35 meters
BMAX - 2.0 meters
Hull Weight - 41kg
Sail Area
Mainsail - 10.2 sq meters
Gennaker - 10.2 sq meters
Suggested Crew Weight 70 - 85kg.

MX
T
NE
DESIGN FEATURES
11
mxNEXT - OWNERS MANUAL
head area that keeps it stable even in a light breeze. It’s easily deployed using
a reverse 3:1 purchase which requires only a 5-foot pull to set the spinnaker.
The tack line is connected to the halyard so the same pull that raises the
spinnaker also pulls the tack out to the bow of the boat.
To lower the spinnaker you simply uncleat the halyard, pull the retrieval line
and the sail folds up for easy storage in the spinnaker sock. The retrieval line
is led through a lower patch on the sail and attached to the upper patch. When
the retrieval line is pulled the spinnaker folds up in three portions and stows
neatly inside the spinnaker sock. Only the three corners are left outside the
sock, ready for the next hoist.
SAIL PLAN (CONTD.)
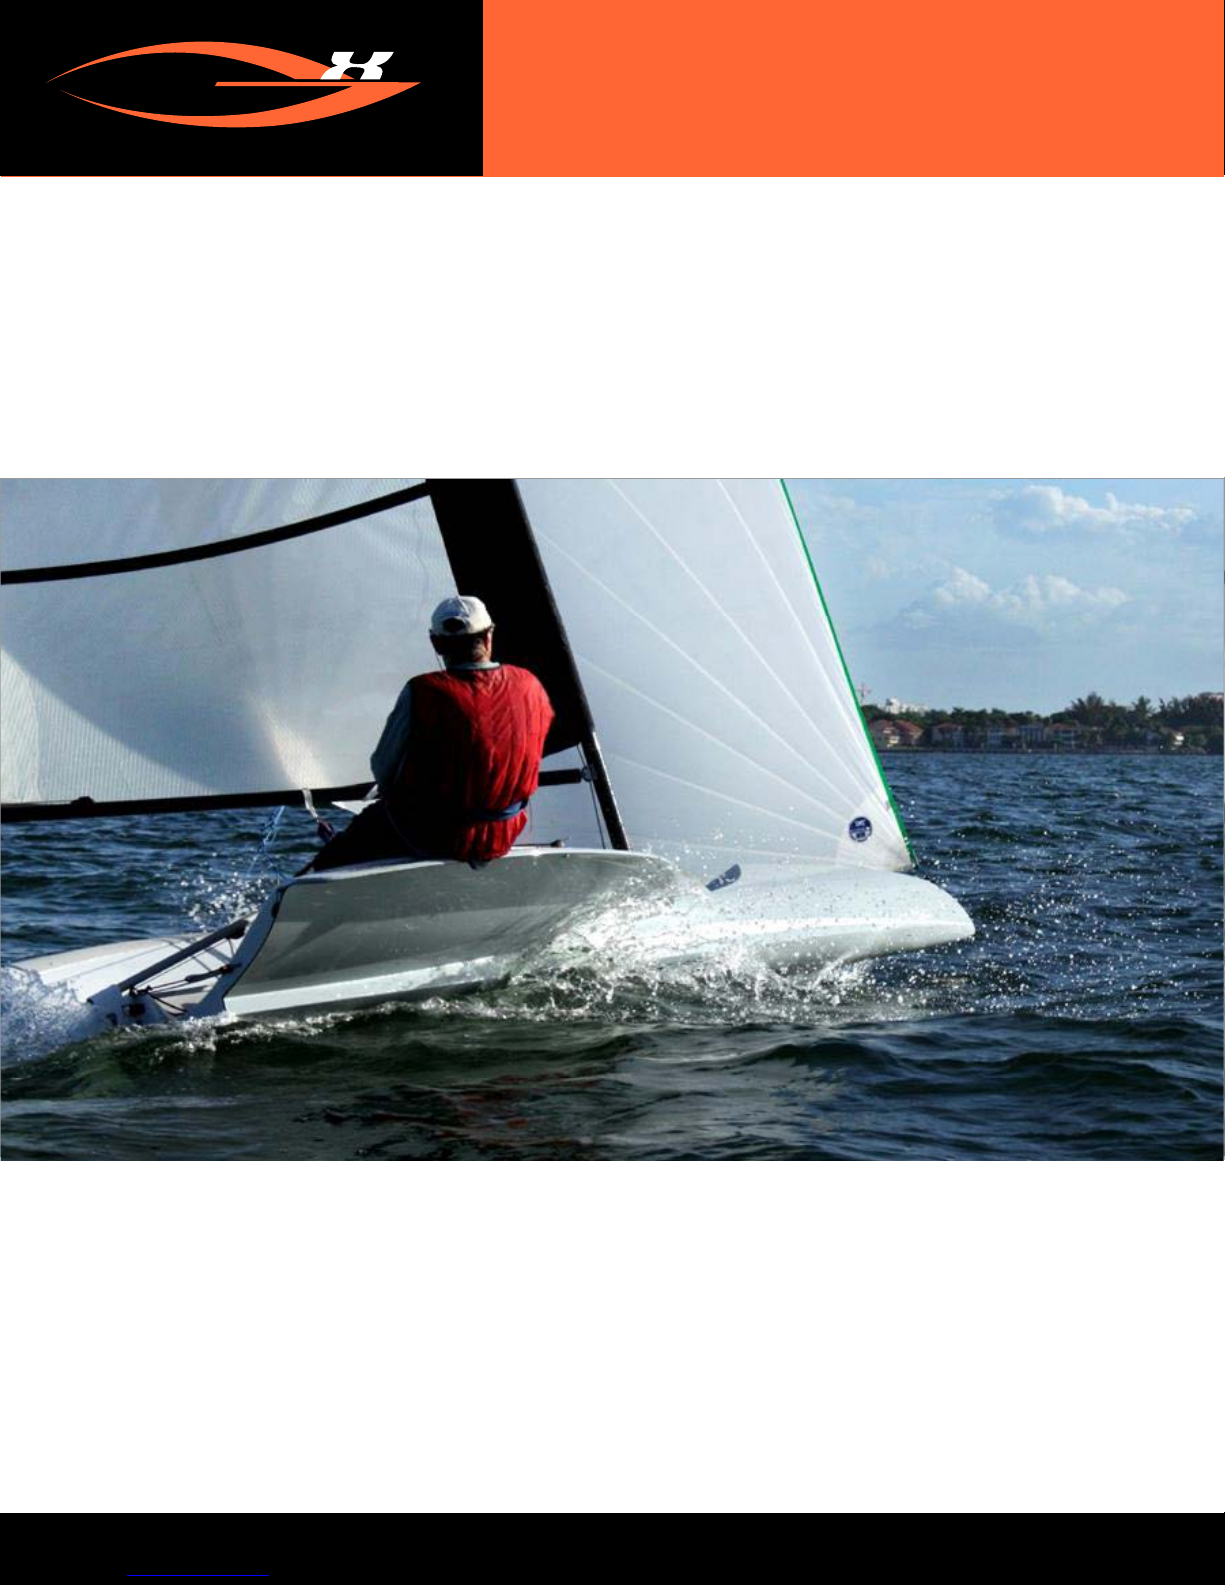
The hull shape is a development of the mxRay as well as SpeedDream,
a new innovative design concept that relies on efciency over power
for high performance. The mxNext hull is very sleek and narrow on
the waterline. This is part of the secret of the boat’s speed. A narrow
waterline reduces wetted surface which in turn reduces drag translating
into speed. The cross sections of the hull are fairly deep and rounded
forward, gradually shifting to an elliptical shape that gets flatter as you
move aft. This is a perfect planing hull.
The aft-swept wave piercing bow slices effortlessly through waves at
any point of sail. There is plenty of reserve buoyancy in the forward hull
sections so that if you surf down a wave and the bow starts to become
submerged, the buoyancy immediately kicks in and lifts the bow right
out of the water. There is almost zero chance of pitchpoling.
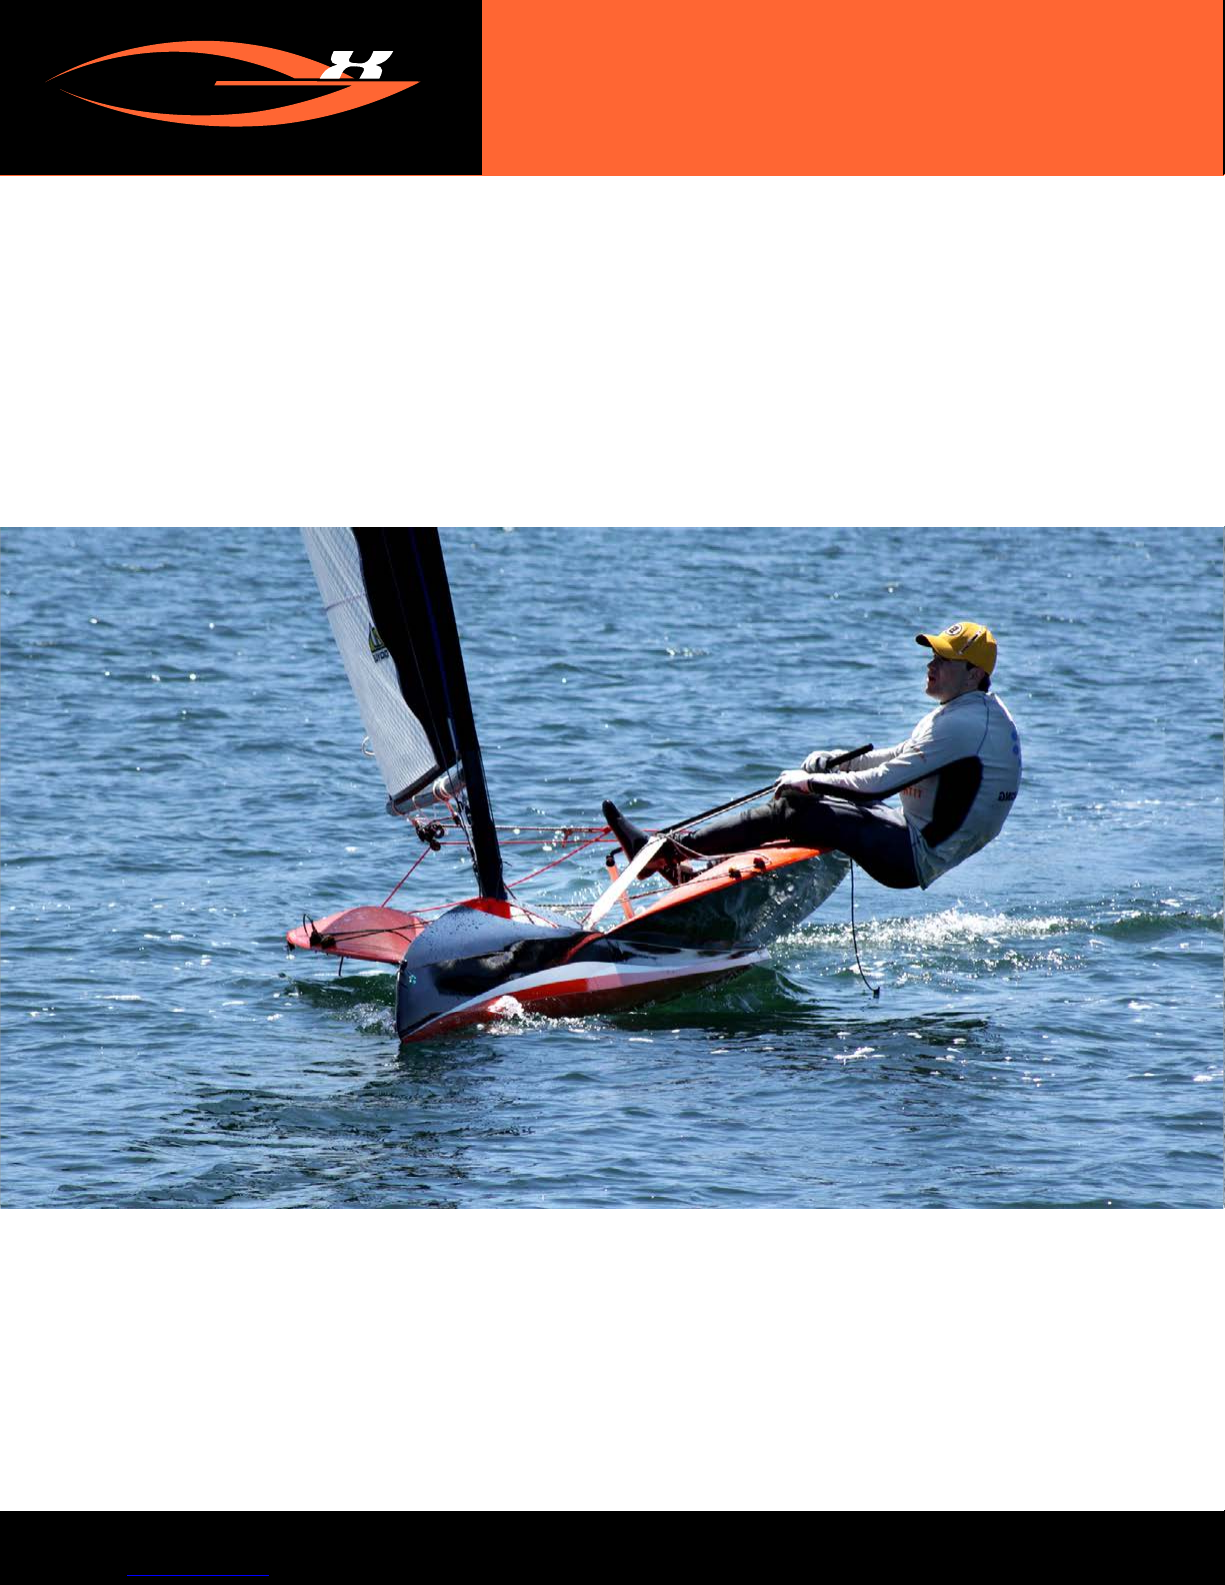
The elegant hiking wings are there to allow you to get your weight as
far outboard as possible. They are also ergonomically designed so that
you can hike comfortably for long periods of time. The principal control
lines; the mainsheet, vang and cunningham are all within easy reach of
a full-hiking position.
HULL SHAPE
MX
T
NE
mxNEXT - OWNERS MANUAL
12 mxNEXT - OWNERS MANUAL

MX
T
NE
13
mxNEXT - OWNERS MANUAL
RIGGING YOUR mxNEXT
5
5
16
MX
T
NE
RIGGING YOUR mxNEXT
The mxNext comes with most of the hardware and equipment already
installed. You just need to go through a few easy steps to get your boat
ready for sailing. Put your mxNext in a place that is exposed to minimal
wind and point the bow into the wind. Later on you will be able to easily
rig the boat in any condition, but it is important to start out slow and in
good weather conditions.
RIGGING YOUR mxNEXT
mxNEXT - OWNERS MANUAL
mxNEXT - OWNERS MANUAL mxNEXT - OWNERS MANUAL
14
HIKING STRAP
FORWARD ATTACHMENT
HIKING STRAP
AFT ATTACHMENT
HIKING STRAPS
MX
T
NE
mxNEXT - OWNERS MANUAL
Assemble the two-piece carbon mast making sure that the joint is completely
together.
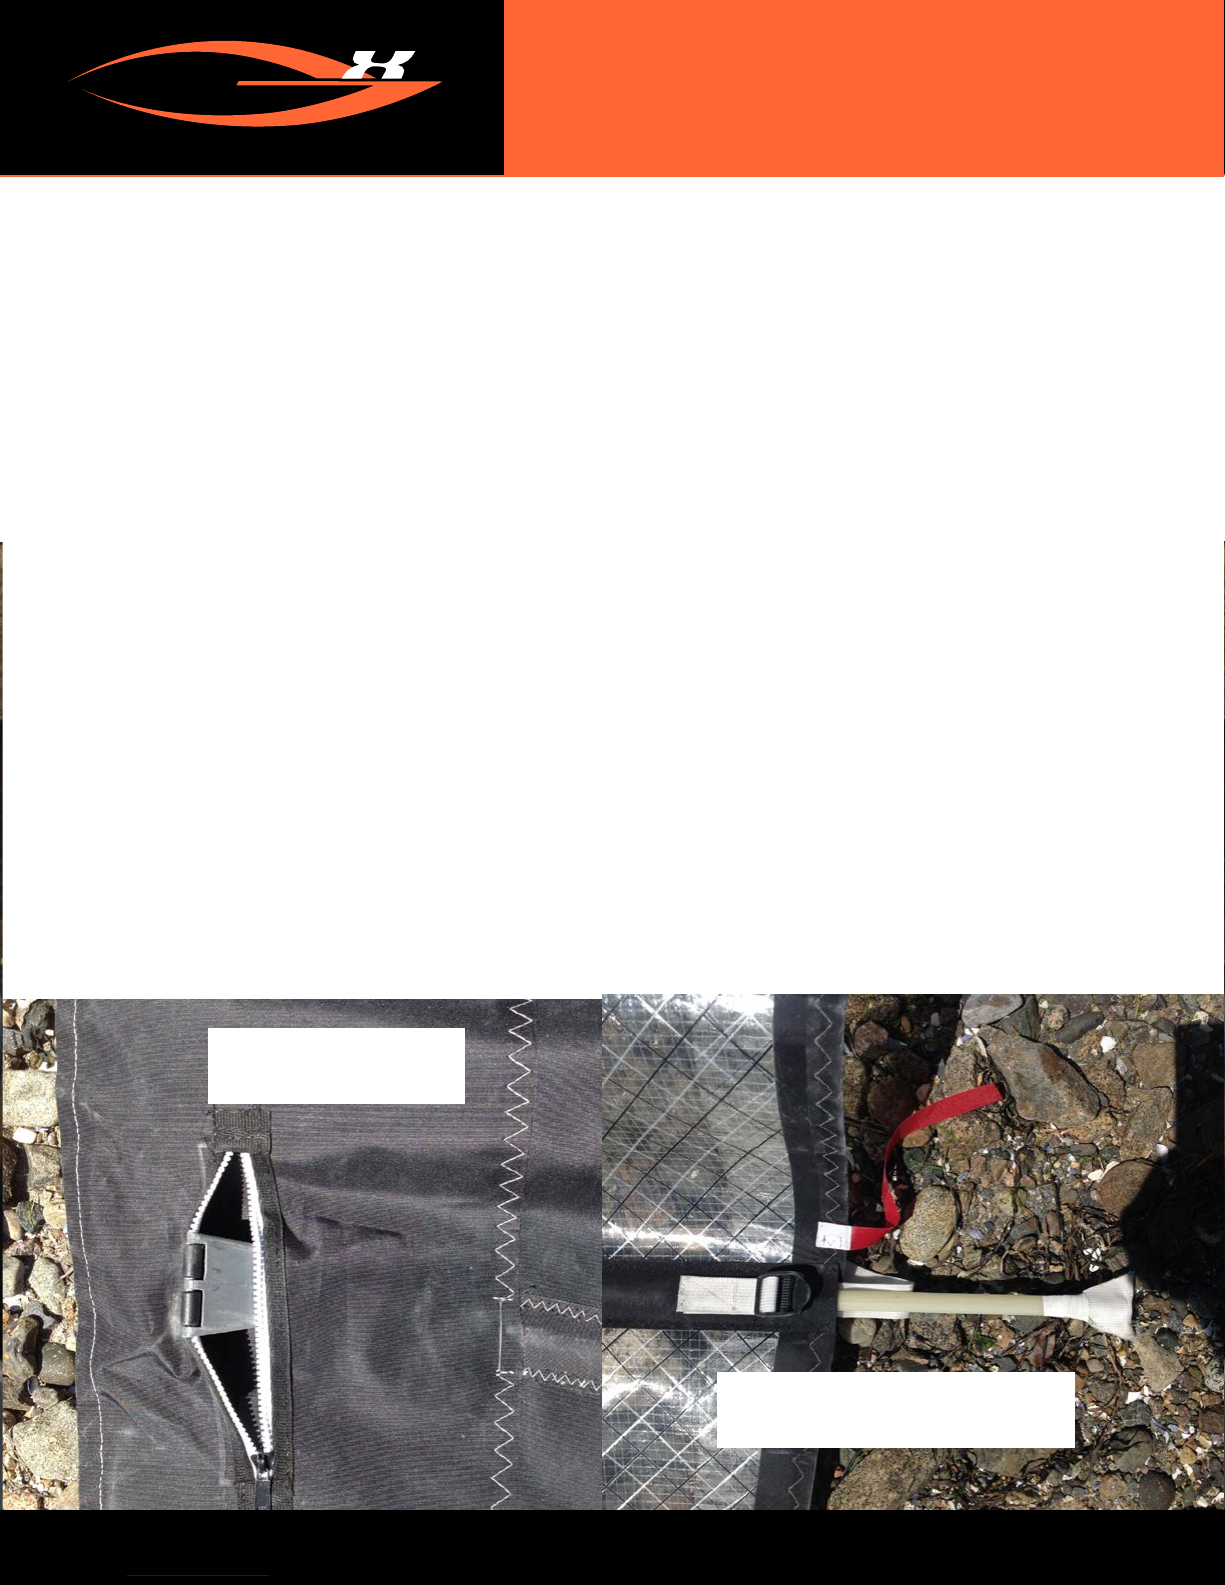
Lay out the mainsail and insert the battens into the batten pockets starting
from the leech, tapered end rst. Each batten is numbered with the number
one batten inserted in the top pocket. The sail comes with cambers for each
batten. You will notice on the luff of the sail that there are short zippers
adjacent to each batten pocket. Insert the camber into the luff pocket and
then install the batten making sure that the tapered batten tip slides all the
way into the camber. Failure to do so will lead to improper sail rotation and
MAST AND MAINSAIL
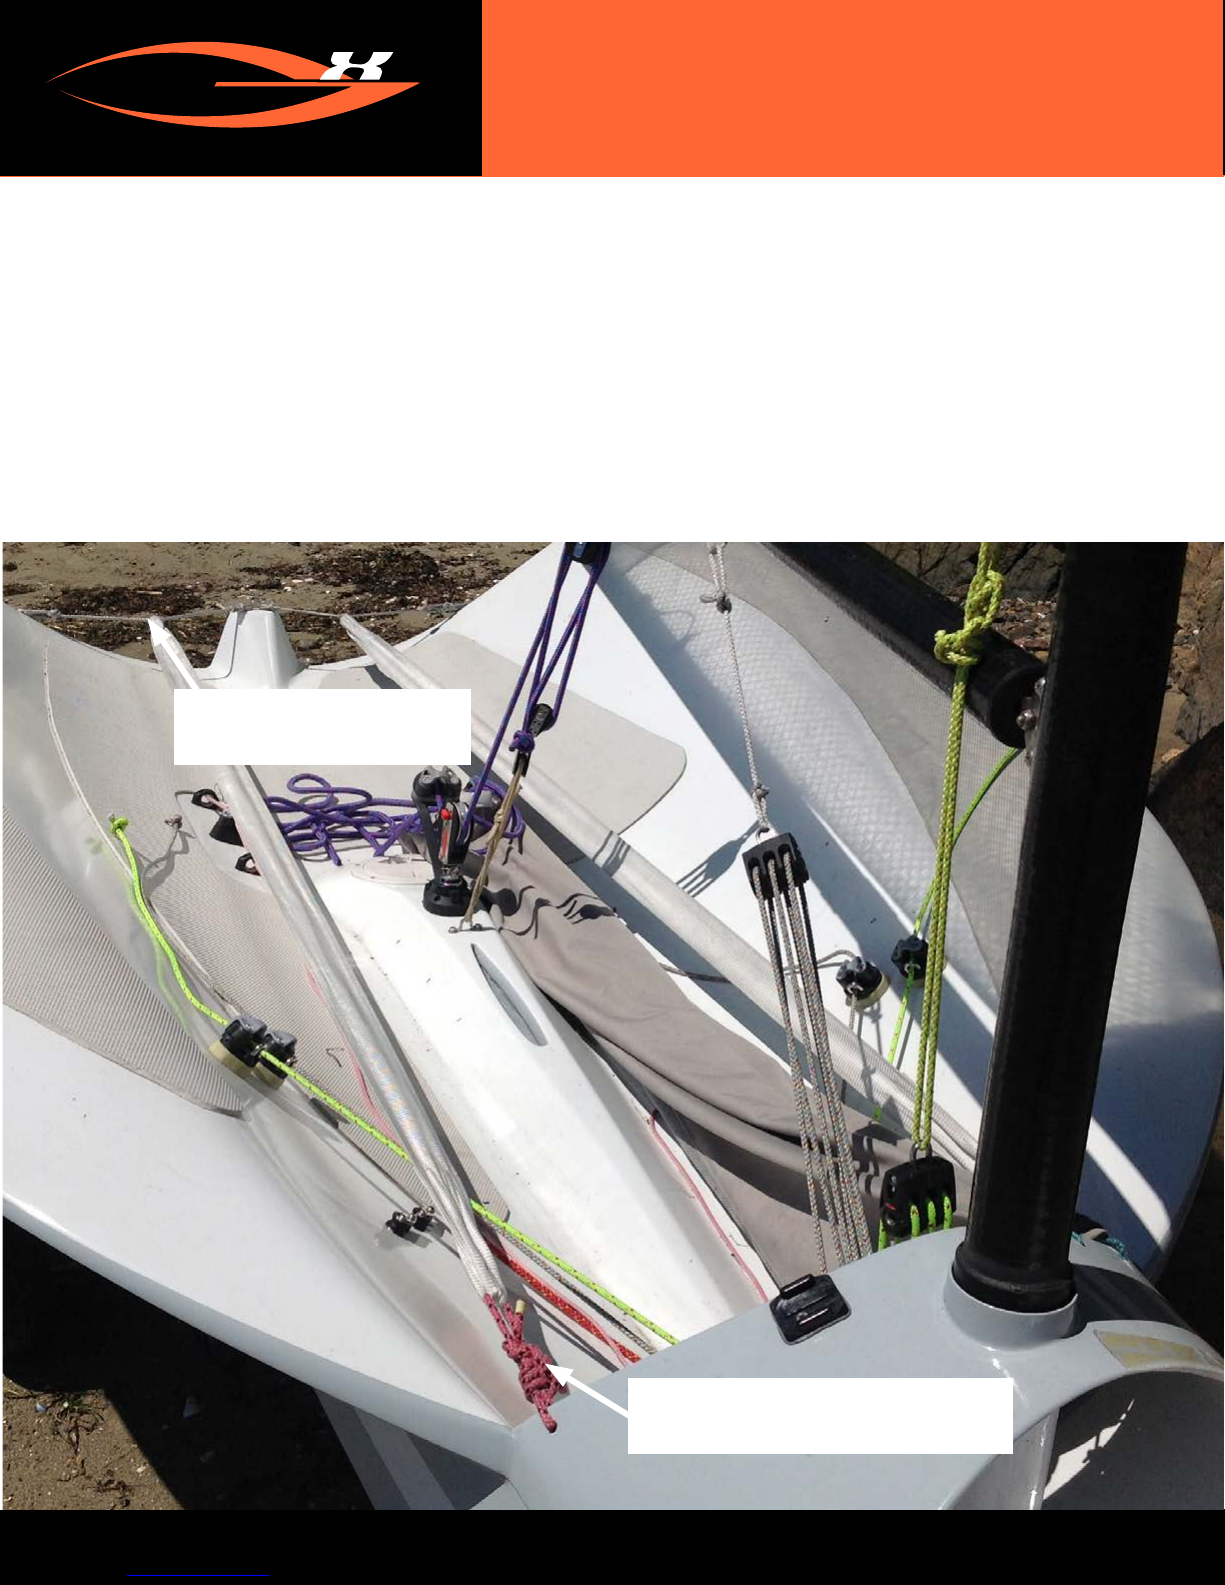
Start by installing the hiking straps. At the forward end the hiking straps are
lashed to mast bridge. At the aft end they are attached to athwartship lines
mounted on the transom. This keeps the hiking straps raised off the deck so
that you can easily get your feet under them. The exact placement where you
attach the strap at the aft end will depend on your size and sailing style. Play
around with different locations until you nd the most comfortable place.
MAST CAMBER
INSIDE ZIPPER
BATTEN TENSIONING
SYSTEM
15

RIGGING YOUR mxNEXT
MAST AND MAINSAIL (CONTD.)
battens breaking. Tension battens snugly until all wrinkles along the pocket
disappear. It is not necessary to adjust the batten tension after the initial
rigging unless additional wrinkles appear.
Slide the mast into the luff sock on the mainsail. After the mast is halfway
inserted, it helps to move up the luff and bunch the sail onto the mast by
pulling from the top down. Then move to the base of the mast and pull the
bunched portion down. The cambers do not require special rigging. The
mast slides by them as you are installing the sail. The cambers automatically
cradle the mast once it’s rigged.
Once the sail is on the mast you will need to add the spinnaker halyard
block. roughly 30 inches down from the top you will see a small opening in
the luff sock. You need to use the small bullet block that is supplied. Using
the line that is attached to the block tie a clove hitch around the mast.
Tighten the hitch and then add a second clove hitch. Tighten and nish
with an overhand knot snug up against the last hitch. Because the mast is
tapered the clove hitches and halyard block will not slide down once you
hoist the spinnaker.
At this point with the mast laying alongside the boat you can install the
spinnaker halyard or if you prefer you can heel the boat on it’s side later
and install it at that point.
With the boat pointing into the wind step your mast. Make sure that there
is not any sand or other material in the mast socket as it will hinder the
rotation of your mast when you are tacking or gybing. As you raise the
mast you can use the mast bridge to steady the base of the mast. Once the
mast is inserted and without a boom attached, your boat is quite safe if the
wind picks up.
MX
T
NE
mxNEXT - OWNERS MANUAL
mxNEXT - OWNERS MANUAL mxNEXT - OWNERS MANUAL
RIGGING YOUR mxNEXT
16

RIGGING YOUR mxNEXT
MX
T
NE
RIGGING YOUR mxNEXT
mxNEXT - OWNERS MANUAL
CUNNINGHAM/DOWNHAUL
The Cunningham or downhaul consists of two (2) components: a line that is
attached to a grommet that is located inside the mainsail sleeve, and a block
and tackle system that is led to cleats on either side of the boat.
First attach the lower end of the block and tackle to a metal bracket located
at the base of the mast. The lower end consists of a double cheek block and
two single blocks. Attach all three with the double in the middle. The lines
that exit through the single blocks are led directly to the upper cleat located
on the wings. The line through the port sheeve goes to the port cleat and
the other goes to the starboard cleat. This allows you make adjustments to
cunningham tension while hiking out. It’s a good idea to tie “gure-8” knots
in each end of the cunningham line so that it can’t come undone.
Tie the single piece of line to the grommet on the sail and then attach it to
the becket on the top of the three blocks that forms the upper part of the
block and tackle system. You can add some tension to the sail to take the
wrinkles out of the luff. This is a good time to make sure that all the battens
are neatly in their cambers and have sufcient tension.
BOOM
The inboard end of the boom has a shaft into which you slide the gooseneck.
Before you attach the boom to the mast you need to pass the outboard end
through a loop that is attached to the clew of the mainsail. Slide the boom
through the loop and then attach the forward end to the gooseneck. You will
see a line on the outboard end of the boom going through a cleat located
on the top of the boom. This is your outhaul. Pass it through the small block
attached to the top of the boom and tie to the clew of the sail. Tension the
outhaul and cleat it off.
Note: At this point you are more vulnerable if the wind comes up, but
it’s only when you have attached the mainsheet that you may have a
problem.
RIGGING YOUR mxNEXT
17

RIGGING YOUR mxNEXT
MX
T
NE
mxNEXT - OWNERS MANUAL
5mxNEXT - OWNERS MANUAL mxNEXT - OWNERS MANUAL
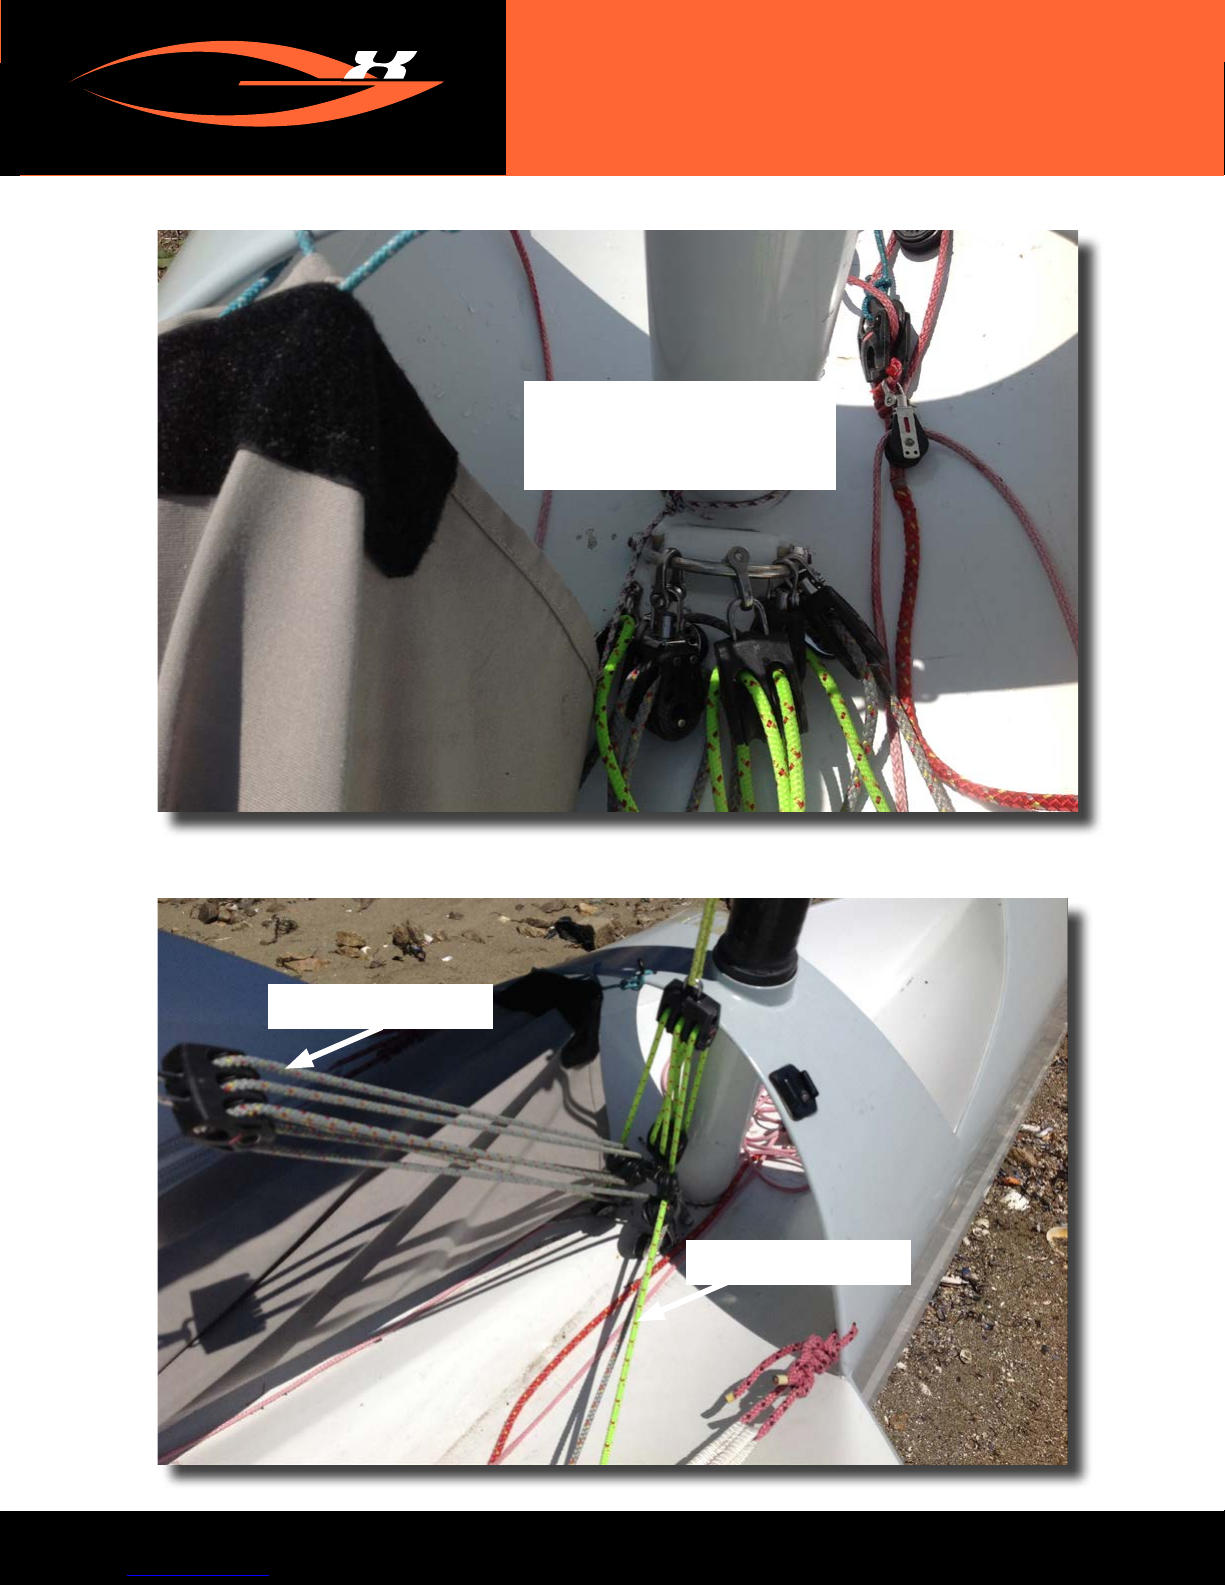
VANG
The Vang also consists of two (2) components and is rigged similarly to
the cunningham. There is a short length of line that attaches to a piece of
webbing that is fastened to the boom. As with the cunningham it’s then
attached to the becket on the top of the the three cheek blocks that form
part of the vang block and tackle system.
The lower end is rigged aft of the cunningham system in a similar fashion
with each line led to the lower cleat on the wings.
Remember to tie “gure-8” knots in each end.
MAINSHEET
CUNNINGHAM
BOOM VANG
RIGGING YOUR mxNEXT
18
RIGGING YOUR mxNEXT
MX
T
NE
RIGGING YOUR mxNEXT
mxNEXT - OWNERS MANUAL
CUNNINGHAM
BOOM VANG
RIGGING YOUR mxNEXT
19
VANG/CUNNINGHAM
BRACKET AT THE
BASE OF MAST

RIGGING YOUR mxNEXT
MAINSHEET
Attach the two upper blocks to the webbing on the boom using the shackle
that comes with the system. Then attach the lower end to a bracket that
is located just in front of the ratchet block and cleat. Finally lead the tail
through the ratchet block and cleat and tie a gure-8 knot in the end.
SPINNAKER
The spinnaker retrieval sock will come installed on the boat when you receive
it. You will need to install the spinnaker and attach the lines. There are three
lines; the tack line, the halyard and the retrieval line.
Attach the tack - The tack line is led forward and comes out of a small hole
on the bow of the boat. Attach it to the tack of the spinnaker.
Attach the sheet - Tie the single continuous spinnaker sheet to the clew of
the sail and then run it aft through the small block located on the side of the
boat amidships. The sheet then is led across the boat to the small block on
the opposite side and then around the front of the mast to the clew.
MX
T
NE
mxNEXT - OWNERS MANUAL
mxNEXT - OWNERS MANUAL mxNEXT - OWNERS MANUAL
RIGGING YOUR mxNEXT
20
MAINSHEET RATCHET BLOCK
Table of contents
Popular Boat manuals by other brands


PURSUIT
PURSUIT 2600 Center Console owner's manual

Walker Bay
Walker Bay Airis Sport Owners & safety manual

Crivit
Crivit Rubber Dinghy Instructions for use

Linder
Linder SPORTSMAN 355 owner's manual

Fountaine Pajot
Fountaine Pajot SUMMERLAND 40 LC user guide

Access Dinghy Sailing
Access Dinghy Sailing 303 Single Seater owner's manual


