Interpage Z-500 Series User manual

“The On-Site Wireless Paging Systems for On Premise Paging”
Z-500 Series Paging System Manual
Version 9.XX and 9.XXSFirmware
InterPage
Z-500 SP
Single Com Port Paging System
Z-500 Pro
Dual Com Port Paging System
InterPage Z-500 Series Alphanumeric Paging Systems
“The On-Site Wireless Paging Systems for On- Premise Paging”
InterPage Sales: 1.800.992.1000 x1 - InterPage Fax: 561.844.5844
InterPage Return Authorizations: 1.800.992.1000 x2
InterPage Technical Support: 1.800.992.1000 x4 – InterPage Website: www.iplp.com

Table of Contents
Introduction Page 3
Warranty and other Misc Information Page 7
Obtaining Pagers for your Paging System Page 8
Paging System Operation Page 9
Paging System Installation Page 10
Quick Start Guide Page 11
Programming Guide Page 12
Appendix “A” – TAP Interface Specifications Page 26
oSystem ID Command Page 27
oPaging Session “Log-In” Page 27
oPaging Operation Page 28
oPaging Session “Log-Out” Page 29
Appendix “B” – Com Port Settings Page 30
Appendix “C” – TAP Checksum Calculations Page 32
Appendix “D” – TAP Response Codes Page 33
Appendix “E” – Extended ID Processing Page 34
Appendix “F” – Embedded Control Characters Page 36
Appendix “G” – WaveWare Interface Specifications Page 37
oPaging Message Command Page 38
oResponse to all Commands Page 40
oSetup Command Page 42
oStatus Command Page 43
Appendix “H” – COMP1 Interface Specifications Page 44
Appendix “I” – COMP2 Interface Specifications Page 45
Appendix “J” – Scope Interface Specifications Page 47
oPaging Message Command Page 48
oResponse to all Commands Page 49
Appendix “K” – Timed Message Function Page 50
Appendix “L” – Connectors and Indicators Page 51
Appendix “M” – Site Survey Page 52
Trouble Shooting Page 53

Introduction – Z-500 Series Paging Systems
Your InterPage Z-500 Series Paging Systems allow you to send paging messages to one or more persons via
pagers, and devices that incorporate POCSAG paging data receivers. You can setup automatic transmission of
messages or you can compose messages on the fly and transmit them immediately.
The InterPage Z-500 Series Paging Encoders can be provided in either standalone form or bundled with a radio
transceiver to become a paging system.
When you attach your paging system to a PC or other Host Device, plug in the provided power adapter, and install
and activate your paging software, you will be ready to make full use of the paging system.
The InterPage Z-500 Series Paging Systems can have a pager database programmed using the InterPage
Z-500 Paging Encoder Setup Software, or you can immediately use the InterPage Z-500 Series Paging Systems
without programming.
Your InterPage Z-500 Series Paging Encoders, using v9.XX firmware, have the following capabilities:
Serial Port Controlled Operation via RS-232 Serial Port with “Programmable” Communication
Parameters. Baud rates of 300, 1200, 2400, and 9600, with None, Even, and Odd parities. Default setting is
9600 N81, unless specified differently by Customer Requirements.
Z-500 SP Single or Pro Dual - RS-232 Serial Com Port(s)
2 or 5 watts, 5 watts UHF effective radiated power with approximately 3 mile range, depending upon local
terrain and obstructions. (Optional 2 watt model also available)
UHF Band (450-470MHz) Synthesized Transceiver. See the Label on the back of the Z-500 Series Paging
Systems to Identify the Operating Frequency of the Paging System. (Optional VHF Band Available)
Industry Standard POCSAG Paging Protocol Covering the Full Range of Paging Functions, Including:
512, 1200 and 2400 bps RF data rates, auto-switching
Alphanumeric (Text), Numeric and Tone/Vibe Only Paging Message Formats
Multiple Tone and Vibration Patterns
Batch Message Delivery, with up to 240 Characters per Message (500 Characters in WaveWare
Mode)
Support for Multiple Paging Control Protocols, Including:
TAP v1.8 (Variations also known as IXO and PET)
Extended TAP (TAP Compatible Extended Interface Supporting Embedded Control Characters and
Paging Message Encoding Parameters Appended to the Pager ID)
PET (Page Entry Terminal), which provides human readable messaging prompts and also supports
TAP protocol message formats
Simplex TAP, a Single Serial Command String Composed of a Standard TAP Message Block.
NOTE: Simplex TAP is the Recommended Interface Protocol for System Developers.
COMP1, Delivery of <CR> or <CR><LF> Delimited Data to One or More Pagers
COMP2, a Command String Composed of PagerID<CR>Message<CR>
SCOPE,a Proprietary Single Serial Command String that Includes Cap Code, Function Code, RF Data
Rate, and Message Values. Scope Protocol can be used as Either Simplex or Duplex Operation.
WaveWare, a Proprietary Single Serial Command String that Includes Cap Code, Function Code, RF
Data Rate, and Message Values. WaveWare Protocol can be used as Either Simplex or Duplex
Operation.
Programmable Carrier Signal Detection, Which allows the Automatic Delay of Transmission while a nearby
Transmitter of the same Frequency is Operating.
“Introduction” Continued on next page…

Programmable Pager Database, Supporting 5,000+ pagers, and up to 10 Groups of 20 Pager IDs each,
Stored in Non-Volatile EEPROM Memory. The Pager Database is “Not Required” for WaveWare Protocol,
Scope Protocol, Extended TAP Protocol, or Pager ID as Cap Code Mode.
Windows Software, called InterPage Z-500 Pro ”Paging Encoder Setup” is provided for Pager Database
Programming, Com Port Settings, Range Testing, and General Messaging.
Programmable Verbose or Non-Verbose Modes, Verbose Output Means the Paging System Responses
Include more Information than Non-Verbose Responses.
Programmable Transmitter Duty Cycle Management, In Percentage, from 0 to 100%.
A Zero (0) value also means 100%.
Default is 66% Duty Cycle.
Programmable Timed Messaging Function, Allowing the Paging System to Monitor the Host System,
and Automatically Deliver Alert Paging Messages if the Host System does not communicate to the Paging
System within a Two Minute Time Cycle. The Timer Triggered Messaging Function can be Enabled or
Disabled via Programming, and can also be used as a Repetitive RF ping for Fully Supervised Applications.
Predefined Alert Messages can be up to 60 Characters in Length.
Programmable Maximum Batch Size for Batch Messaging, Ranging from 1 to 32 Messages per Batch.
Batch Messaging allows Higher Message Throughput by Outputting a Single POCSAG Preamble for the
Batch of Messages.
Default Max Batch Size is “10”
Programmable Pager ID as Capcode mode, This Mode allows a Pager ID value in the COMP2 or TAP
Protocols to be treated as a Cap Code, allowing a Bypass of the Pager Database, and allowing Direct
Encoding of the Pager ID value as the Pager Cap Code. This Method Reduces Database Configuration
Efforts and Opens the Paging Encoder up to use of the Full Approximately 2 Million POCSAG Cap Code
Values.
Programmable Carrier Detect Polarity, Supports Integration of the InterPage Z-500 Series Paging
Encoders to a Variety of Radio Transmitters.
Choice of 0v or 5v
Default is “0v”
Programmable Data Encoding Polarity, Supports the Encoding of POCSAG Messages:
Normal Polarity
Inverted Polarity
Default is “Normal”
Programmable Flow Control Signaling, Accommodates a variety of methods of busy terminal signaling.
Choose either:
None
Hardware (CTS)
Software (XOFF/XON)
Alt Hardware (CTS gets asserted before message response)
Alt Software (XOFF is output before message response)
Default is “Hardware”
The InterPage Z-500 Series “Paging Encoders” are used in the following product models:
Z-500 SP Paging System: 1RS-232 DB-9 Female Serial com port, and 5 watt output, (2-watt Optional).
Z-500 Pro Paging System: 2RS-232 DB-9 Female Serial com ports, and 5 watt output, (2-watt Optional).
Encoder Only for OEM applications: Adjustable AC coupled and TTL radio Interface options.
“Introduction” Continued on next page…

The InterPage Z-500 Series “Paging Encoders” can operate simultaneously on two types of alert event activity, including:
Serial Port Paging Commands received on the Single or Dual (Optional) Serial Com Port.
Timer Triggered Delivery of paging messages (Also called Timed Messaging).
The InterPage Z-500 Series Paging Encoders can simultaneously receive data on the input serial port while encoding
paging messages and delivering the paging messages through the attached radio transmitter.
The InterPage Z-500 Series Paging Encoders can output messages up to 500 characters in length in WaveWare mode,
or up to 240 characters in other serial port modes of operation.
The InterPage Z-500 Series Paging Encoders can operate without a pager database, if you use one of the direct encoder
control methods available. If you use traditional paging system control systems that use Pager ID values that are expected
to be translated into pager capcodes, then you should use the pager database configuration functions.
Direct Encoder Control is available in the following ways (allowing a pager database to not need to be programmed into
the encoder):
Setting “Pager ID as Capcode” Mode On, and running TAP or COMP2 Input Mode
Using Extended Pager ID Encoding method and running TAP Input Mode or COMP2 Input Mode
Using Scope Input Mode
Using WaveWare Input Mode
The InterPage Z-500 Series Paging Encoder’s pager database is organized into four sections:
Pager Families
Pager Groups
Canned (Predefined) Messages
Settings
Pager Families
“Pager Families” are sequentially defined ranges of pager IDs, where the pagers in each range have common attributes,
such as pager type, function code, data rate, etc. Capacity of the “Pager Families” database is 50 “Pager Families” of up
to 999 pagers per family, for well over 5,000+ pagers.
Pager Groups
“Pager Groups” are randomly defined lists of up to 20 pager IDs per group, where a Group ID triggers output to the list of
pagers in the group. The capacity of the “Pager Groups” database is 10 pager groups of up to 20 pagers per group.
NOTE:
For most normal Grouping of Pagers, it is “Recommended” to use a “Common” Cap Code within a Group of Pagers.
This way the Pagers within that Group will receive the Message all at the Same Time, instead of paging them one at a time
from a List of Pagers, which could take awhile to go thru the entire list.
Predefined Messages
“Predefined Messages” are stored messages used for the following types of functions:
Paging message Prefix
Paging message Suffix
Timer Event Triggered paging message
“Predefined Messages” can be up to 60 characters in length and the v8 encoder can support up to 15 “Predefined
Messages”.
Settings
The Z-500 Series “Settings” is Split into two Areas: “Encoder Settings” and “Advanced Encoder Settings”.
“Introduction” Continued on next page…

The “Z-500 Series Encoder Settings” allows Setup of the Following: (For the Pro, Setup the Com Ports Separately)
The “Protocol” of each RS-232 Serial Com Port (1 and/or 2) - TAP, WaveWare etc.
The “Settings” of each RS-232 Serial Com Port (1 and/or 2) - Verbose or Non Verbose and 9600 N 8 1, etc.
The “Advanced Settings” Button, allows changes to Advanced Options.
The available “Advanced Z-500 Series Encoder Settings” options include: (For the Pro, Setup each Port Separately)
Transmitter Duty Cycle %: 0% to 100% (Global Setting) Note: 66% is Default
Max Messages per Batch: 10 or 32 (Global Setting) Note: 10 is Default
Carrier Signal Detection: “On” or “Off” (Global Setting) Note: On is Default
Carrier Detect Polarity: 0v or 5v (Global Setting) Factory Set before Shipping
Serial Port Reset of Timed Paging: “On” or “Off” (Com Port 1 and 2)
Assume Pager ID is Cap Code: “On” or “Off” (Com Port 1 and 2)
Data Encoding Polarity: Normal or Inverted (Com Port 1 and 2)
Flow Control: None, Hardware or Software (Com Port 1 and 2)
Increment Cap Codes by 8: “On” or “Off” (Com Port 1 and 2)
Restore Defaults Button: Resets encoder to Factory Defaults (Global Setting)
Transmitter Duty Cycle: Transmitter Duty Cycle % values can range from 0 to 100. 0 and 100 values cause the duty
cycle management function of the encoder to be disabled. Any value from 1 to 99 causes duty cycle management function
to be enabled. The lower the number, the greater the delays between transmissions caused by the encoder, to
accommodate the duty cycle requirements of specific radio models attached to the InterPage Z-500 Series paging encoder.
If there are concerns about the duty cycle requirements of a particular radio, duty cycle values of 33, 50, or 66 are
reasonable numbers to consider using. Default is 66%.
Max Messages per Batch: The Max Messages per Batch value can range from 1 to 32. Default is: 10.
The InterPage Z-500 Series paging encoder supports batch paging, where multiple messages can be included in a single
key up cycle on a radio. Batch paging allows more efficient use of the radio and delivers messages quicker, because one
preamble sequence is delivered at each “Key-up” of the radio and multiple pager IDs and messages may be interspersed in
a single transmission cycle. Optimum message batching occurs when all pagers operate with the same data rate, such as
512 bps (bits per second). The Z-500 Series Paging Encoder is able to auto-switch between data rates, which breaks up a
batch into smaller batches.
Carrier Signal Detection: The InterPage Z-500 Series Paging Encoder supports the monitoring of carrier signal detection
signals from radio receivers. If a receiver reports a detected carrier, the encoder will halt transmission output until the carrier
signal is no longer detected. Default is: Enabled.
Serial Port Reset of Timed Paging: If Serial Port Timer Reset mode is enabled, the encoder will reset the internal two
minute timer each time a paging message or ATI command is received on the input serial port. If no paging messages or
ATI commands are received on the input serial port within two minutes, a timer triggered event will occur, with any active
Timer functions in the Pager Groups database being processed. If Serial Port Timer Reset mode is OFF, timer triggered
messaging will occur regardless of input serial port activity. Default is: Enabled.
Pager ID as Capcode – If “Assume Pager ID is Capcode” mode is enabled, all incoming pager IDs on the serial port are
treated as capcodes, and must meet the capcode formatting requirements of 1 to 7 digits in length, ranging from 9 to
2097143. Leading zeroes are optional. In addition, no pager ID lookup occurs in the pager databases while this mode is
enabled. You can demonstrate this by enabling this mode, then using the Lookup ID function button in this software.
Carrier Detect Polarity – The InterPage Z-500 Series Paging Encoder is compatible with radios and radio receivers that
output TTL level voltage shifts as a carrier signal is detected. Some radio receivers output 5V upon carrier detection, while
others drop to 0V.
Data Encoding Polarity – The POCSAG radio paging specification allows the encoded paging message to be encoded
with one of two polarities. Many pager models are programmable to have normal or inverted data decoding. This is a global
setting, meaning all pagers used with a particular encoder installation must match the specified method of data encoding.
Default is: Normal.
“Introduction” Continues on the Next Page

Flow Control – Accommodates a variety of methods of busy terminal signaling, Including: None, Hardware, Software, Alt-
Hardware and Alt-Software. See Previous Page 4for more Details. Default is Hardware.
Increment Cap Codes by 8 – If “Increment Cap Codes by 8” mode is enabled, for each successive pager ID defined in the
Pager Families section of the encoder database, the associated cap code will be incremented by 8. This mode is
sometimes required in some legacy systems where pager cap codes can only be in increments of 8, e.g. Scope paging
systems. Default is NOT Enabled.
Restore Defaults Buttons – Clicking on the Button is any Screen where it available will “Reset” the Screen/Settings to the
Factory Default Configuration.
Station ID – The WaveWare SPS-5 v9 Series Paging System Supports Morse Code Station ID. If a non-blank station ID
(up to 20 characters) is programmed into the system, it will output the station ID in Morse Code at 20WPM (48 mSec/dot) at
1200 HZ, every approximately 14 minutes. If using one of WaveWare’s Paging Frequencies this will Enabled.
This Completes the “Introduction”
“Warranty and other Information” is Next…

Liability, Warranty and Other Information
Liability
InterPage and the importer and the manufacturer; do not accept any liability for any damage or injury howsoever resulting
from misuse of this equipment. It is the responsibility of the user to ensure that the equipment is operated in the manner for
which it was intended and that it is the correct item of equipment for the required task.
Limited Warranty
With respect to the physical documentation and physical electronic circuitry of the Z500 and the Z-500 Pro paging
transmitter, the manufacturer warrants same to be free of defects in material and workmanship for a period of one year from
the date of purchase. In the event of notification within the warranty period of defects in material or workmanship, the
manufacturer and/or InterPage LP will replace the defective parts and circuitry free of charge. The remedy for breach of
this warranty shall be limited to replacement and shall not encompass any other damages, including, but not limited to, loss
of profit, special, incidental and consequential damages and similar claims.
Equipment Applications
It is the user's responsibility to determine the suitability of the Z500 Series paging systems for any given application.
InterPage, or any of its subsidiaries, cannot provide specific advice, as each application will require independent evaluation.
The following information, however, may be of benefit:
Equipment Testing
Range tests should be carried out at least once a week, more often when critical criteria apply. They should involve testing
the unit past the limit of its required working range so as to ensure a measure of safety. InterPage suggests that a log
should be kept of all the test dates and the information gathered, together with the service records.
The frequency of the tests required will vary between applications. If a pager has been dropped or is worn by a person
involved in an accident, the unit should be tested again before re-use. It must be stressed that the physical range tests are
essential and any construction work or movement of plant or equipment, could alter the signaling capability of the unit.
Literature
InterPage in conjunction with the importer and the manufacturer, operate a policy of continual improvement, and therefore
reserve the right to modify or change the specifications without prior notice.
While every possible care has been taken in the preparation of this manual, InterPage, the importer and the manufacturer
shall not be liable for technical or typographical errors or omissions contained herein, nor for incidental or consequential
damage arising from the use of this material.
Copyright © 2012
No part of this document may be photocopied or reproduced in any without the express permission of InterPage L.P., in
writing.
License Information
You are cleared to use this equipment within the USA under InterPage Corporation’s license. The License number 9812A030006 issued
on 03/31/1999 which expires on 03/31/2014. Certain restrictions apply in respect of output power and antenna installations. If you have
any questions contact Inter Page before installation and use. Alternative frequencies are available by formal license application (Form
600) via the FCC. These will not be subject to the same restrictions as the standard assigned license. You should obtain the FCC Rules
and Regulations, Title 47, Part 80 to End, including Parts 90 and 95, available from the US Government Printing Office, GPO bookstore
or FCC Office.
Authorized Distributor
InterPage LP
7354 Central Industrial Dr. Suite 110A
West Palm Beach, Florida 33404
Telephone: (800) 992-1000
Fax: (561) 844-5844

Obtaining Pagers for Your Paging System
You can use a wide variety of paging receiver types with InterPage Z-500 Series Paging Systems, including
Alphanumeric, Numeric and Tone/vibe and Wireless Message Centers.
You can obtain InterPage compatible paging receivers from many sources, including InterPage, Motorola, NEC,
Panasonic, and others. The paging receivers that you obtain for use with the InterPage Z-500 Series Paging Systems
should meet the following basic specifications:
Frequency - All paging receivers used with the InterPage Z-500 Series Paging Systems must be of the same
frequency and must match the frequency of the paging system transmitter.
See the label on the back of any Z-500 Series Transmitter Unit to identify the operating frequency of your paging
system.
POCSAG - All paging receivers used with the InterPage Z-500 Series Paging Systems must be POCSAG
Compatible. POCSAG is the paging protocol most frequently used in the paging industry.
Pager Type - You can mix different paging receiver types in a Z-500 Pro installation. You can obtain the following
paging receiver types for use with the InterPage Paging System:
Alphanumeric
Numeric
Tone/vibe only, with or without multiple tone/vibrate cadence features.
The InterPage Z-500 Series Paging Systems support pagers with multiple tone/vibrate features.
Tone/Vibe Pagers have two Cap Codes and have multiple tone/vibrate features.
InterPage Wireless Message Centers allow group message notification on scrolling multicolor LED
Displays, using the InterPage Z-500 Series Paging Systems to communicate to the message centers.
Paging Data Rate - You can mix different paging data rates (baud rates) in a InterPage installation. The data rate of
the paging receivers can be your choice of 512, 1200, or 2400 bps (bits per second).
Cap Codes - Each paging receiver used in a InterPage Z-500 Series Paging System installation must have one or
more capcodes (addresses) programmed into it. Each paging receiver used with a particular Z-500 Series Paging
System installation, regardless of paging receiver type, must have a unique capcode programmed into it, in order to
be able to transmit messages to that individual paging receiver. Contact your paging systems dealer for cap code
assignment information.
Message Center
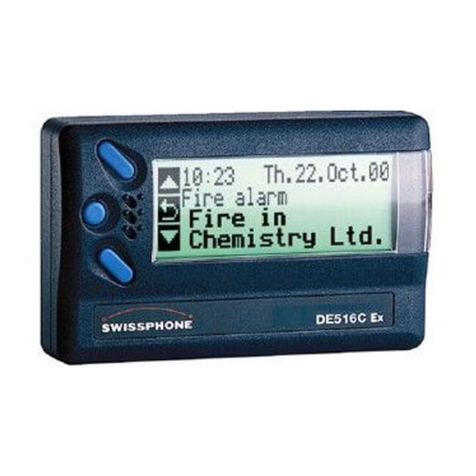
Alphanumeric Pager Numeric Pager Tone/Vibe Pager
“Paging System Operation” is Next…

Paging System Operation
Your InterPage Z-500 Series Paging Systems includes a UHF Transceiver and an onboard Single or Dual RS-232
communications, and encodes paging messages for RF transmission using the industry standard POCSAG paging
protocol. The Programmable RS-232 communications allow you to interface the encoder to a PC or to other devices and
systems that use RS-232 serial communications (Host Devices). Other models of InterPage Z-500 Series Paging
Systems products include encoder only models, and the combination of the paging encoder with VHF and UHF radio
transceivers.
Amplification Kits are also available when more than 5 watts of power is required to obtain better coverage of a site.
The types of paging receivers that are compatible with your InterPage Z-500 Series Paging Encoder include:
Any POCSAG compatible paging receiver operating on the same frequency as the paging transmitter (in the
UHF band) and operating at 512, 1200, or 2400 bps data rate. Pagers of this type include alphanumeric,
numeric, and tone/vibe models and can be obtained from InterPage, Motorola, NEC, Panasonic, and others.
InterPage Wireless Message Centers operating at the same frequency as your paging system. InterPage
Wireless Message Centers are normally configured to receive at a 512 bps data rate.
The InterPage Z-500 Series Encoder may be controlled by a PC, or other control system, that is running software
designed to interface to the encoder. InterPage wireless communication systems software is designed to take full
advantage of the features of your InterPage Z-500 Series Paging Encoder. The TAP Interface Protocol is defined in this
handbook to allow you or others to develop software or devices to directly control the transmitter.
The InterPage Z-500 Series Encoder maintains an input buffer, which can receive commands from the Host Device while
a page is being transmitted. When a command is received from the Host Device, the Z-500 Series Encoder responds with
a message back to the Host Device. The Z-500 Series Encoder encodes the paging messages into POCSAG paging
format and transmits the encoded paging message to the paging receivers of your choice.
PC Software developed to utilize the InterPage Z-500 Series Paging Encoder can be designed to maintain a simple
database of pager ID numbers, or the software can be designed to allow definition of paging receiver attributes, including:
Pager Type
Alphanumeric
Numeric
Tone/Vibe Only, with or without multiple tone/vibrate cadences
Cap Code - The unique address assigned to each paging receiver
Function Code - Also known as alert type, allows four different tone/vibrate cadences to be performed by the
pager. The TAP, PET, COMP2, SCOPE, and WaveWare protocols provide support for variable Function Codes.
RF Data Rate (Also called the Pager’s Baud Rate)
512 bps
1200 bps
2400 bps
Refer to Appendix A – TAP Interface Specifications, for details on how to communicate to the InterPage Z-500 Series
Paging Encoder via the TAP Protocol.
The InterPage Z-500 Series Paging Encoder unit may require the Programming of the Serial Com Port Settings and
Protocols to change communication interface parameters.
Refer to Appendix B – “Com Port Settings” for information on how to program the Com Port Settings and Protocols, as
required.
If you want to use the TAP Interface Protocol with 1 to 4 digit pager IDs, you will need to configure a pager database
(also known as a lookup table), using the InterPage Z-500 Series Paging Encoder Setup software.
You can obtain the InterPage Z-500 Pro Paging Encoder Setup Software from the Z-500 Product Support CD.
“Paging System Installation” is Next…

PAGING SYSTEM INSTALLATION
Your InterPage Z-500 Series Paging Systems include: 1 Transmitter Unit, a “Rubber Duck” Antenna, 1 RS-232 Cable,
Mounting Screws/Plastic Anchor Kit and a Power Supply. A Second RS-232 Cable is available for Sale, if needed.
To install the paging system please following these steps:
Attach the “Rubber Duck” Antenna to the Transmitter Unit. In normal paging operations, the paging transmitter
antenna should be oriented in a vertical position to maximize the paging range.
Note: Do not attempt to operate the paging system without the antenna connected to the paging transmitter,
as damage to the paging transmitter may occur.
Remove the Front Cover of the Transmitter Unit. Hold the unit up against the wall or other non-metallic vertical
surface as a template to mark the 2 hole locations where you will mount the Transmitter Unit. Drill and attach
the top # 8 x ¾” sheet metal screw to the wall or vertical surface (use the plastic anchors if needed). Mount the
Transmitter Unit onto the top screw, using the 1 Slotted mounting hole near the top of the unit inside the
enclosure. Then attach the 2nd screw into the round hole near the bottom of the unit inside the enclosure and
tighten both screws. Re-attach the Front Cover of the Transmitter unit.
Plug the RS-232 Cable into an available DB9 serial port connector on the back of a Host Device, such as a PC
or Nurse Call system or other Host Device. If the serial port has a DB25 connector, you must provide a DB25 to
DB9 adapter, which is available from InterPage or from a computer supply company. Tighten the connector
screws.
Plug the RS-232 Cable into the DB9 female connector on the Transmitter Unit. Tighten the connector screws.
Plug the Power Supply into a 110 VAC power outlet. The GREEN colored Power LED Indicator on the
Transmitter Unit should be illuminated when power is properly applied.
Program the pager database, if required, using InterPage Z-500 Pro Paging Encoder Setup Software, which
is available on the Z-500 Product Support CD.
If you are using a PC as a Host Device, load paging control software, such as Enterprise 101 Messaging
Software, on the PC and configure it to operate with your InterPage Z-500 Series Paging System. Make sure
the proper serial port settings are defined. The GREEN colored RF TX LED Indicator on the Transmitter Unit
should illuminate for about 3-4 seconds during a paging transmission. If the Carrier Detect function is enabled,
you may see the GREEN colored RF CD LED Indicator temporarily illuminate prior to some paging
transmissions, if a carrier signal is detected from a nearby transmitter at the same frequency as your InterPage
Z-500 Series Paging System.

Quick Start Guide
Your InterPage Z-500 Pro Paging System should include:
1- Rubber Duck Style Antenna, 1- Power Supply, 1- Serial Cable, 1- Package of Mounting Hardware and 1- Z-500
Product Support CD. A Second RS-232 Cable is available for Purchase if Required.
Notes:
The Frequency, Cap Code(s), Watts and other Information are “Labeled” on the Back of the unit.
The Z-500 will “Auto Detect” the Encoder Setup Software for Pager Database Programming.
The attached Host System will usually need to send a 3-Digit Pager ID to the Z-500 Paging System.
After Programming the Database, attach the Serial Cable to the Host System that Initiates the Page.
Installation:
The Z-500 has Mounting Holes on the Back of the Unit for Wall Mounting.
Remove the Front Cover to access these Mounting Holes and use the Screws and Anchors provided.
Programming the Z-500 Paging System: Note: The Red LED will be Lit when you “Read/Edit/Program”.
Attach the Z-500 Paging System to a Laptop or Desktop Computer running Windows XP Pro or Windows 7 Pro.
Install the “Encoder Setup” Program from the “Z-500 Product Support CD”. This Program does “Both”, SP and Pro.
Com Port:
Choose the Com Port you will use and Click on the Com Port Button to Open the Port.
The RED light next to the Com Port Button will then turn “GREEN” to show that the port is Open.
The Software will tell you that the “Encoder Database will now be Read” and you MUST click OK.
Note: You MUST read the Database BEFORE Adding or Changing the Database information.
Pager Database:
Click on the Pager “Families” Icon (Far Left) to Add or Change the Quantity of Pager(s), Add or Change the Pager ID
Number(s) and Add or Change the Cap Code(s) and Baud Rate(s).
The Function Code is “Normally” set to 4 for Alphanumeric Pagers and set to 1for Numeric Pagers.
After Entering all the Pager Information click the “OK” Button at the bottom of the screen.
The Software will check for any Conflicts with the Information you have entered. If so, you will need to correct the
problem(s) and Click “OK” again to verify all Conflicts were corrected.
Settings:
Click on the “Settings” Icon (In the Middle) in order to setup the Communications “Protocol” for the Com Port used
with the Host System.
In the Encoder “Settings” Screen, choose the “Protocols” needed for Communications with the Host System along
with the other Com Port settings needed.
Advance Settings:
The “Advance Encoder Settings” were configured before shipment, but if you need to access those settings the
password is “maint”, (not case sensitive).
If you are not sure how to set the “Advanced Encoder Settings”, you can click on the “Restore Defaults” Button to
set it to “Factory Settings” and click “OK”.
Click on the “Program Encoder” (Green down Arrow) Button to Program the Z-500 Encoder.
Testing the Z-500 with Pagers:
Click on the “Test Encoder Icon” on the Main Screen (Far Right) to send a “Test Page” to a pager. The Test
Encoder function should “reboot” the encoder into the protocol, baud, and parity that the encoder was programmed to
operate at. The status bar on the Test Encoder window should display the protocol, baud, and parity that the encoder
is currently operating at. The Test Encoder window should adjust to the features that the selected protocol supports.
Enter the Pager ID Number in the “PIN” or “Cap Code” Field of the pager you want to test. (For TAP, PET, and
COMP2 protocols, using the Pager Families section of the pager database, a 3-Digit Number should be entered in
the PIN field. For other protocols, you may want to enter a full 7 digit capcode value).
Enter a Message that you want to send to the pager.
The GREEN “RF TX LED” on the paging system should light up for a few seconds while the message is being sent to
the pager. This LED should stay lit for about 3-4 seconds per Transmission.
You can observe the Com Port Log at the bottom of the screen to see the paging system status as each message is
sent.
The “Programming Guide” is Next…

Z-500 Series Programming Guide
Getting Started
Insert the “Product Support CD” into a Laptop or Desktop.
Install the Encoder Setup Z-500 Encoder Program Software.
The Z-500 Pro Encoder Software has the ability to work with Both Versions of the Z-500 Series Paging Systems.
Attach the paging system using the supplied Standard RS-232 serial cable to an Available Com Port.
The Z-500 Pro or the Z-500 SP will be Auto-Detected by the Encoder Setup Software, when you “Open” the Com
Port.
Encoder Software Main Screen – Setup the Com Port
Start the Encoder Setup Program and Click on the “Com Port” Text in the Menu and Click on “Properties”.
See Fig. 1
Fig. 1 (Choose the Com Port, Part 1) If the Com Port Number is Wrong, Click “Properties” to Choose Port.
Com Port Settings Screen
Choose the “Com Port” and Settings and Click “OK”.
See Fig. 2
Fig. 2 (Choose the Com Port, Part 2)

Encoder Software Main Screen - Open Com Port
On the Main Screen of Encoder Setup Program, Click on the “Open Com (X)” Button next to the RED Light.
See Fig. 3
Fig. 3 (Open the Com Port, Part 1)…Click the “Open Com 2” to Open the Com Port.
The Software will detect the Z-500 Pro or the SP Paging System and Open the Com Port and the Light will turn Green.
See Fig. 4(Part 2) and 4A (Part 2A)
Fig. 4(Open the Com Port, Part 2)…Dual Port Identification – Firmware Version: 9.04 or…
Fig. 4A (Open the Com Port, Part 2A)… Single Port Identification – Firmware Version: 9.04S

The Software has “Detected” either the Z-500 Pro Dual Com Port or the Z-500 SP Single Com Port Paging System.
The Software has Opened the Com Port and will now READ the Database. Click “OK”
See Fig. 5
Fig. 5 (You MUST read the Database)
For Programming of the Pager Families – (See next page).
(Pager Database)

On the Main Screen of Encoder Setup Program, Click on the “Pager Families” Icon to Open the Pager Database.
See Fig. 6
Fig. 6 (Open the Pager Database)…Configuration for Both of the Z-500 Series Paging Systems
Pager Families Screen: Enter Quantity, Pager ID’s, 7-Digit Cap Code, Baud Rate, Pager Type and Function code.
Function Code 4 is normally for Alphanumeric Pagers and Function Code 1 is normally for Numeric Pagers.
When Finished, Click “OK” See Fig. 7
Fig. 7 (Enter Pagers in the Database) If Family 1 is Red, Click to Activate and to Add Pagers, it will turn Green.
For Programming of the Pager Groups – (See Next Page).

On the Main Screen of Encoder Setup Program, Click on “Group Paging” to Open the Pager Database.
See Fig. 8
Fig. 8 (Group Paging)…Configuration for Both of the Z-500 Series Paging Systems
Pager Groups Screen: Enter The Group ID and list the pager ID’s you want in that group. The ID’s must be in the
Pager Families, programmed previously. Note: In most cases you would use a “Common” Pager Cap Code in the
Pager themselves instead of using Pager Groups. Using a Common Cap code will page all pagers at the same
time; whereas using a group will page each pager one at a time, which is slow.
Pager Groups would be used primarily when “Timer Active” Mode is needed.
When finished, Click “OK” See Fig. 9
Fig. 9 (Pager Groups Setup) If Group 1 is RED, click on the Box to Activate that Group, it will turn Green.

Pager Groups “Timer” Screen: This will send a page every 2 minutes to the pagers listed in that Group unless the
“Host system issues a “Reset” Command. You create the message to be sent in the “Canned Messages” Screen.
When Finished, Click “OK”. See Fig. 10
Fig. 10 (Activate Timer) If Timer in the group is RED, click on the Box to Activate and it will turn Green.
“Timer Message”: Choose the Number of the Canned Message you want to send.
NOTE: You may need to “Configure” the Canned Messages “Before” Part.
Programming the Canned (Predefined) Messages (See next page).

On the Main Screen of Encoder Setup Program, Click on the “Canned Messages” Icon to Open the Predefined
Messages Screen.
See Fig. 11
Fig. 11 (Canned Messages)…Configuration for Both of the Z-500 Series Paging Systems
In the “Predefined Messages Setup” Screen type the Message you want sent, 1 Message per Line and Click “OK”.
See Fig. 12
Fig. 12 (Add Predefined Messages)
For System Configuration Settings: (See Next Page).

On the Main Screen of Encoder Setup Program, Click on the “Settings” Icon to Open the Predefined Messages
Screen. See Fig. 13
Fig. 13 (Settings Icon)…Settings for Both Z-500 Series Paging Systems
There are Two New Models of Z-500 Series Encoder:
The Z-500 Pro “Dual RS-232 Serial DB-9 Com Port” Paging System. (This Page: 21 for Setup)
The Z-500 SP “Single RS-232 Serial DB-9 Com Port” Paging System. (See Page: 13 for Setup)
Table of contents
Other Interpage Pager manuals
